Existing Users: Quick Start Guide
Welcome to the new mobohubb experience. This guide will help you transition from the classic portal to the updated version. You’ll learn how to log in with your current credentials, customize your branding, and update user data so your team can take advantage of the improved login methods.
In this quick start guide you'll learn
- How to log in using your classic mobohubb credentials
- How to update your organization’s branding in the new portal
- How to update user data (phone number/email) to enable SMS, email code, or username & password logins
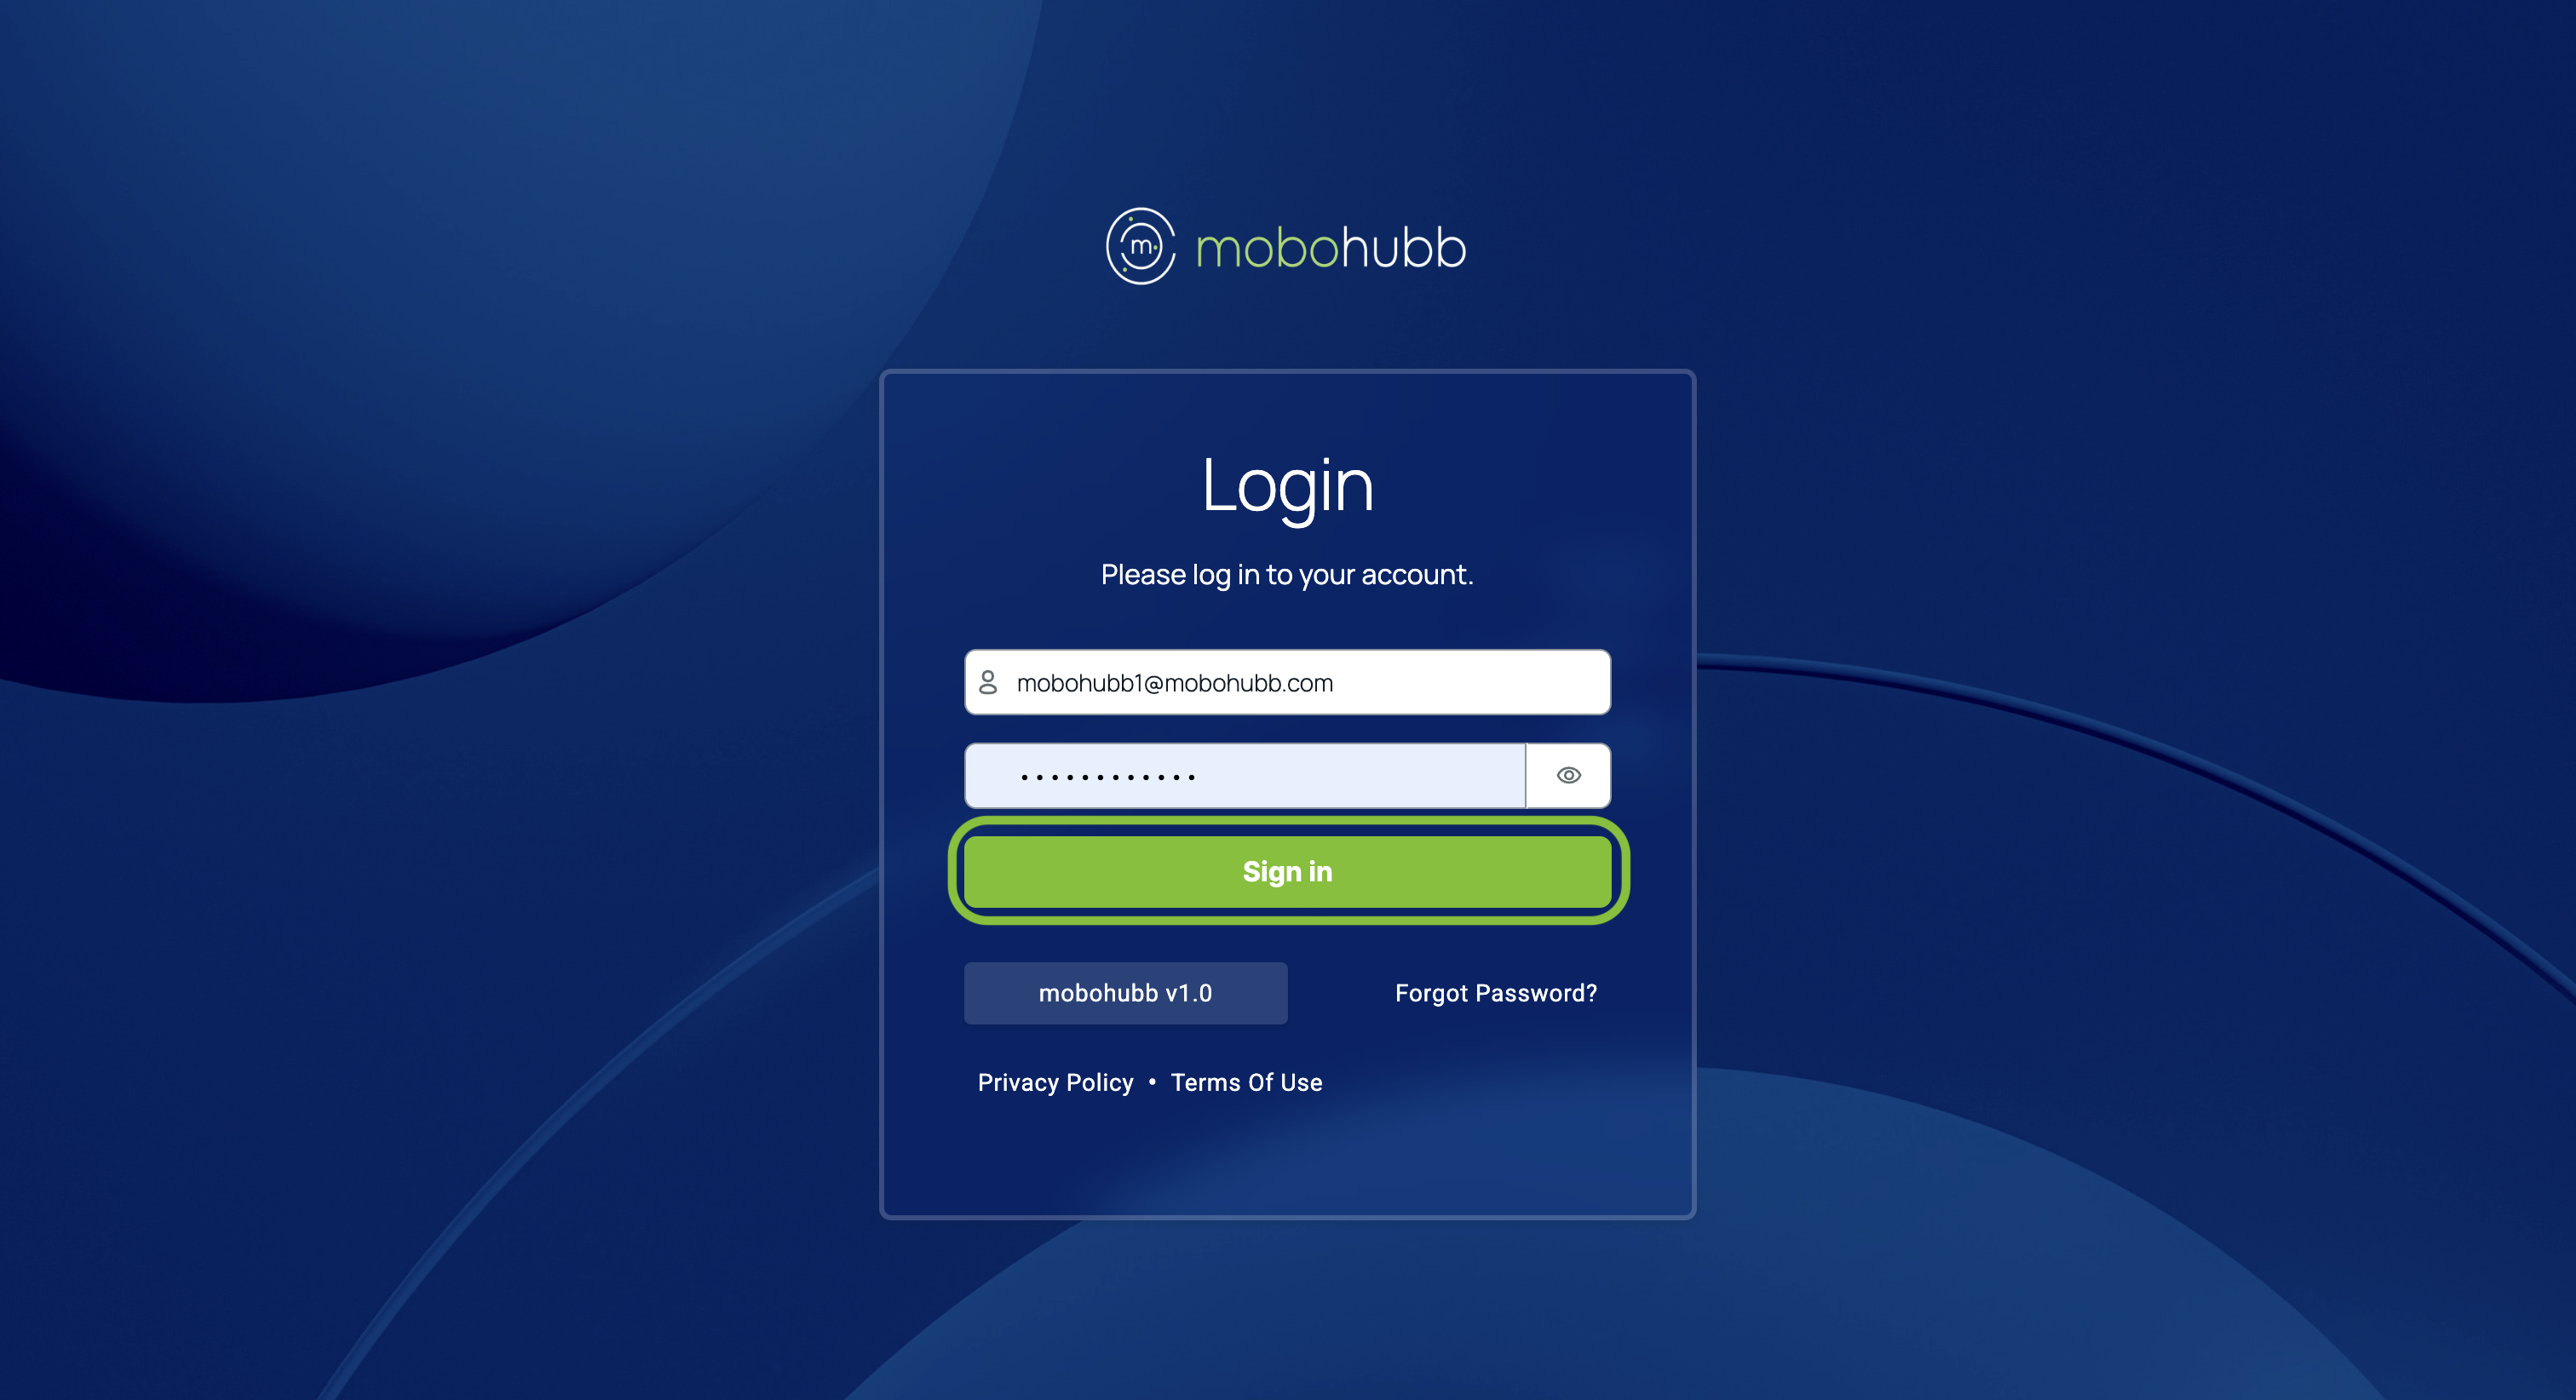
Log In
-
Go to the mobohubb portal.
-
Enter your username and password (the same information you use on the classic mobohubb portal).
-
Click “Sign in”.
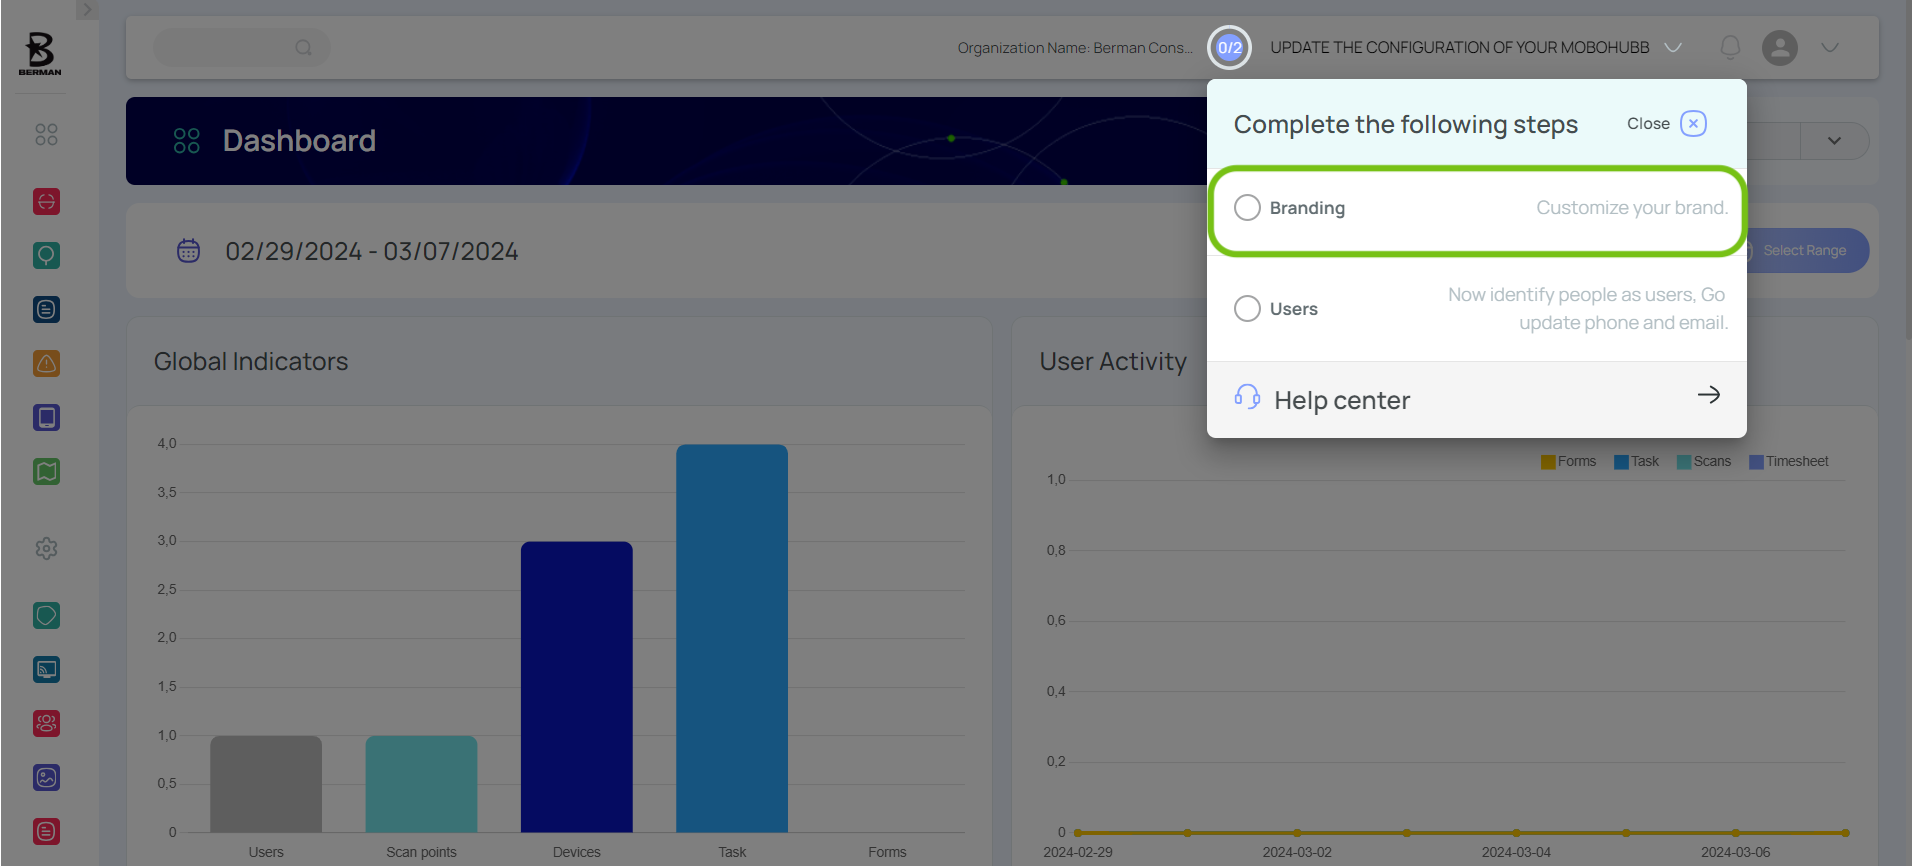
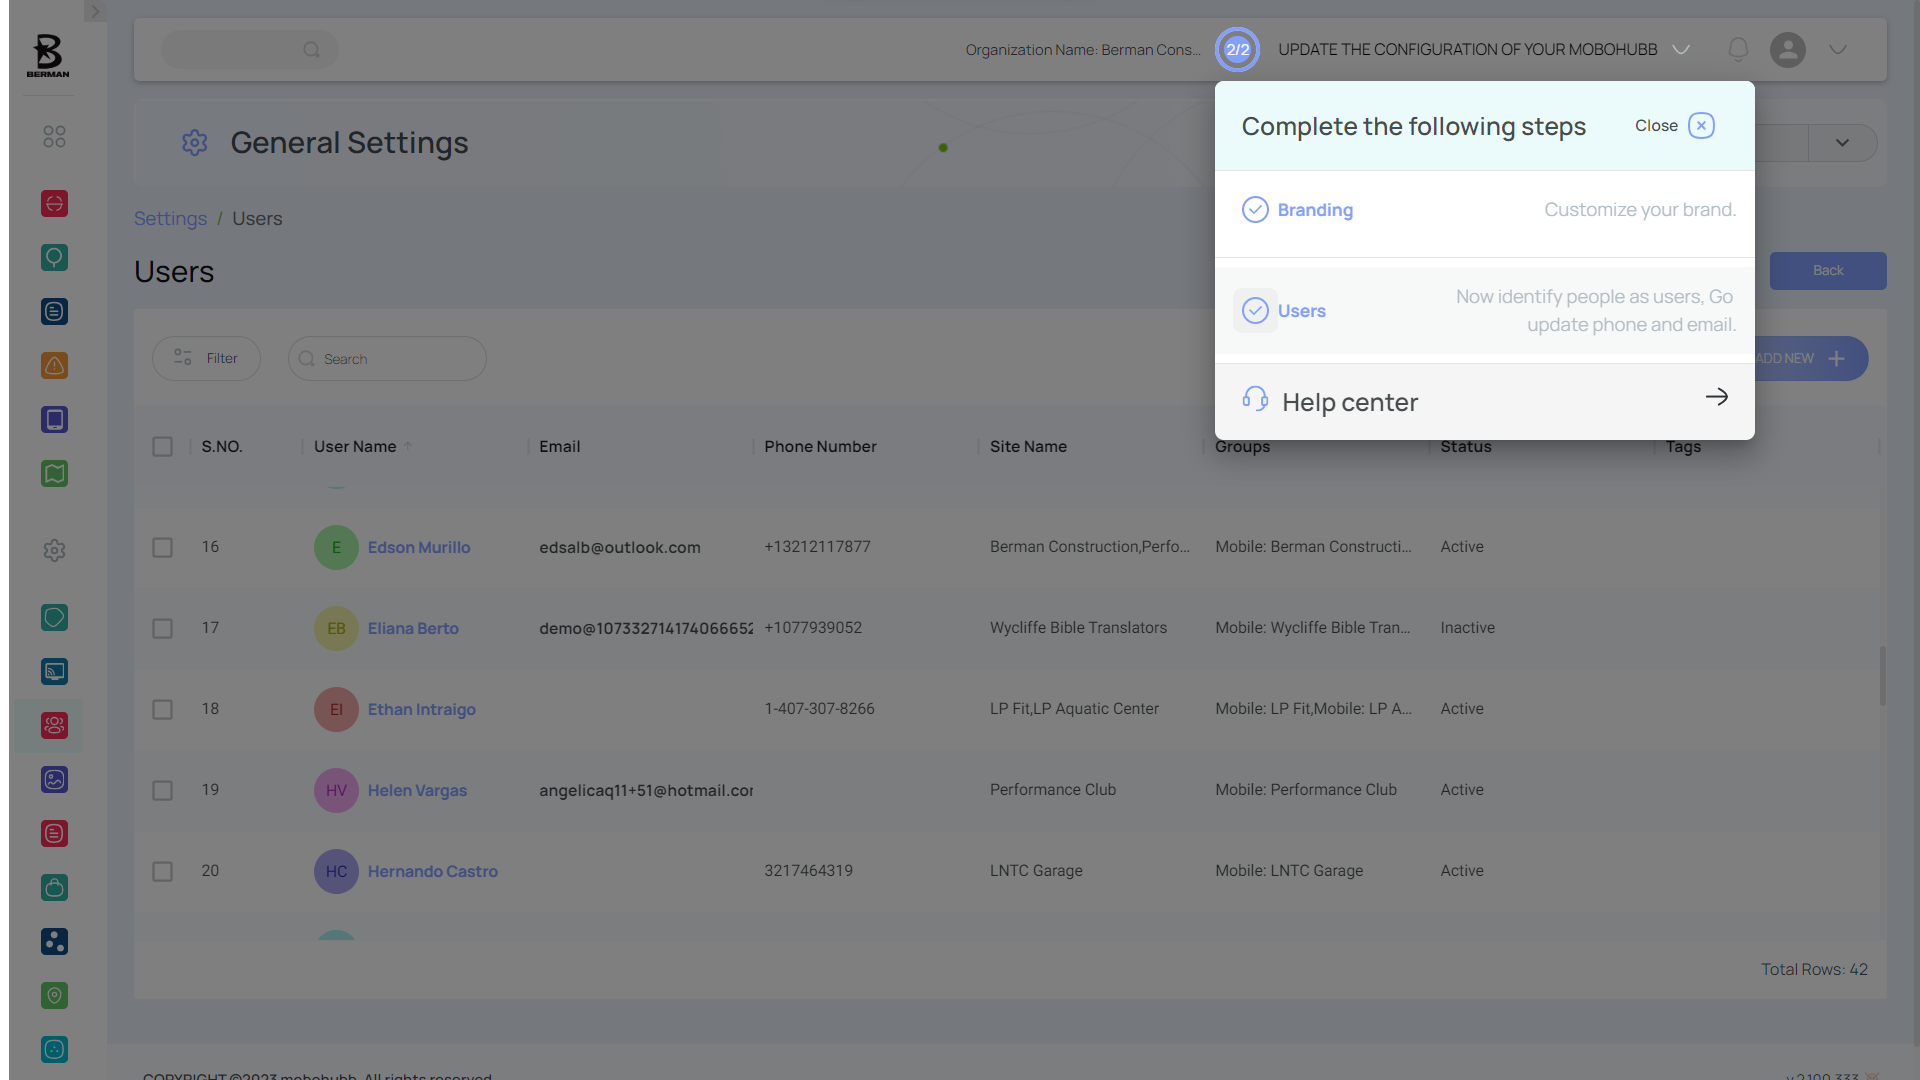
Update Your Organization
You can configure your organization in two steps—Branding and Users. Access each interface by clicking on the step names in the top menu.

Update Your Branding
- Click “Branding”.
- Review and fill in the required fields (e.g., logos, color theme, date/time format).
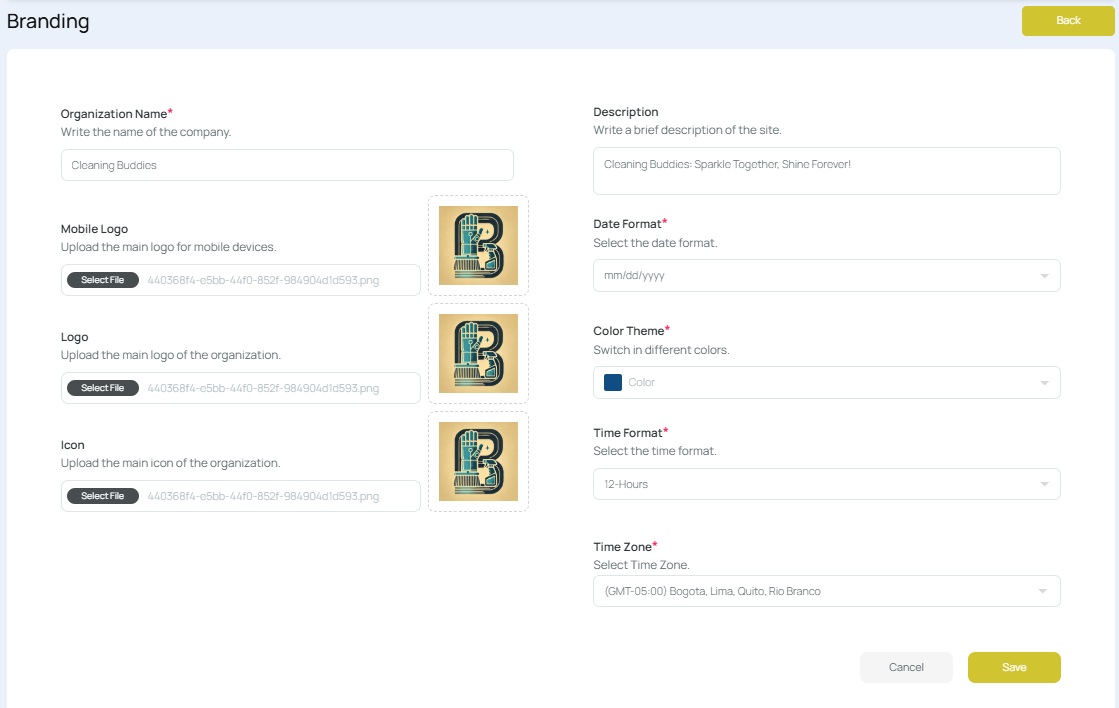
- Click “Save”.
- Check the “Branding” step so the configuration indicator shows 1/2.
Note: For more details on organization branding, see Organization Branding.
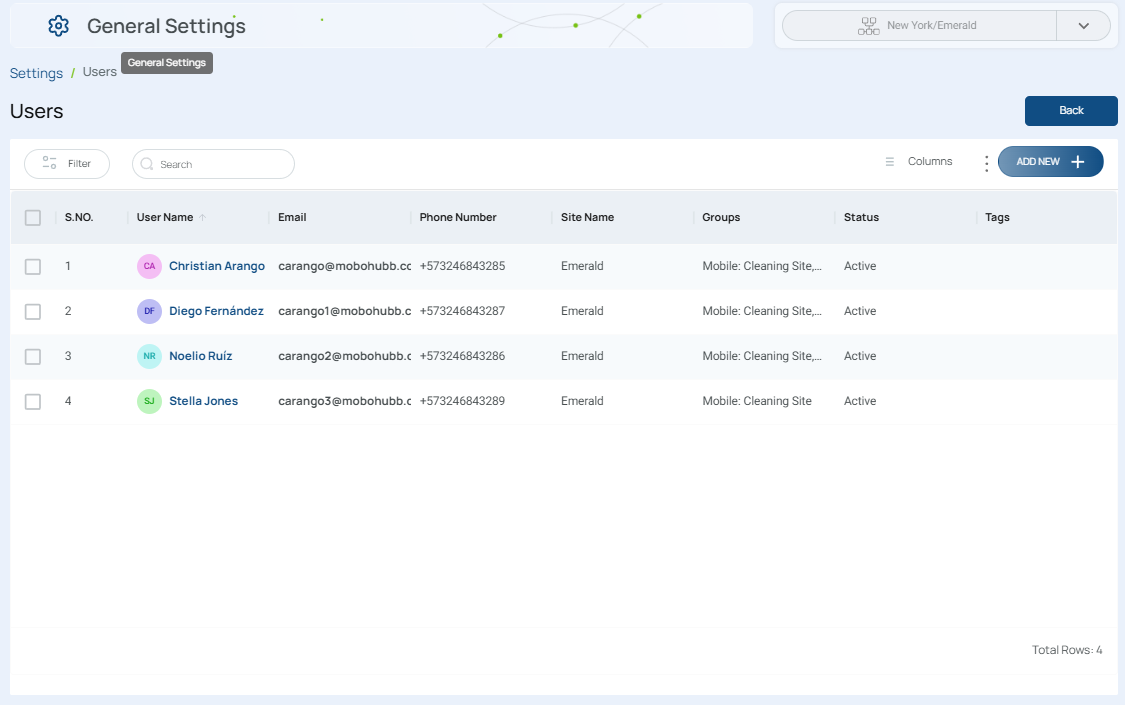
Update Users
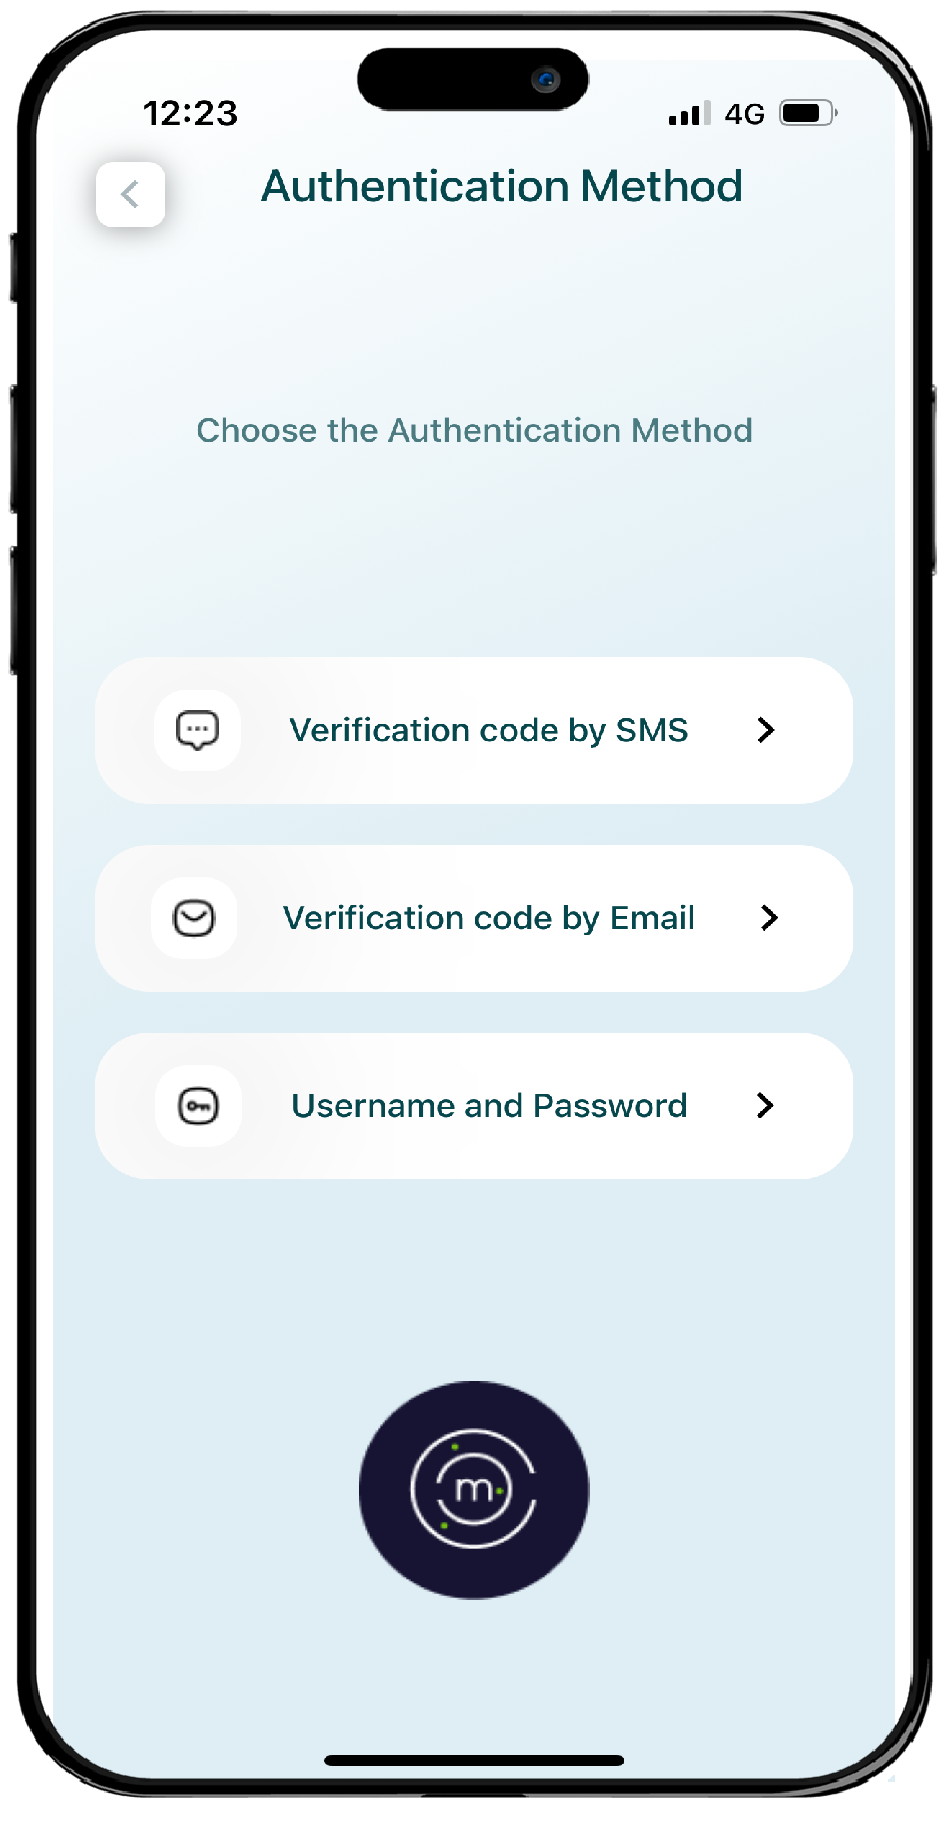
In the previous system, users accessed the app with a domain and pin. Now, mobohubb offers three login options for the mobile app:
- SMS verification code: Receives a code via text.
- Email verification code: Receives a code via email.
- Email & password: Credentials created for each user.
Note: In this new version, “People” and “Portal users” are now “Users”.
Updating User Information
- Click “Users”.

- Under the “User Name” column, click the user you want to edit.
- In the “Profile” tab, fill in any empty fields:
- To allow SMS login: Update the phone number.
- To allow email code login: Update the email address.
- To allow username & password login: Update the email address and then reset the password.
- To upload a profile picture for each user: Use the photo field to upload a picture.
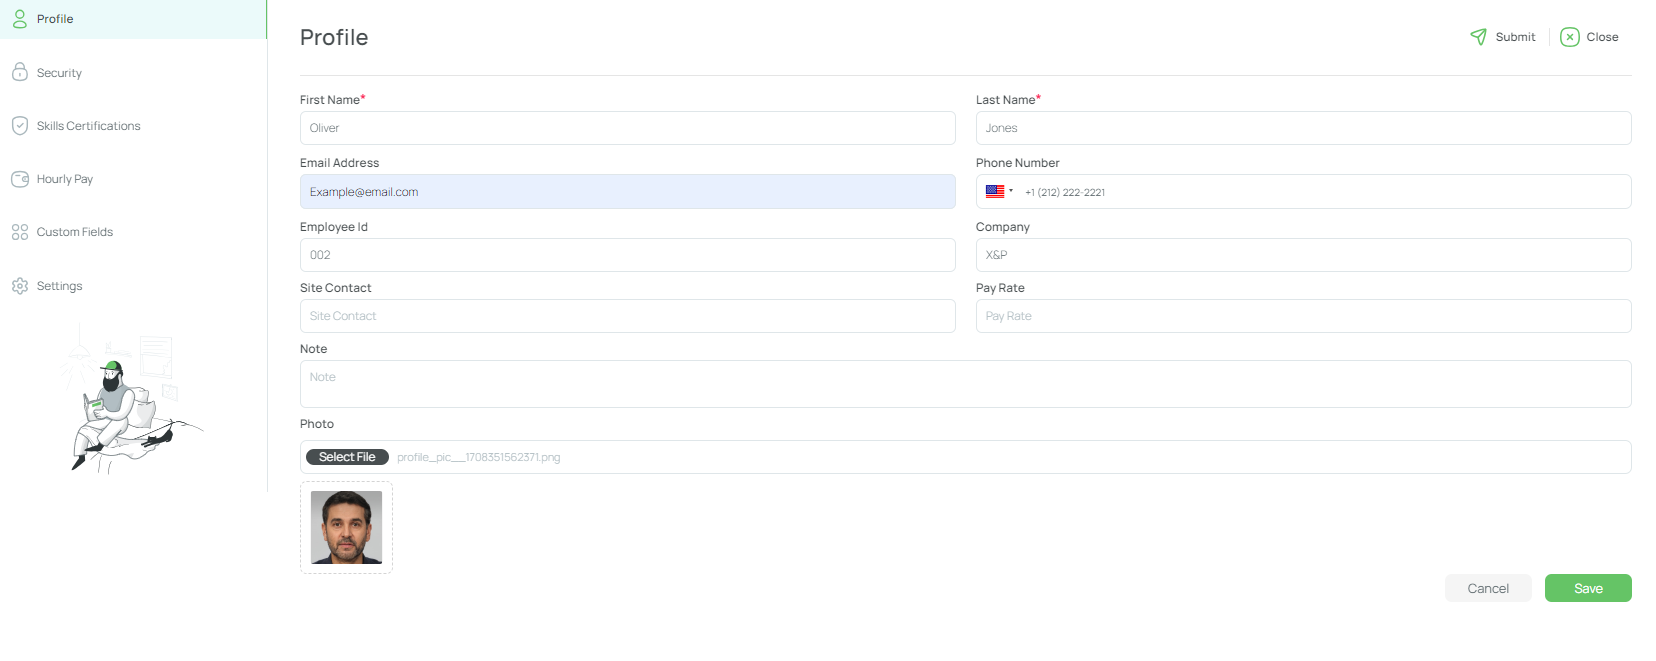
Update the email in the Profile tab.
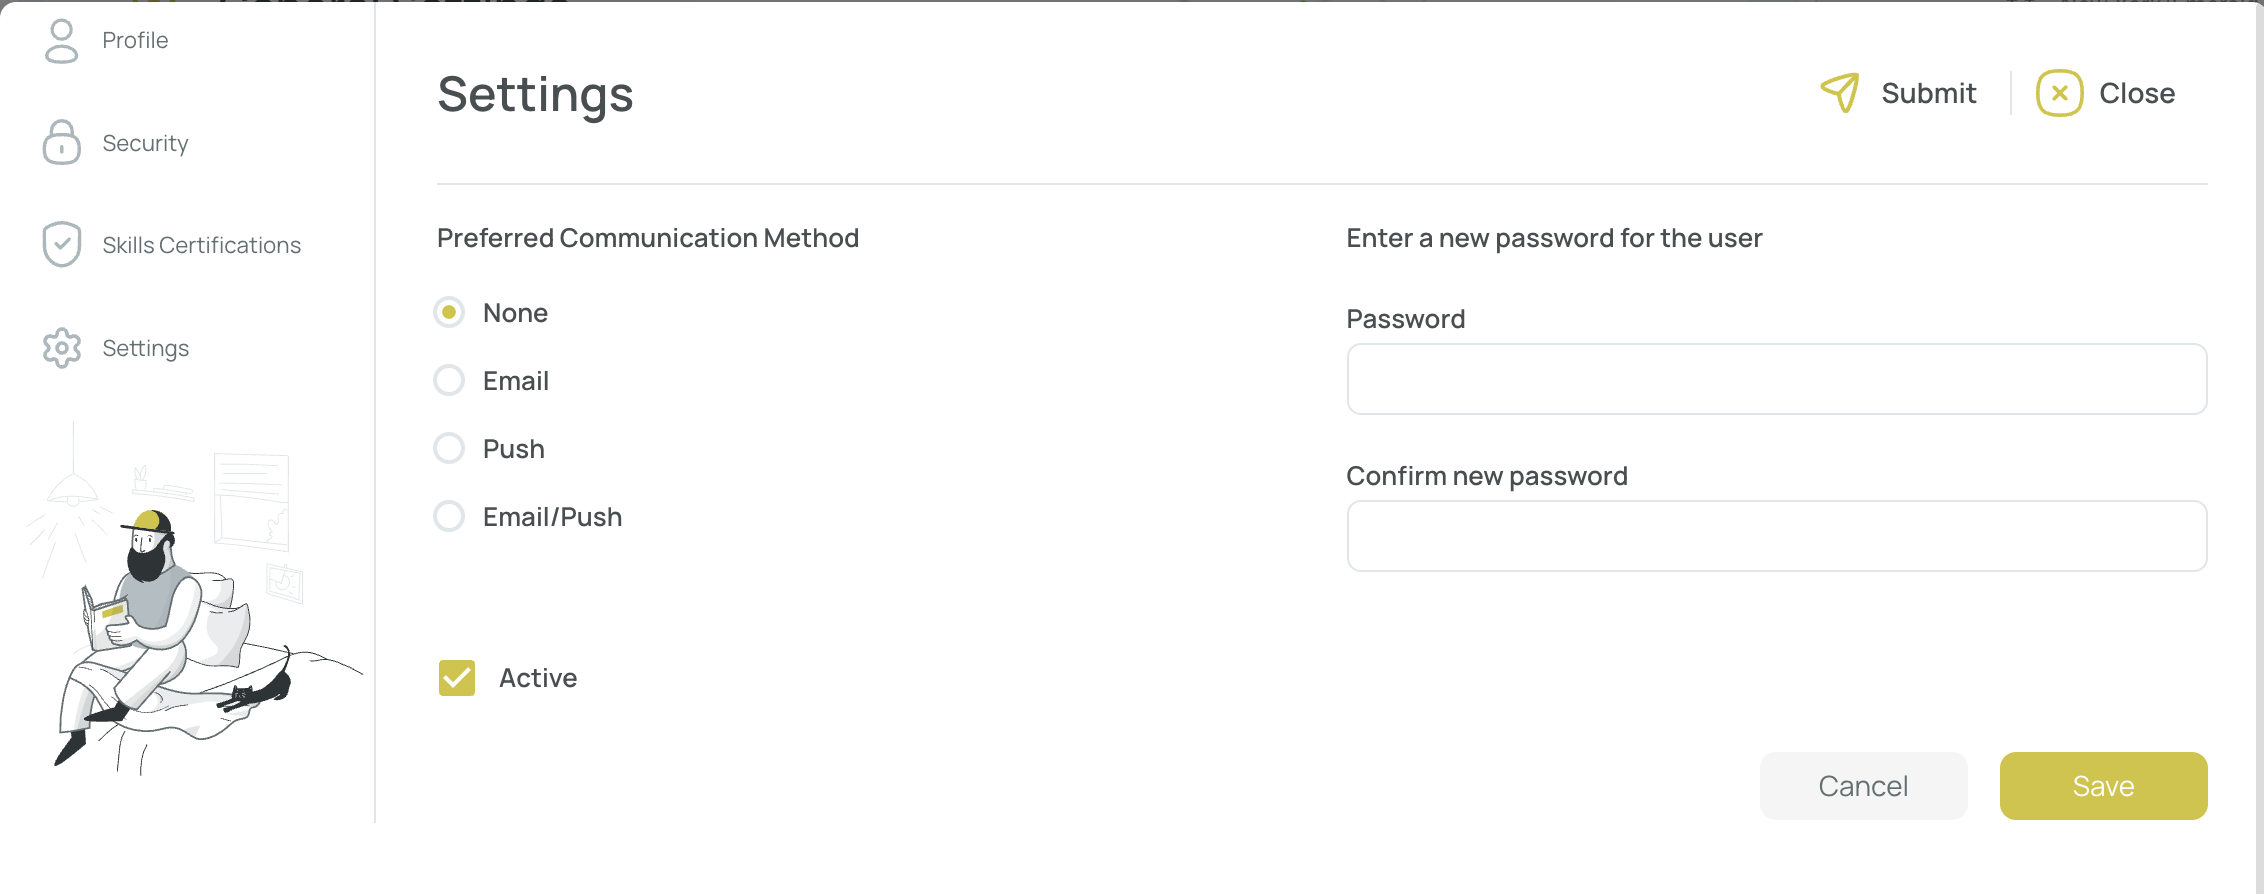
Update the password in the Settings tab.
- Click "Save".
- Close when finished.
Note: Repeat for each user until all data is updated.
Remember to check the final step so the configuration indicator shows 2/2.
Note: To add new users, see the Add New Users section.
You’re all set! Your organization is now configured, and your existing users can log in using any of the new authentication methods. If you have any questions, please visit our support resources or contact support.