Scan Data
Learn how to view, filter, and export Scan Data in mobohubb. This guide explains how each scan record captures device details, user info, timestamps, and any associated tags when a point is scanned with a mobile device.
In this guide you'll learn
- What Scan Data includes
- How to filter and manage scan records
- How to export your current view into an Excel file
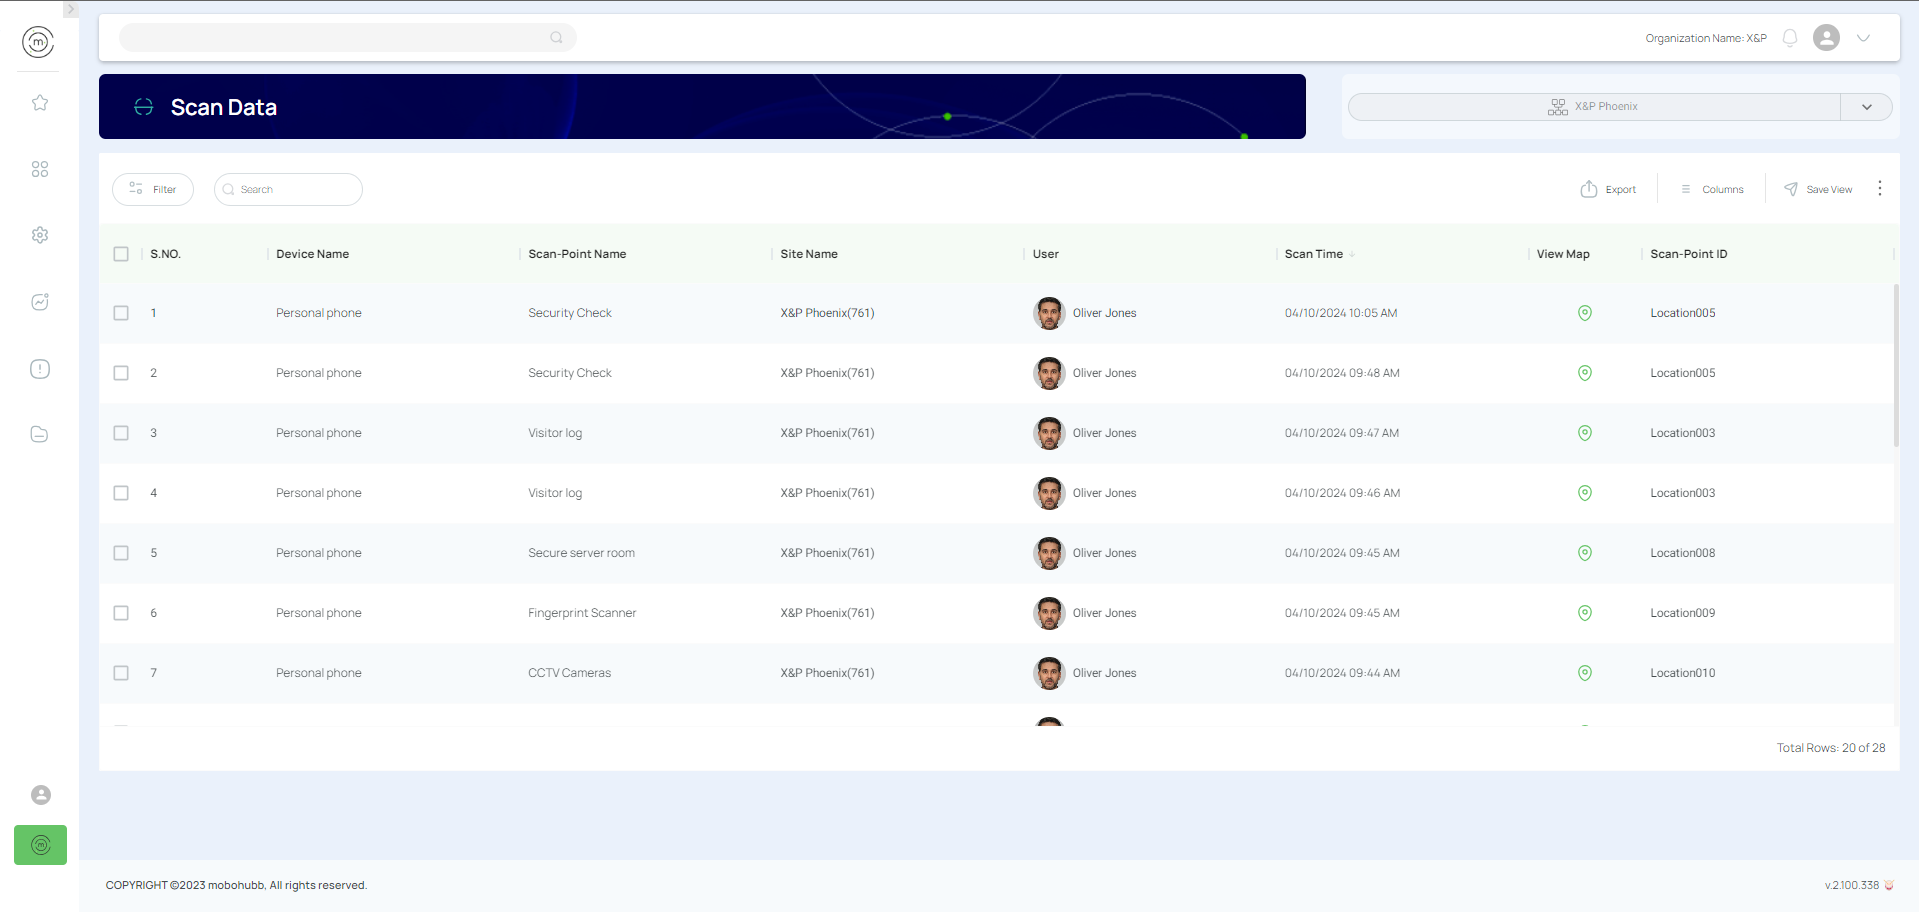
Scan Data is created when a user scans a point using a mobile device in mobohubb. Each record typically includes the device name, scan point, time of scan, any tags, and the user who performed the scan. Accessing a specific point in the Scan menu lets you preview all captured details.
What Scan Data Includes
Each scan record generally shows:
- Device Name: Identifies the hardware used for scanning.
- Scan Point: The point (QR or NFC tag) scanned.
- Time: Exact moment of the scan.
- Tag: Any keywords or metadata linked to the scan.
- User: The individual who performed the scan.
Access & Manage Scan Data
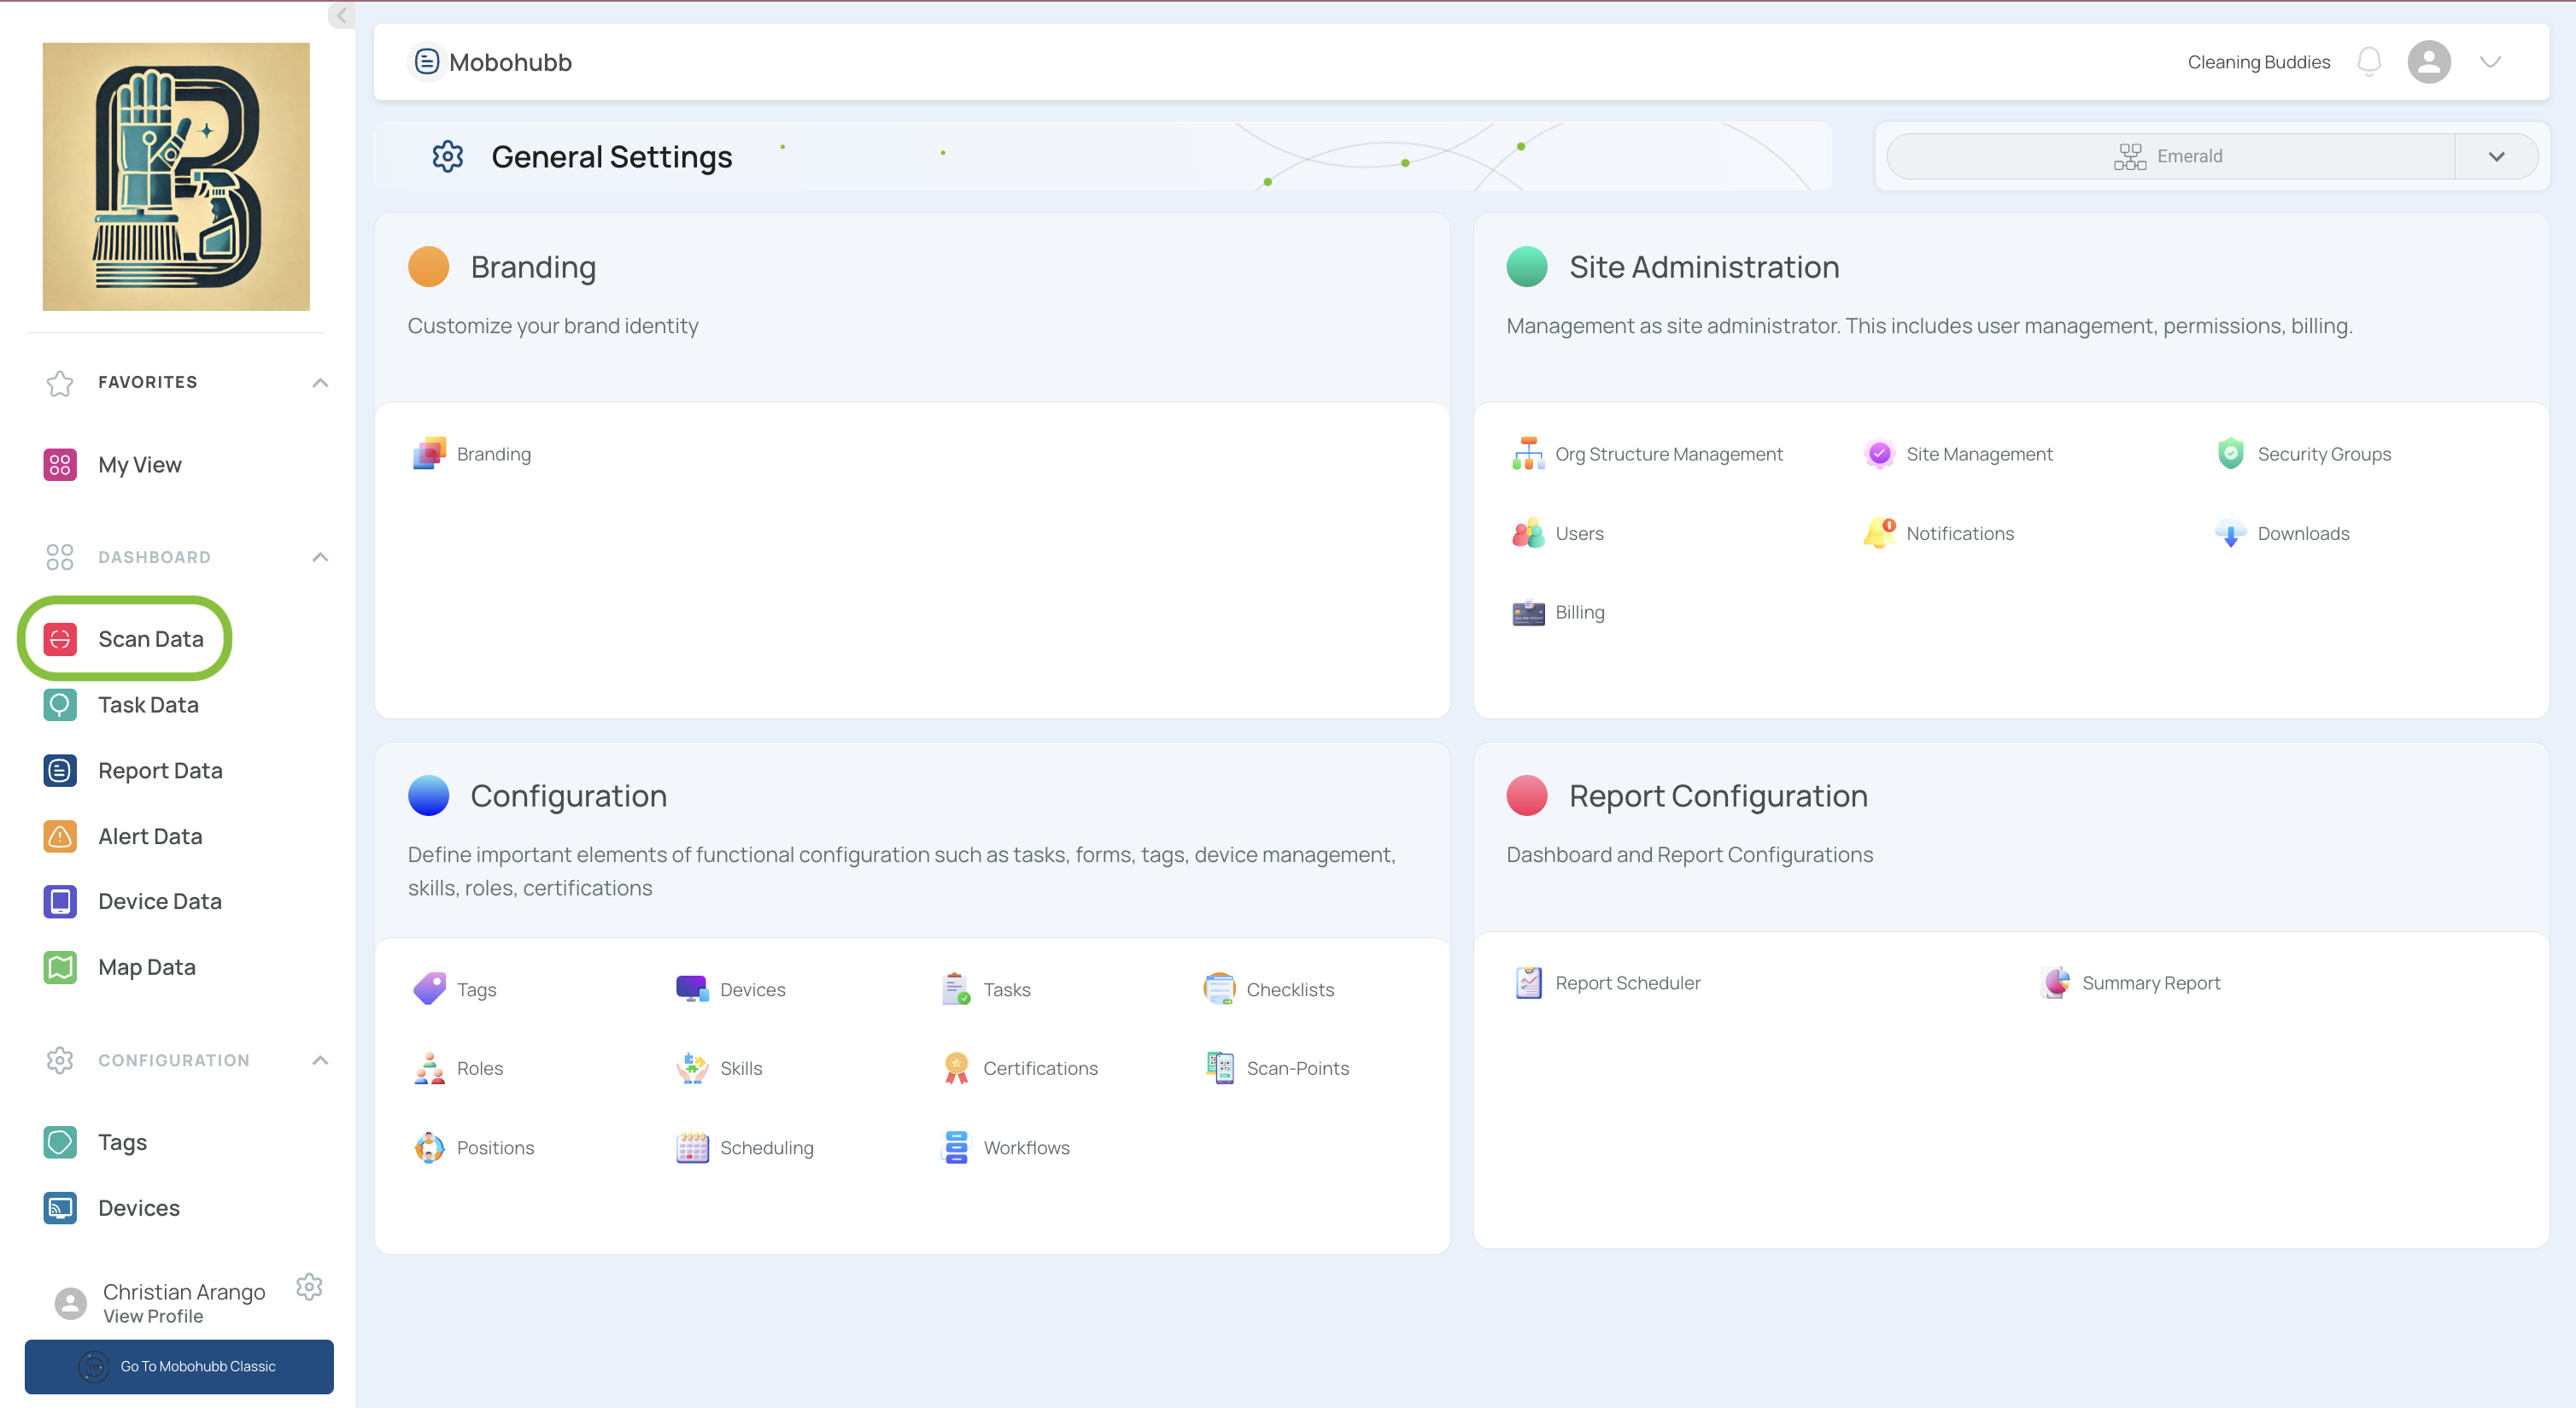
- Go to “Scan Data” from the side menu in the portal. (You may also use the search bar in the top menu.)
- Filter data using either quick or advanced filters:
- Quick Filters: Basic parameters like user or date.
- Advanced Filters: Multiple logical conditions (equals, not equals, contained in, etc.).
Click “Add New Filter” for additional rules. Press “Apply” once you’ve refined your parameters.
- View all related scans in the main table.
- Checking the upper box selects all data for group actions.
Exporting Your View
- Select relevant rows by checking their boxes.
- Click “Export” at the top.
- Choose “Export current view.”
A file in Excel format will download if it’s within the size limit. If the file is too large, it appears in Downloads on the platform.