Organizational Structure
Learn how to design and maintain your organizational hierarchy in mobohubb, adding levels/parents and sites up to five levels deep. This guide walks you through creating, editing, and deleting levels, as well as adding sites for maximum flexibility in structuring your company’s operations.
In this guide you'll learn
- How to add new levels/parents (up to five) to represent your organizational hierarchy
- How to move and edit existing sites or levels for changing needs
- Where to delete levels (and what happens to the sites underneath them)
mobohubb allows you to manage multiple sites by organizing them under one or more parent levels, creating up to five tiers in a hierarchical tree. This system supports unique branding and mobile configurations for each site, while also letting you segment tasks and responsibilities. For example, you might define cities as Level 1 and neighborhoods as Level 2, with individual sites attached at either level. This flexibility helps you tailor the platform to your company’s real-world layout.
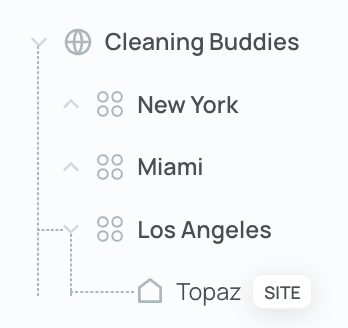
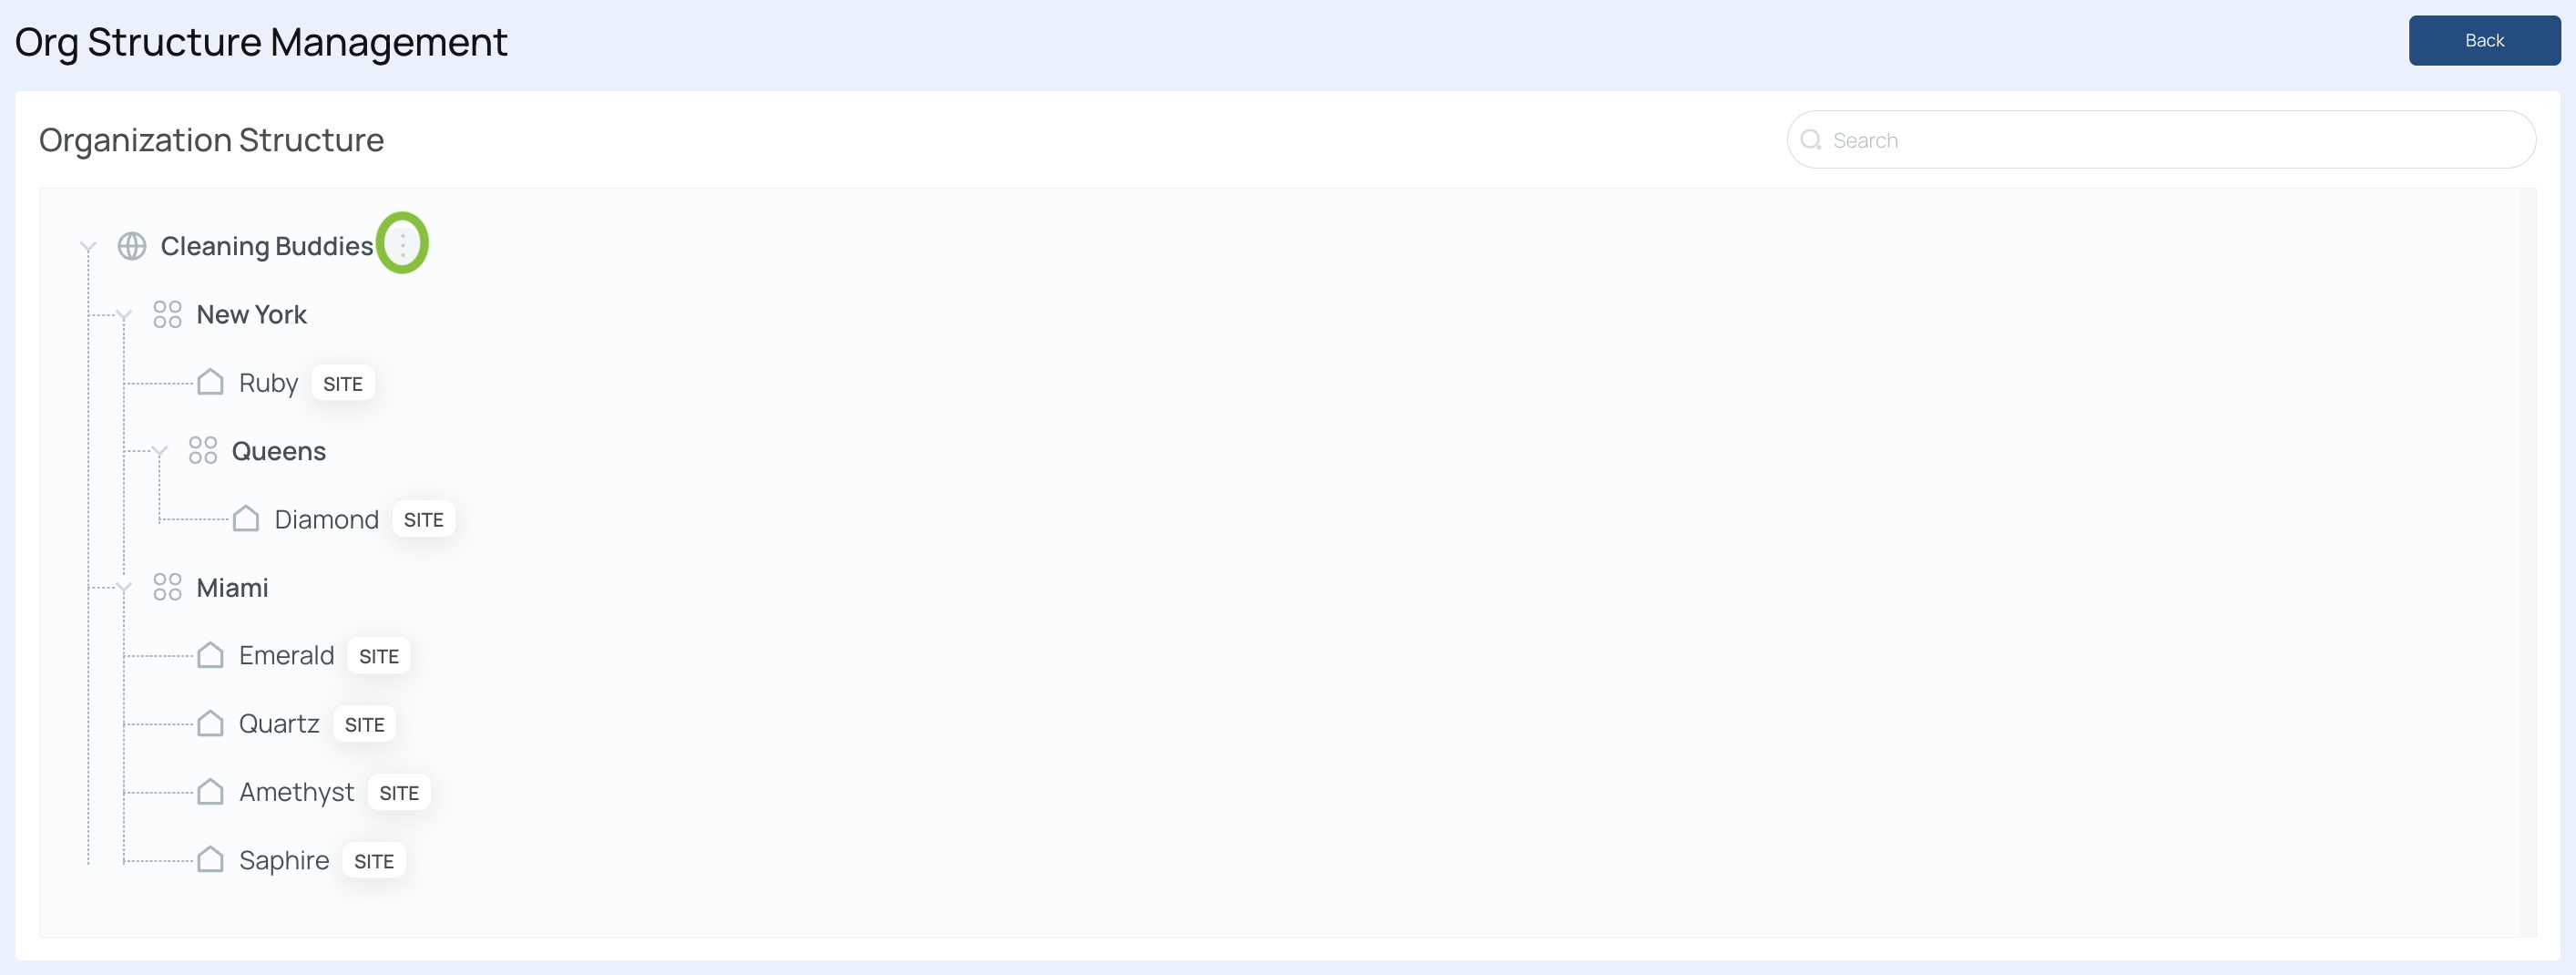
The company Cleaning Buddies operates six sites—Ruby, Diamond, Emerald, Quartz, Amethyst, and Sapphire. Two Level 1 entries, New York and Miami, group these sites. Queens serves as a Level 2 (neighborhood under New York). You can repeat this pattern up to five levels, ensuring each portion of your organization is properly represented.

By properly configuring the organizational structure, you can:
- Streamline staff onboarding across different sites.
- Assign tasks and schedules per location or level.
- Segment data effectively, ensuring each site has accurate branding and security groups.
Follow the instructions below to enter and manage your organizational structure.
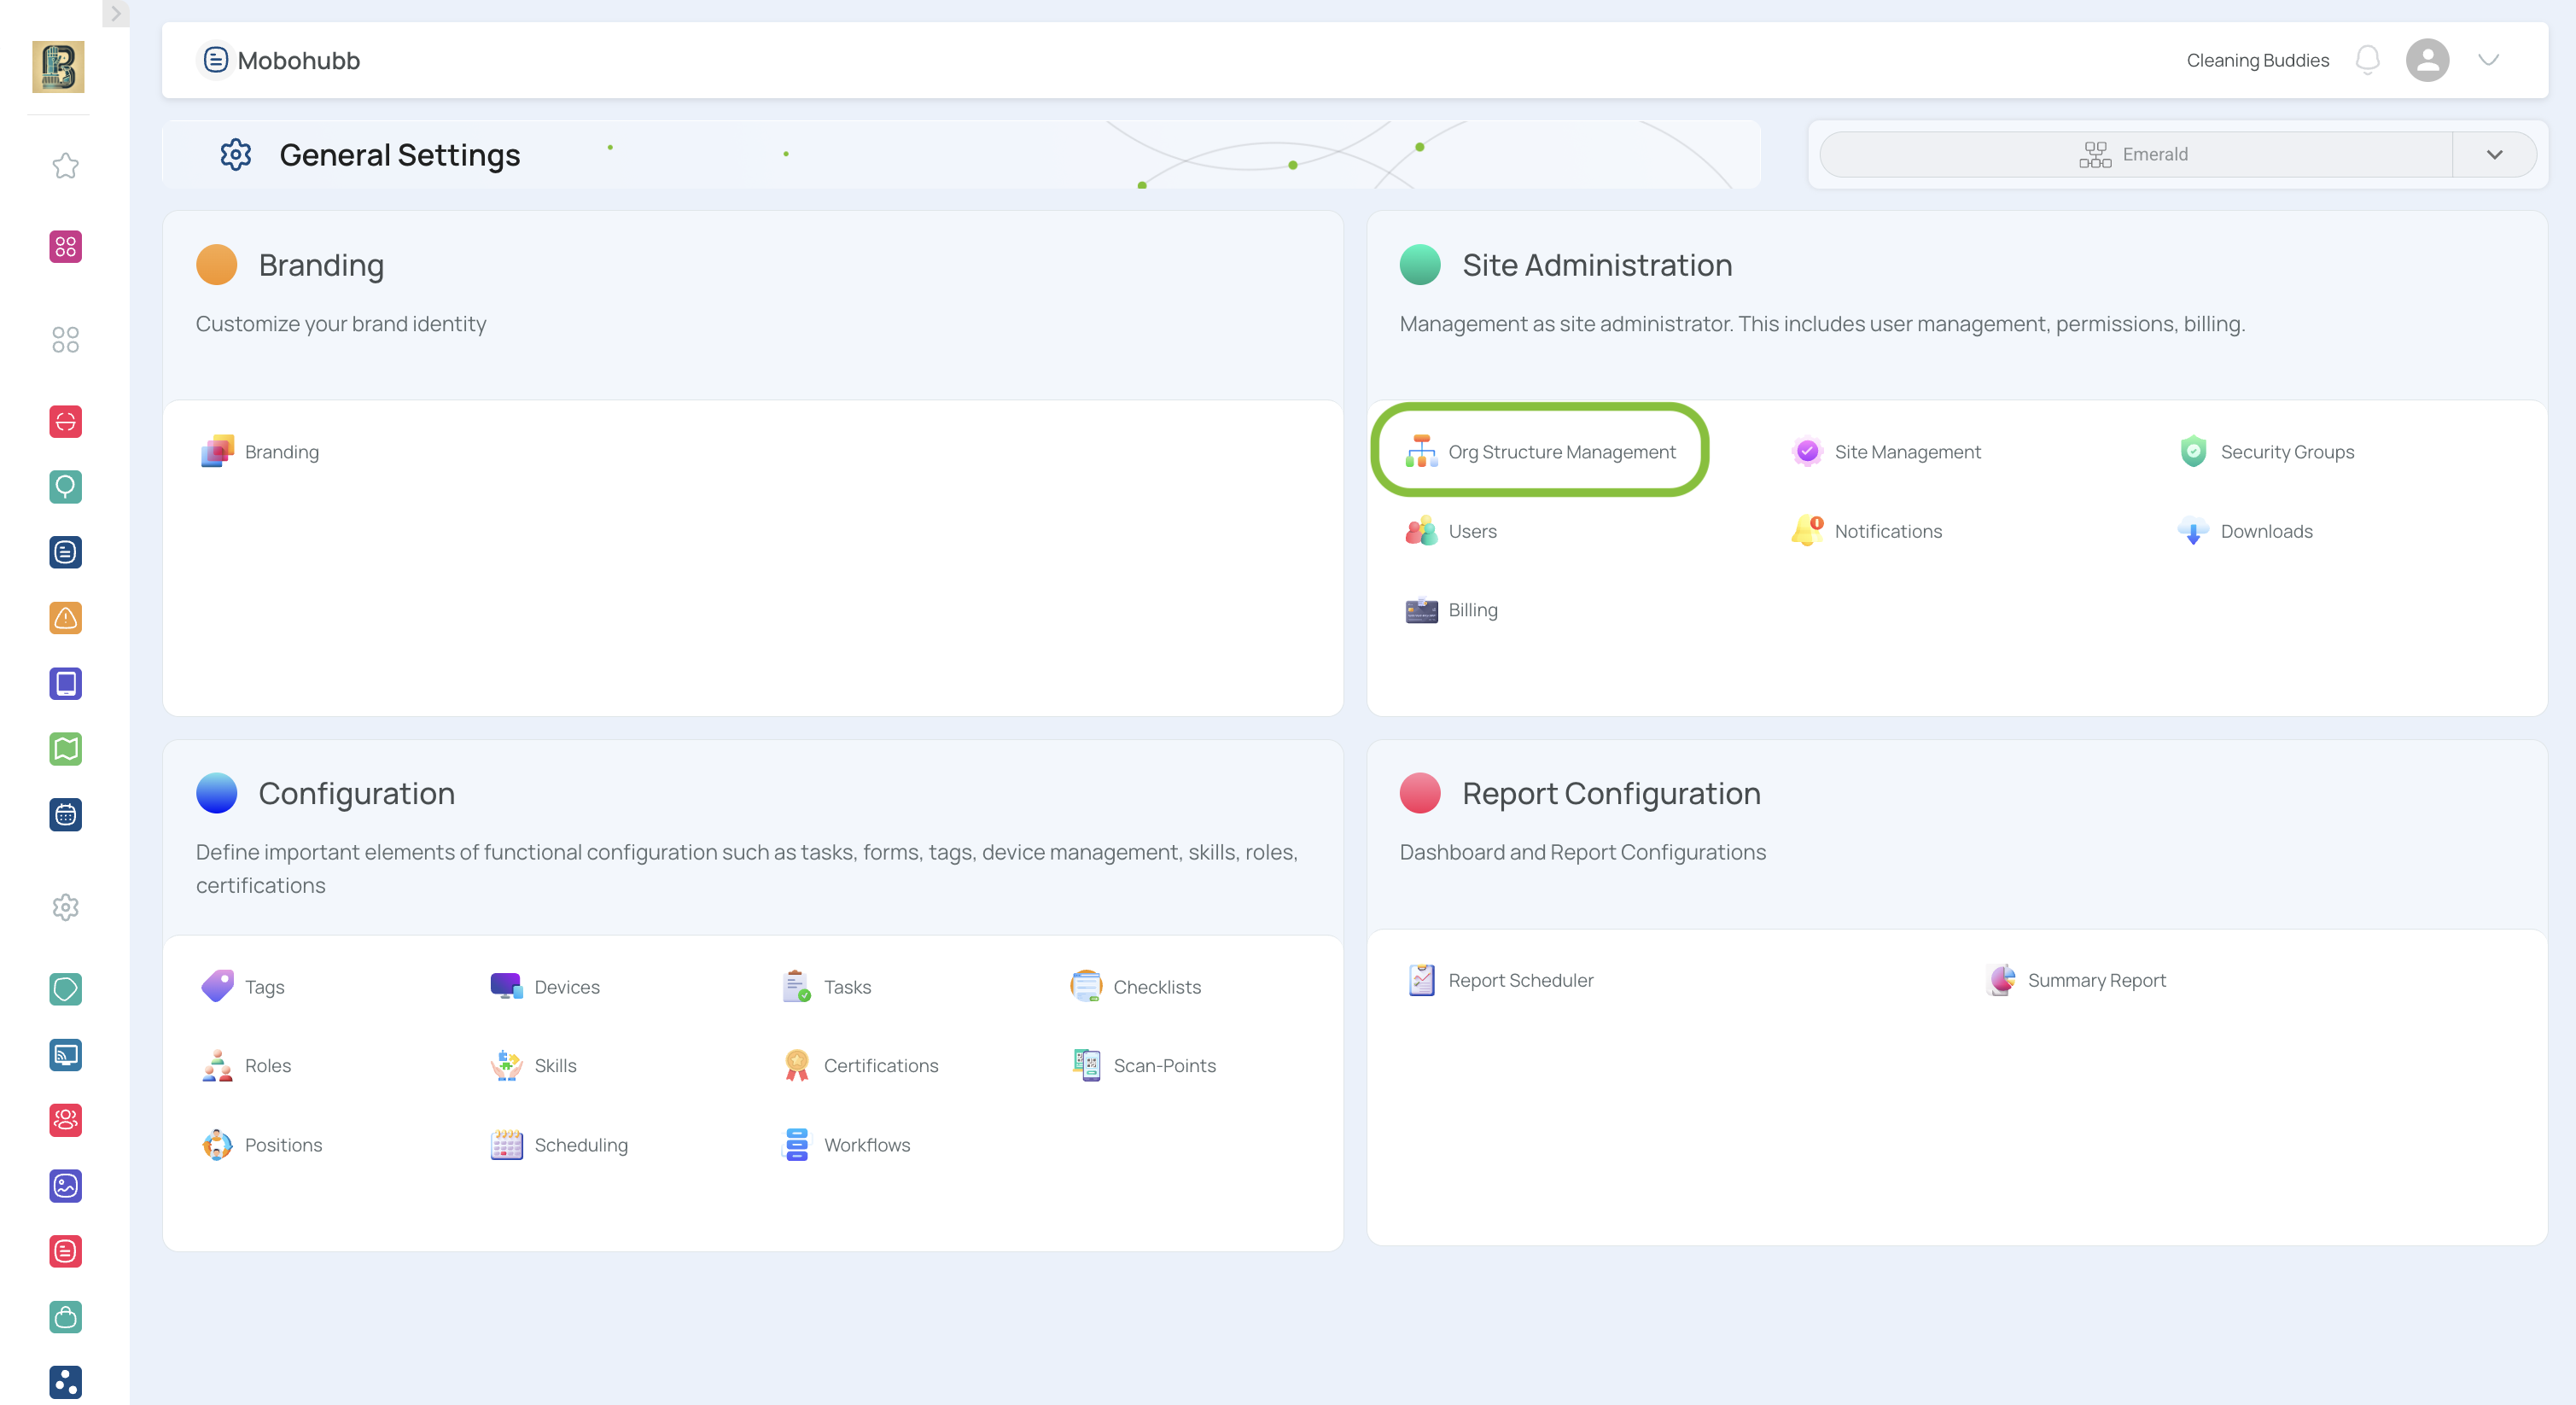
Accessing Organizational Structure Management
- Navigate to the portal’s top menu, and click on "Settings"
- Select "Org Structure Management" in the Site Administration section.
Adding Levels
mobohubb’s Org Structure lets you add levels for your organization. Levels could be Level 0 Organization, Level 1 main headquarters, Level 2 offices, etc.
Add a Site Directly Under the Organization (Level 0)
-
Open your Org Structure Management page.
-
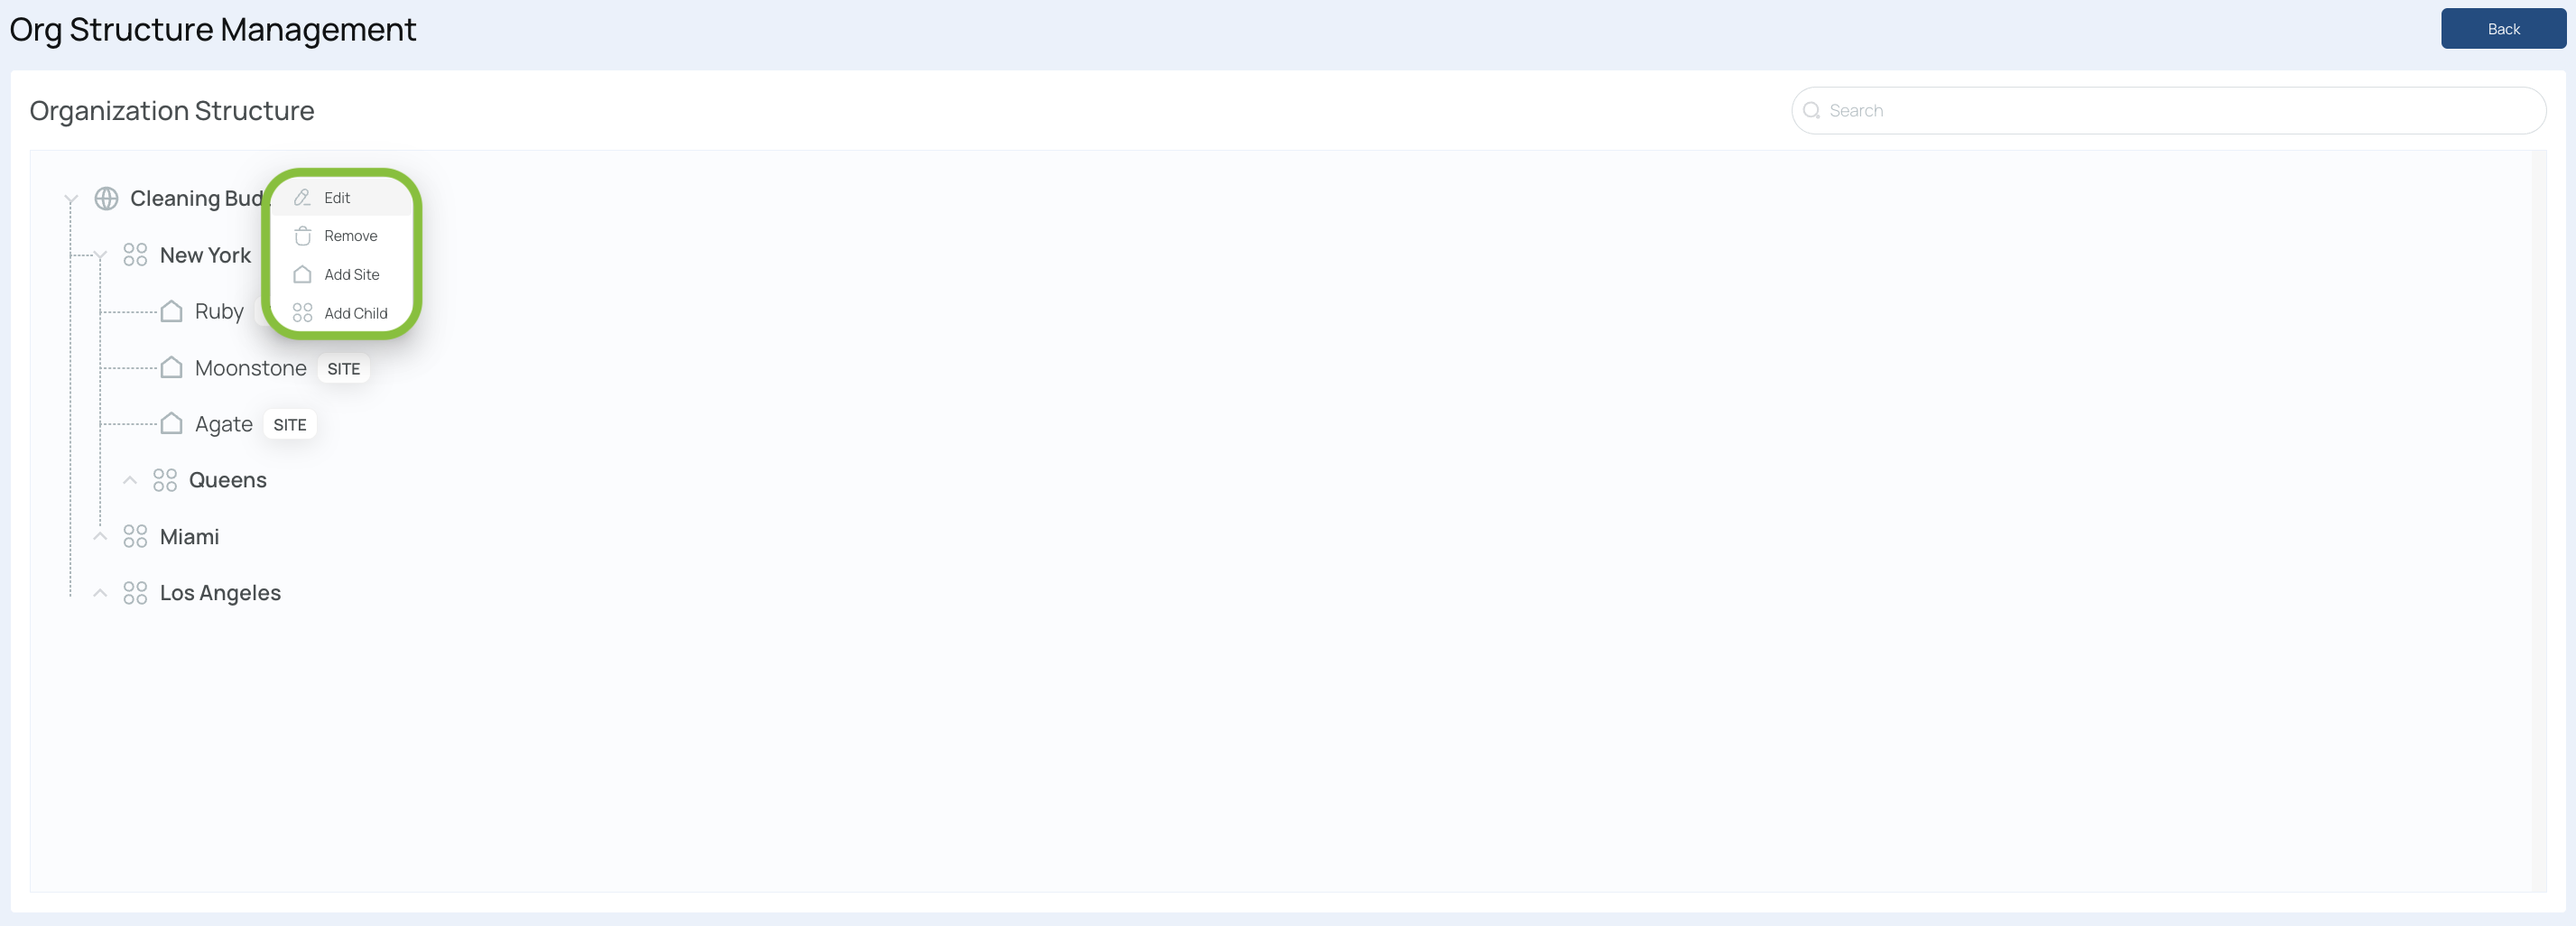
Click the three dots next to your organization name.
- Select “Add Child”.
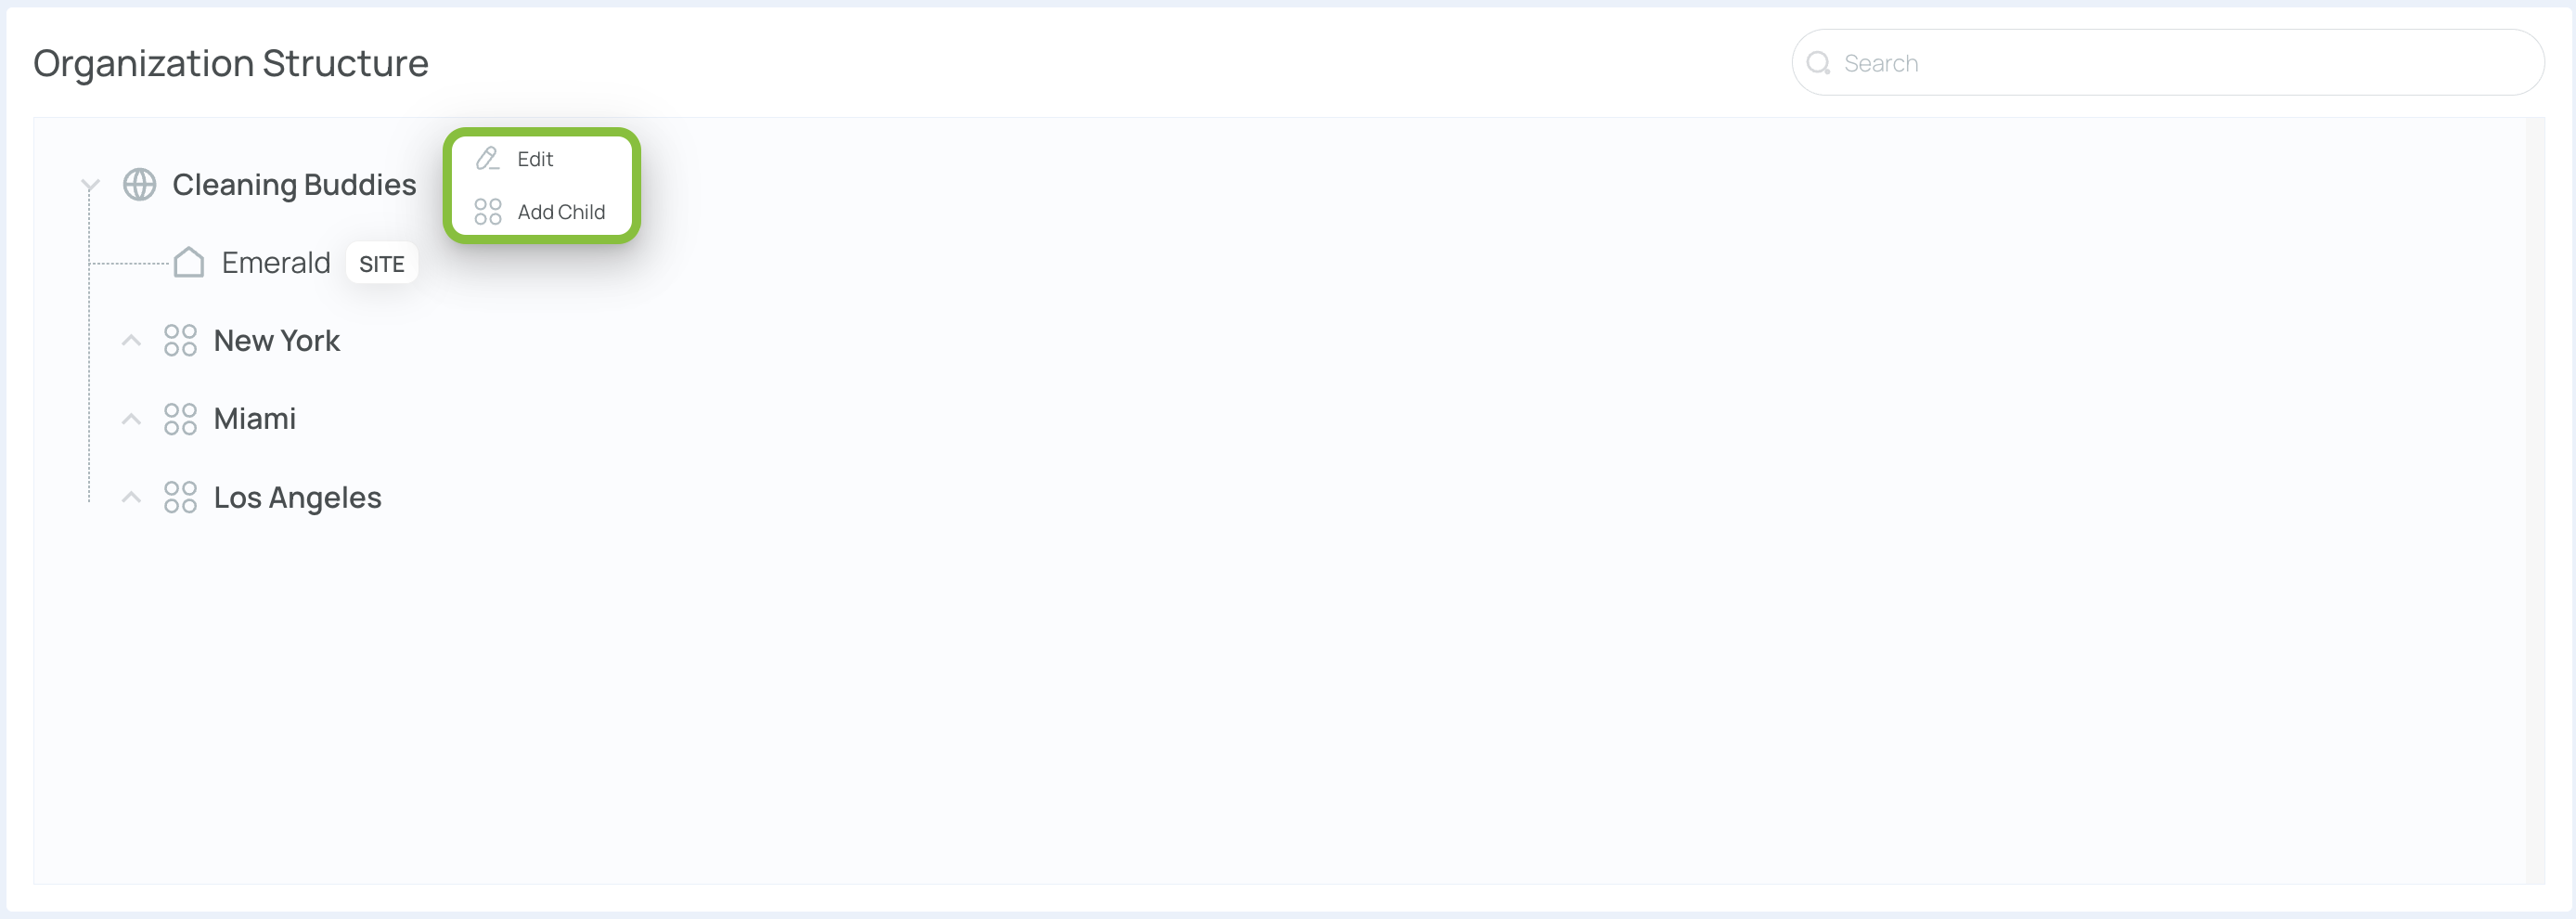
- In the Add Child window, fill in the child's name.
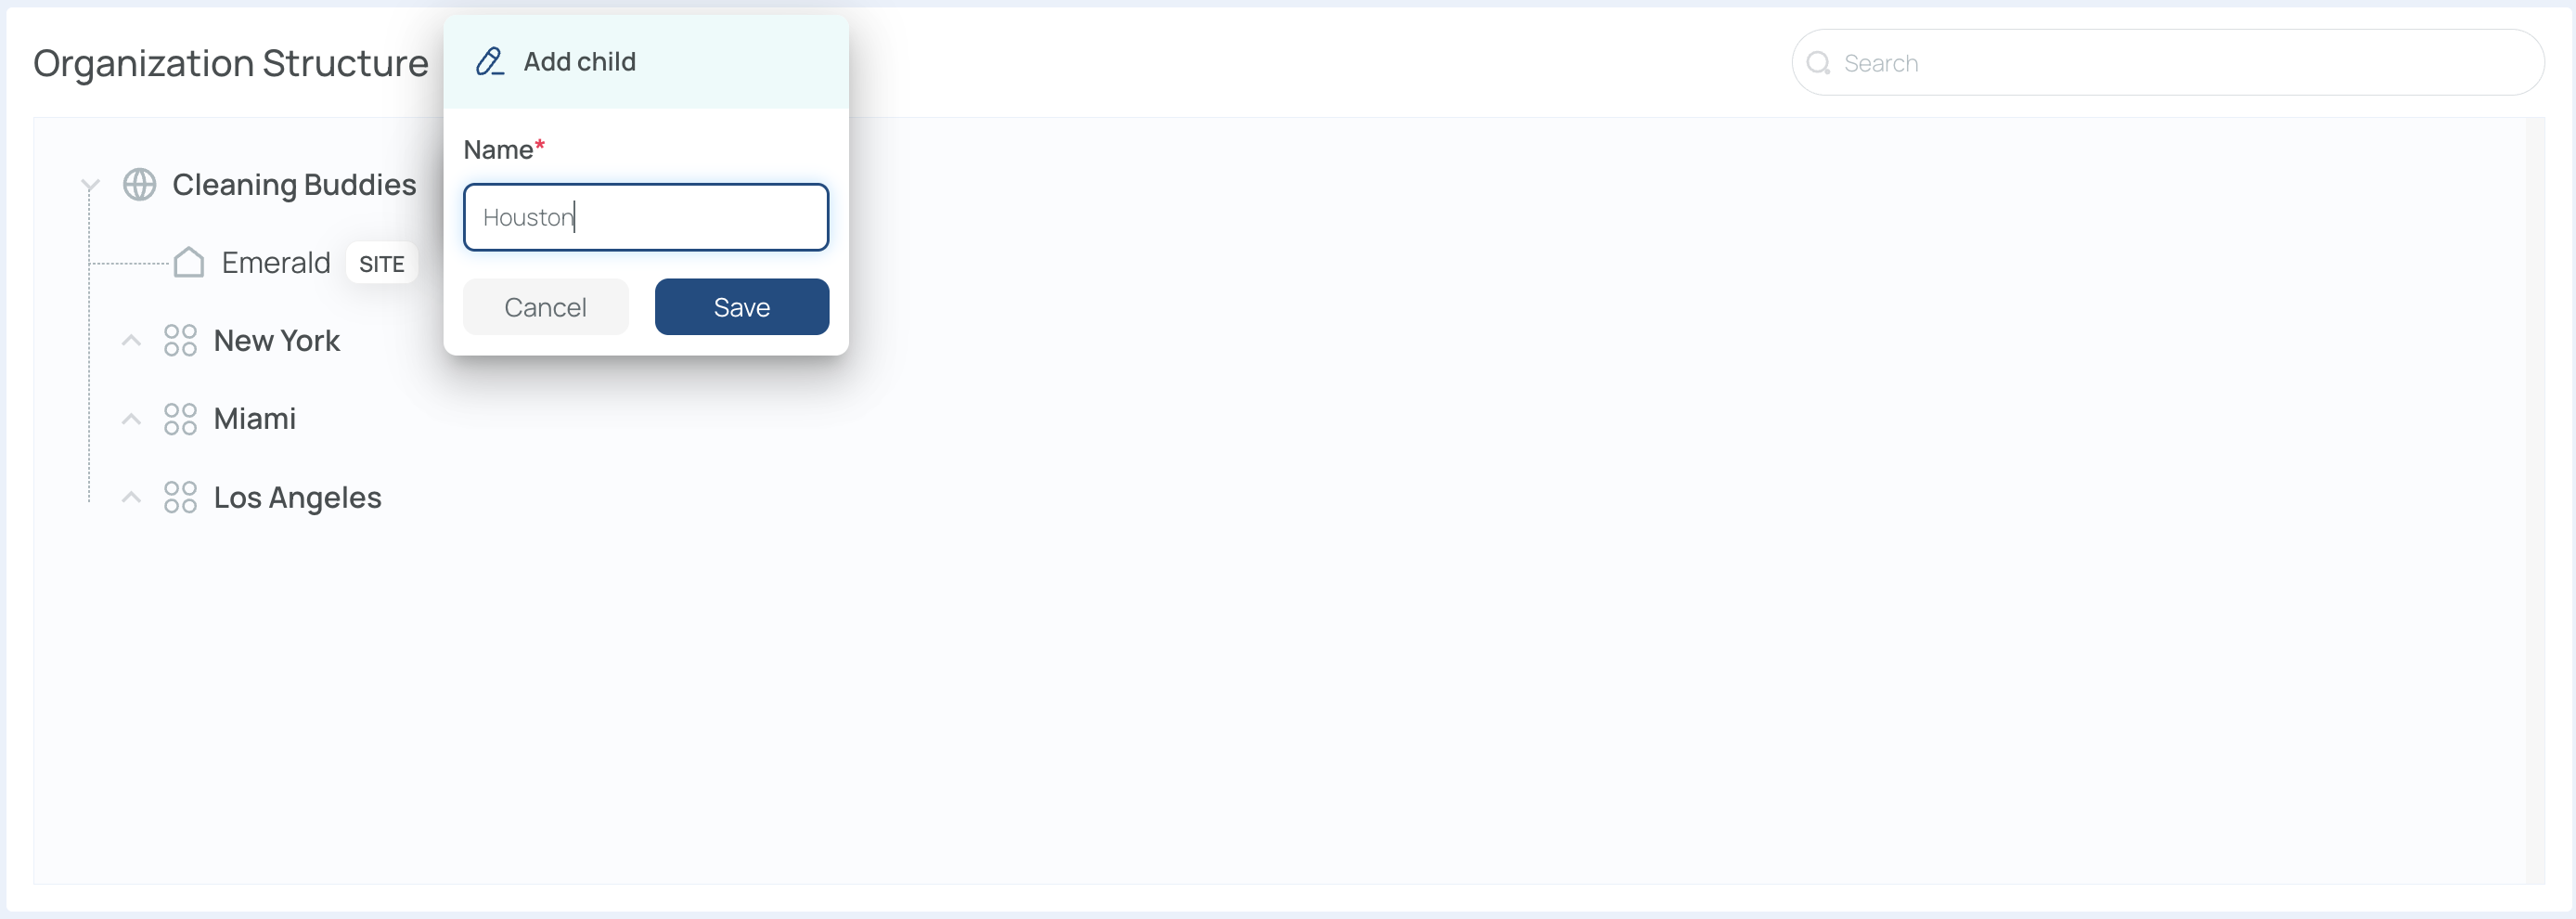
- Click Save to confirm.
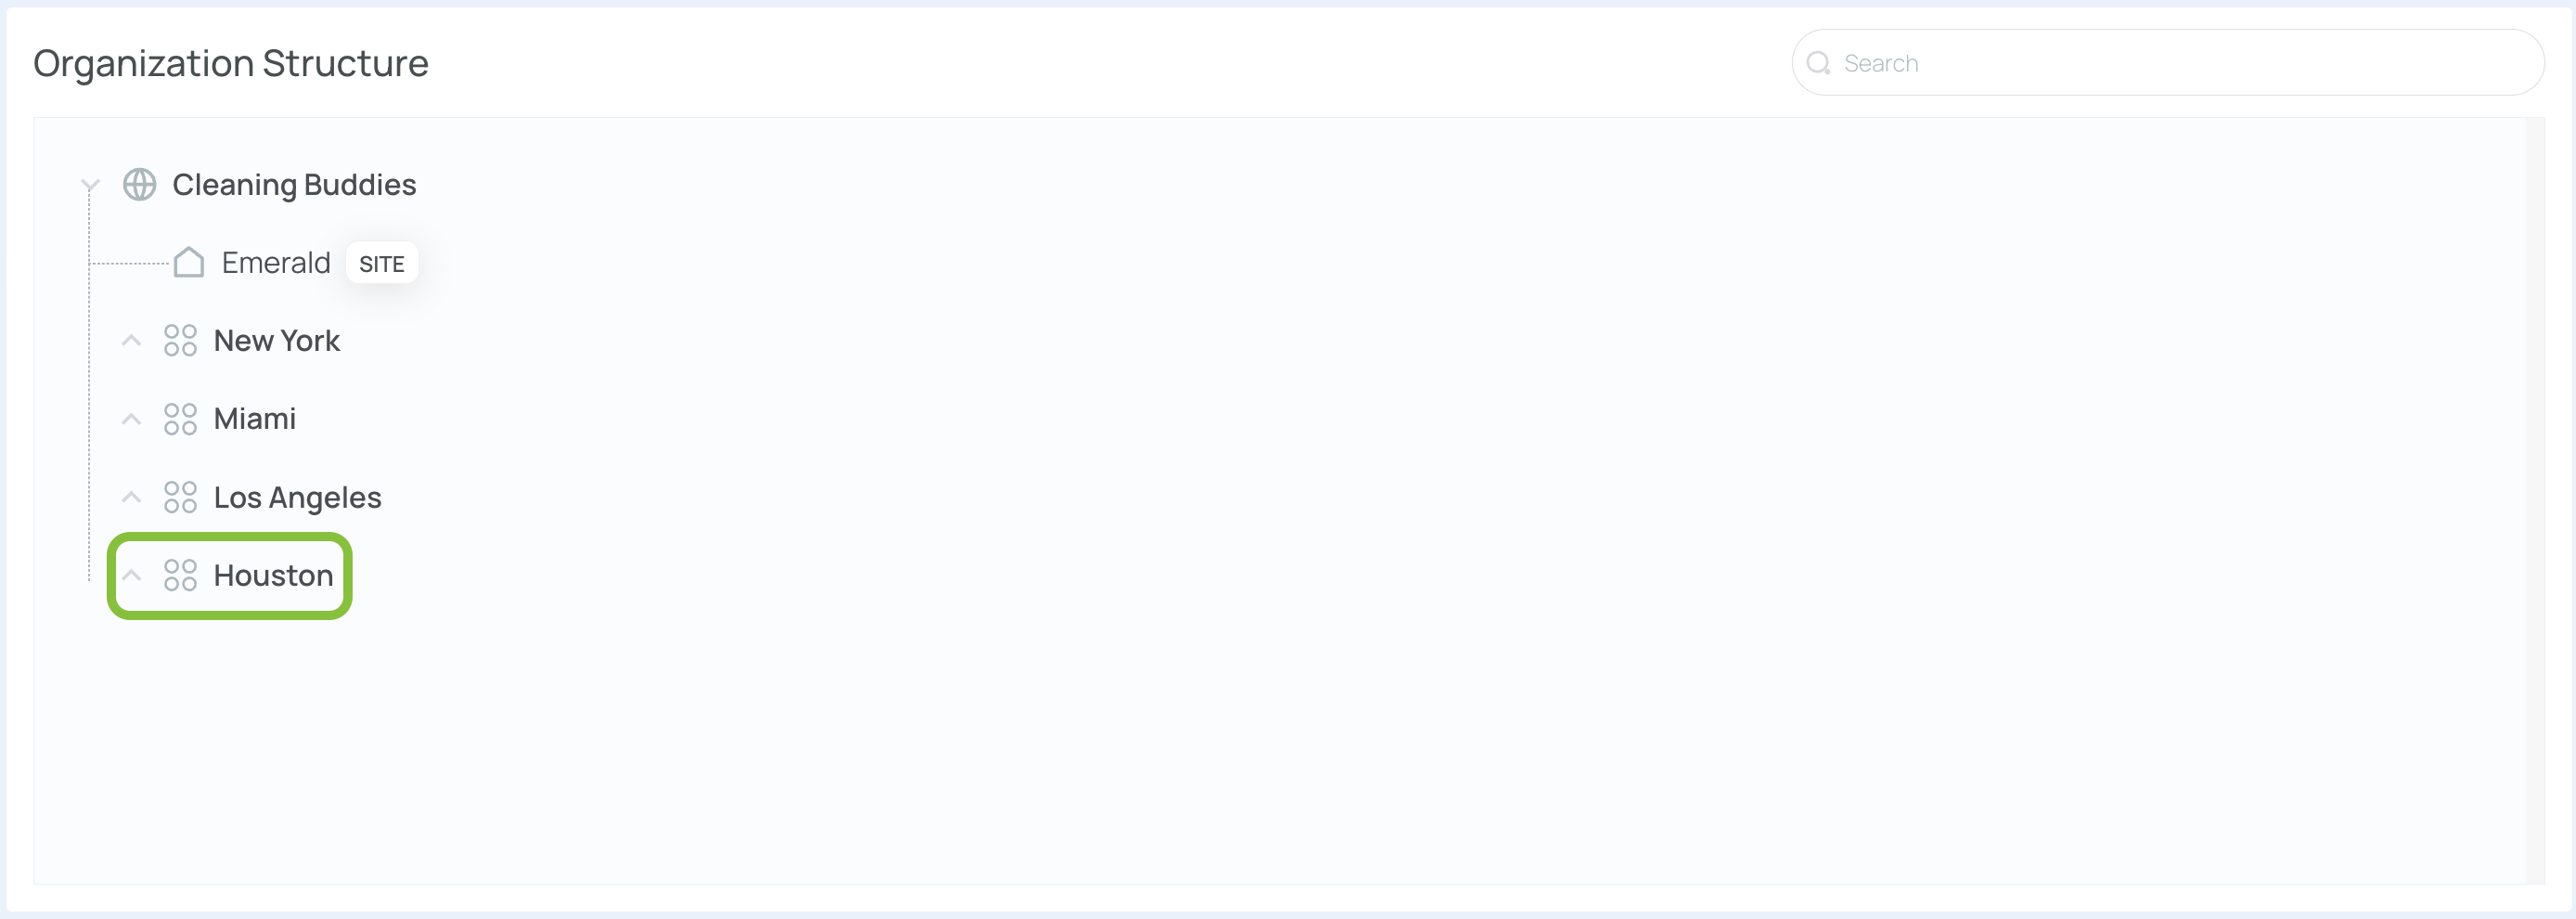
- You can add levels under a child, too, following the same process. Click the 3 dots, add a child, and give it a name.
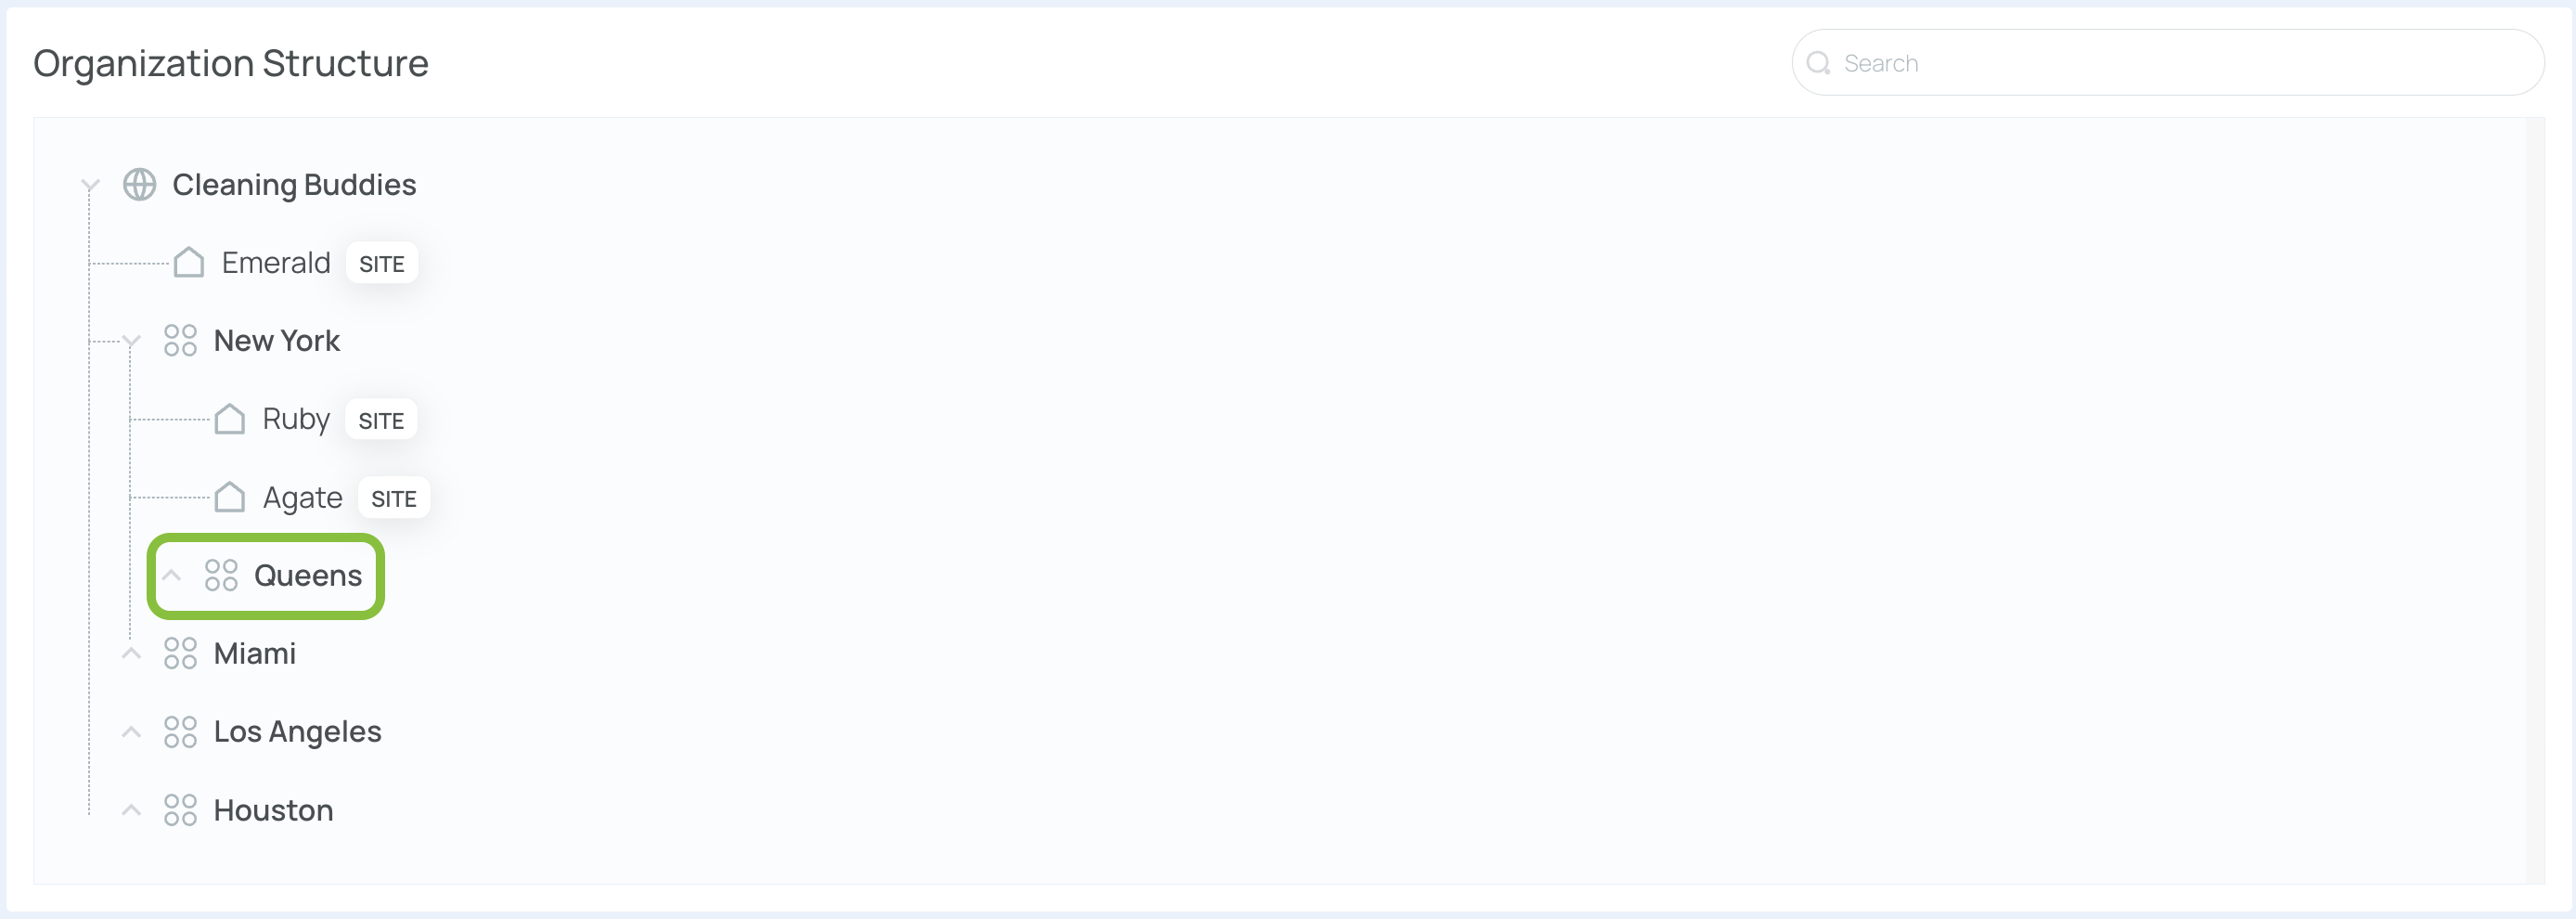
In this example, Queens is a child under New York, which is a child under your organization.
Important
- mobohubb lets you insert additional organizational tiers up to five levels deep.
- If you want to create a new site, please contact support.
Moving Sites Within the Organization
If your hierarchy changes or you want to reassign a site’s parent, you can edit any site’s level/parent:
-
Locate the site you want to move.
-
Click the three dots next to its name.

-
-
Select “Edit.”
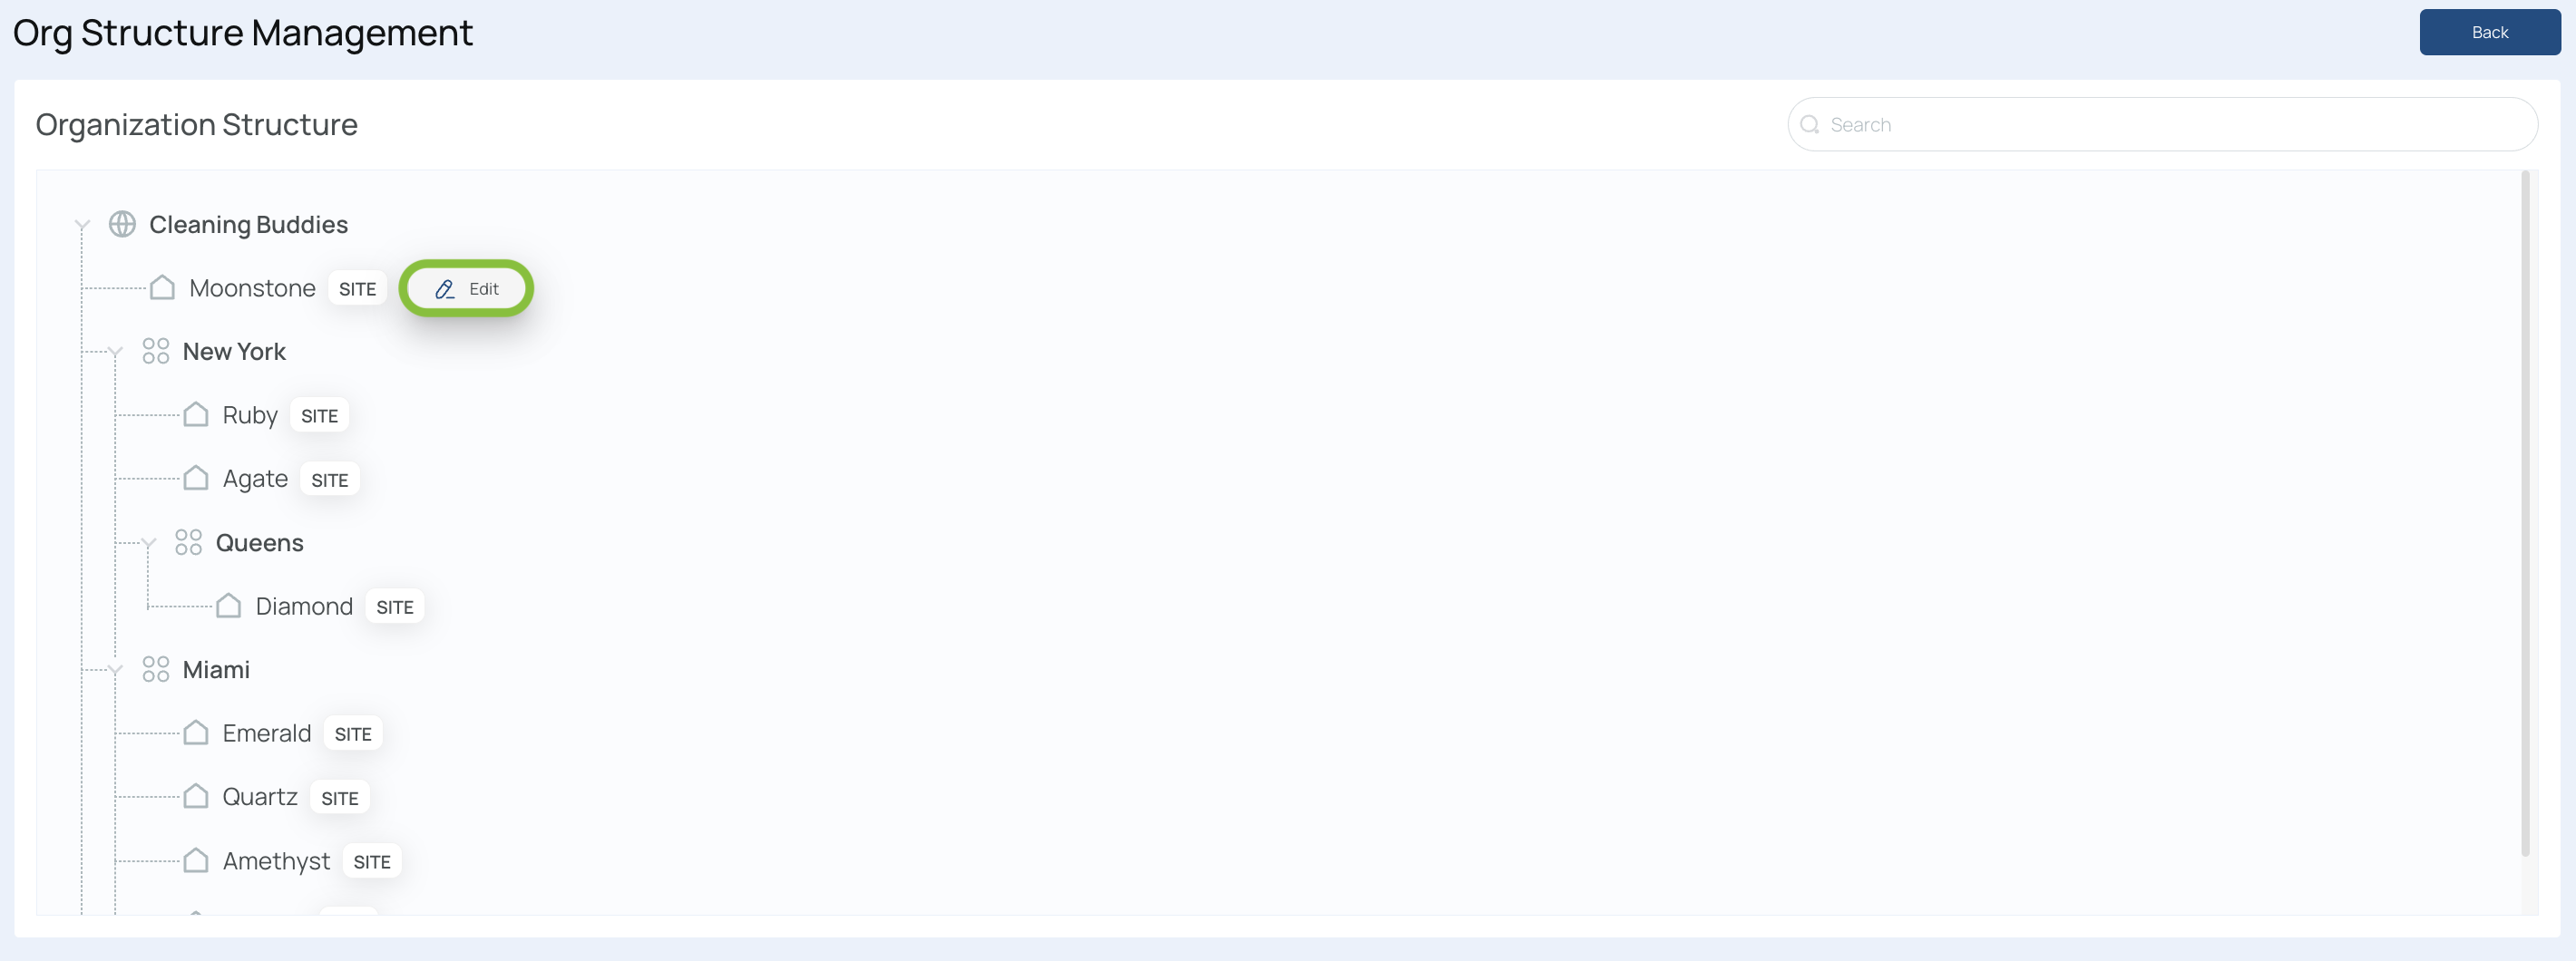
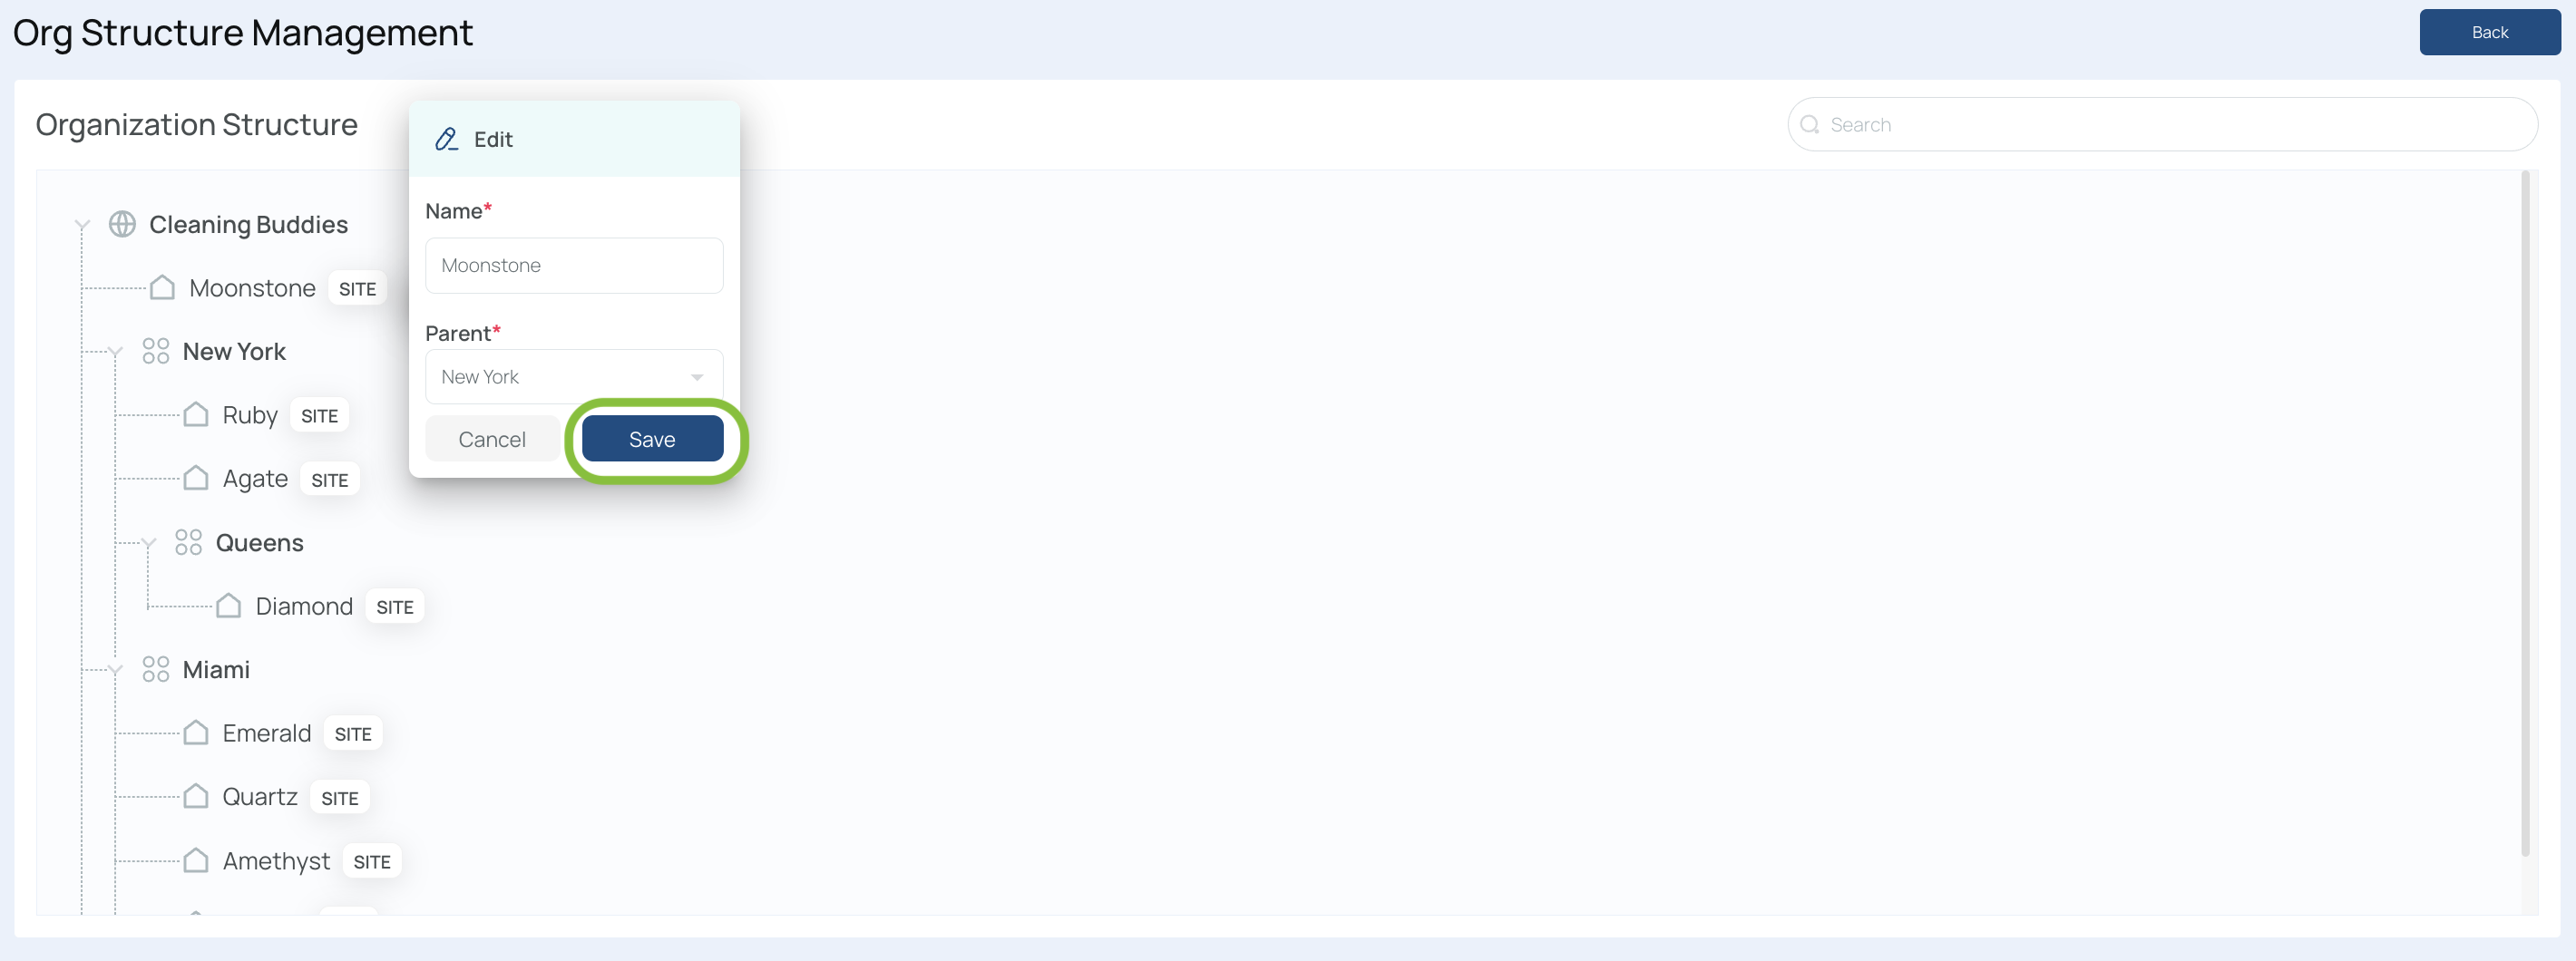
- Change the Level/Parent dropdown to the new parent level.
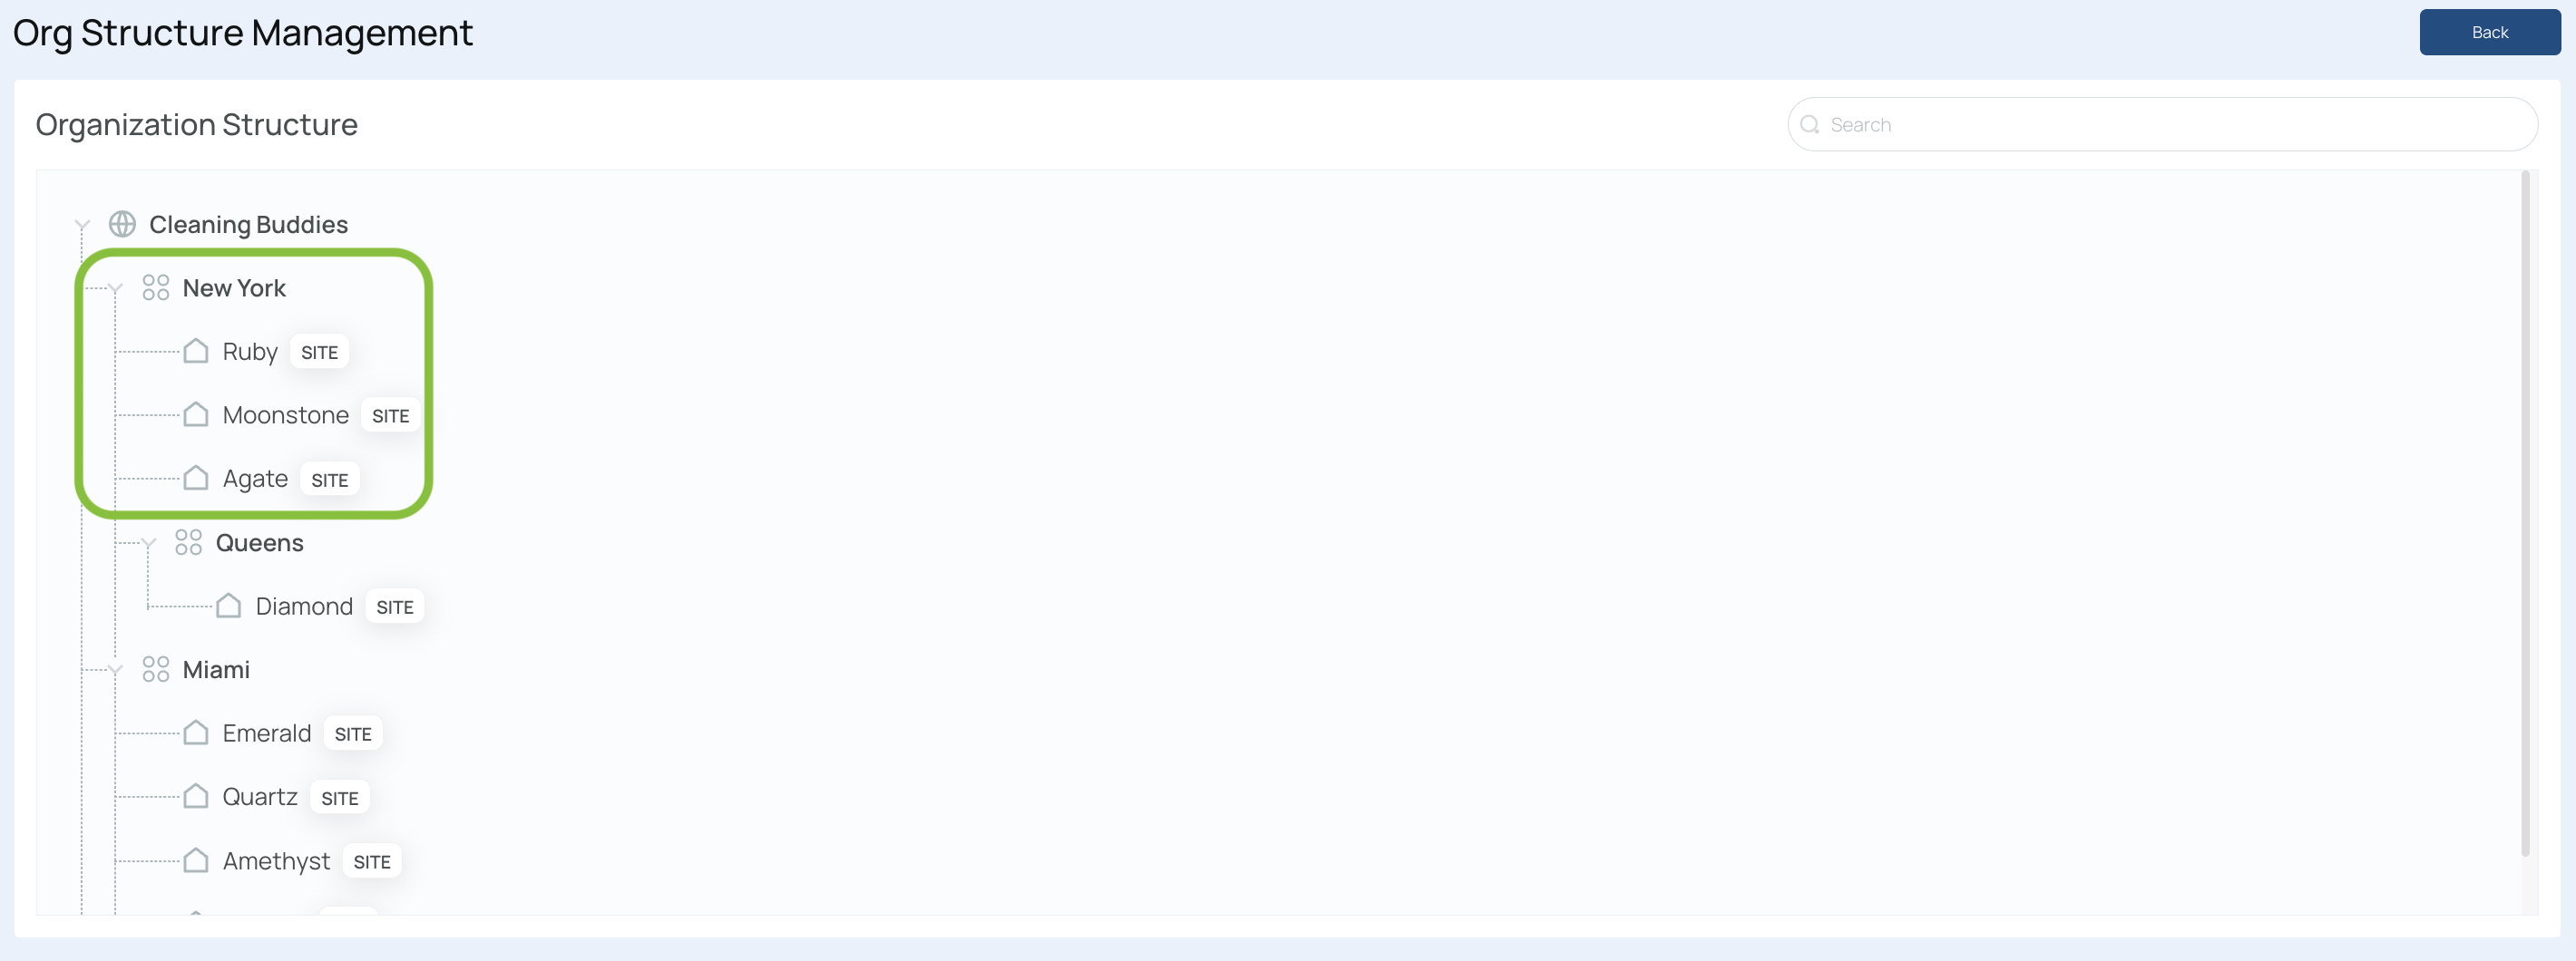
- For example, move Moonstone under “New York” (Level 1).
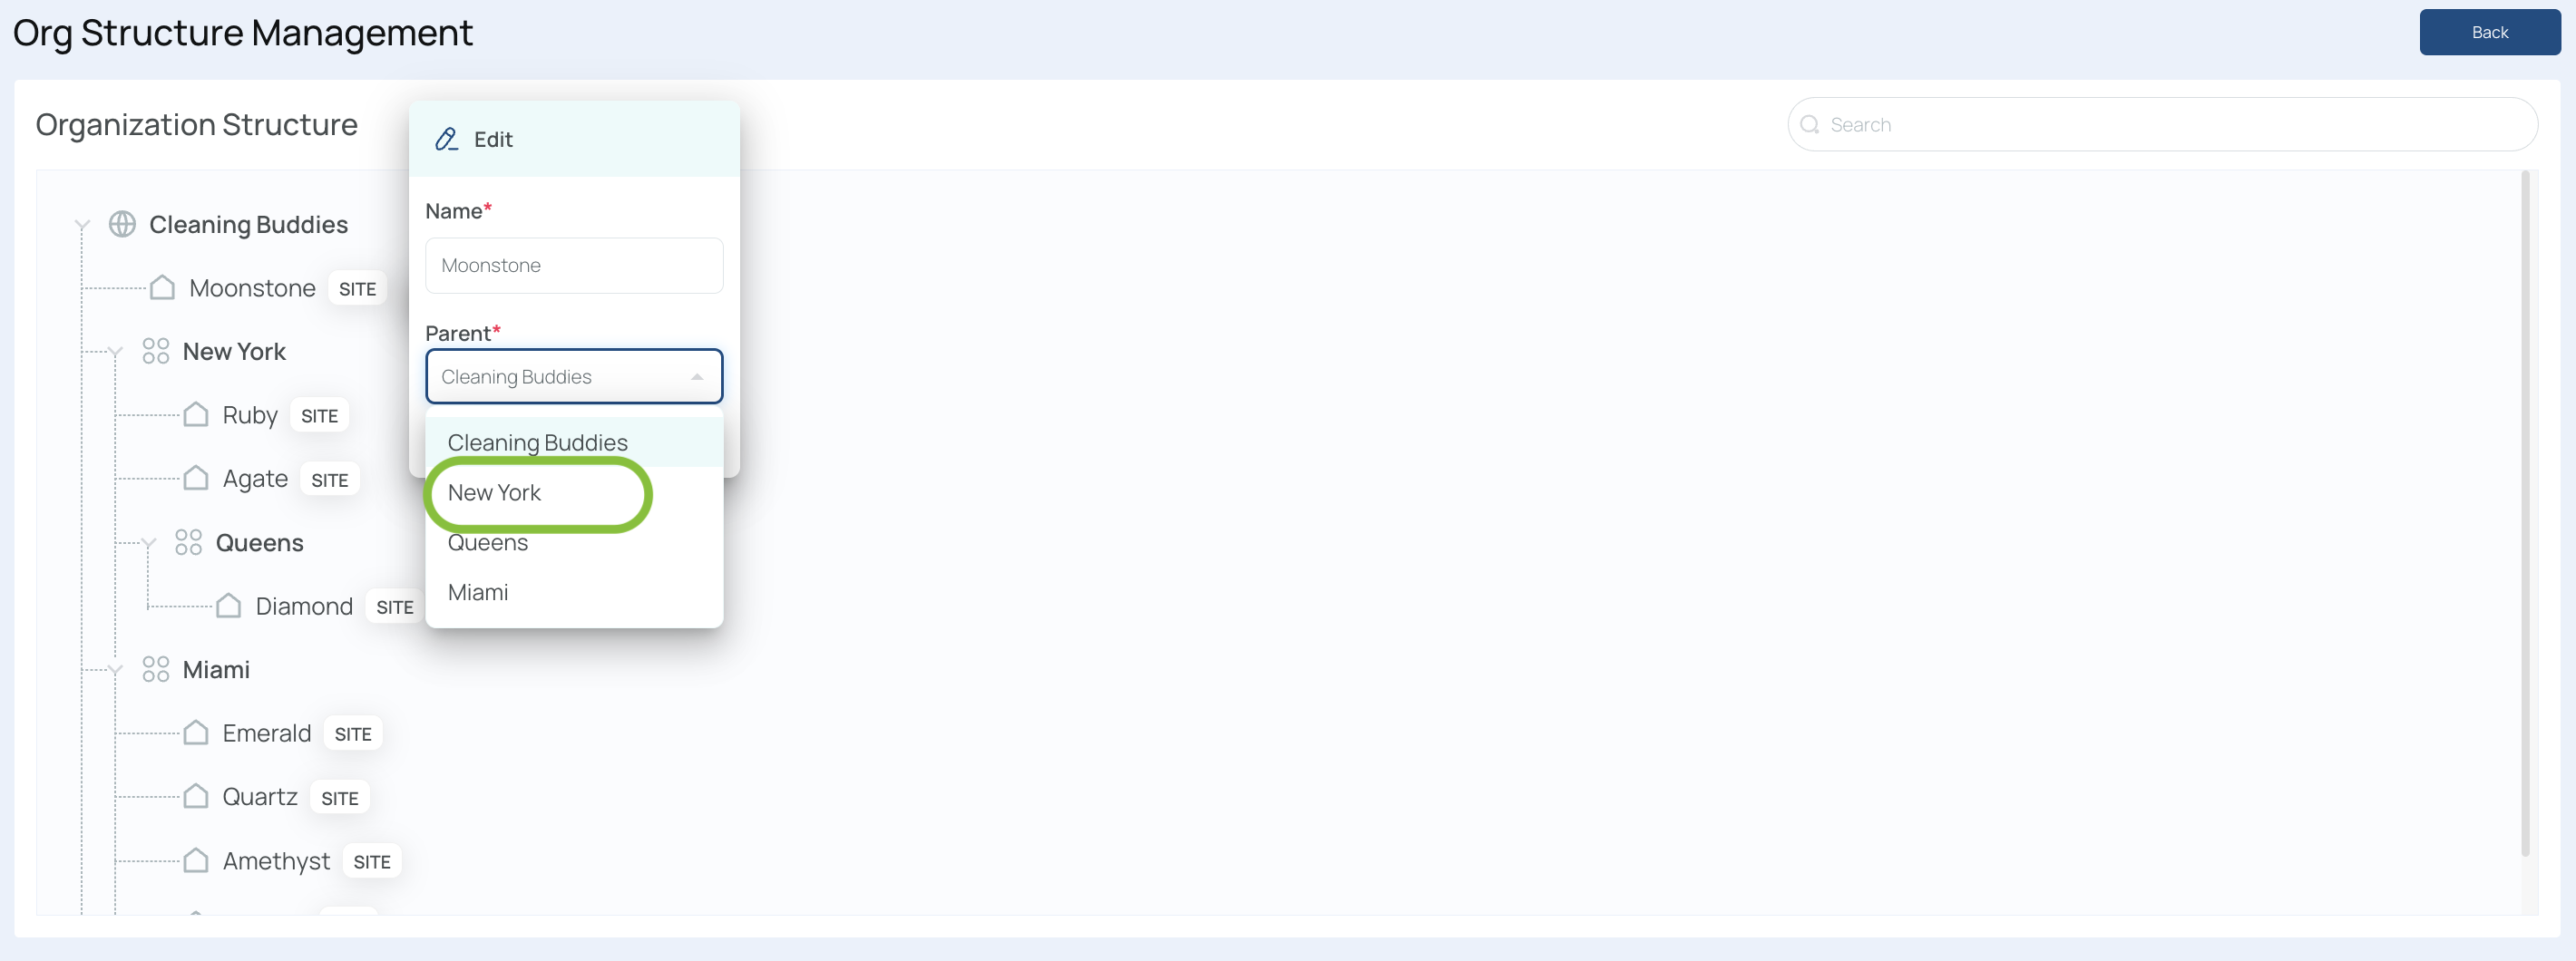
- Save your changes.
- Check your organizational structure: the site now appears under its new parent.
Editing Sites or Levels/Parents
Editing a Site
-
Locate the desired site in your org structure.
-
Click the 3 dots next to the site’s name, then select “Edit.”
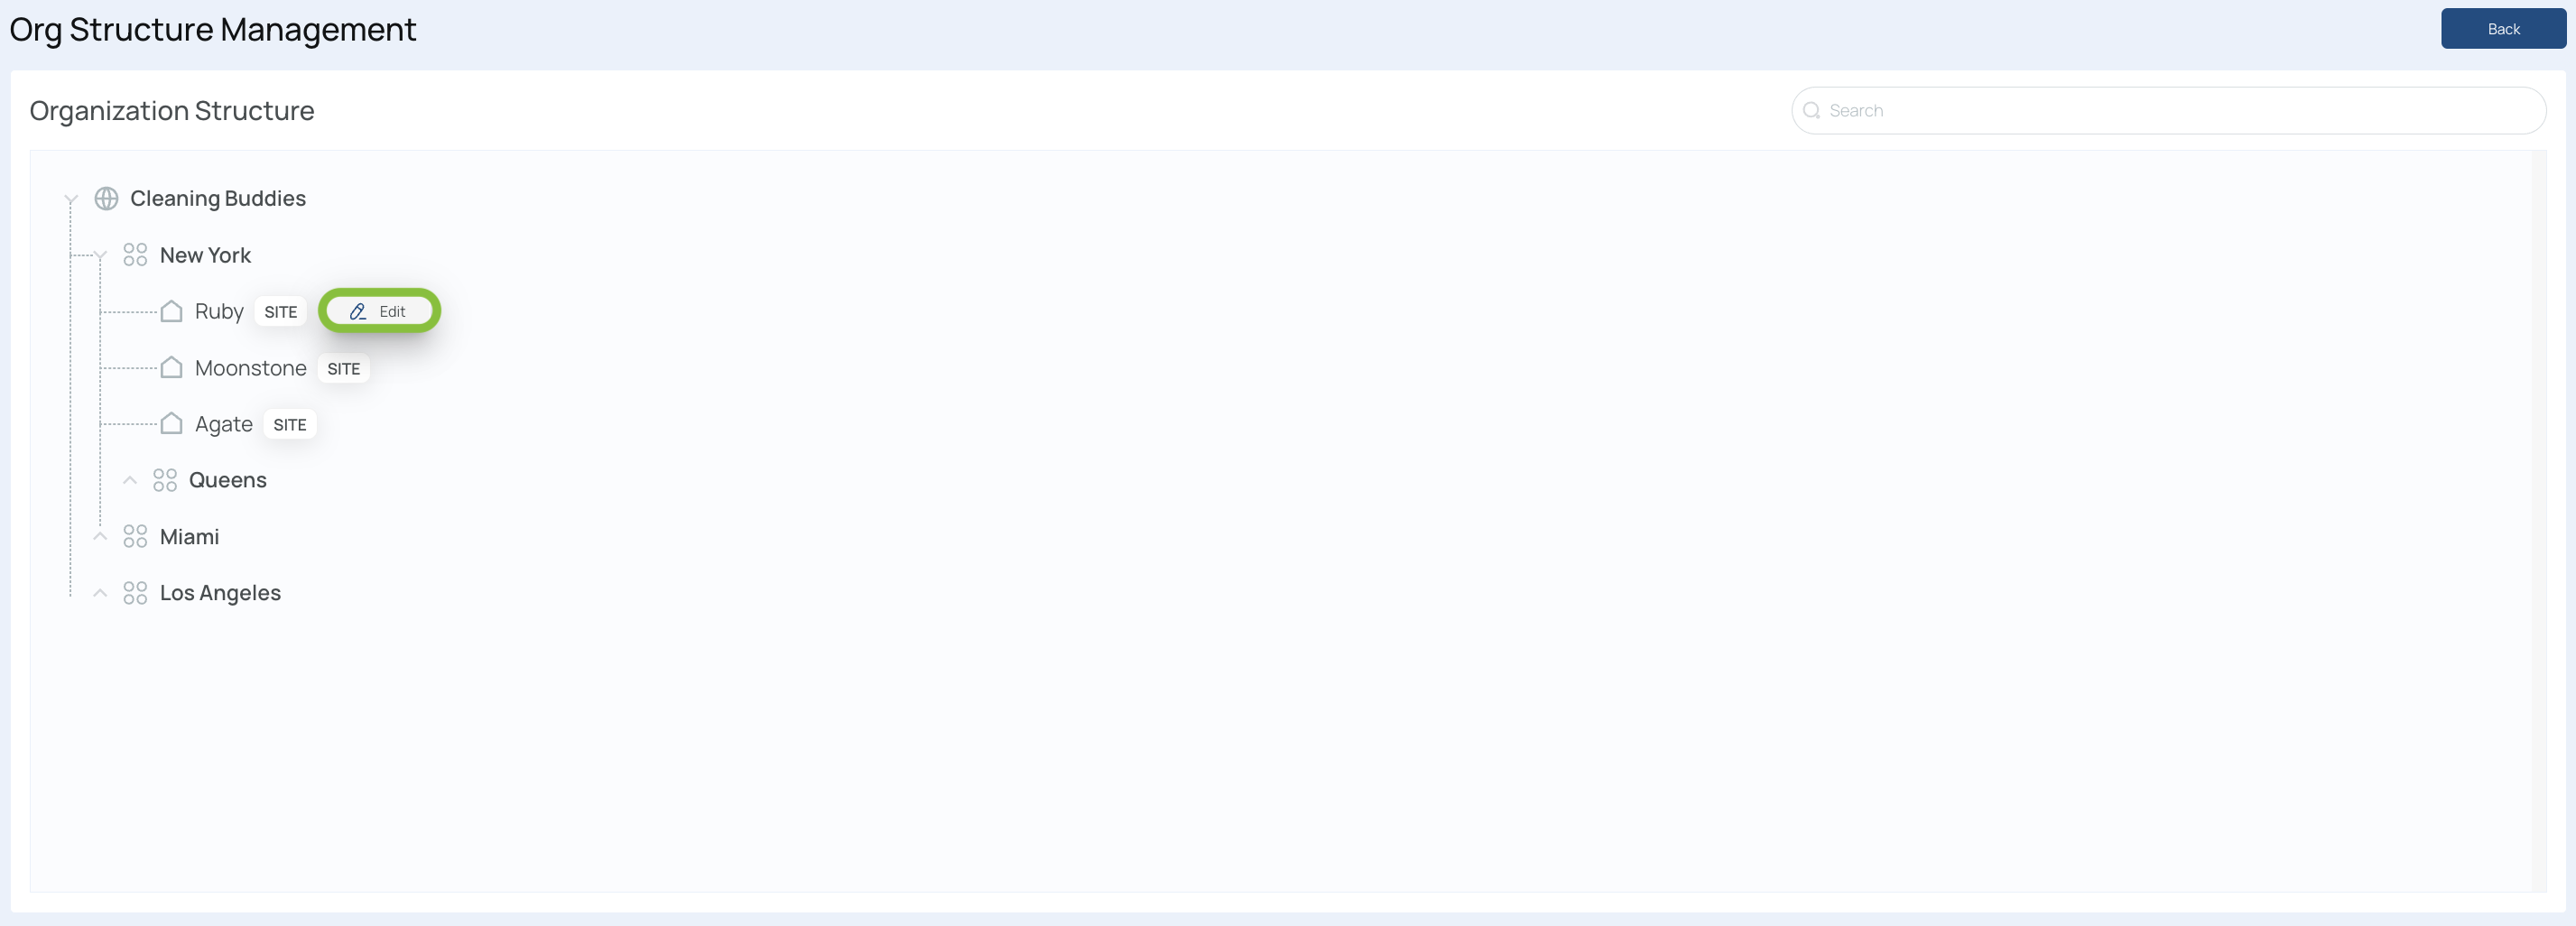
- Modify site details:
- Site Name
- Parent (the level under which it resides)
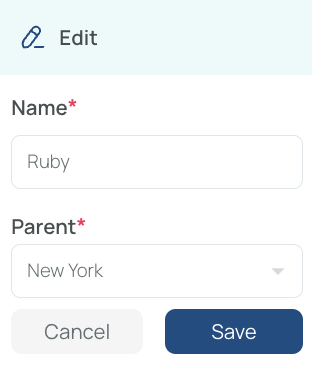
- Save changes to confirm.
Editing a Level/Parent
-
Locate the level/parent in your org structure.
-
Click the 3 dots next to the level’s name, then select “Edit.”
- Rename the level as needed.

- Save to apply the updated name.
Deleting Levels/Parents
Note: Sites cannot be deleted; instead, you can mark them as inactive. Learn more.
You can remove an entire level/parent at any time:
-
Click the 3 dots next to the level name.
-
Choose “Remove.”
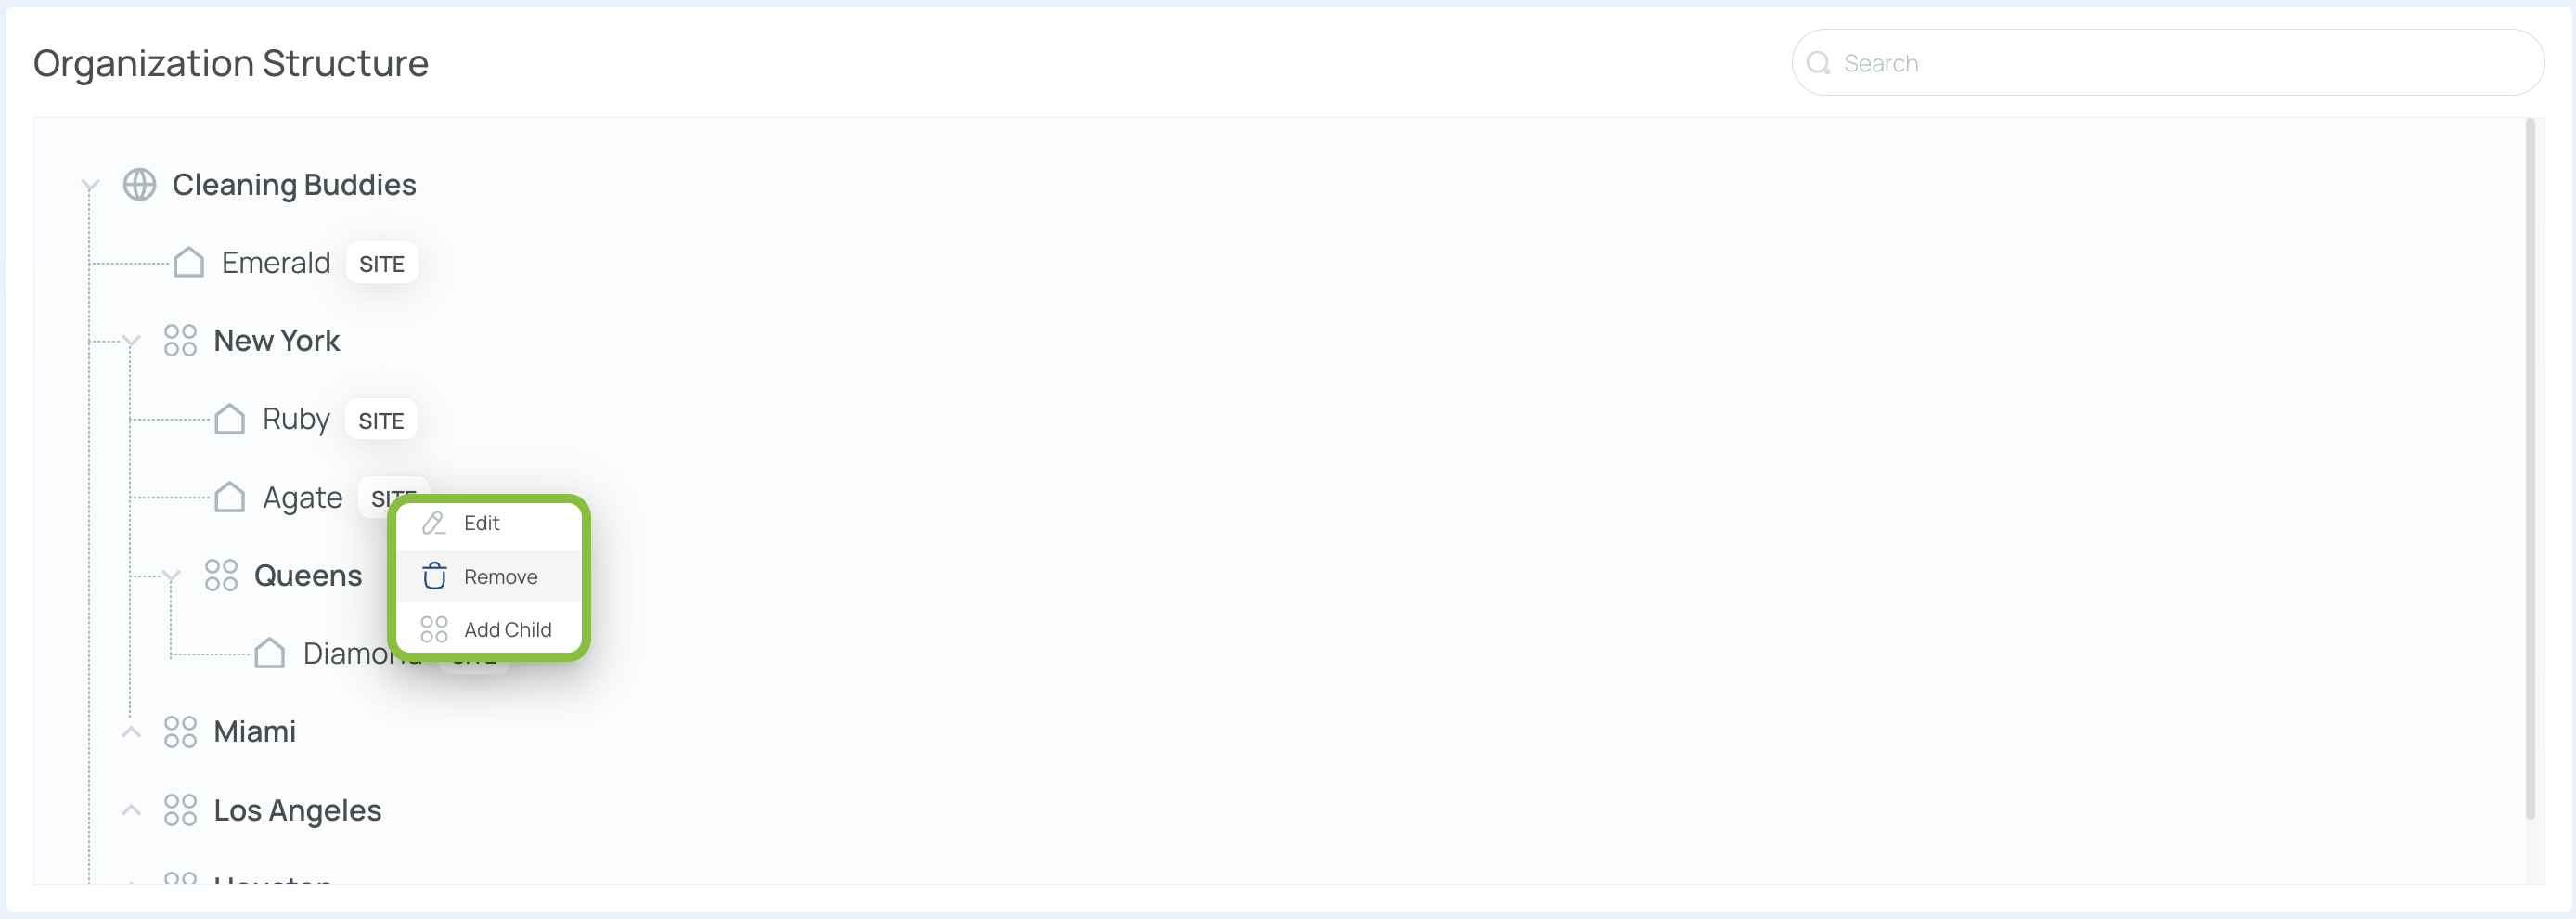
- Confirm the deletion.

What happens to sites under a deleted level?
They are automatically moved up one tier to the next available level/parent. For instance, if you delete Queens (Level 2) containing a site named Diamond, Diamond is reassigned to New York (Level 1).