Report Data
Explore how to view, filter, and export Report Data in mobohubb.
In this guide you'll learn
- What Report Data consists of
- How to filter and manage report records
- How to view a specific report
- How to export the current view to Excel
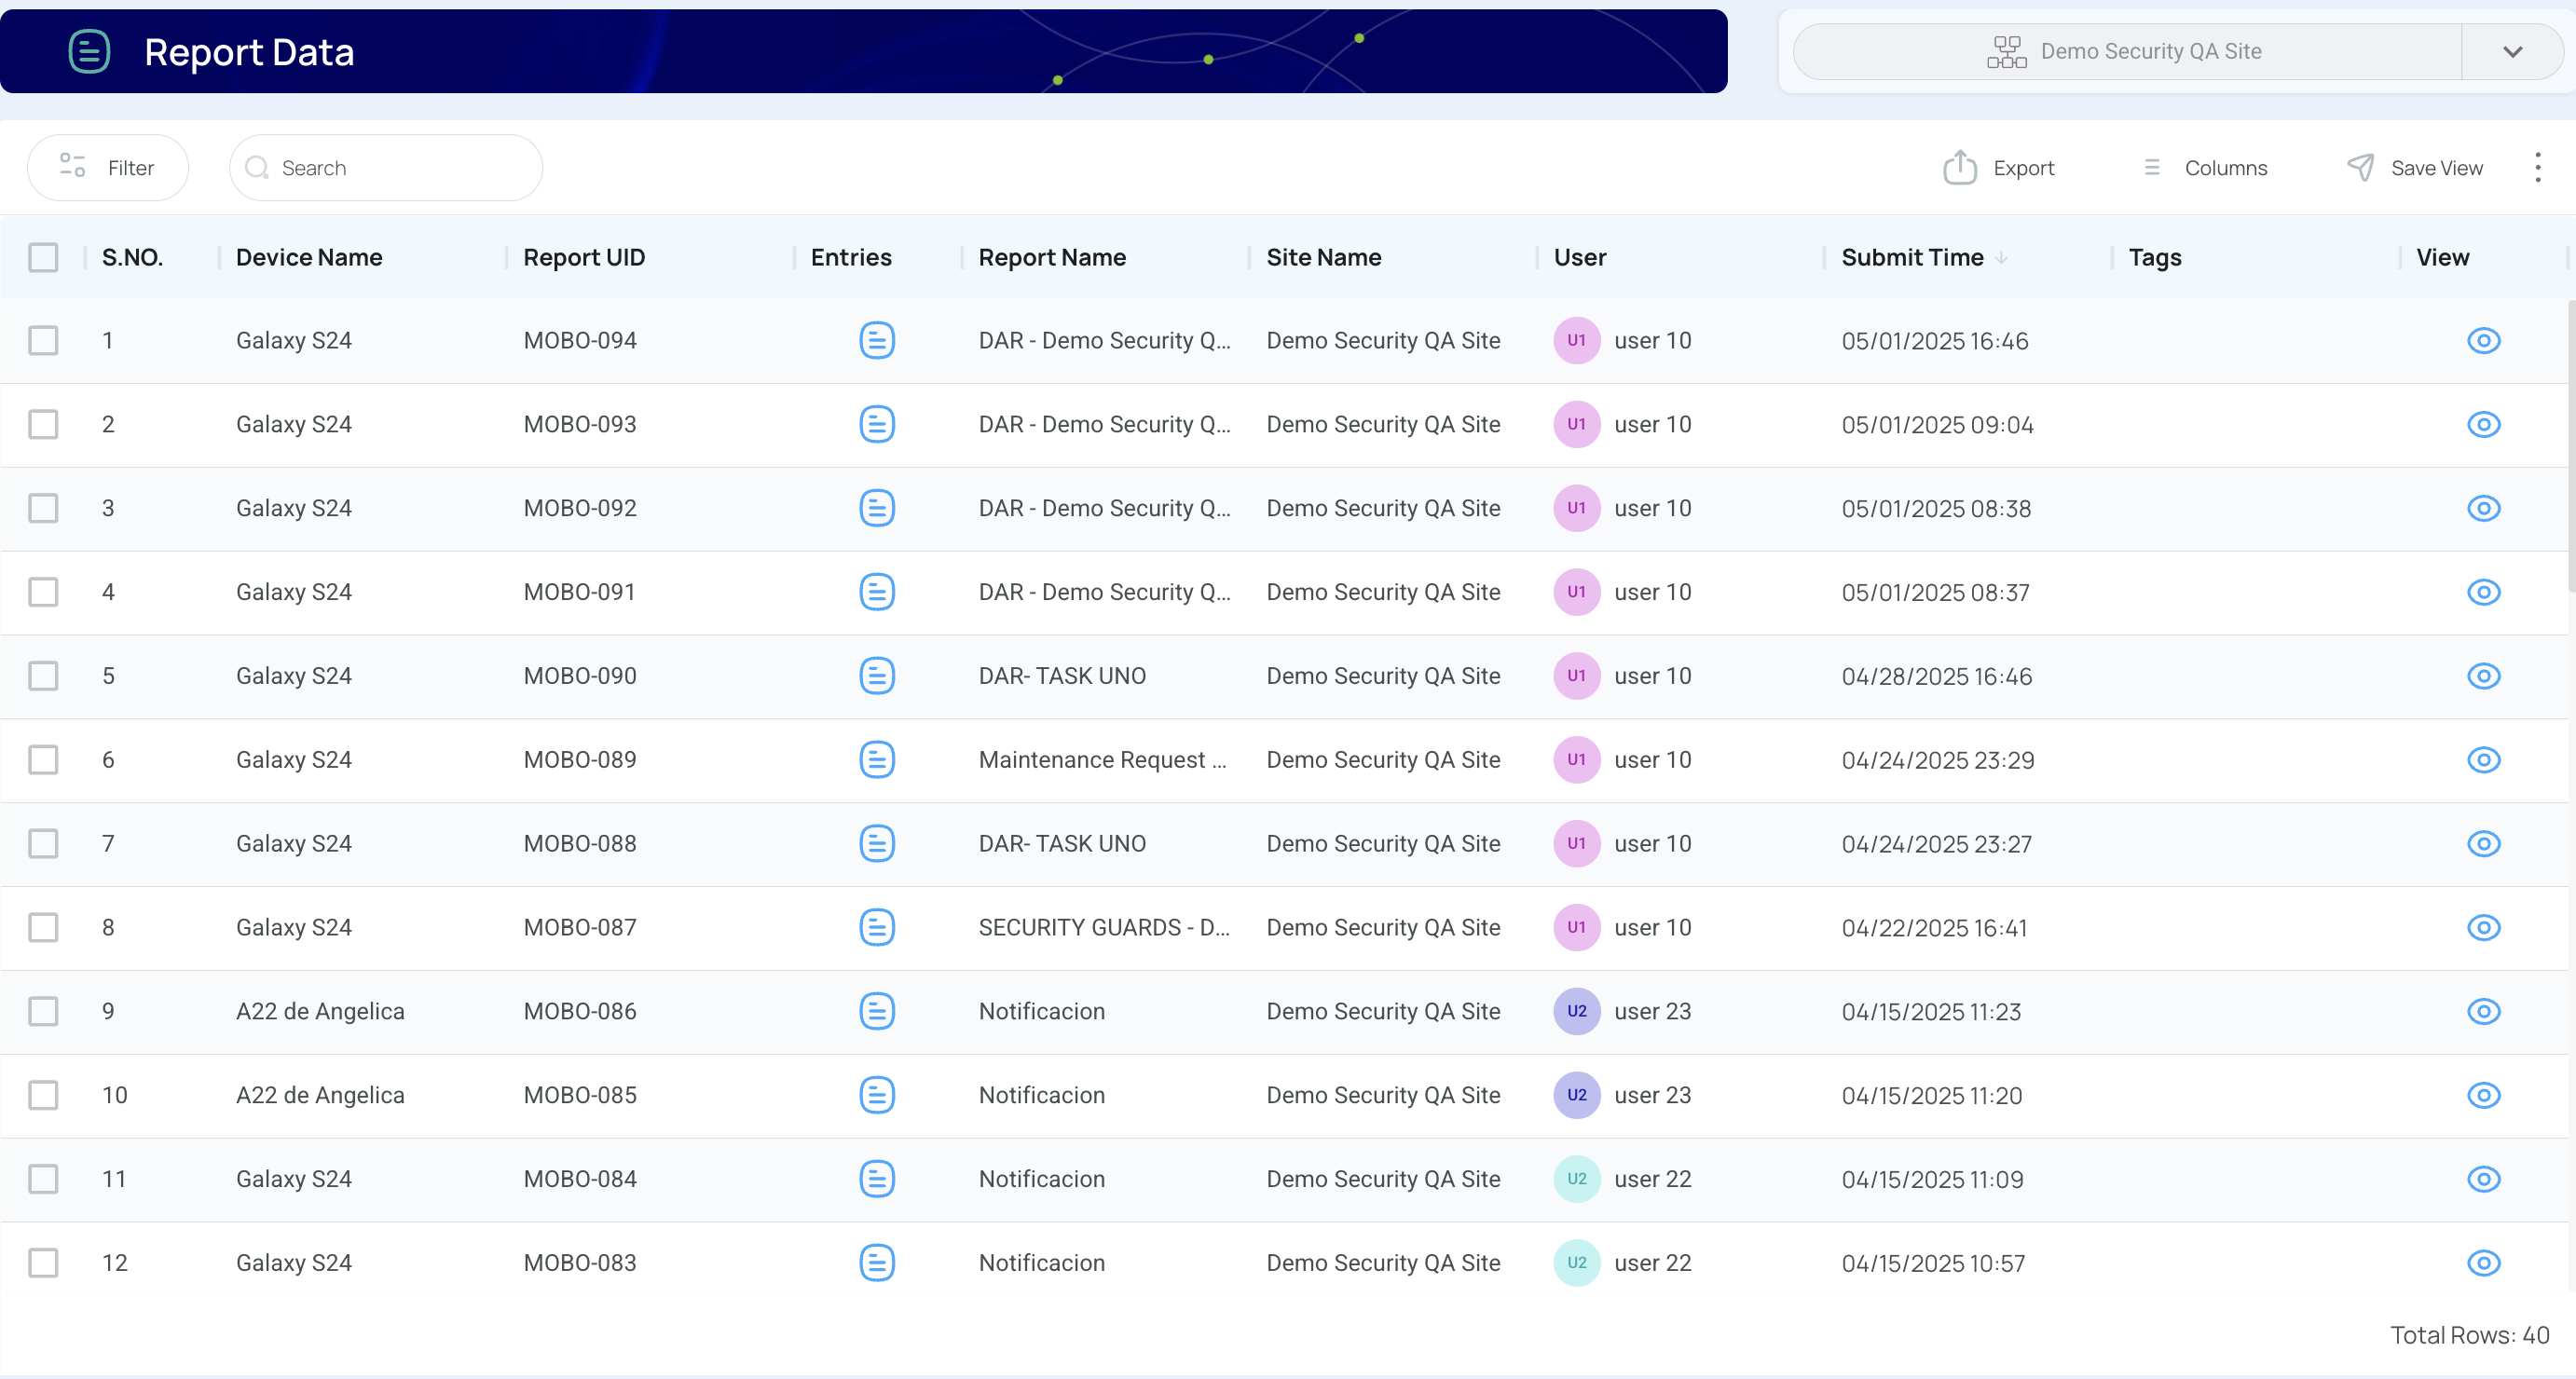
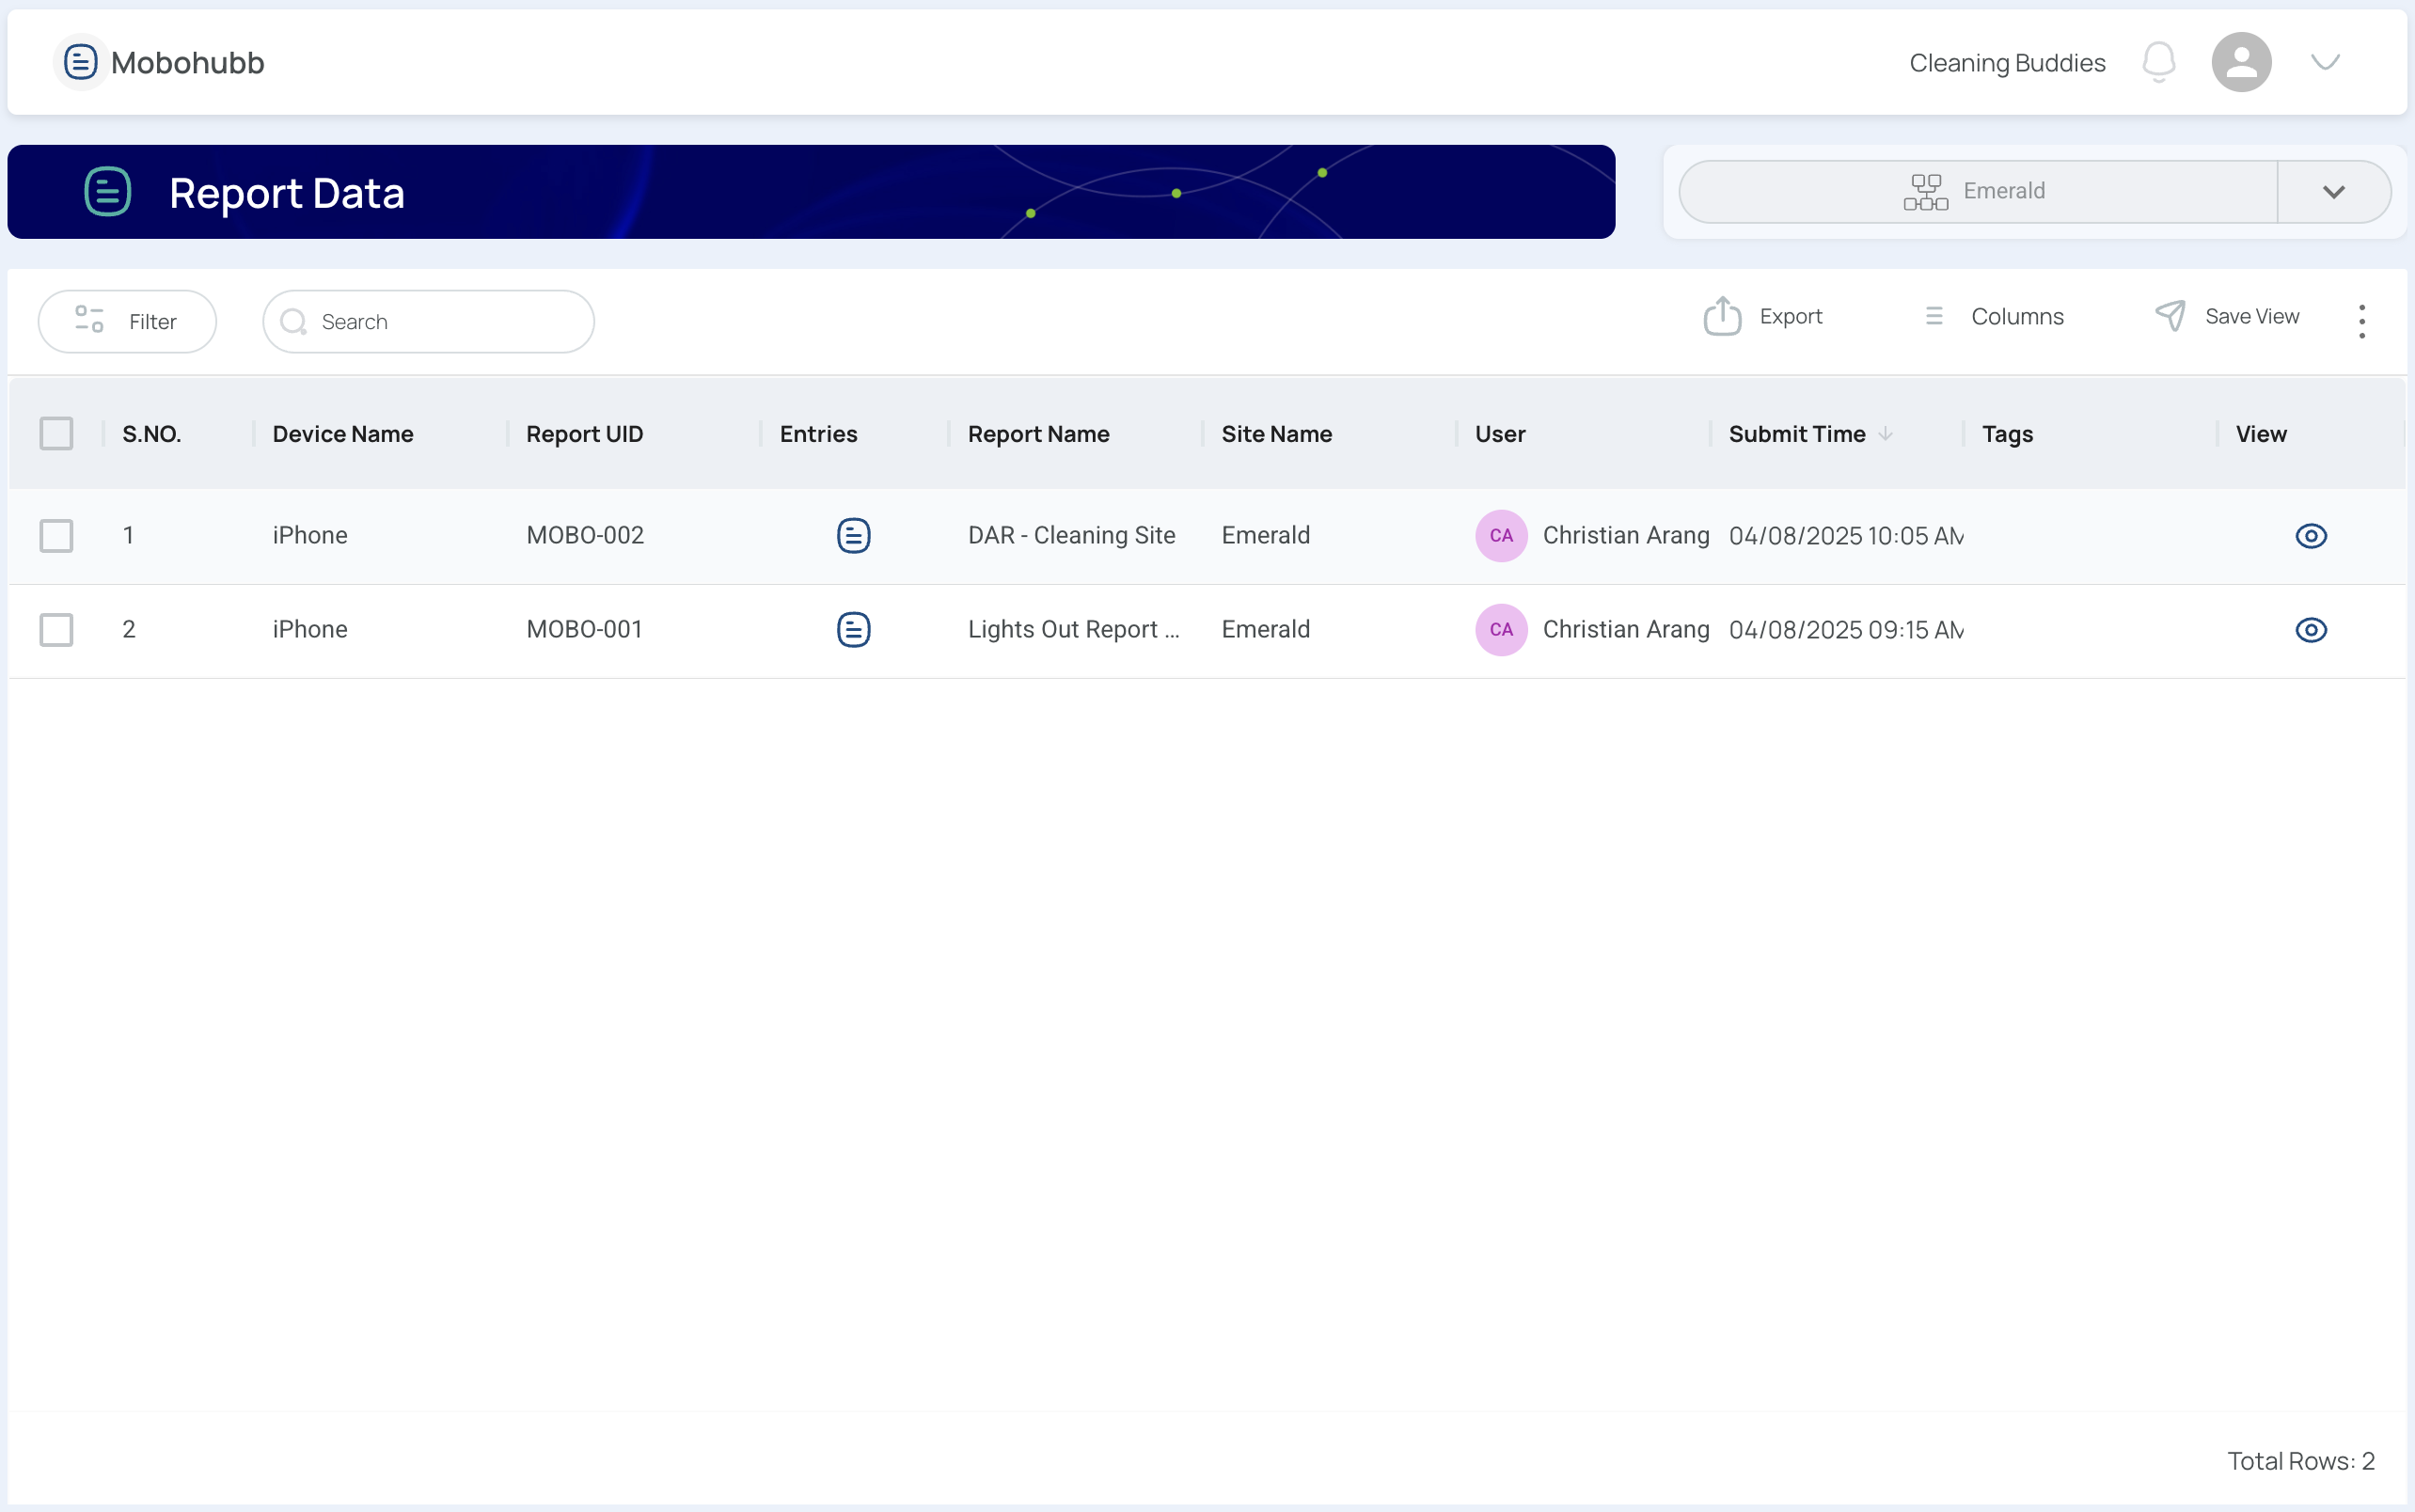
Report Data displays the details and content of generated reports in mobohubb.
Manage Report Data
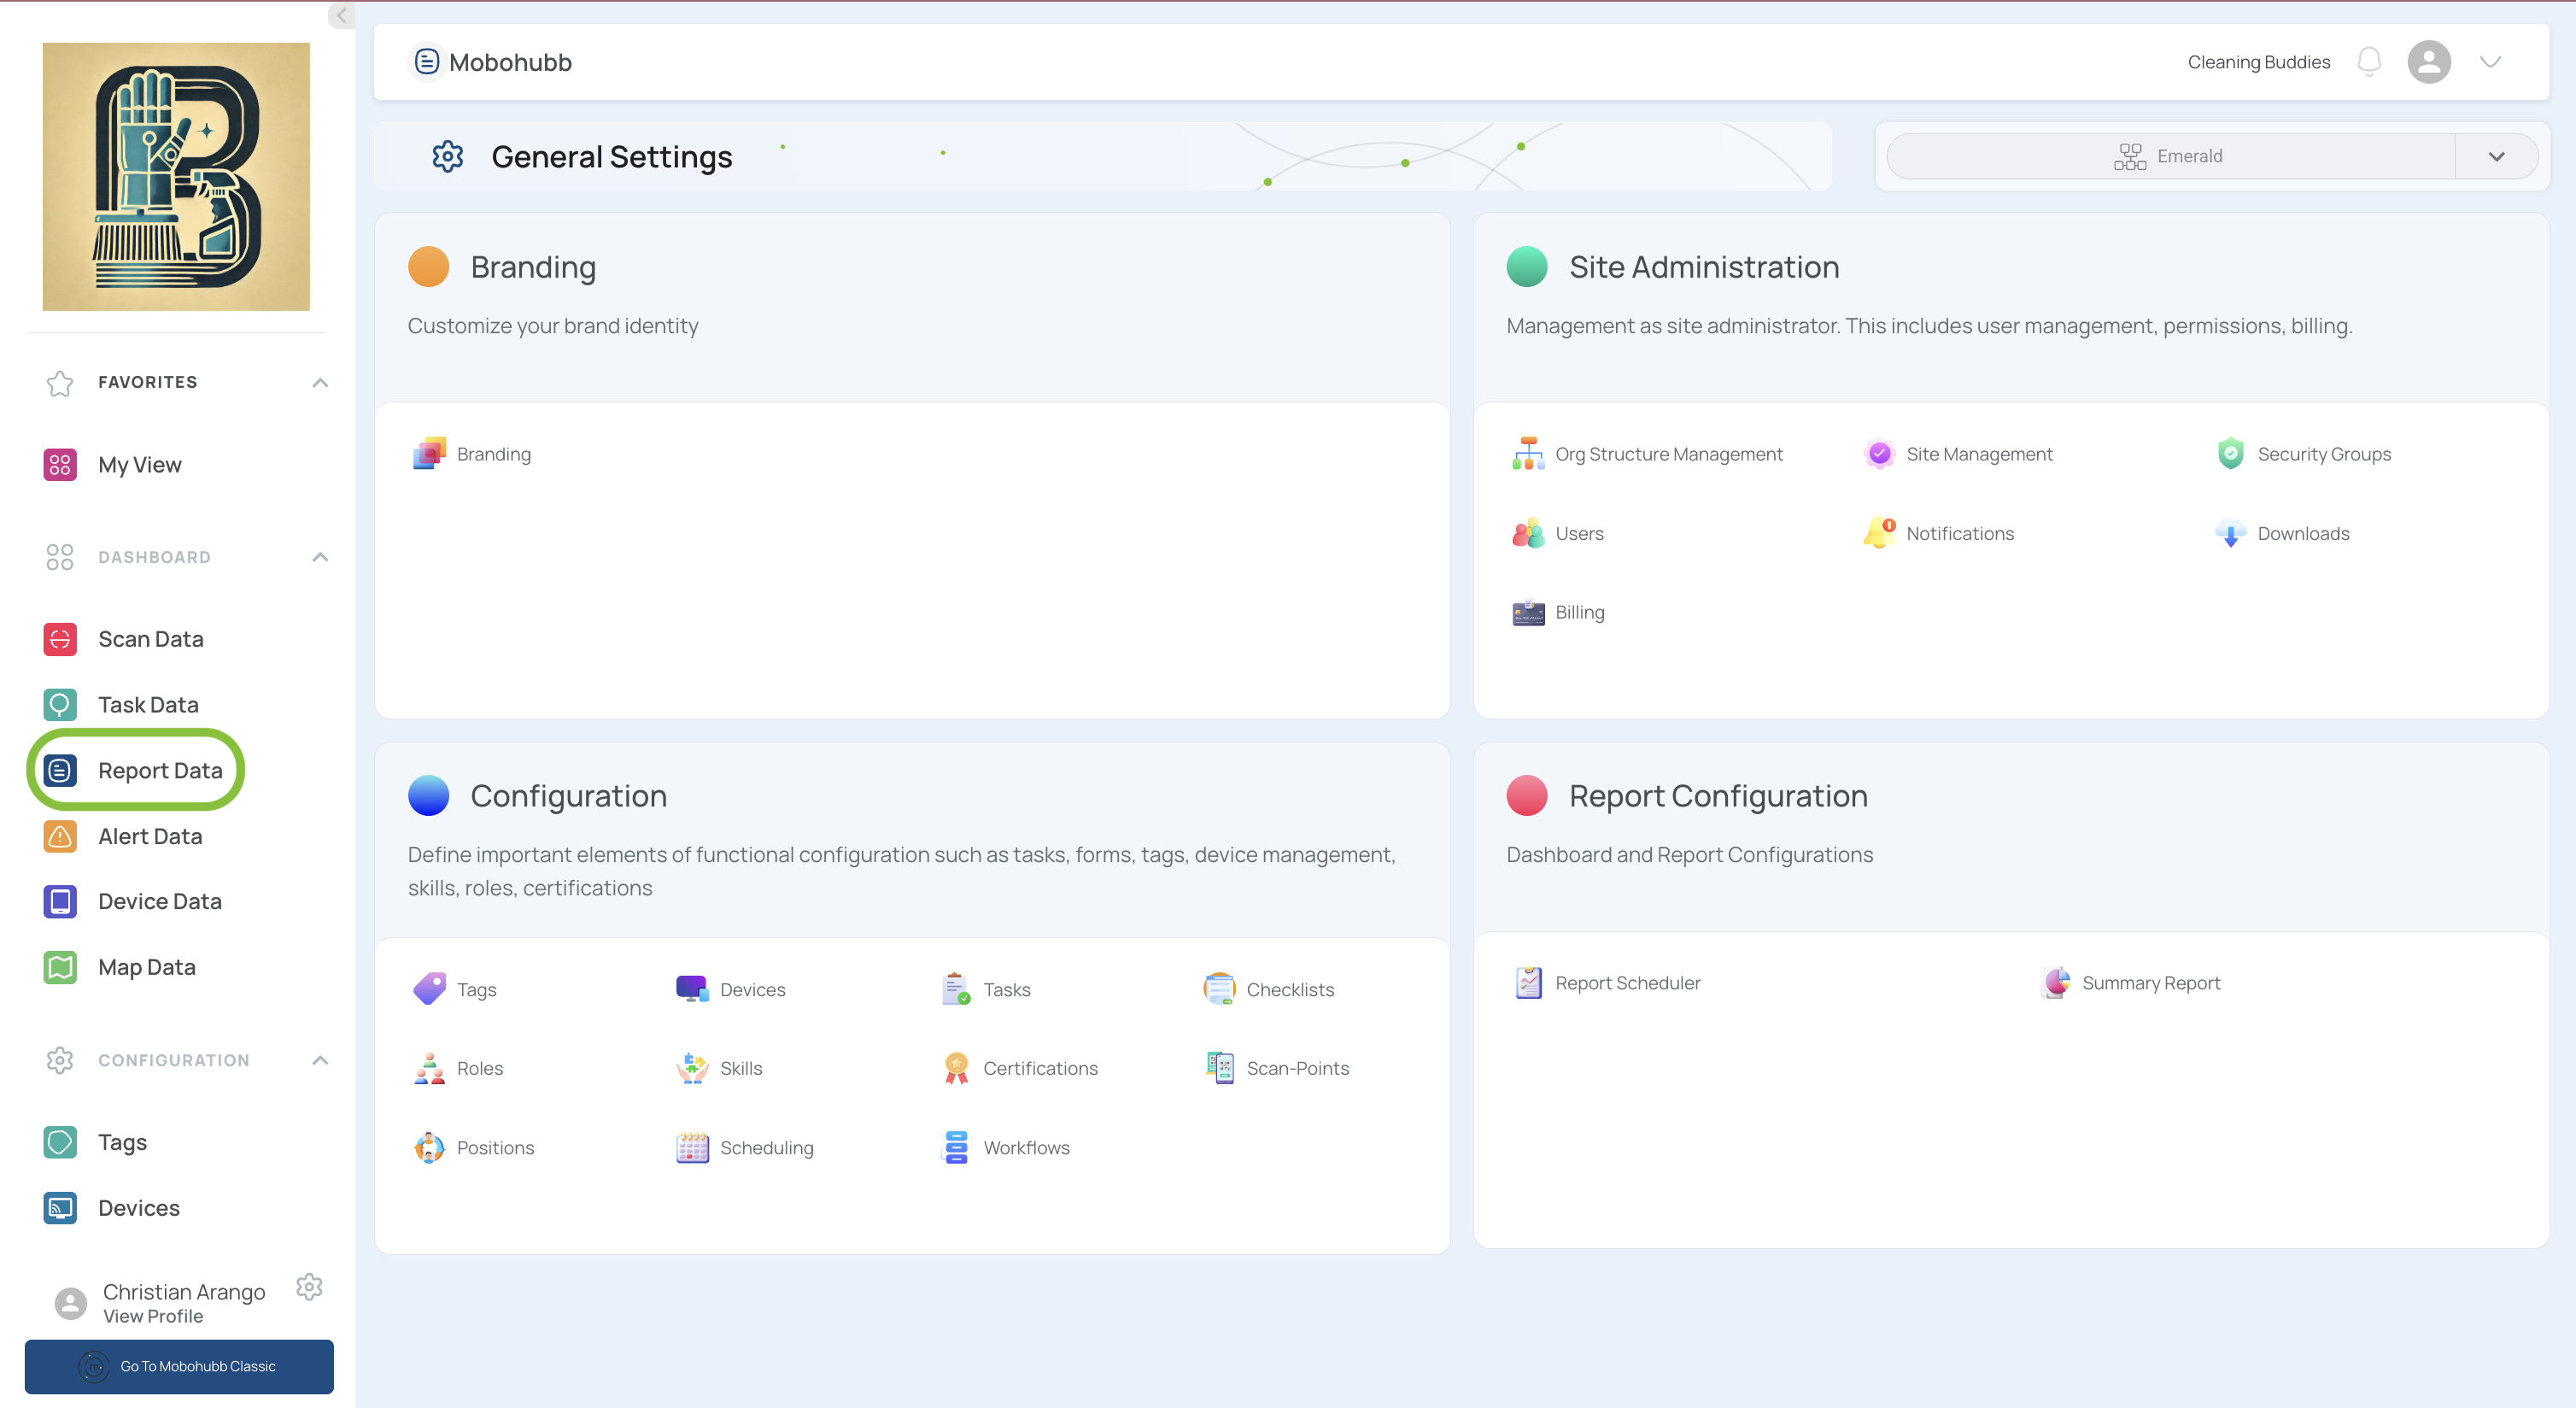
- Navigate to “Report Data” in the side menu of the portal.
- This view contains all the reports and entries for your site.
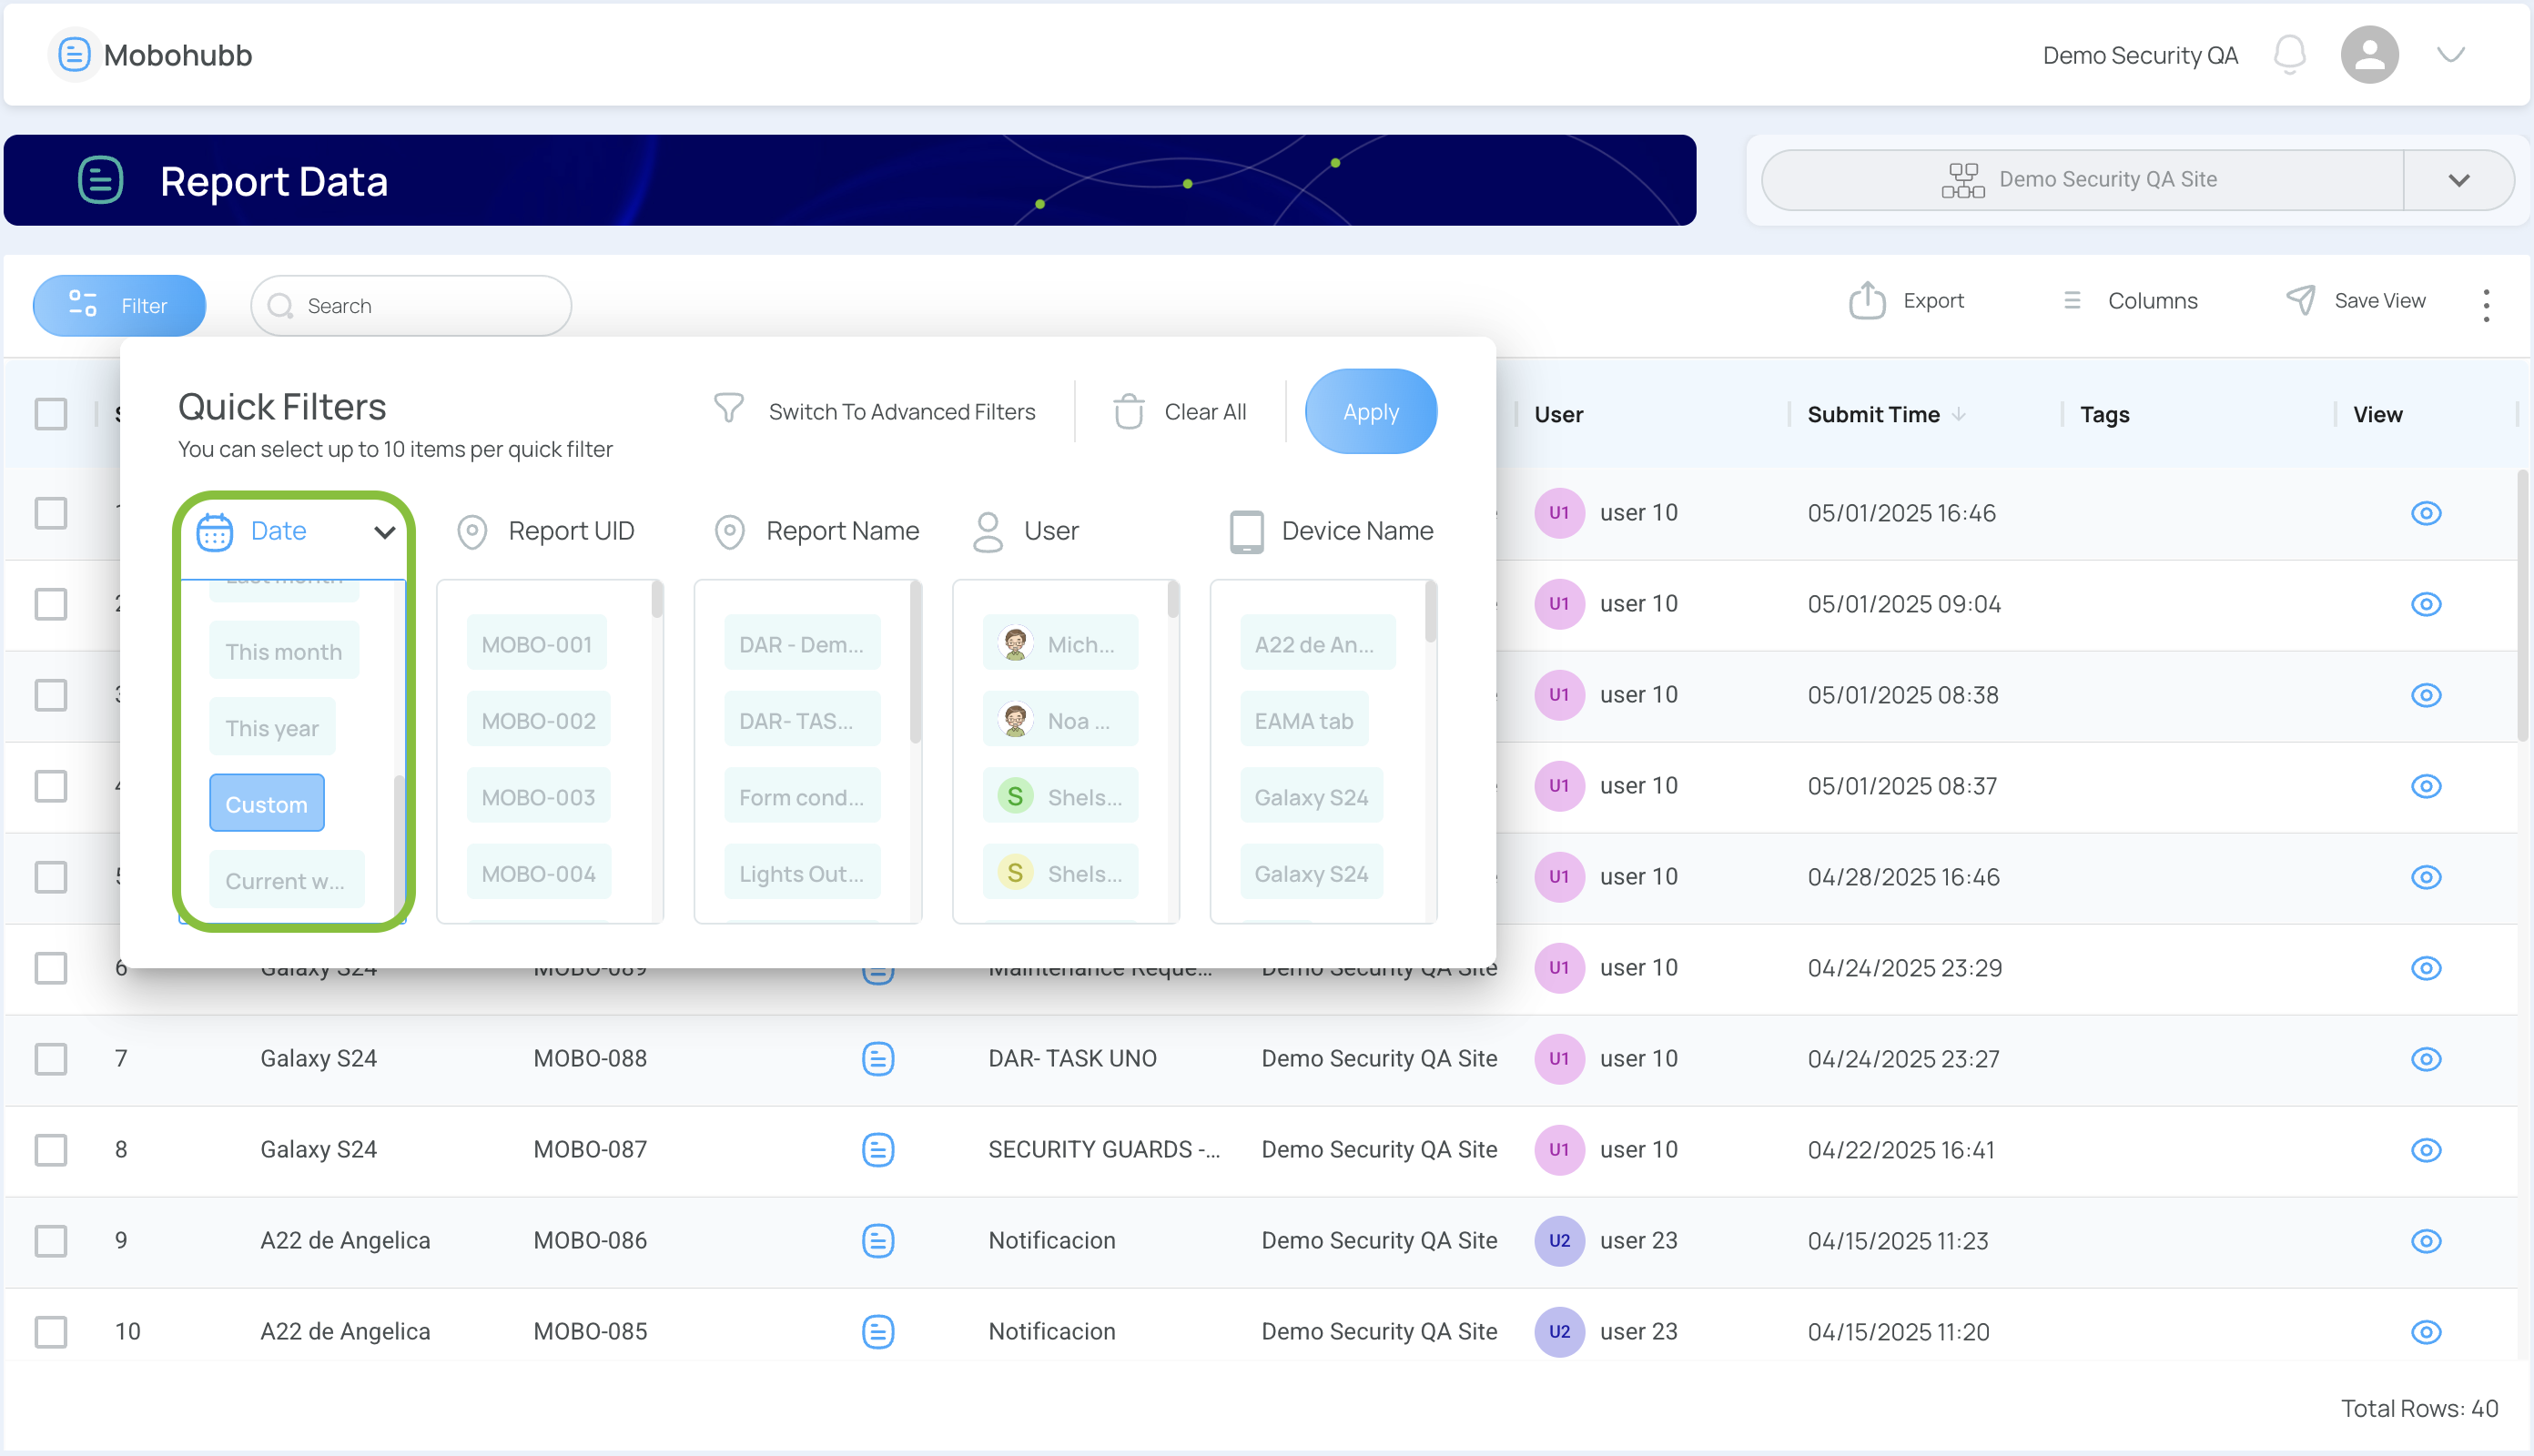
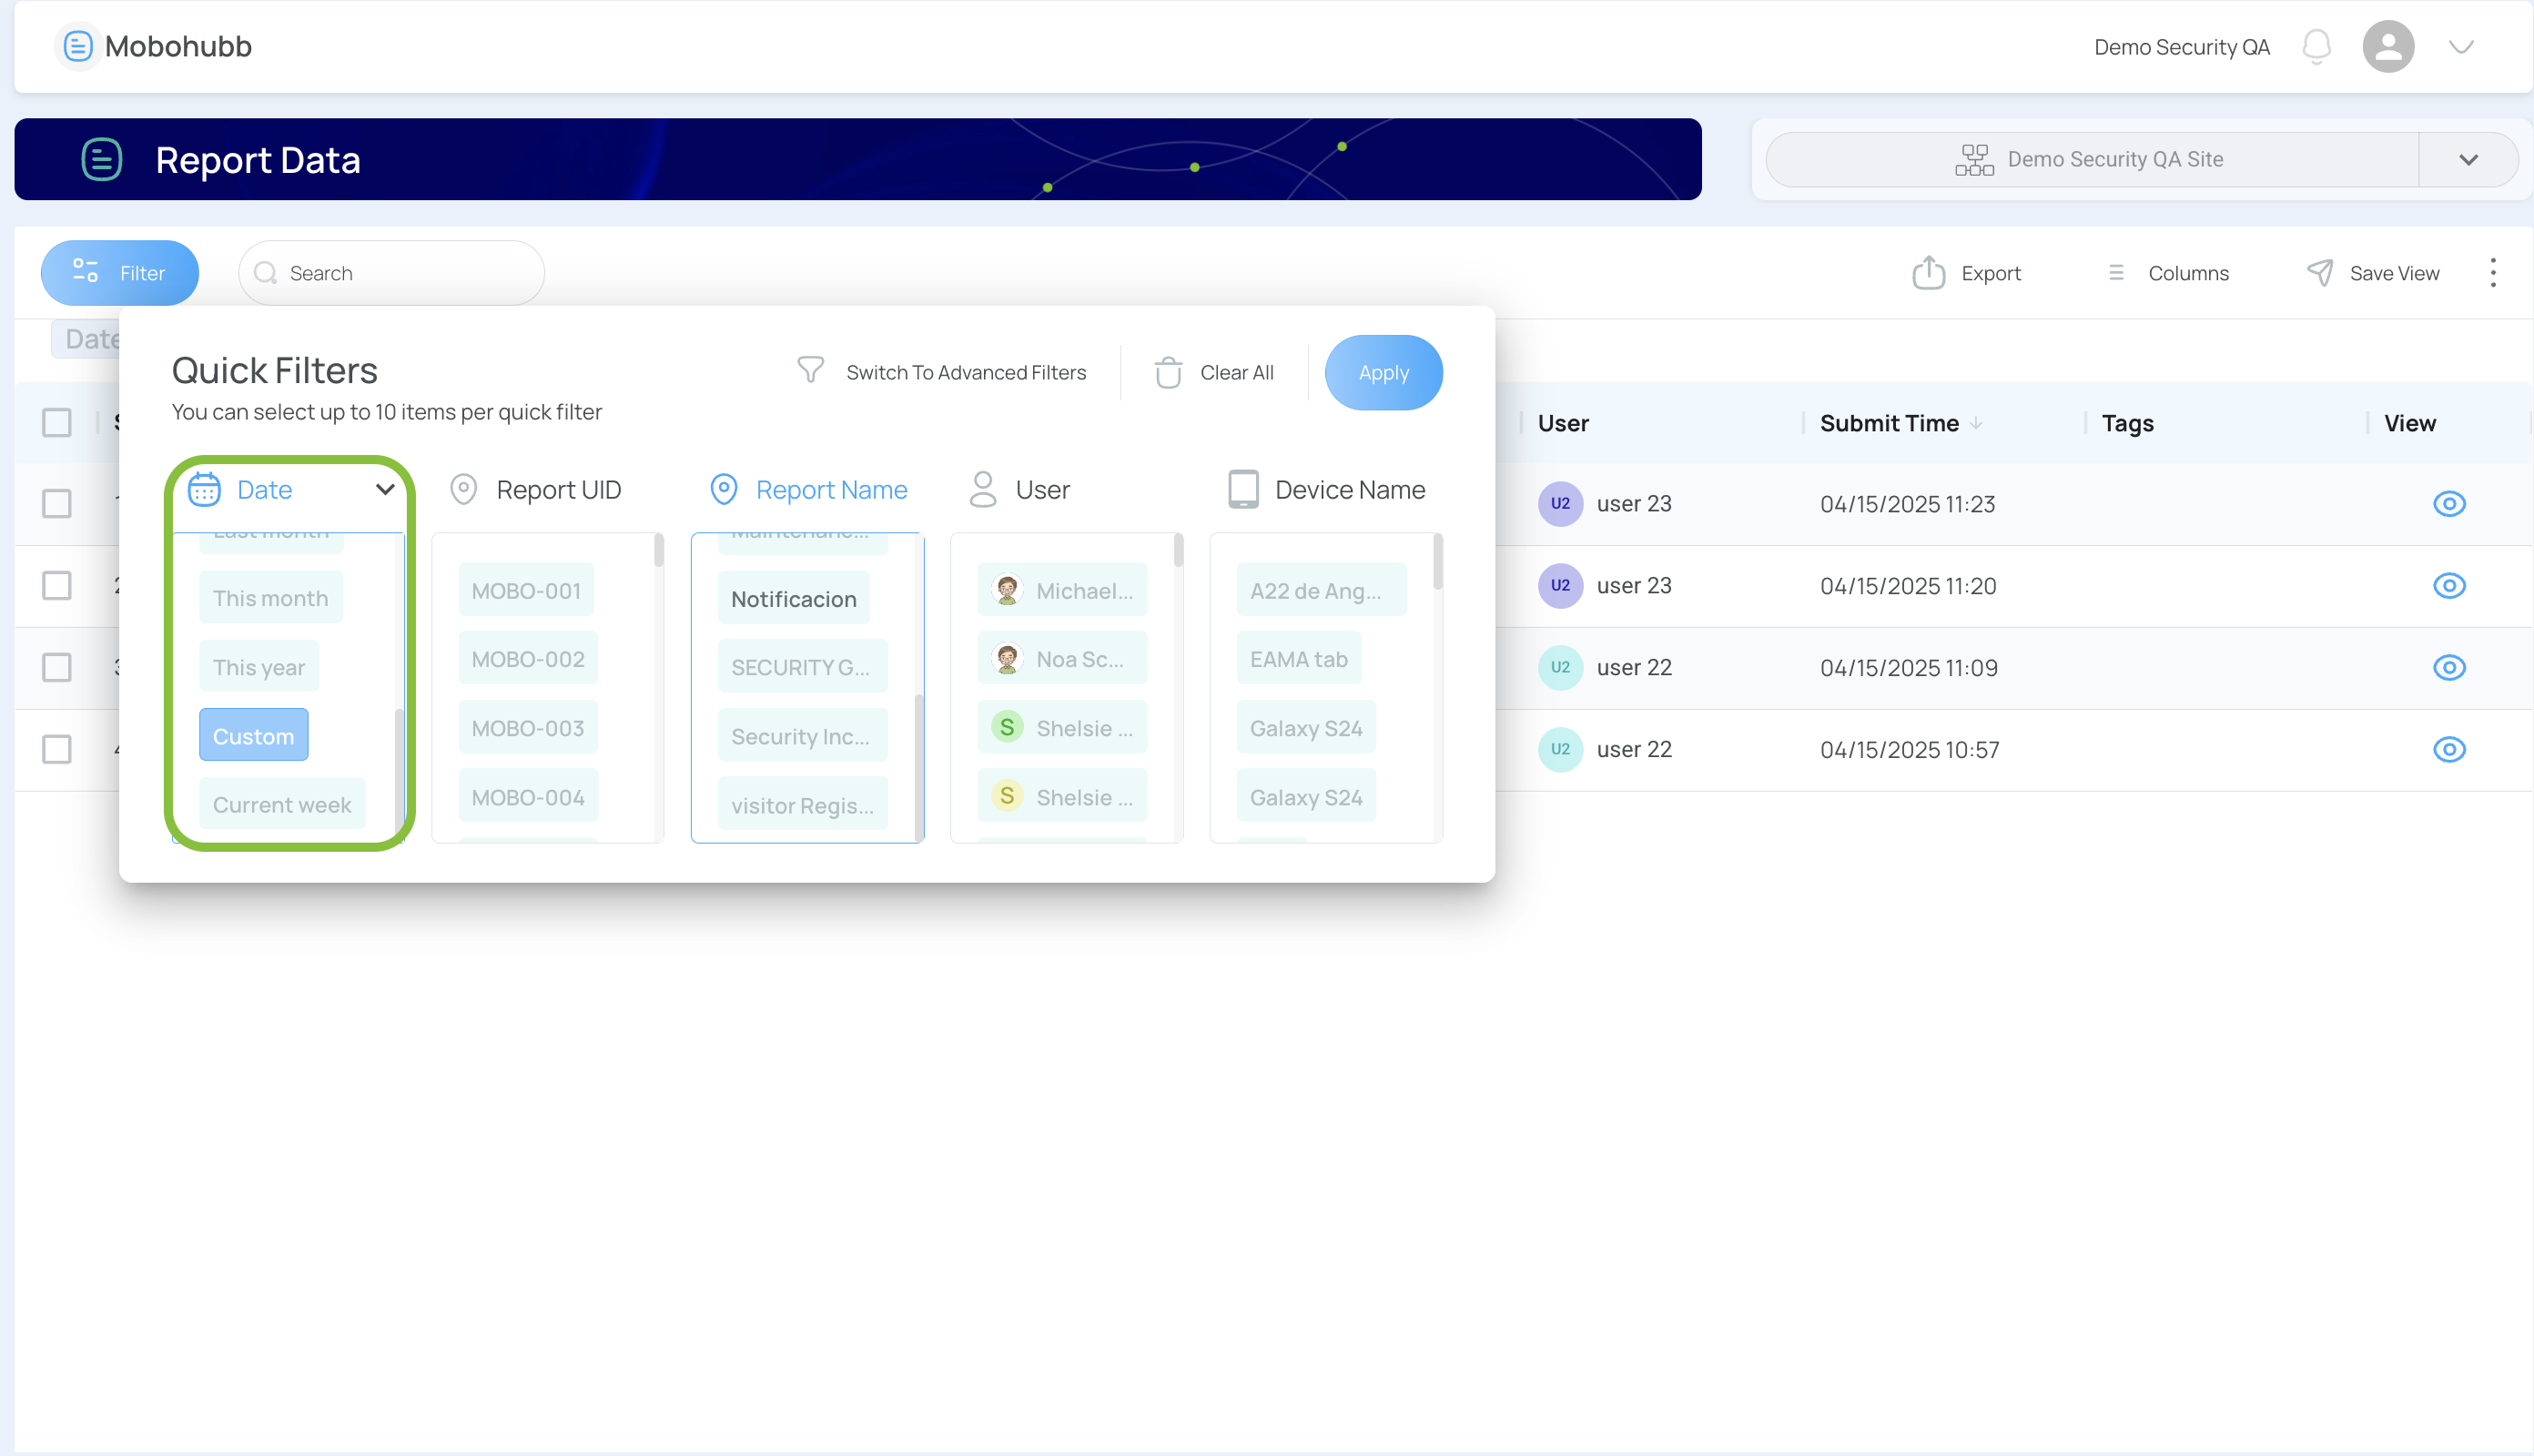
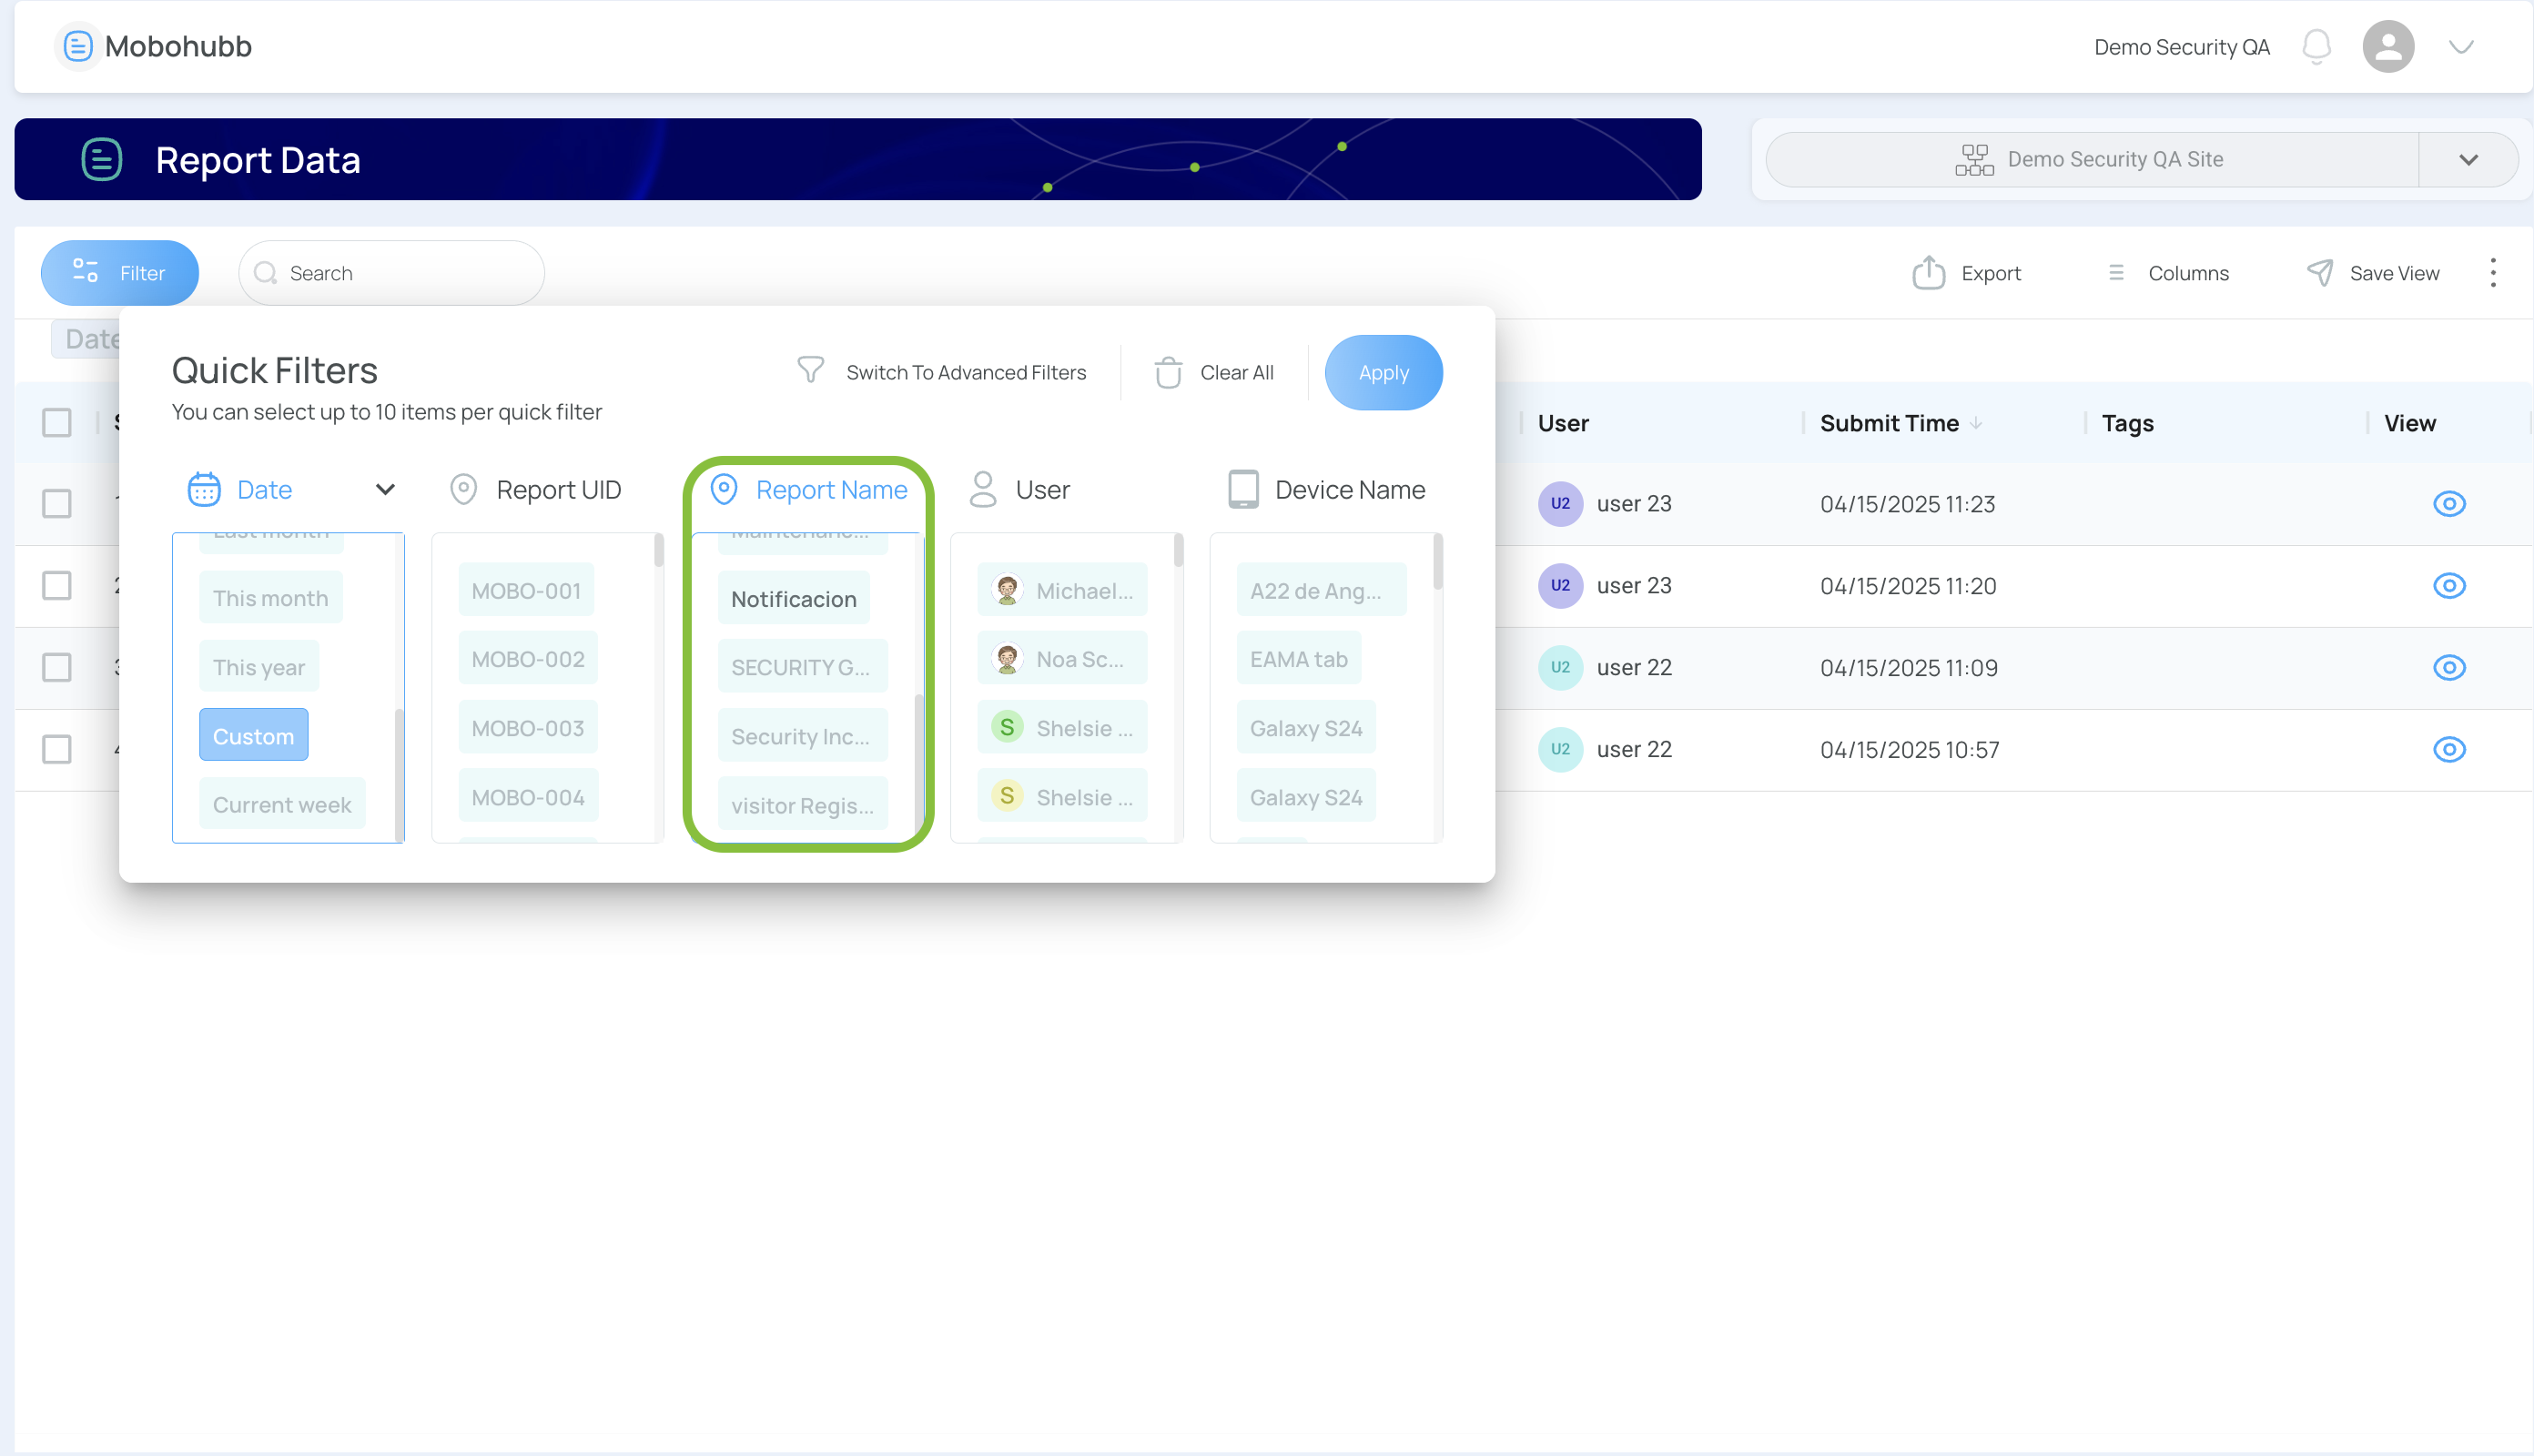
- Filter your data using quick or advanced filters.
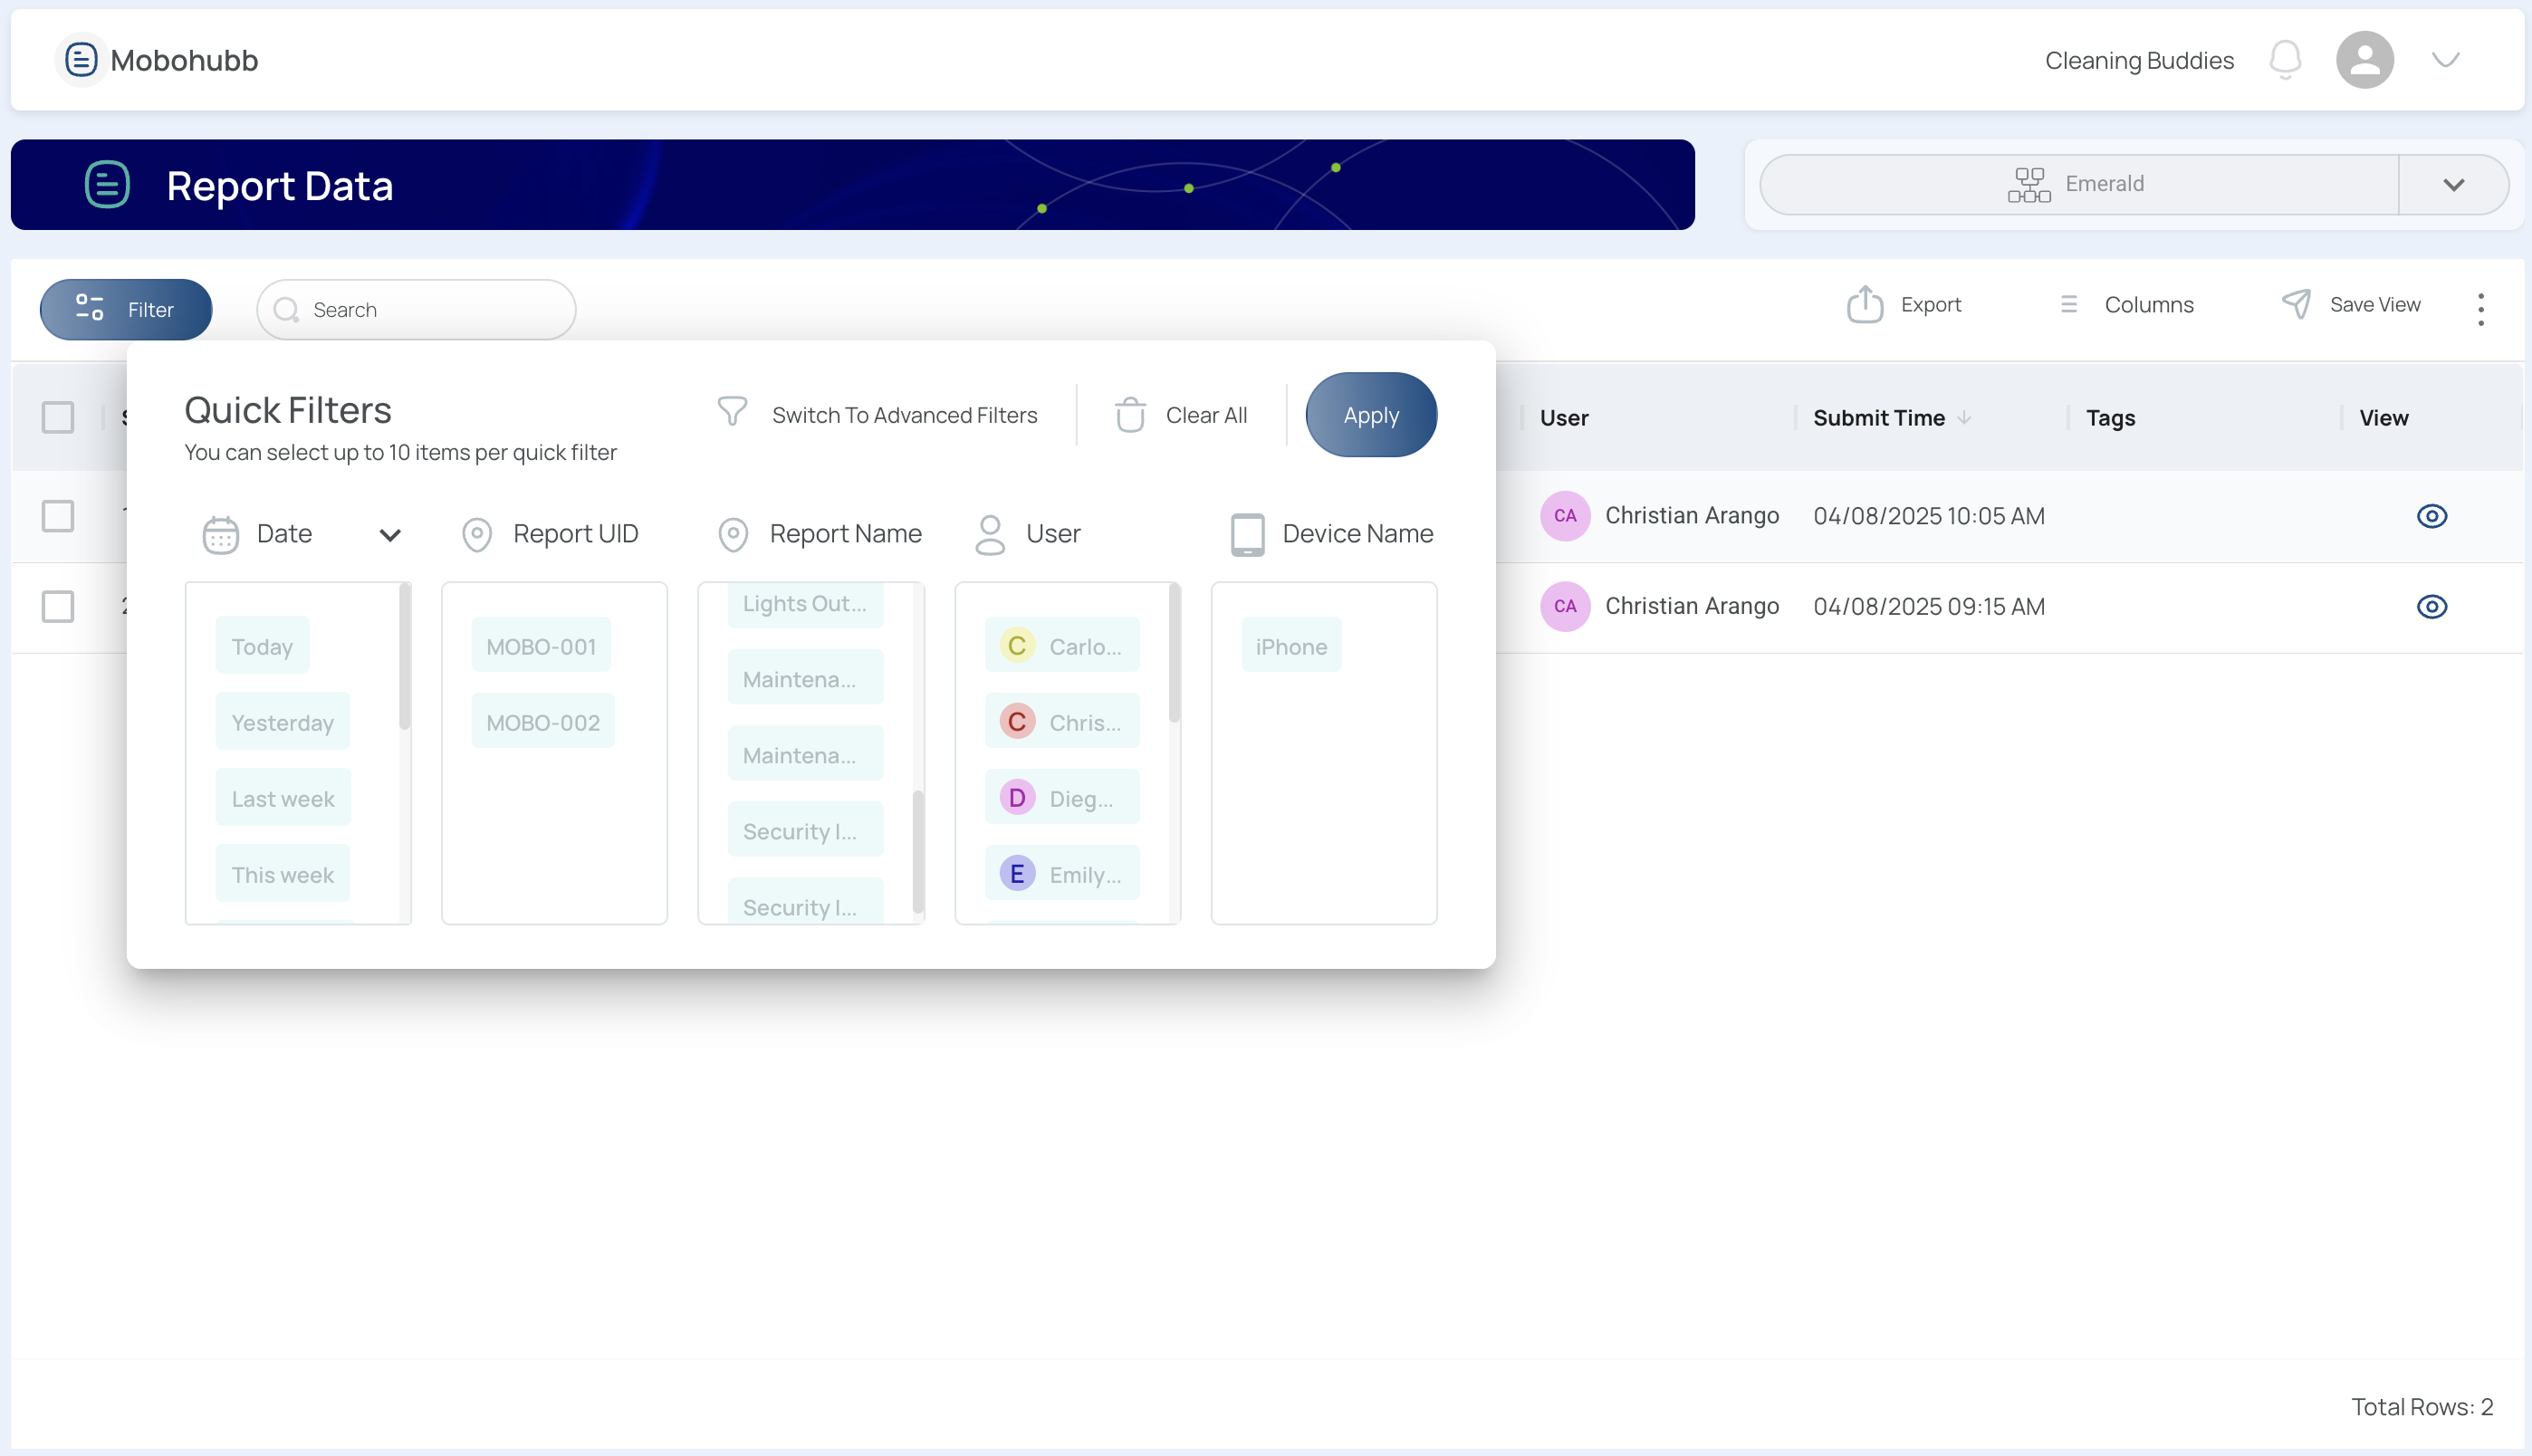
Quick Filters
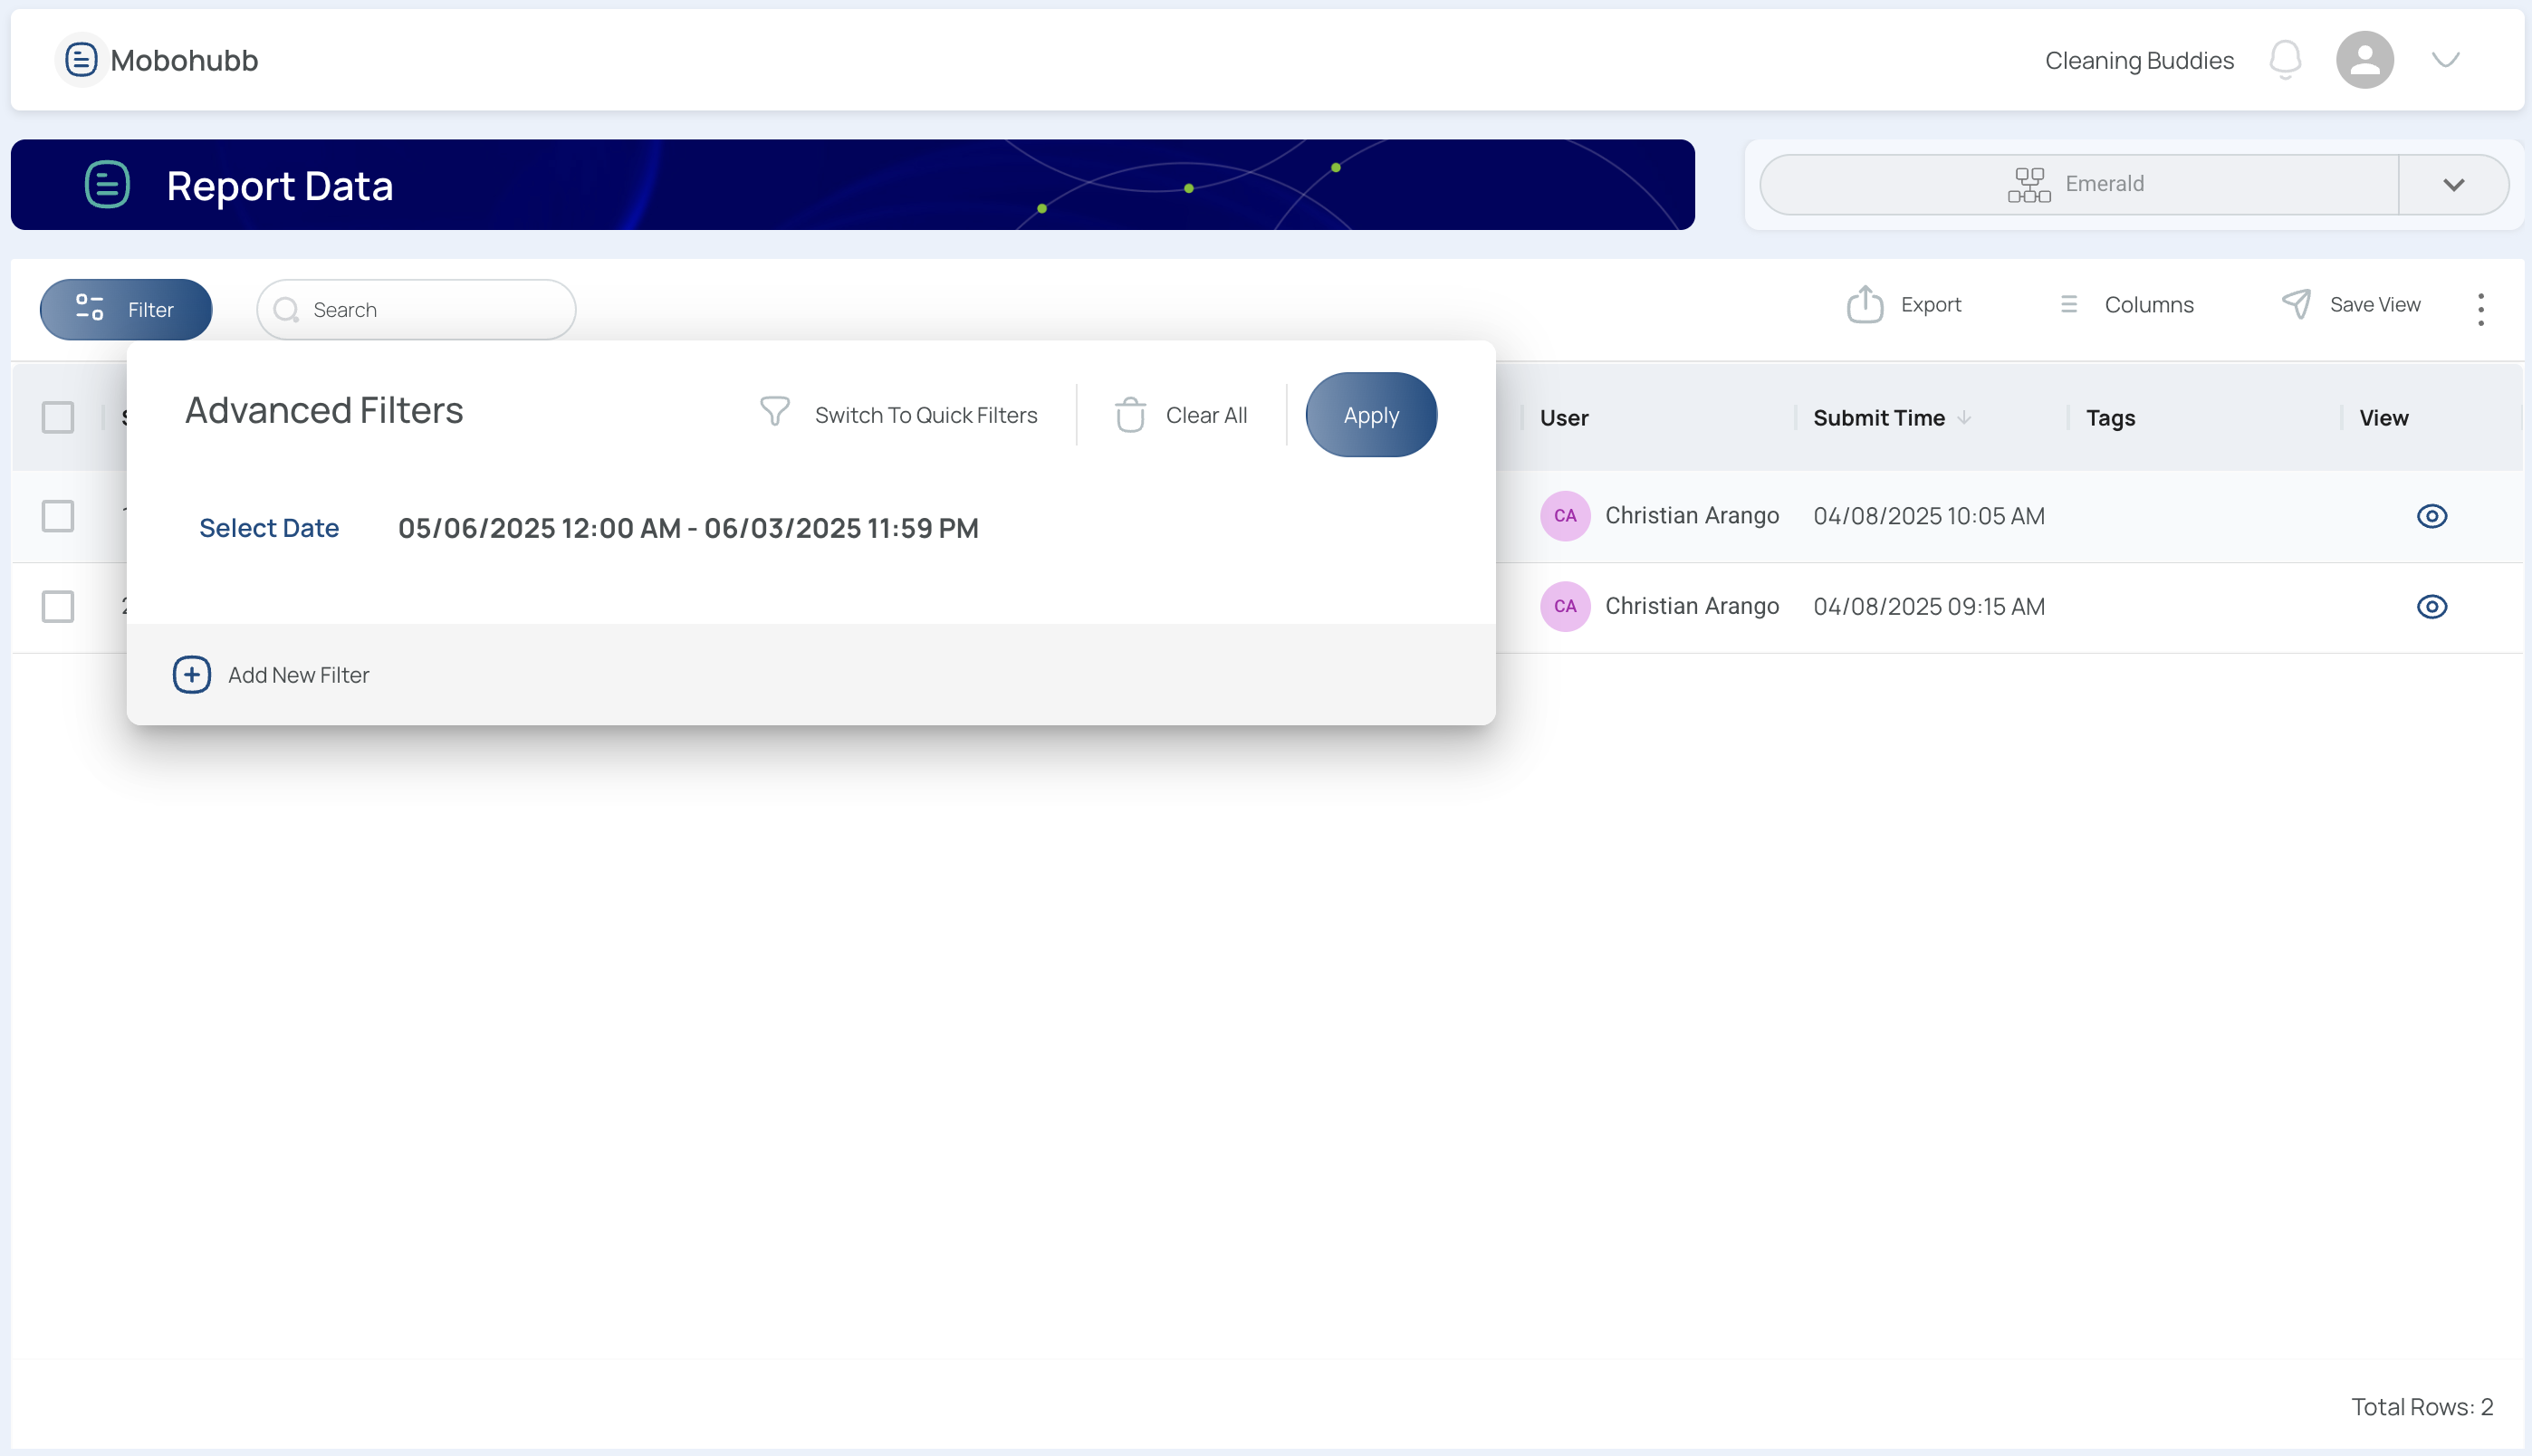
Advanced filters
- Click “Apply” to confirm the filtering.
- Review the relevant information for each report in the main table.
View Entries
To review a report’s submitted entries, click the Doc button in the Entries column.
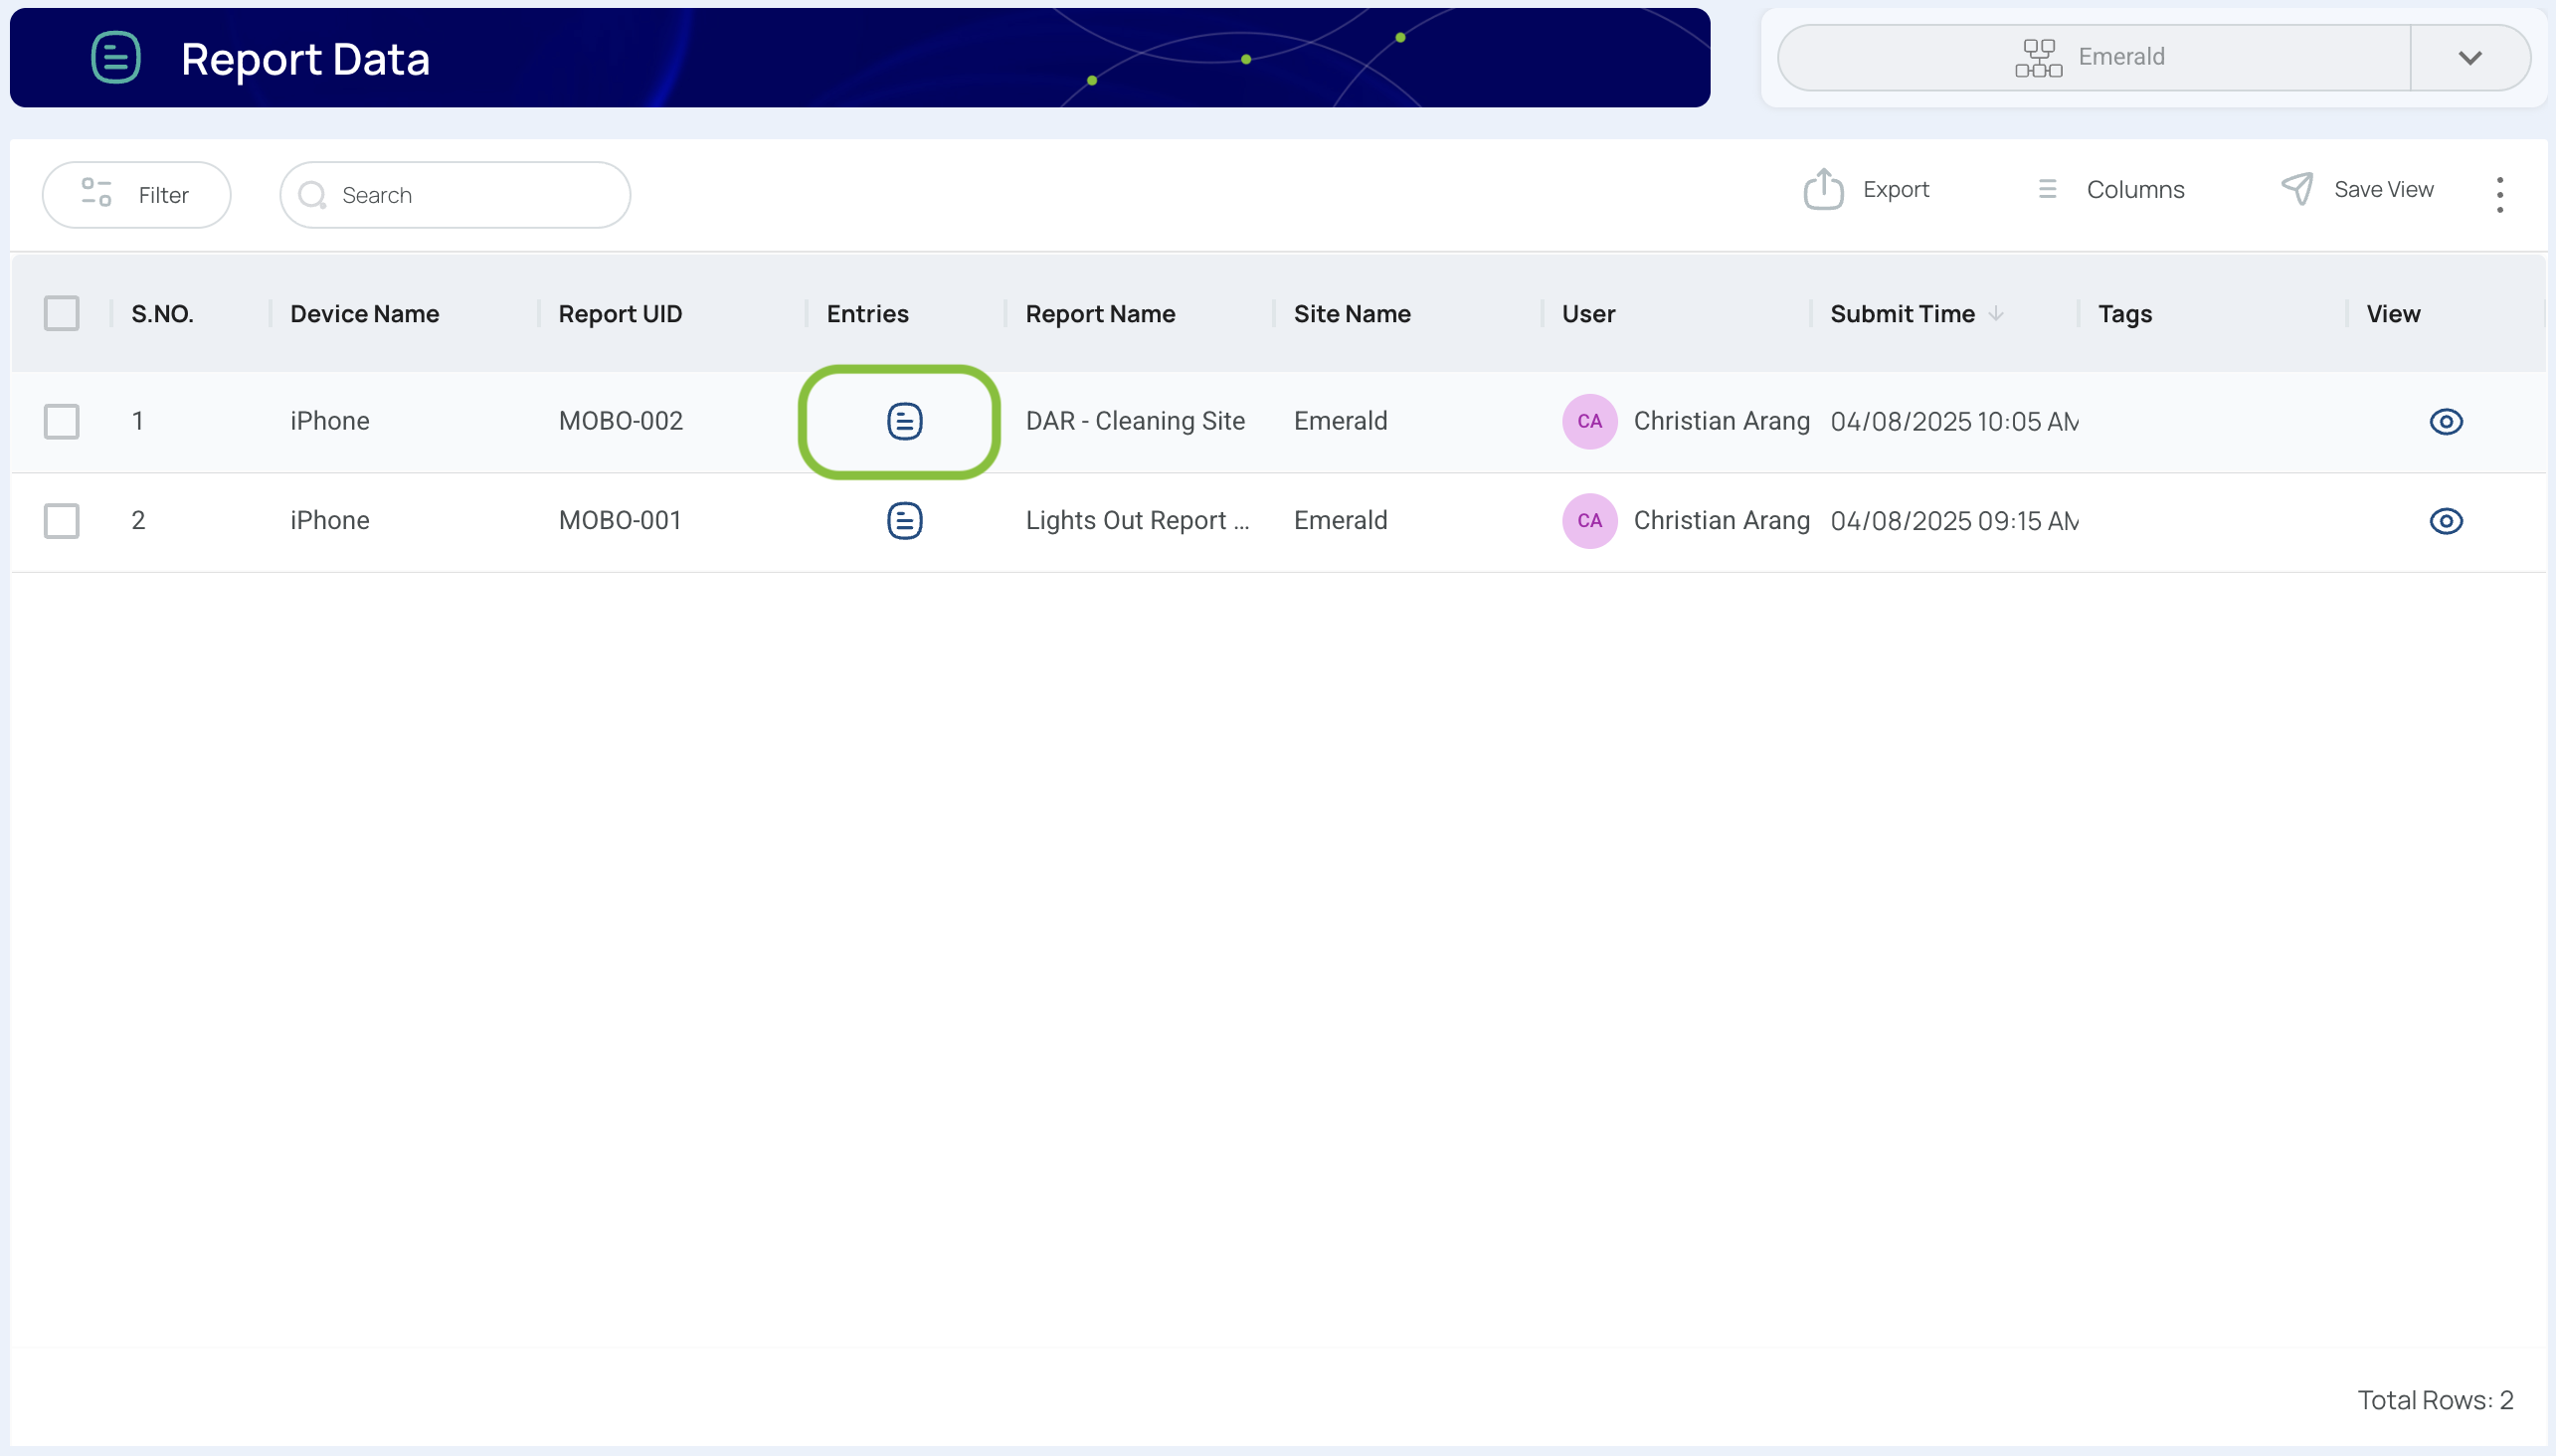
This opens a detailed list of all entries submitted to the report. Each column represents a field completed by the user and displays the corresponding data, including text responses and media files.
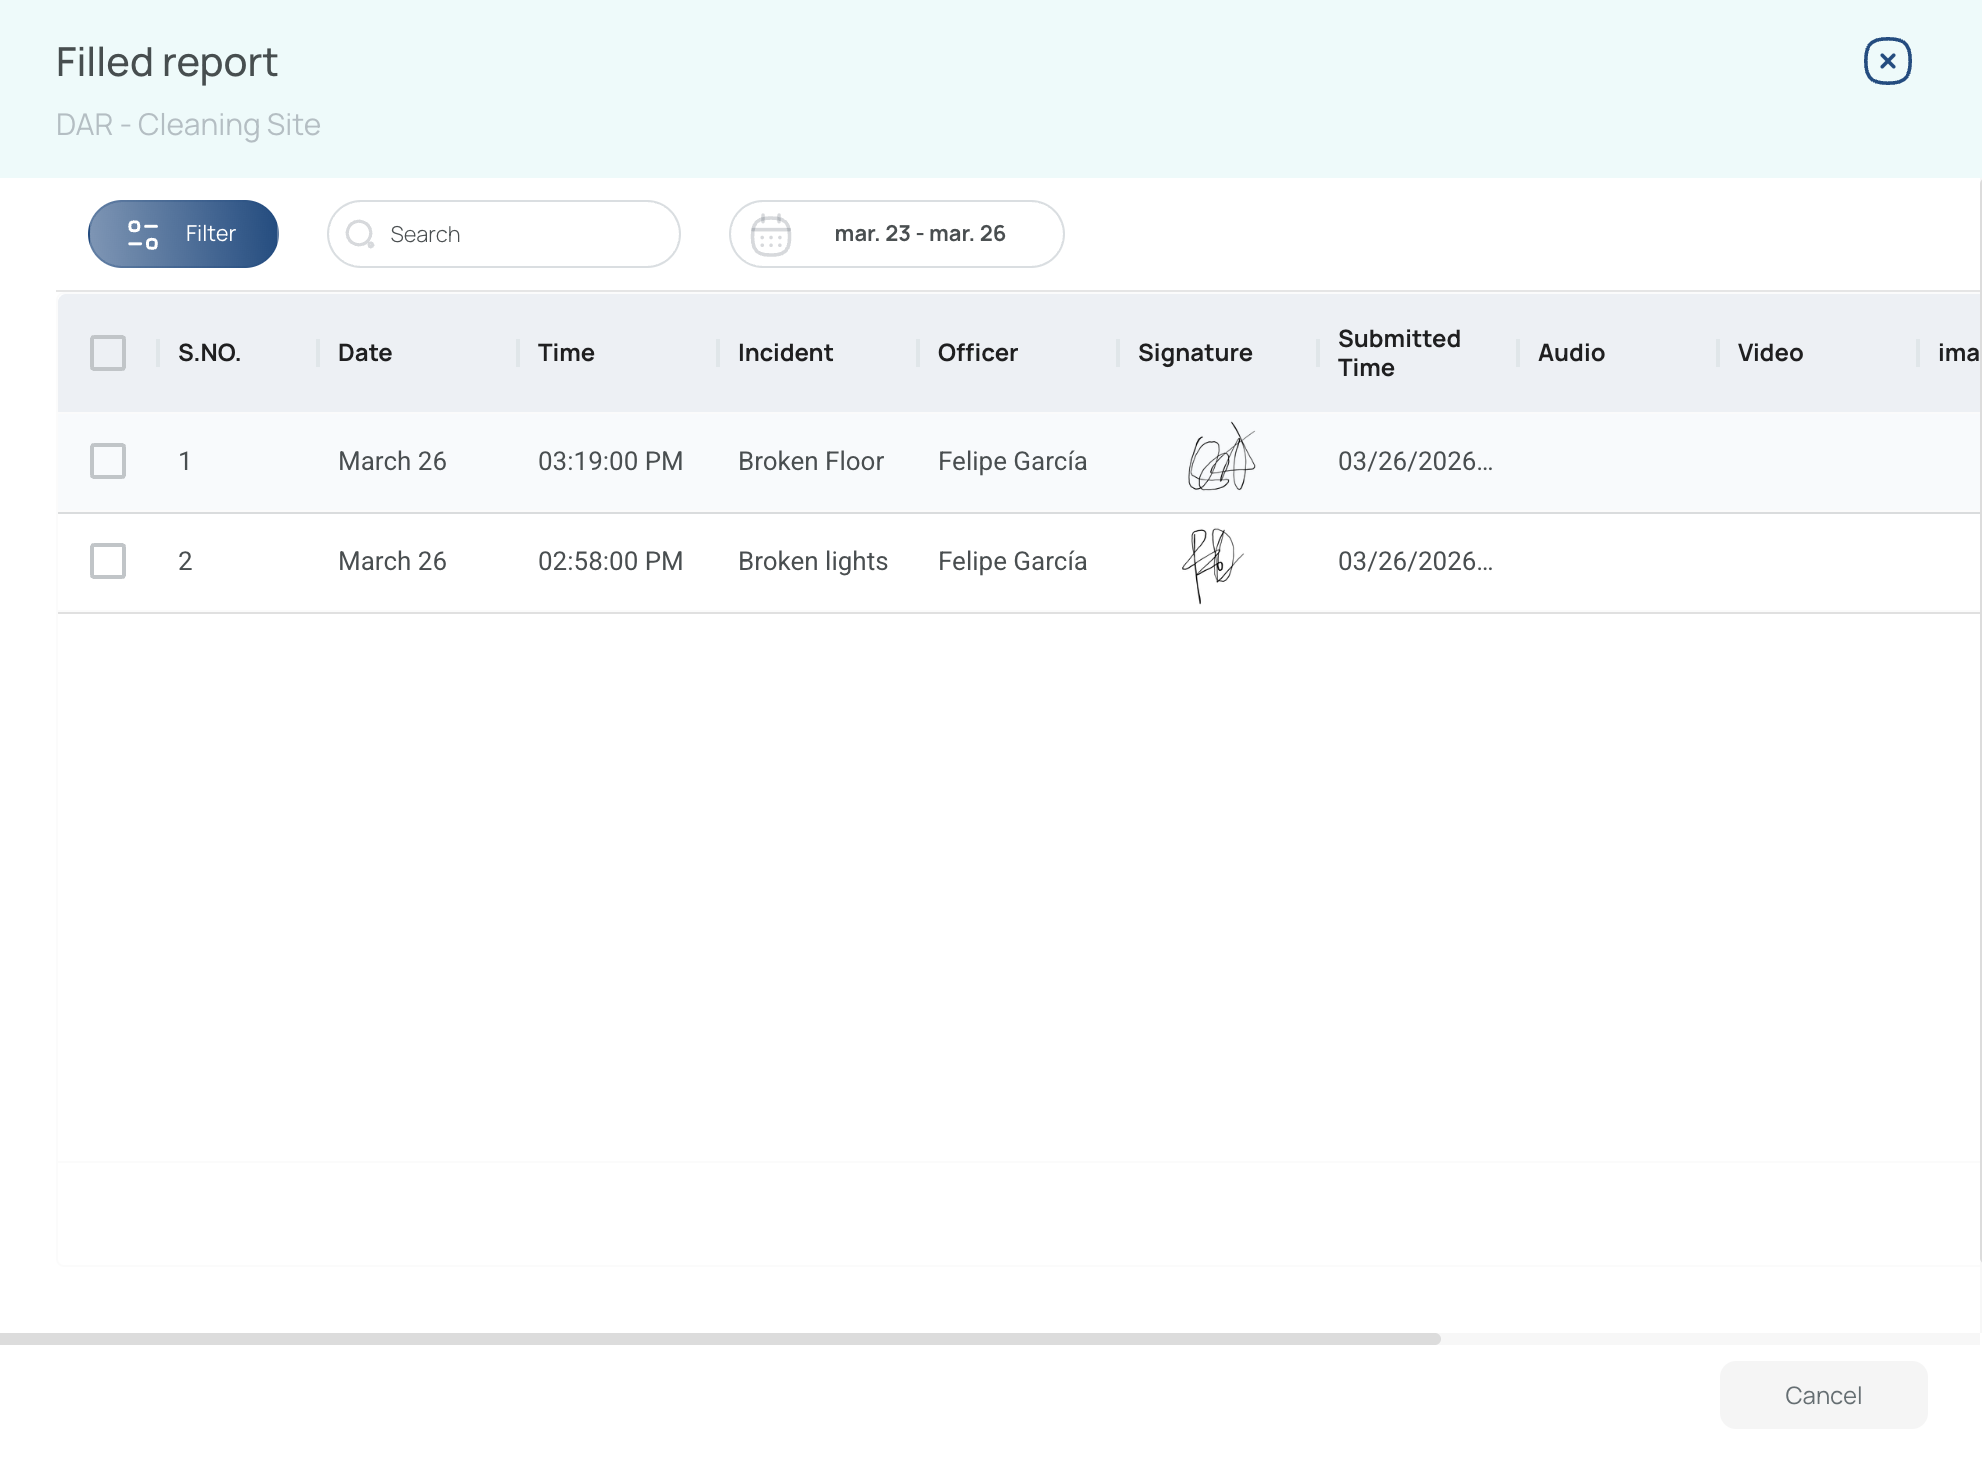
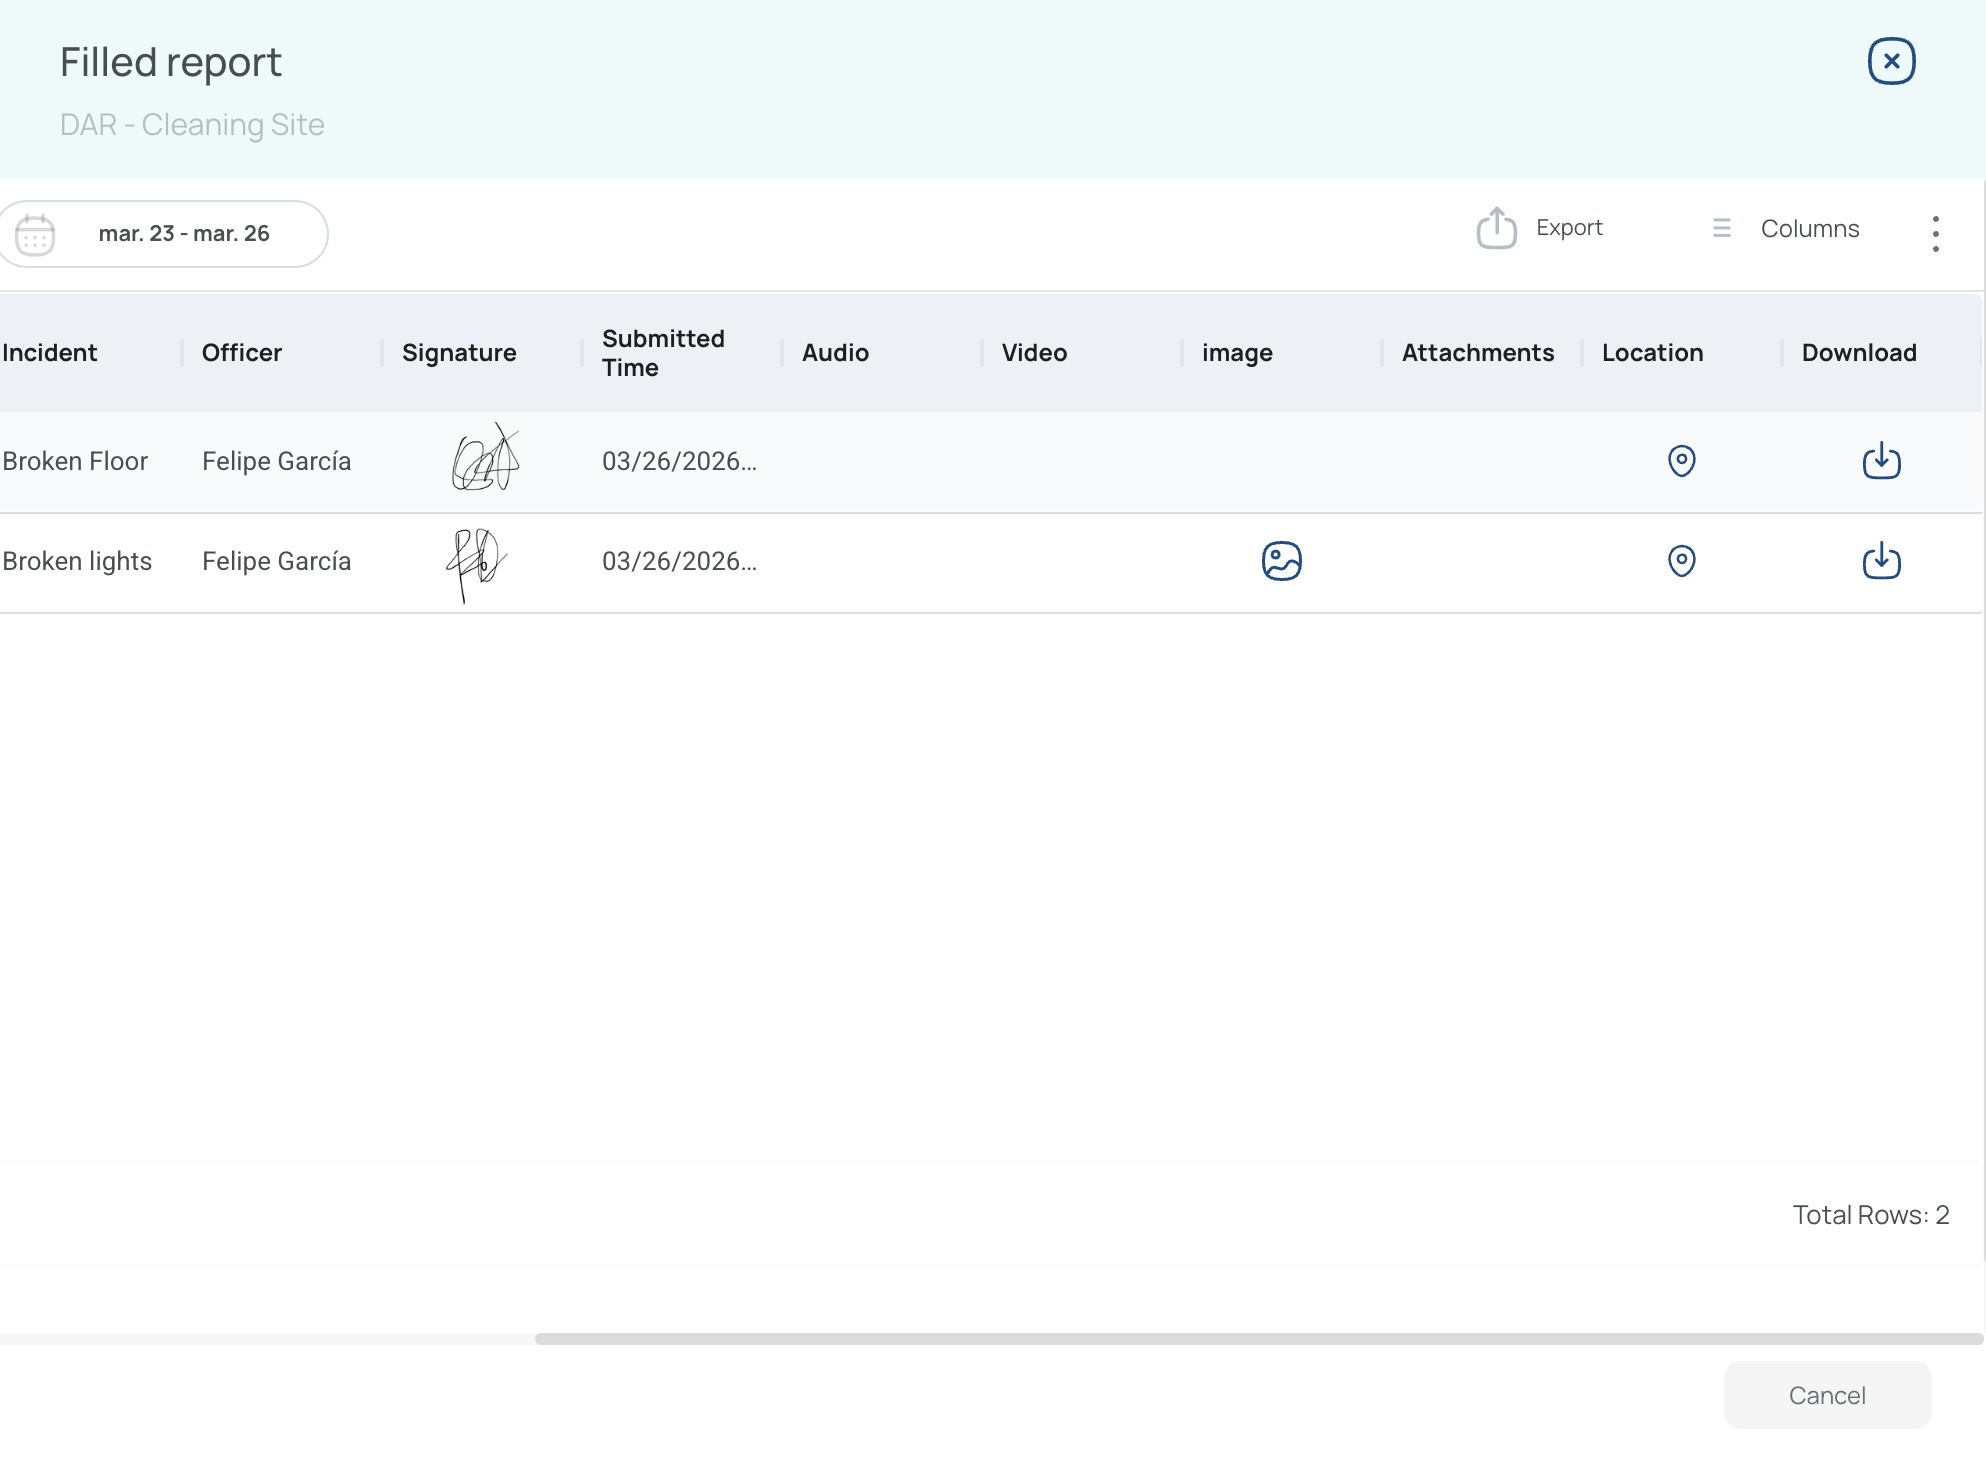
You can refine the results shown on screen by using the available toolbar options:
- Filter the entries using the filter option
- Search for specific content using the search box
- Adjust the visible date range using the date selector

You can also export the current view. Exported results reflect any filters, search terms, or date range currently applied. Export formats include PDF and Excel.
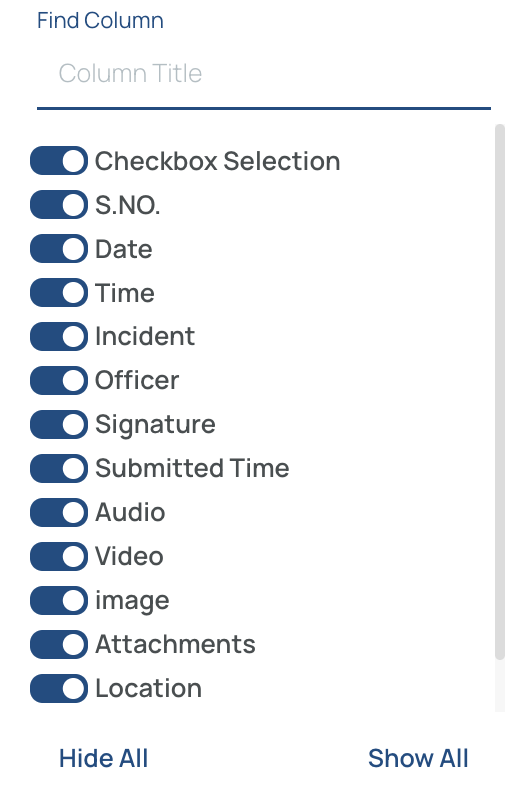
Use the Columns option to show or hide columns in this view.
View Reports
To view specific reports, click on the View button under the View column.
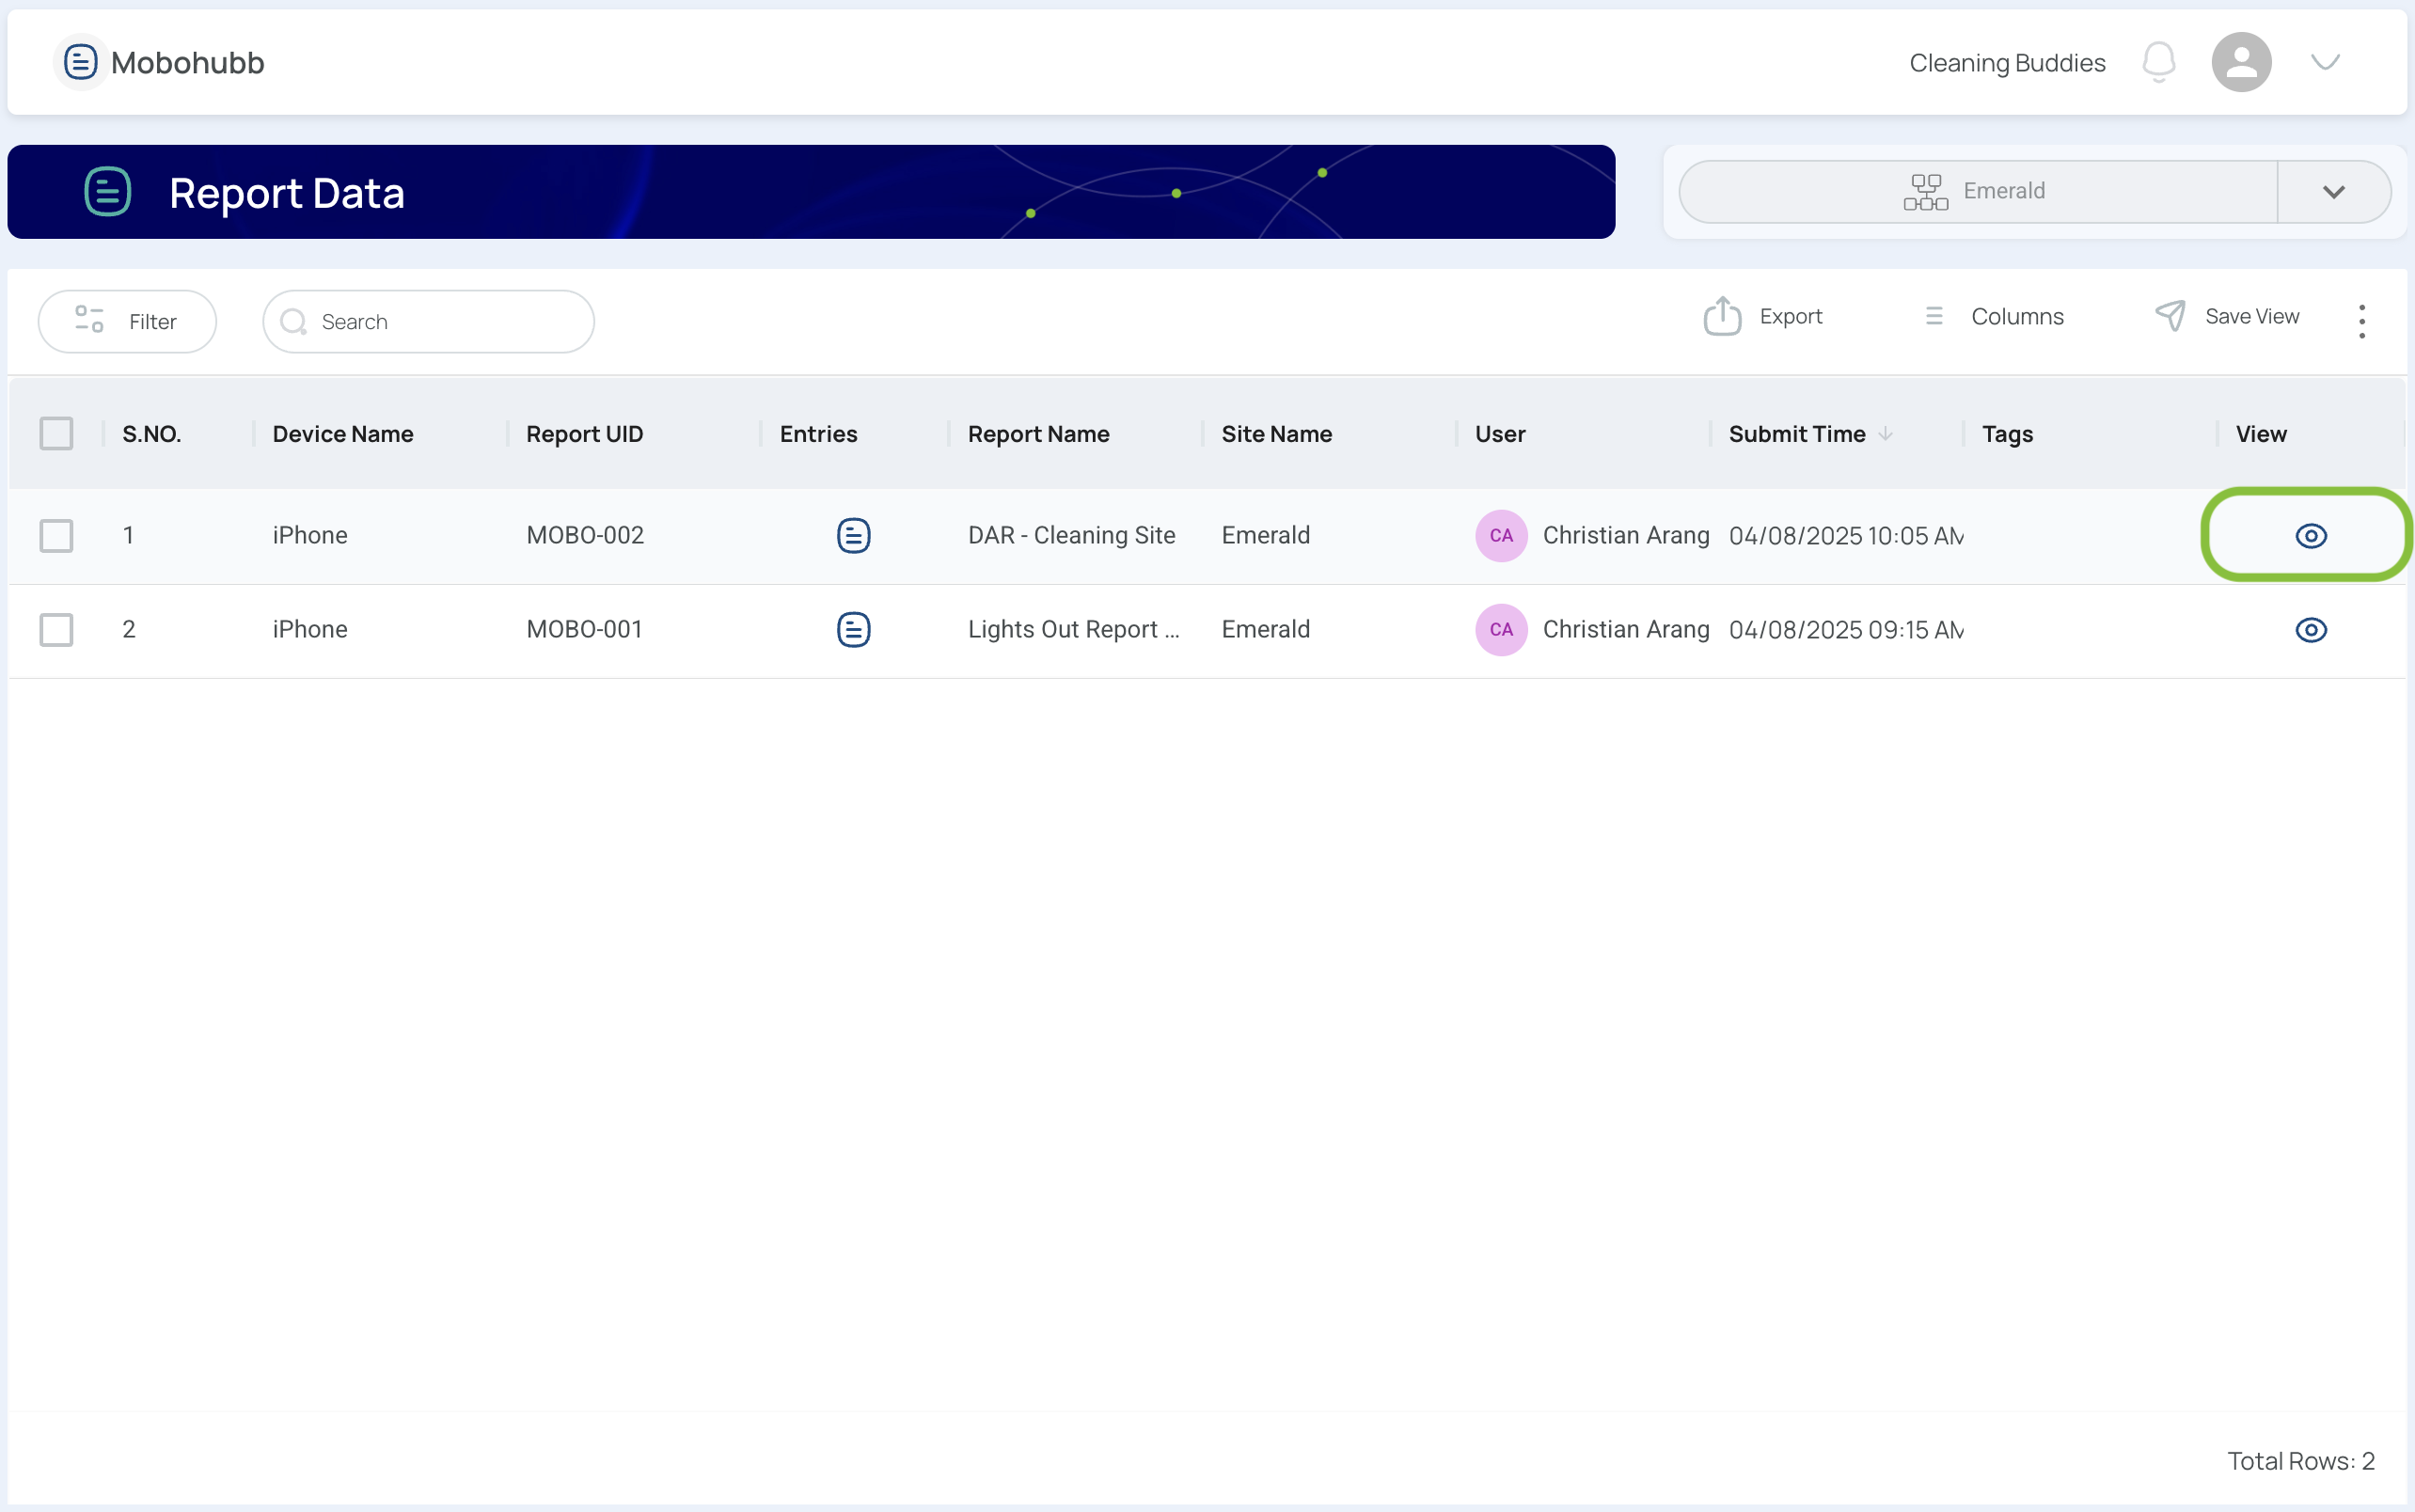
This will open up a menu where you can see the details included in this report.

Export Data
Key points to remember:
- If the file is within size limits, your download starts immediately.
- If it’s too large, you’ll find the file in the “Downloads” option on the platform.
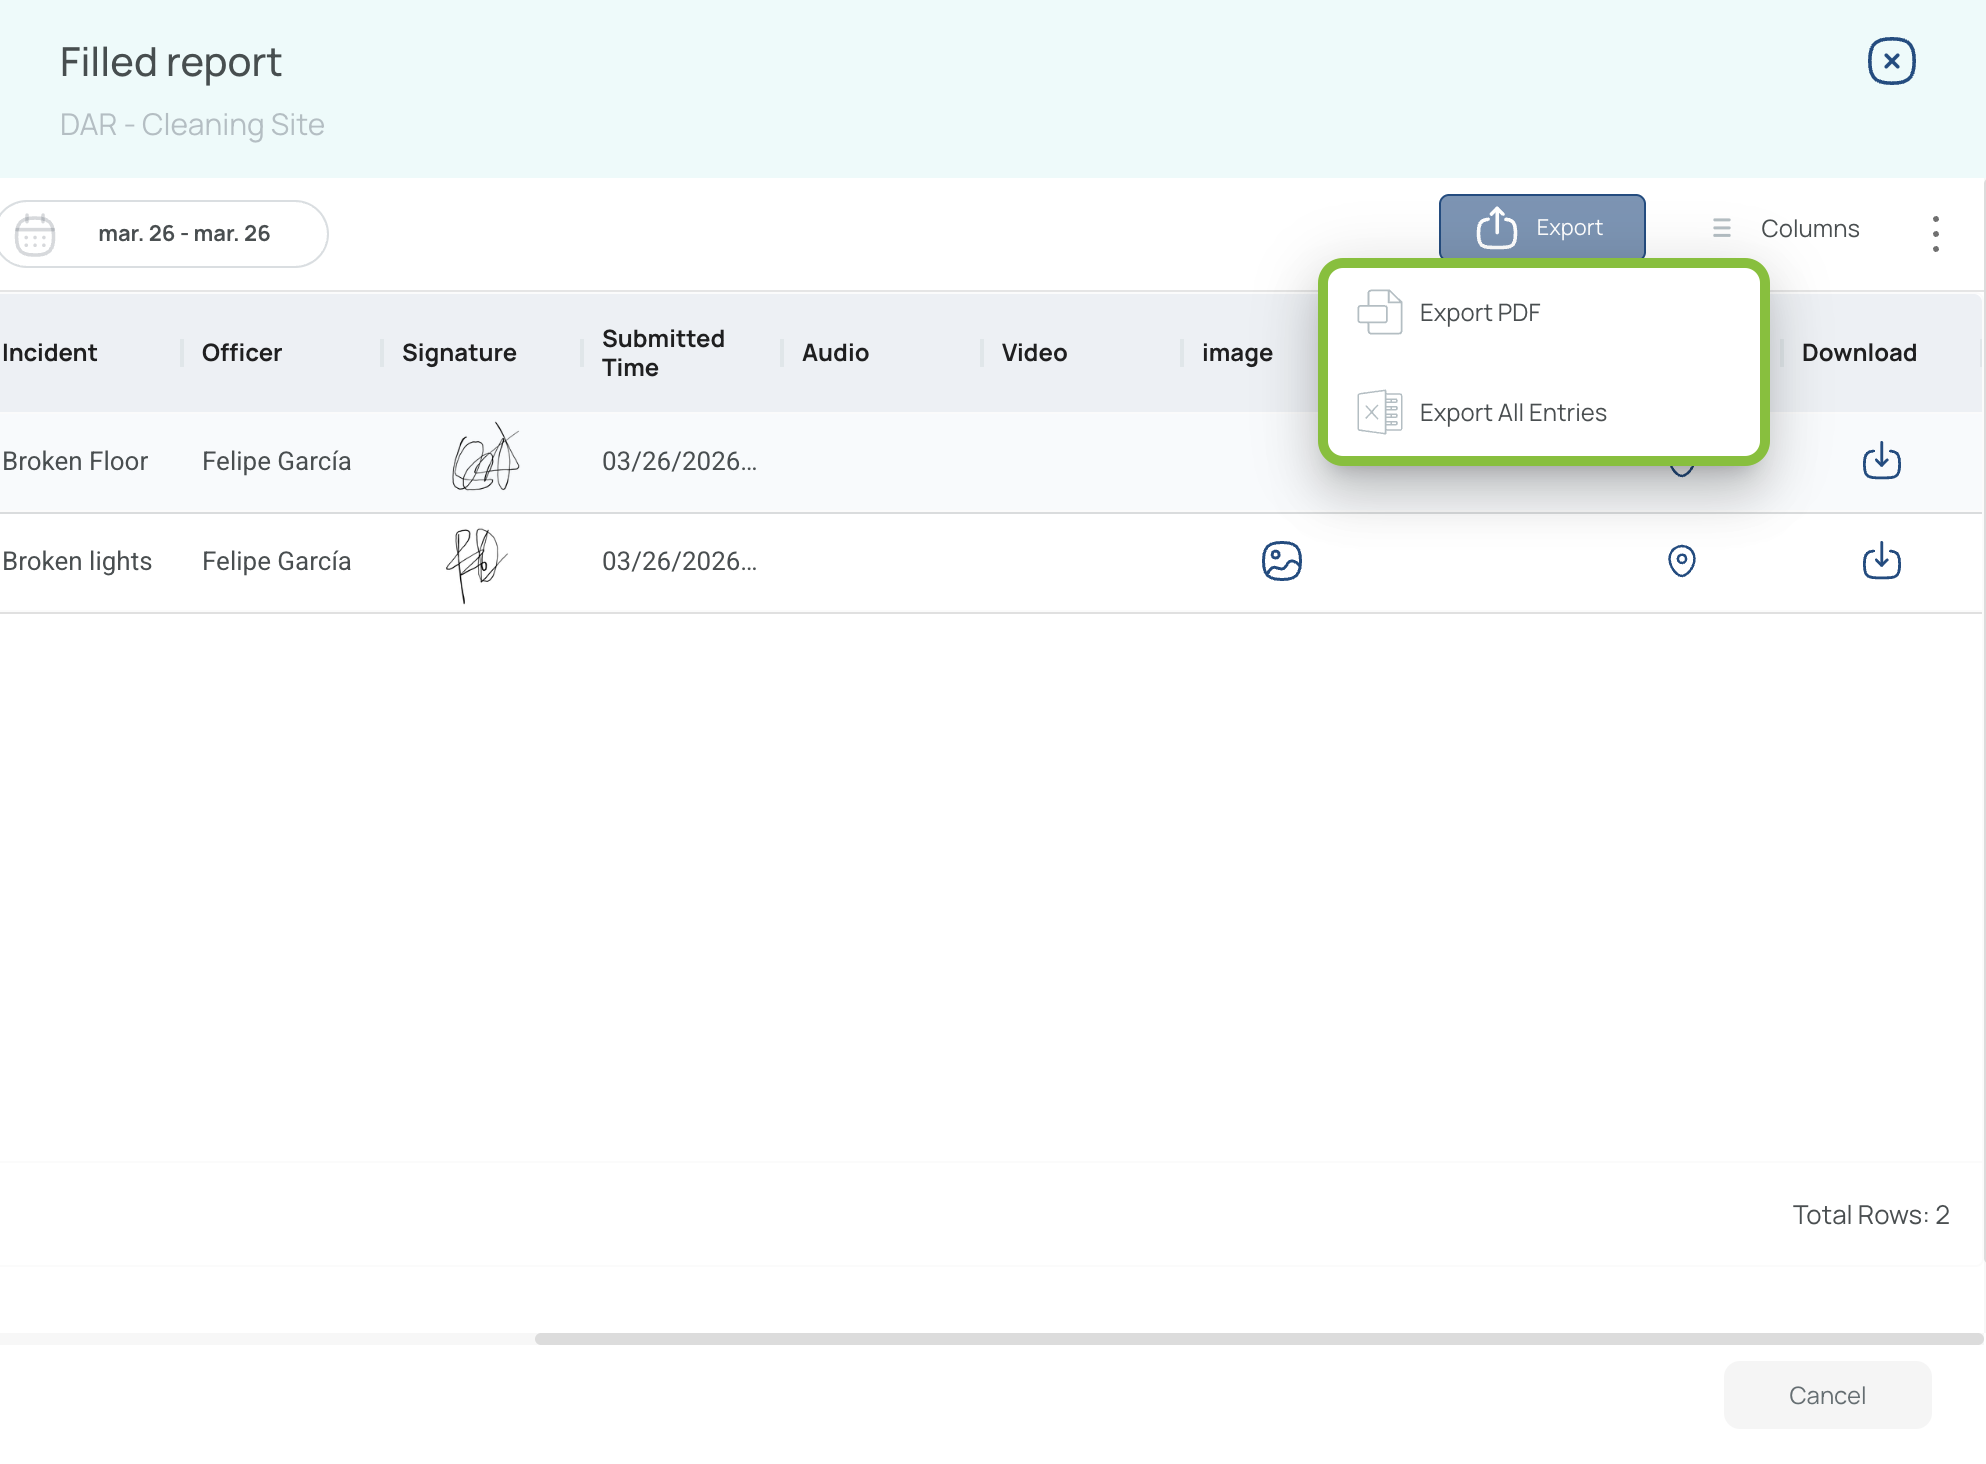
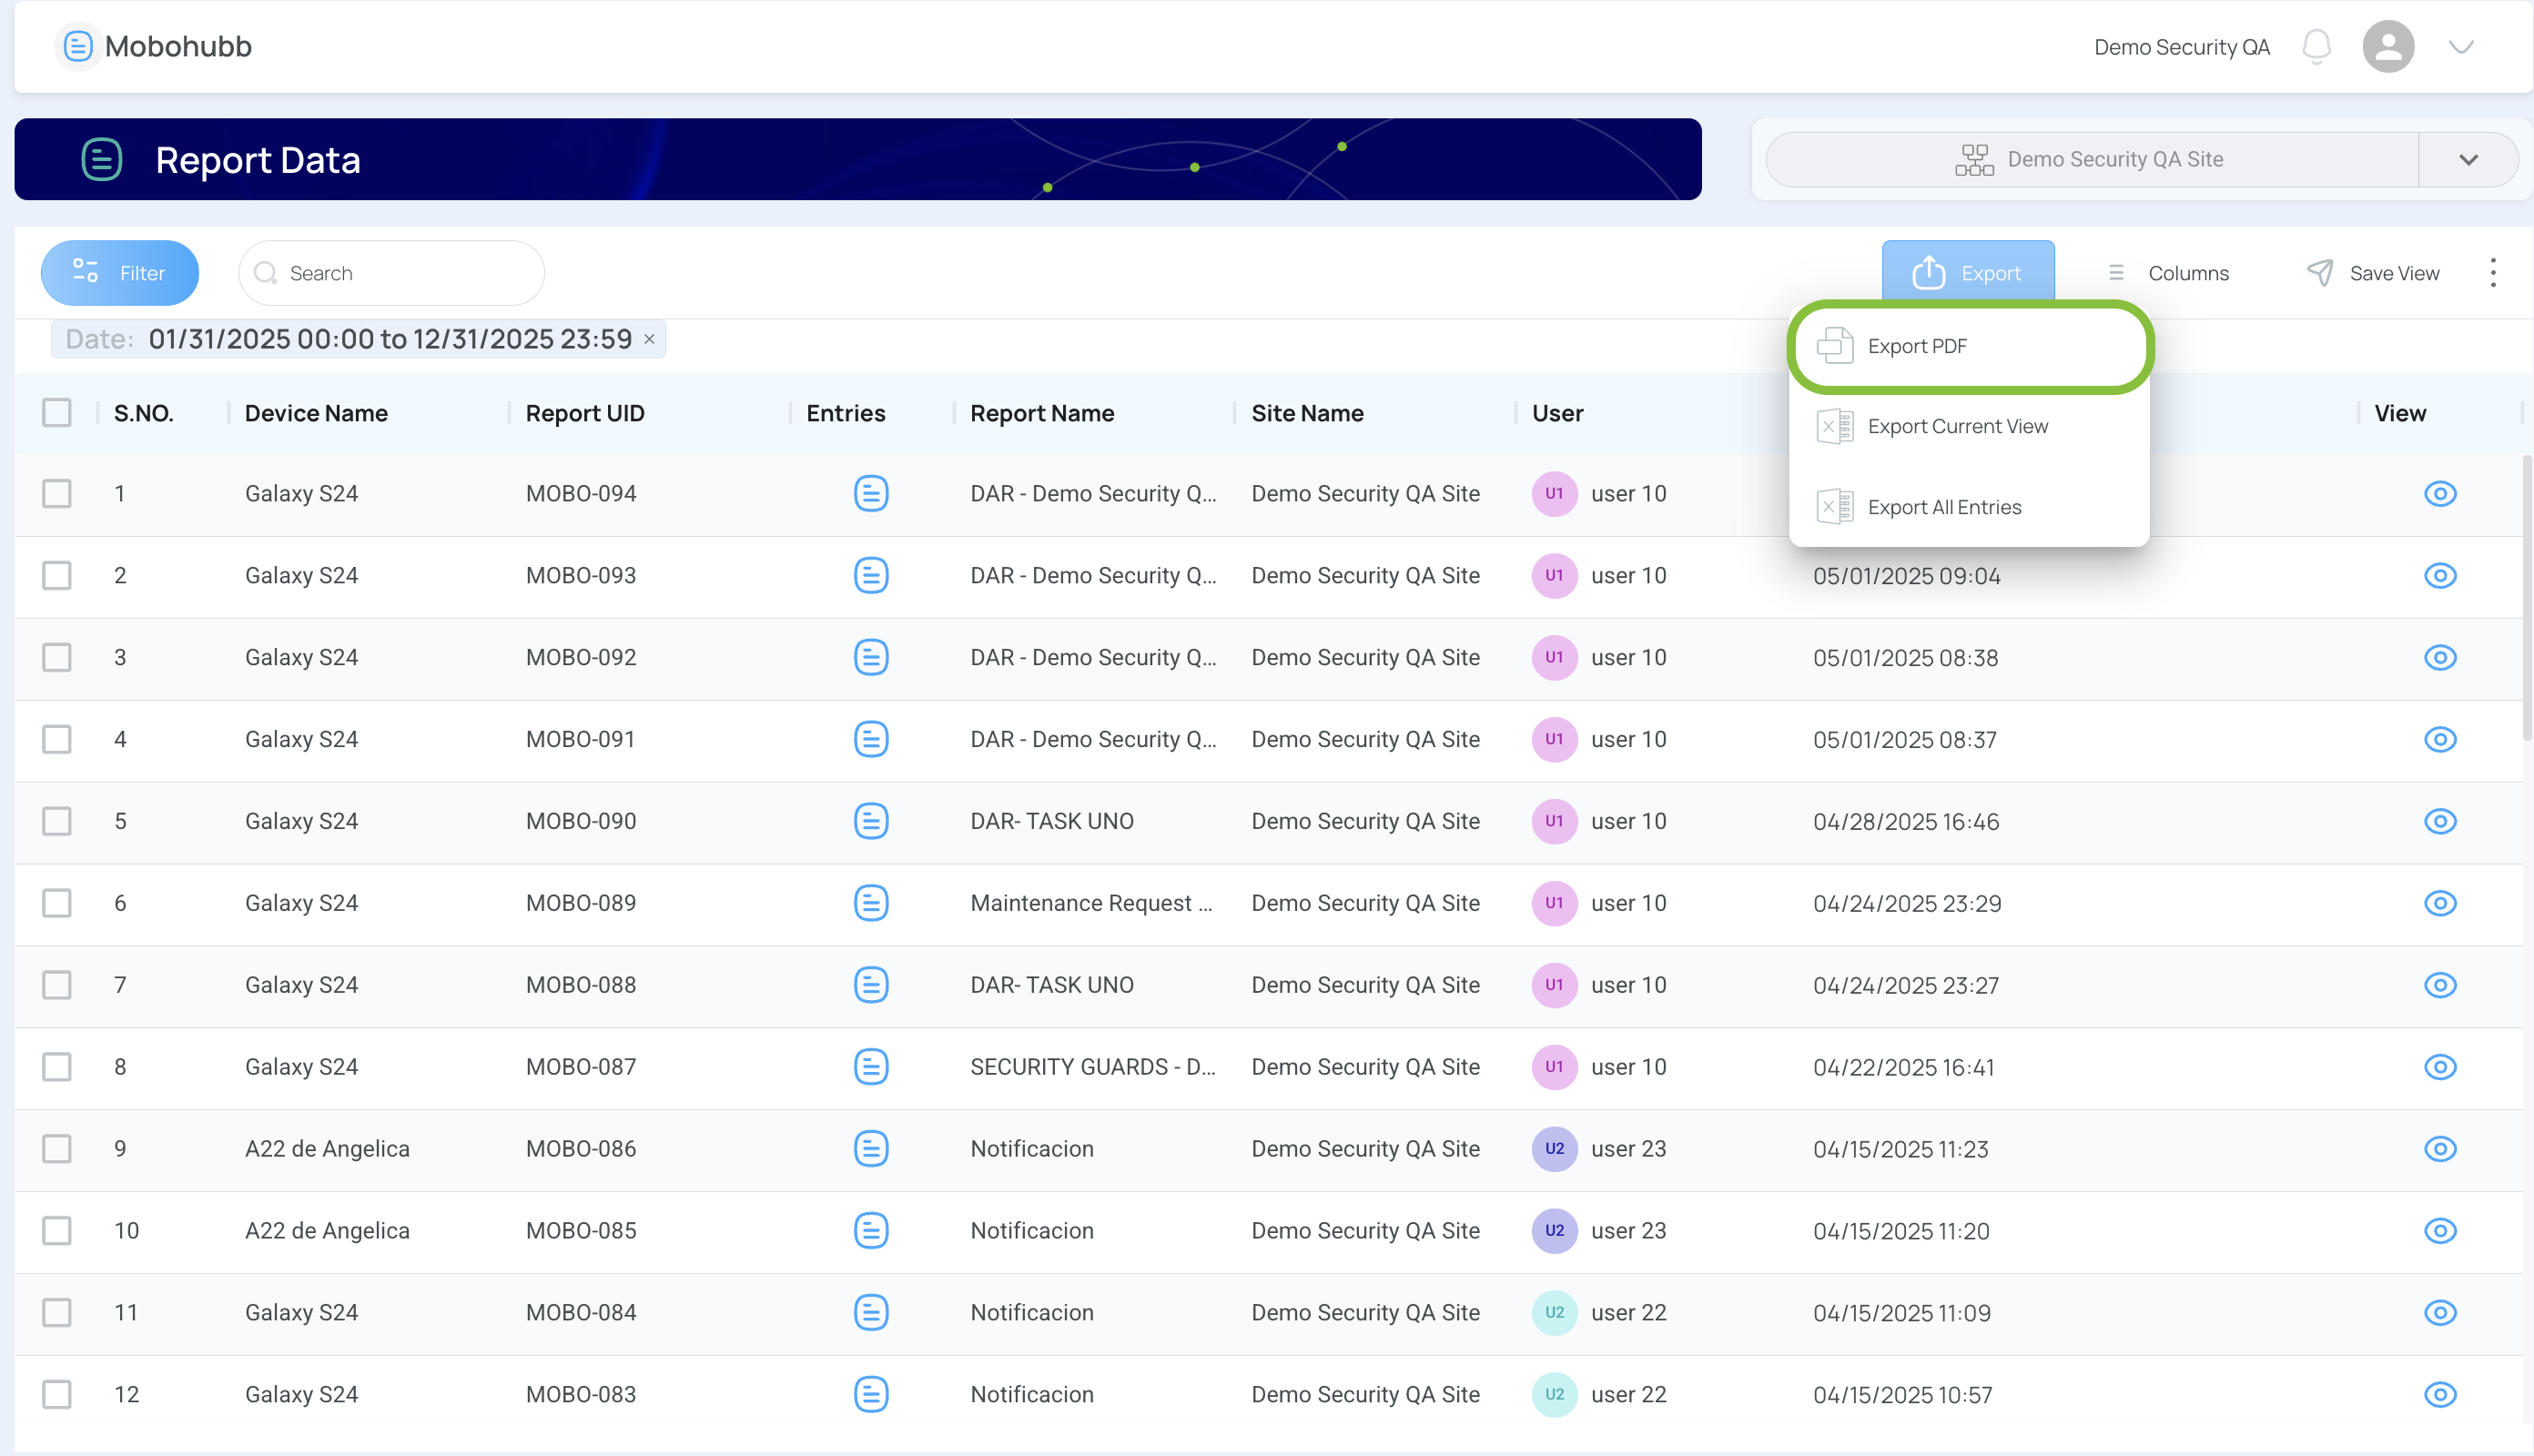
Export PDF
Export PDF produces a single PDF for every report currently displayed. Each file includes all entries (submissions) that match your filter settings. Before exporting several reports at once, open Filters → Quick filters and apply a time range—for example, a custom “Last 30 Days” window. Choosing an explicit range avoids accidental offsets like “Last Month,” which counts backward from yesterday.
Once the date filter is in place, select Export PDF.
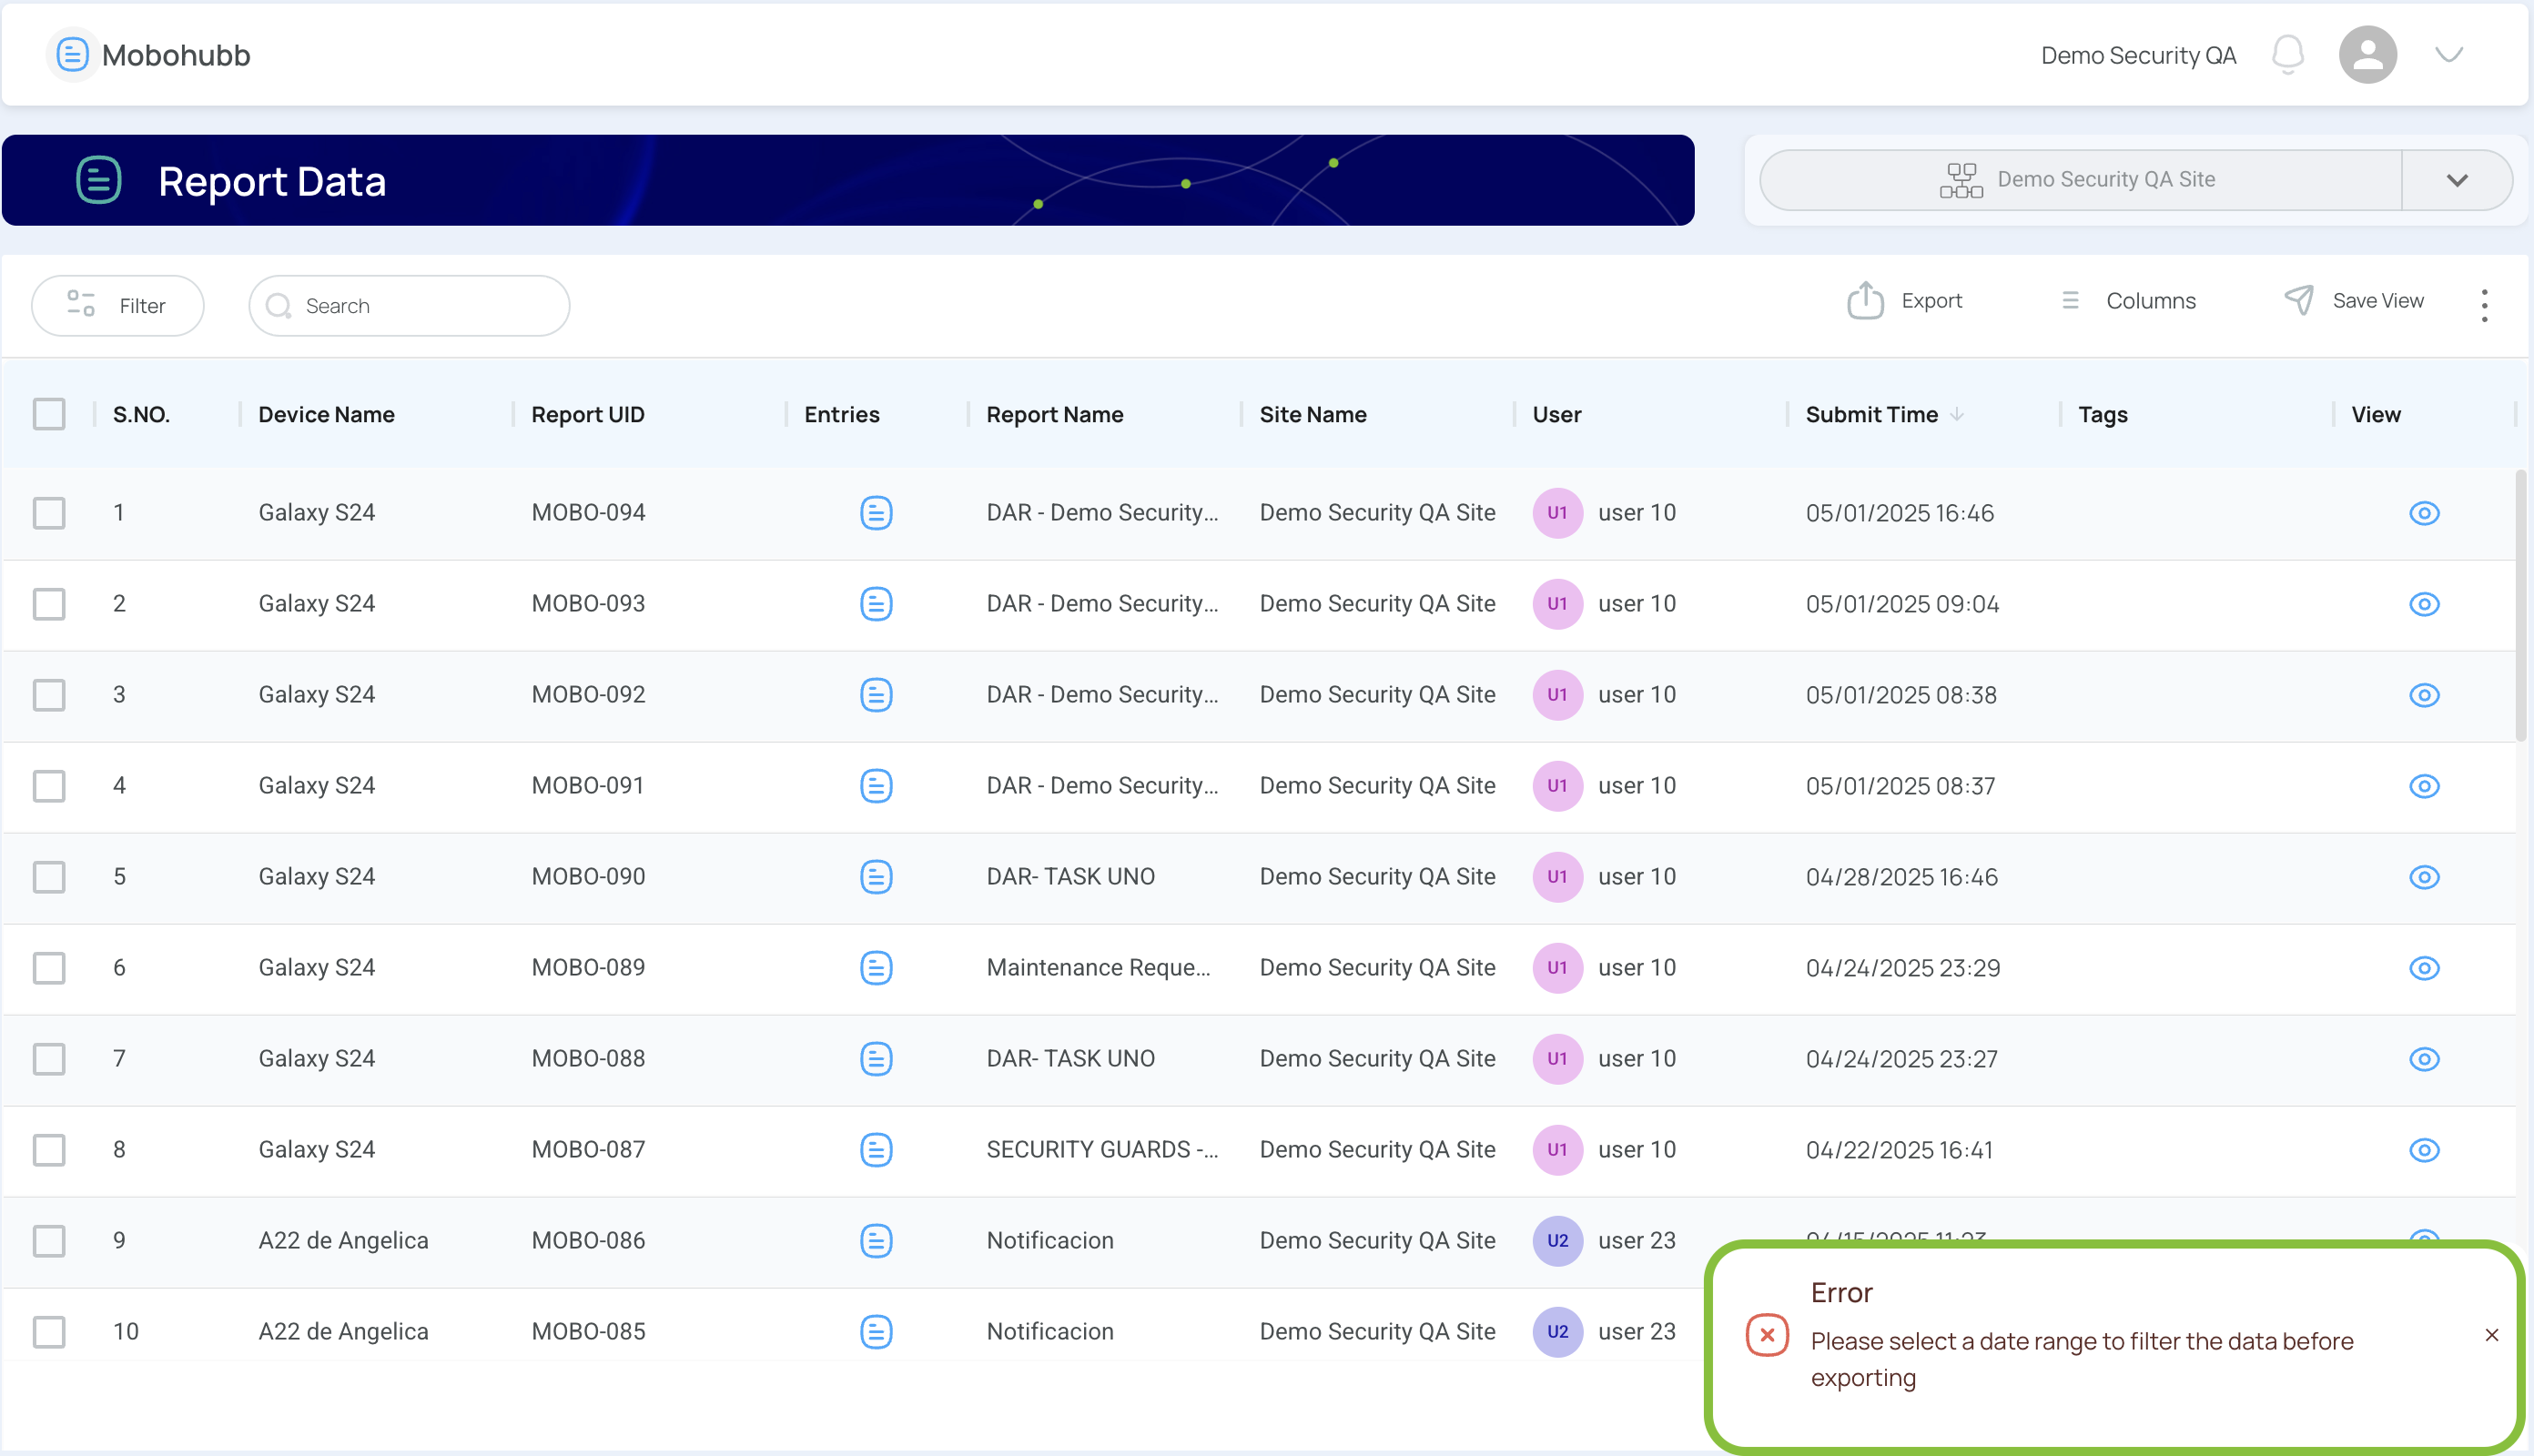
If no range is set, the system blocks the export and displays a prompt:
Export Current View
Export Current View delivers an Excel file that mirrors the exact table on-screen, including any quick or advanced filters, column arrangements, or custom sorting. Tick individual rows first if you want only specific reports; leave every box unchecked to capture the full list.

Improve precision by refining the quick or advanced filters before exporting.
Afterward, choose Export → Export Current View.

Remember: this option lists reports only—entries inside each report are excluded. For full submissions, use Export PDF or Export All Entries.
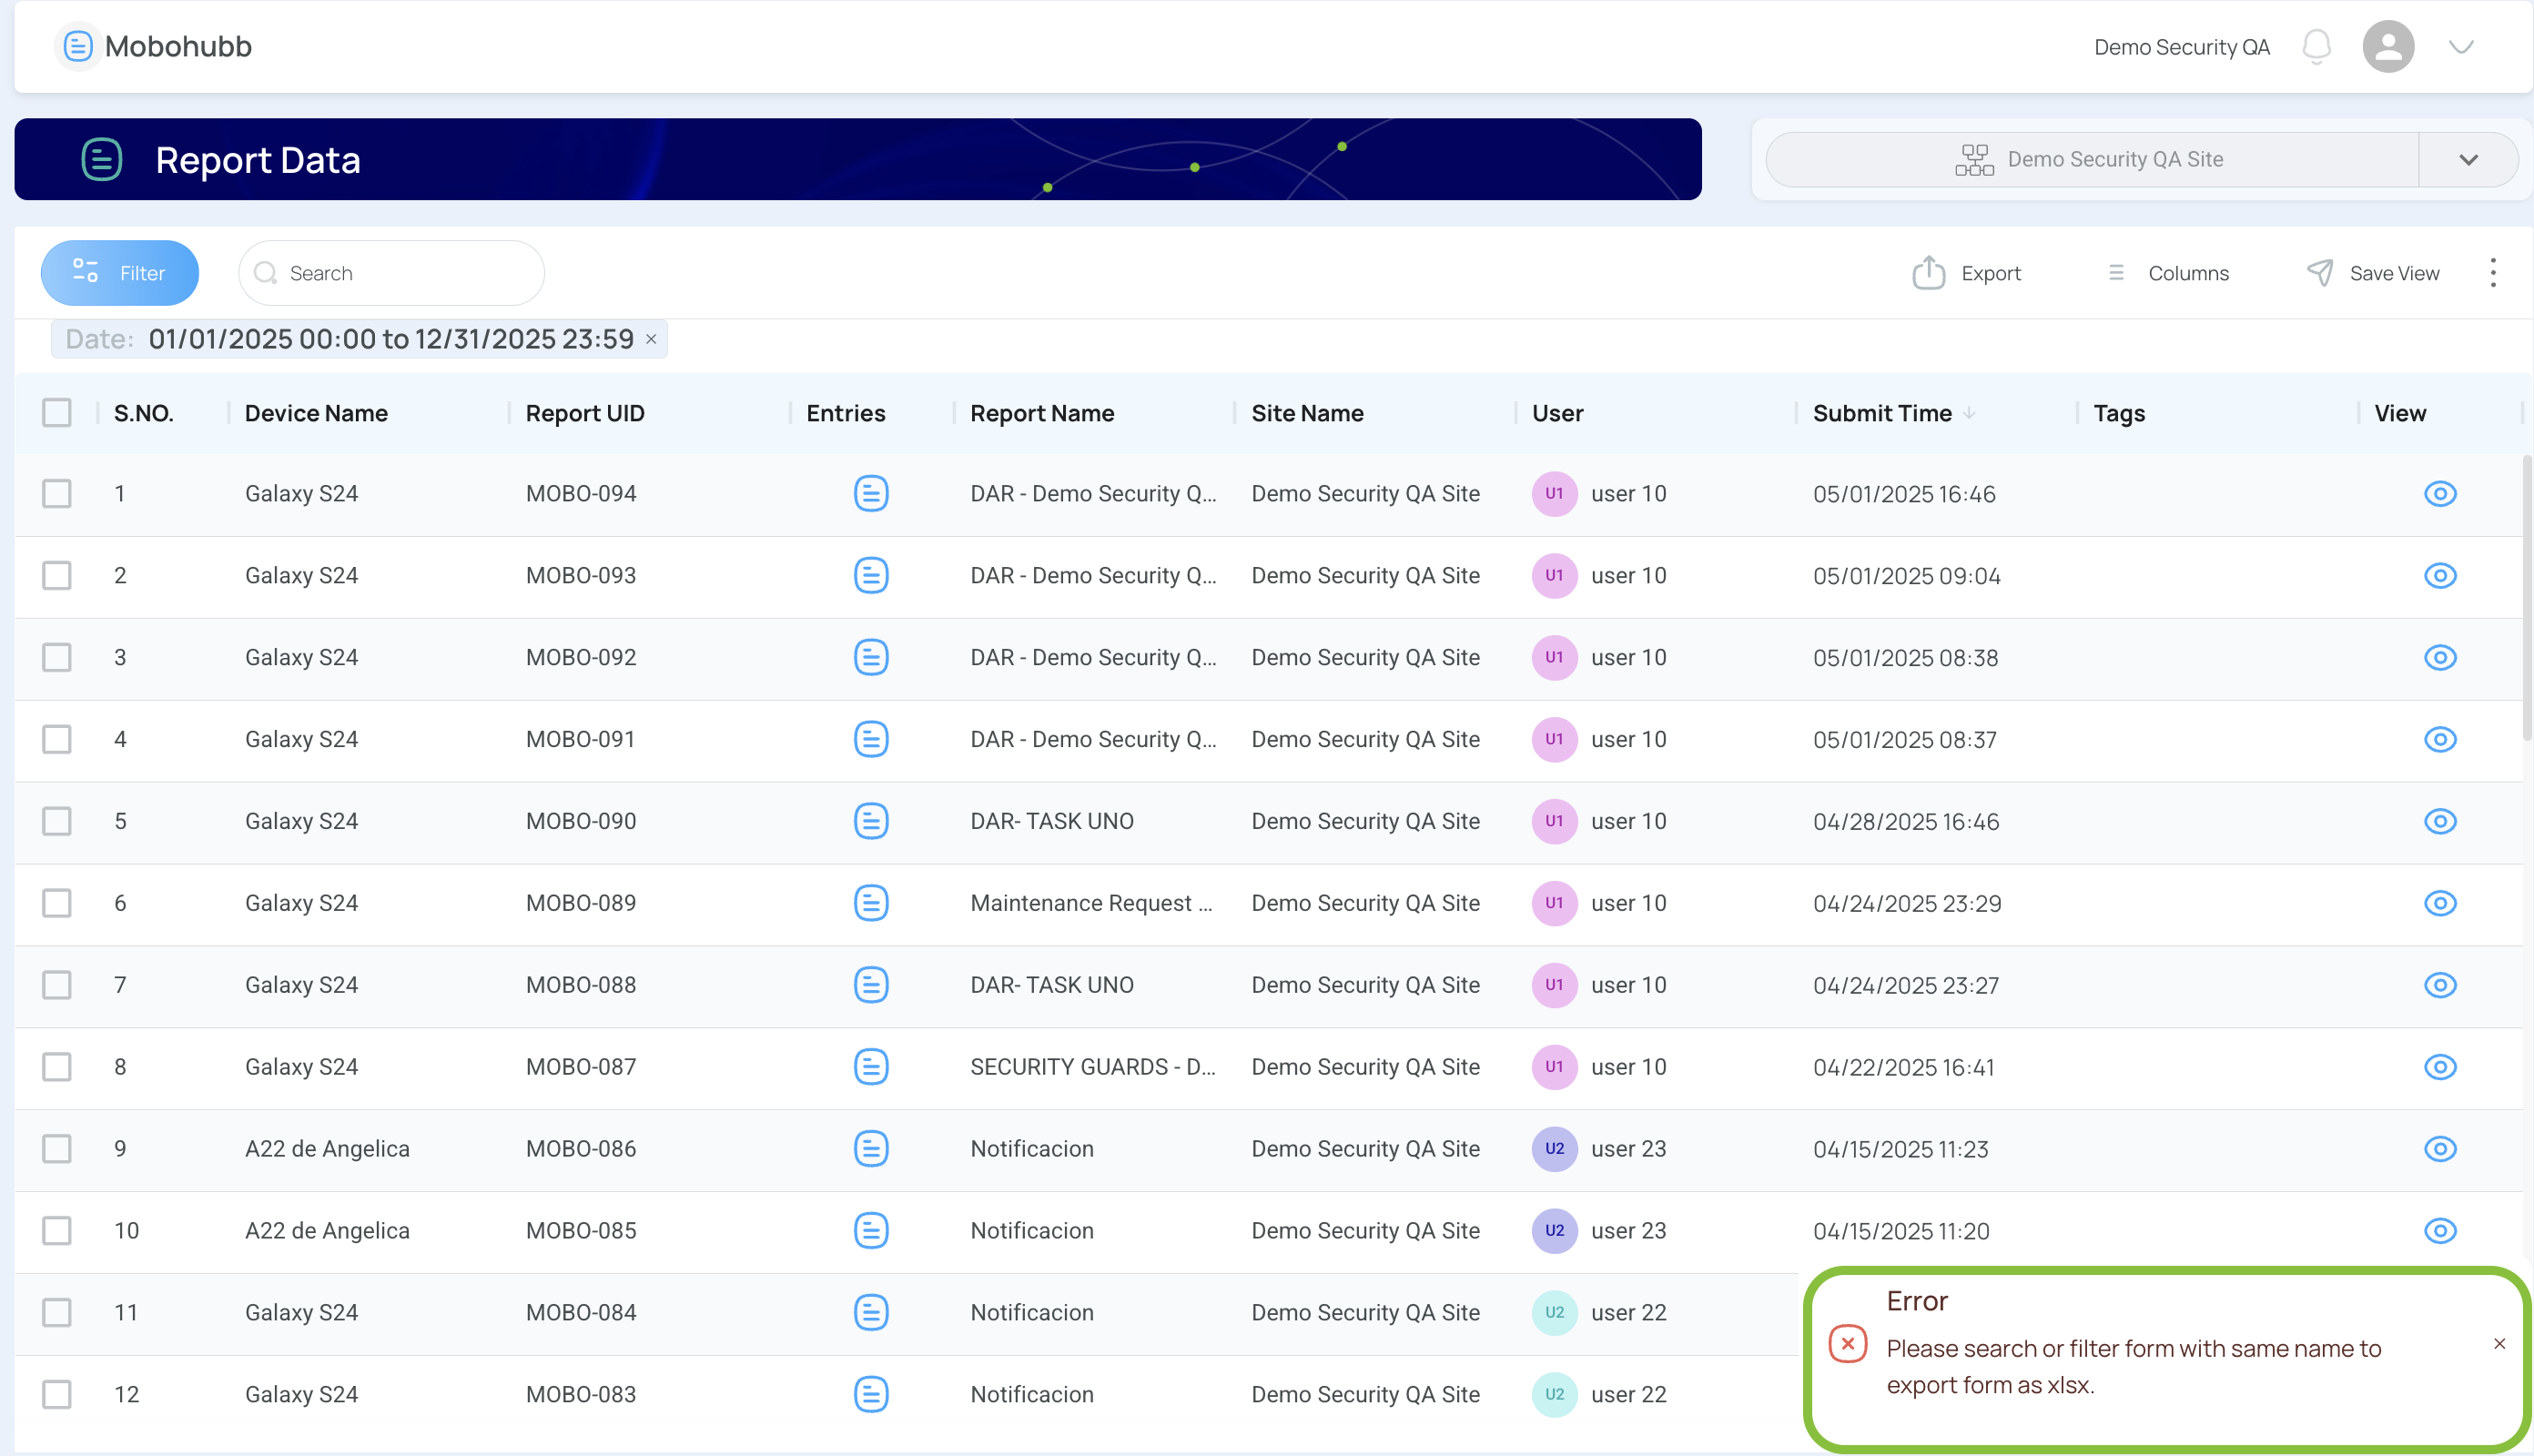
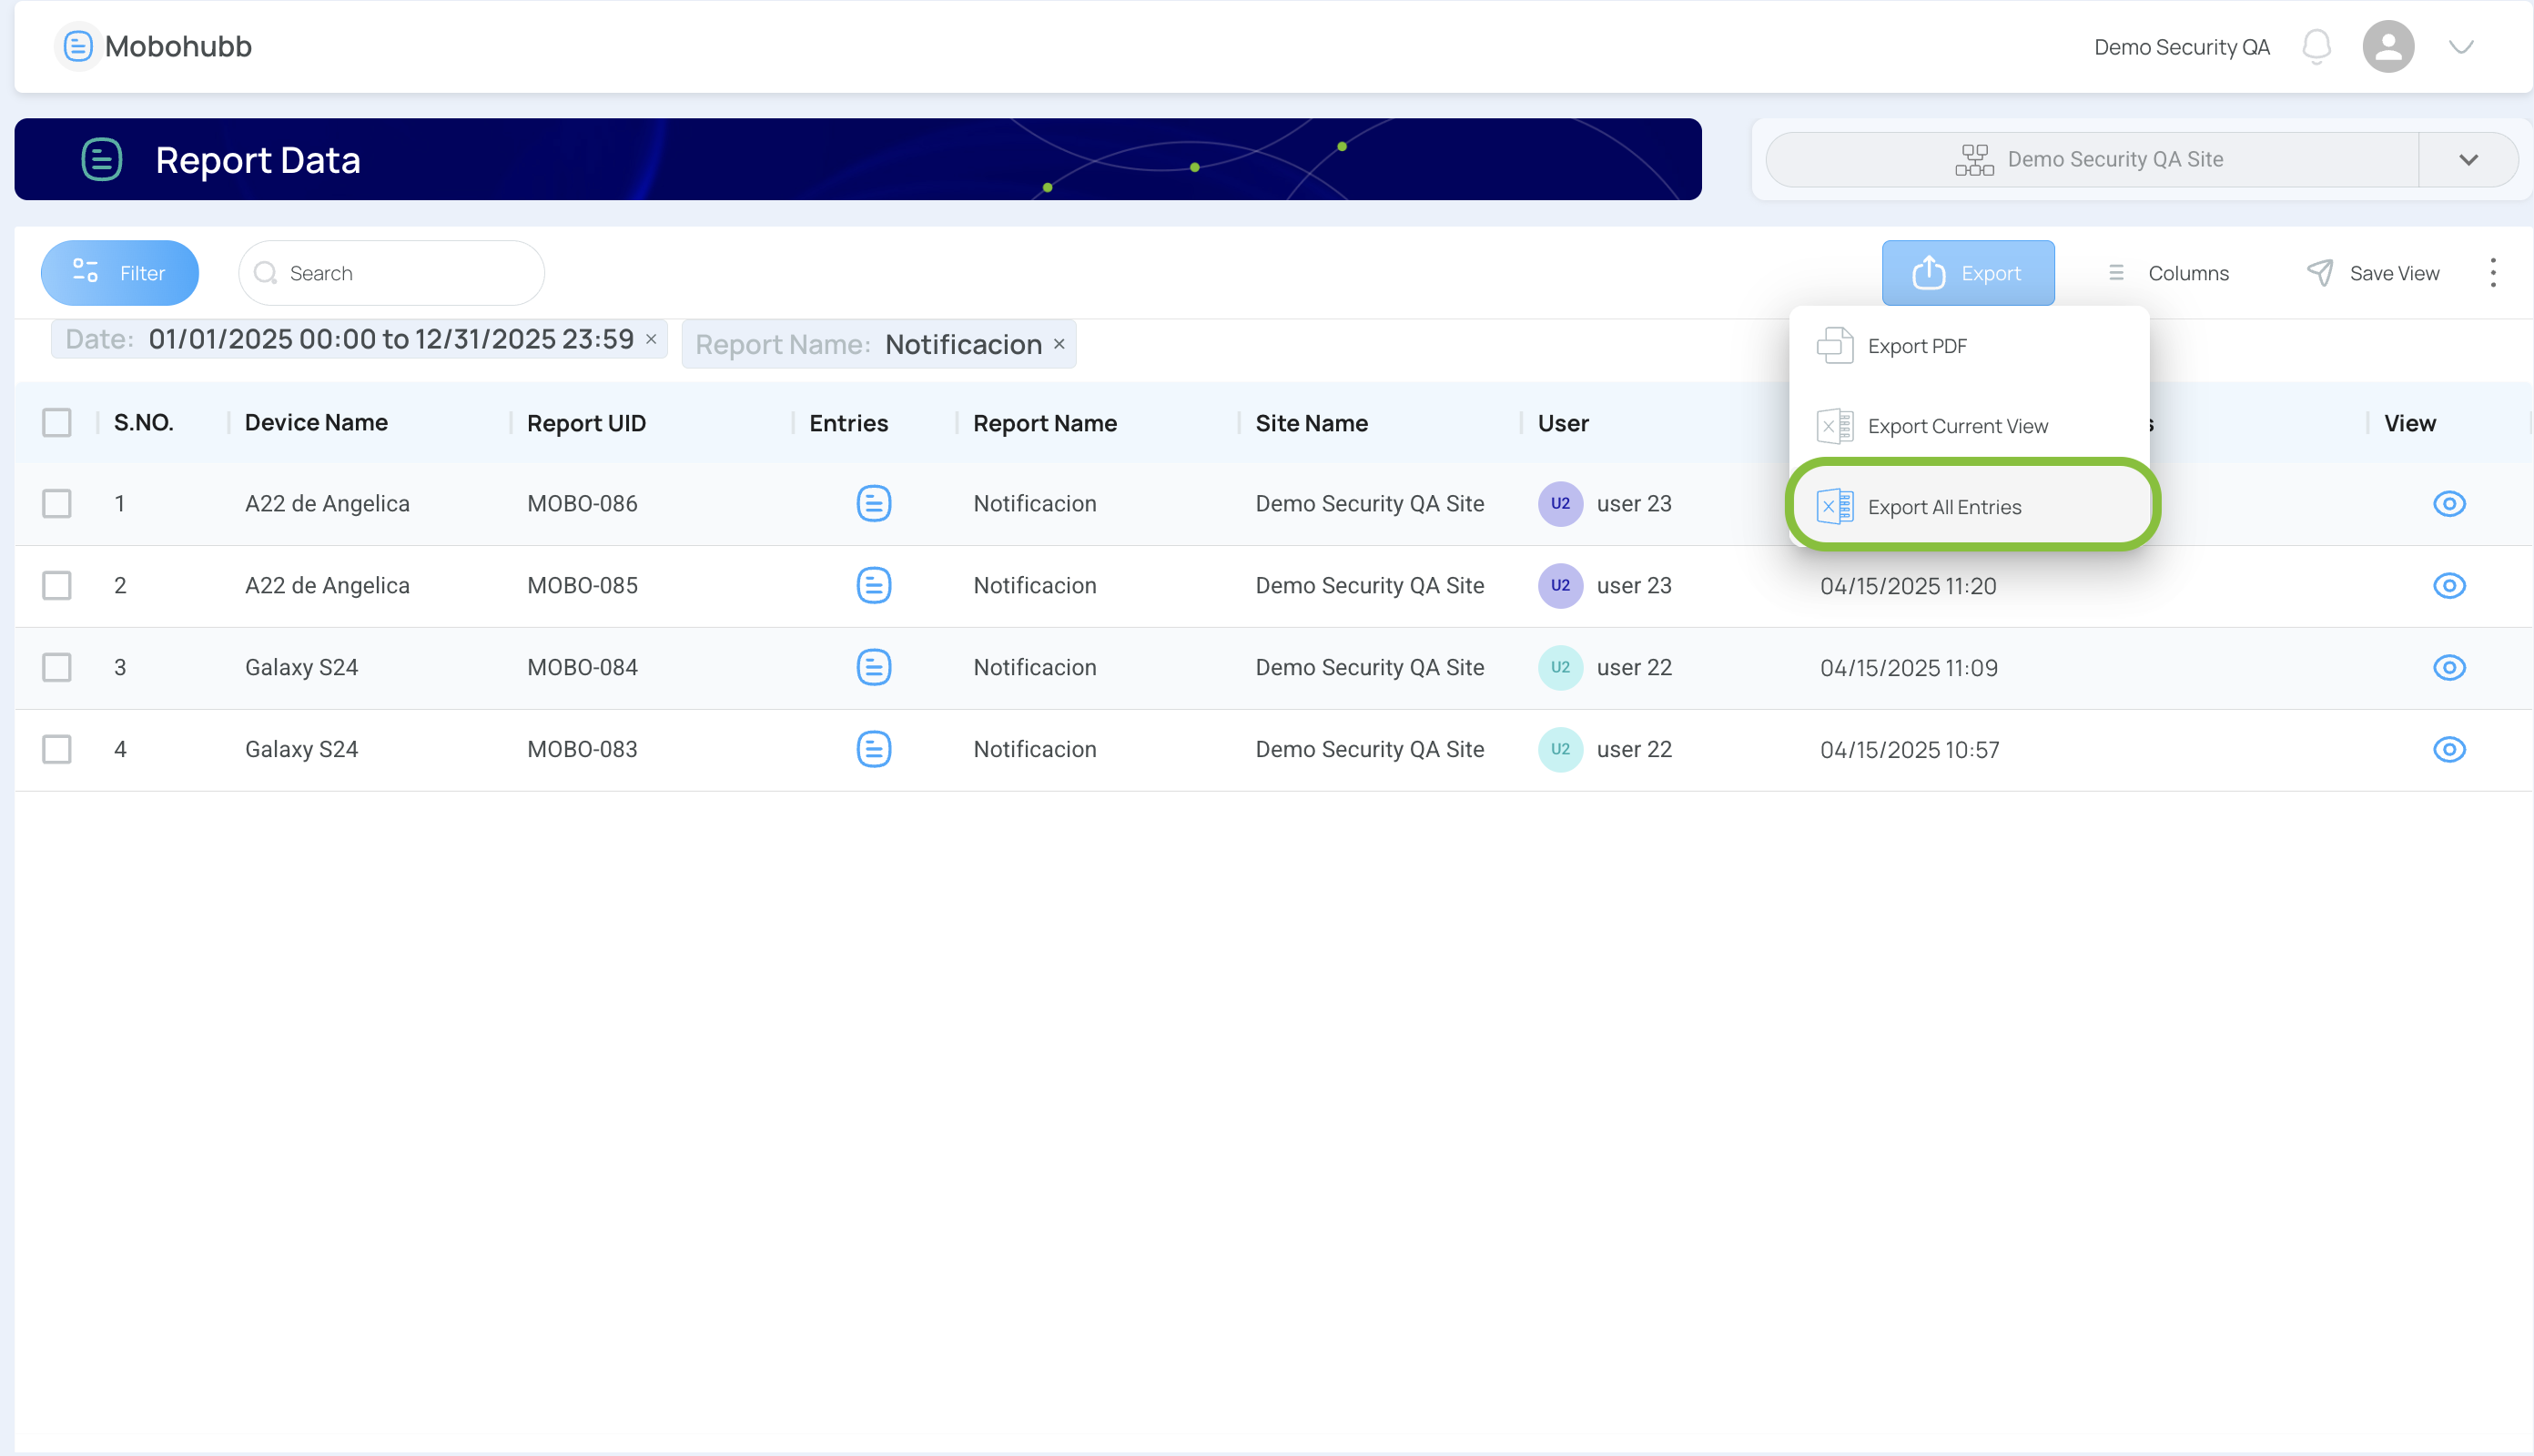
Export All Entries
This choice produces an Excel file containing every entry from multiple reports, but two conditions must be met beforehand.
First, use Quick filters to apply a time range exactly as you did for Export PDF.
Second, filter by Report Name so every item in view shares the same title.
Now open Export → Export All Entries to download a consolidated spreadsheet.
Missing a time range or a report name filter triggers a warning: