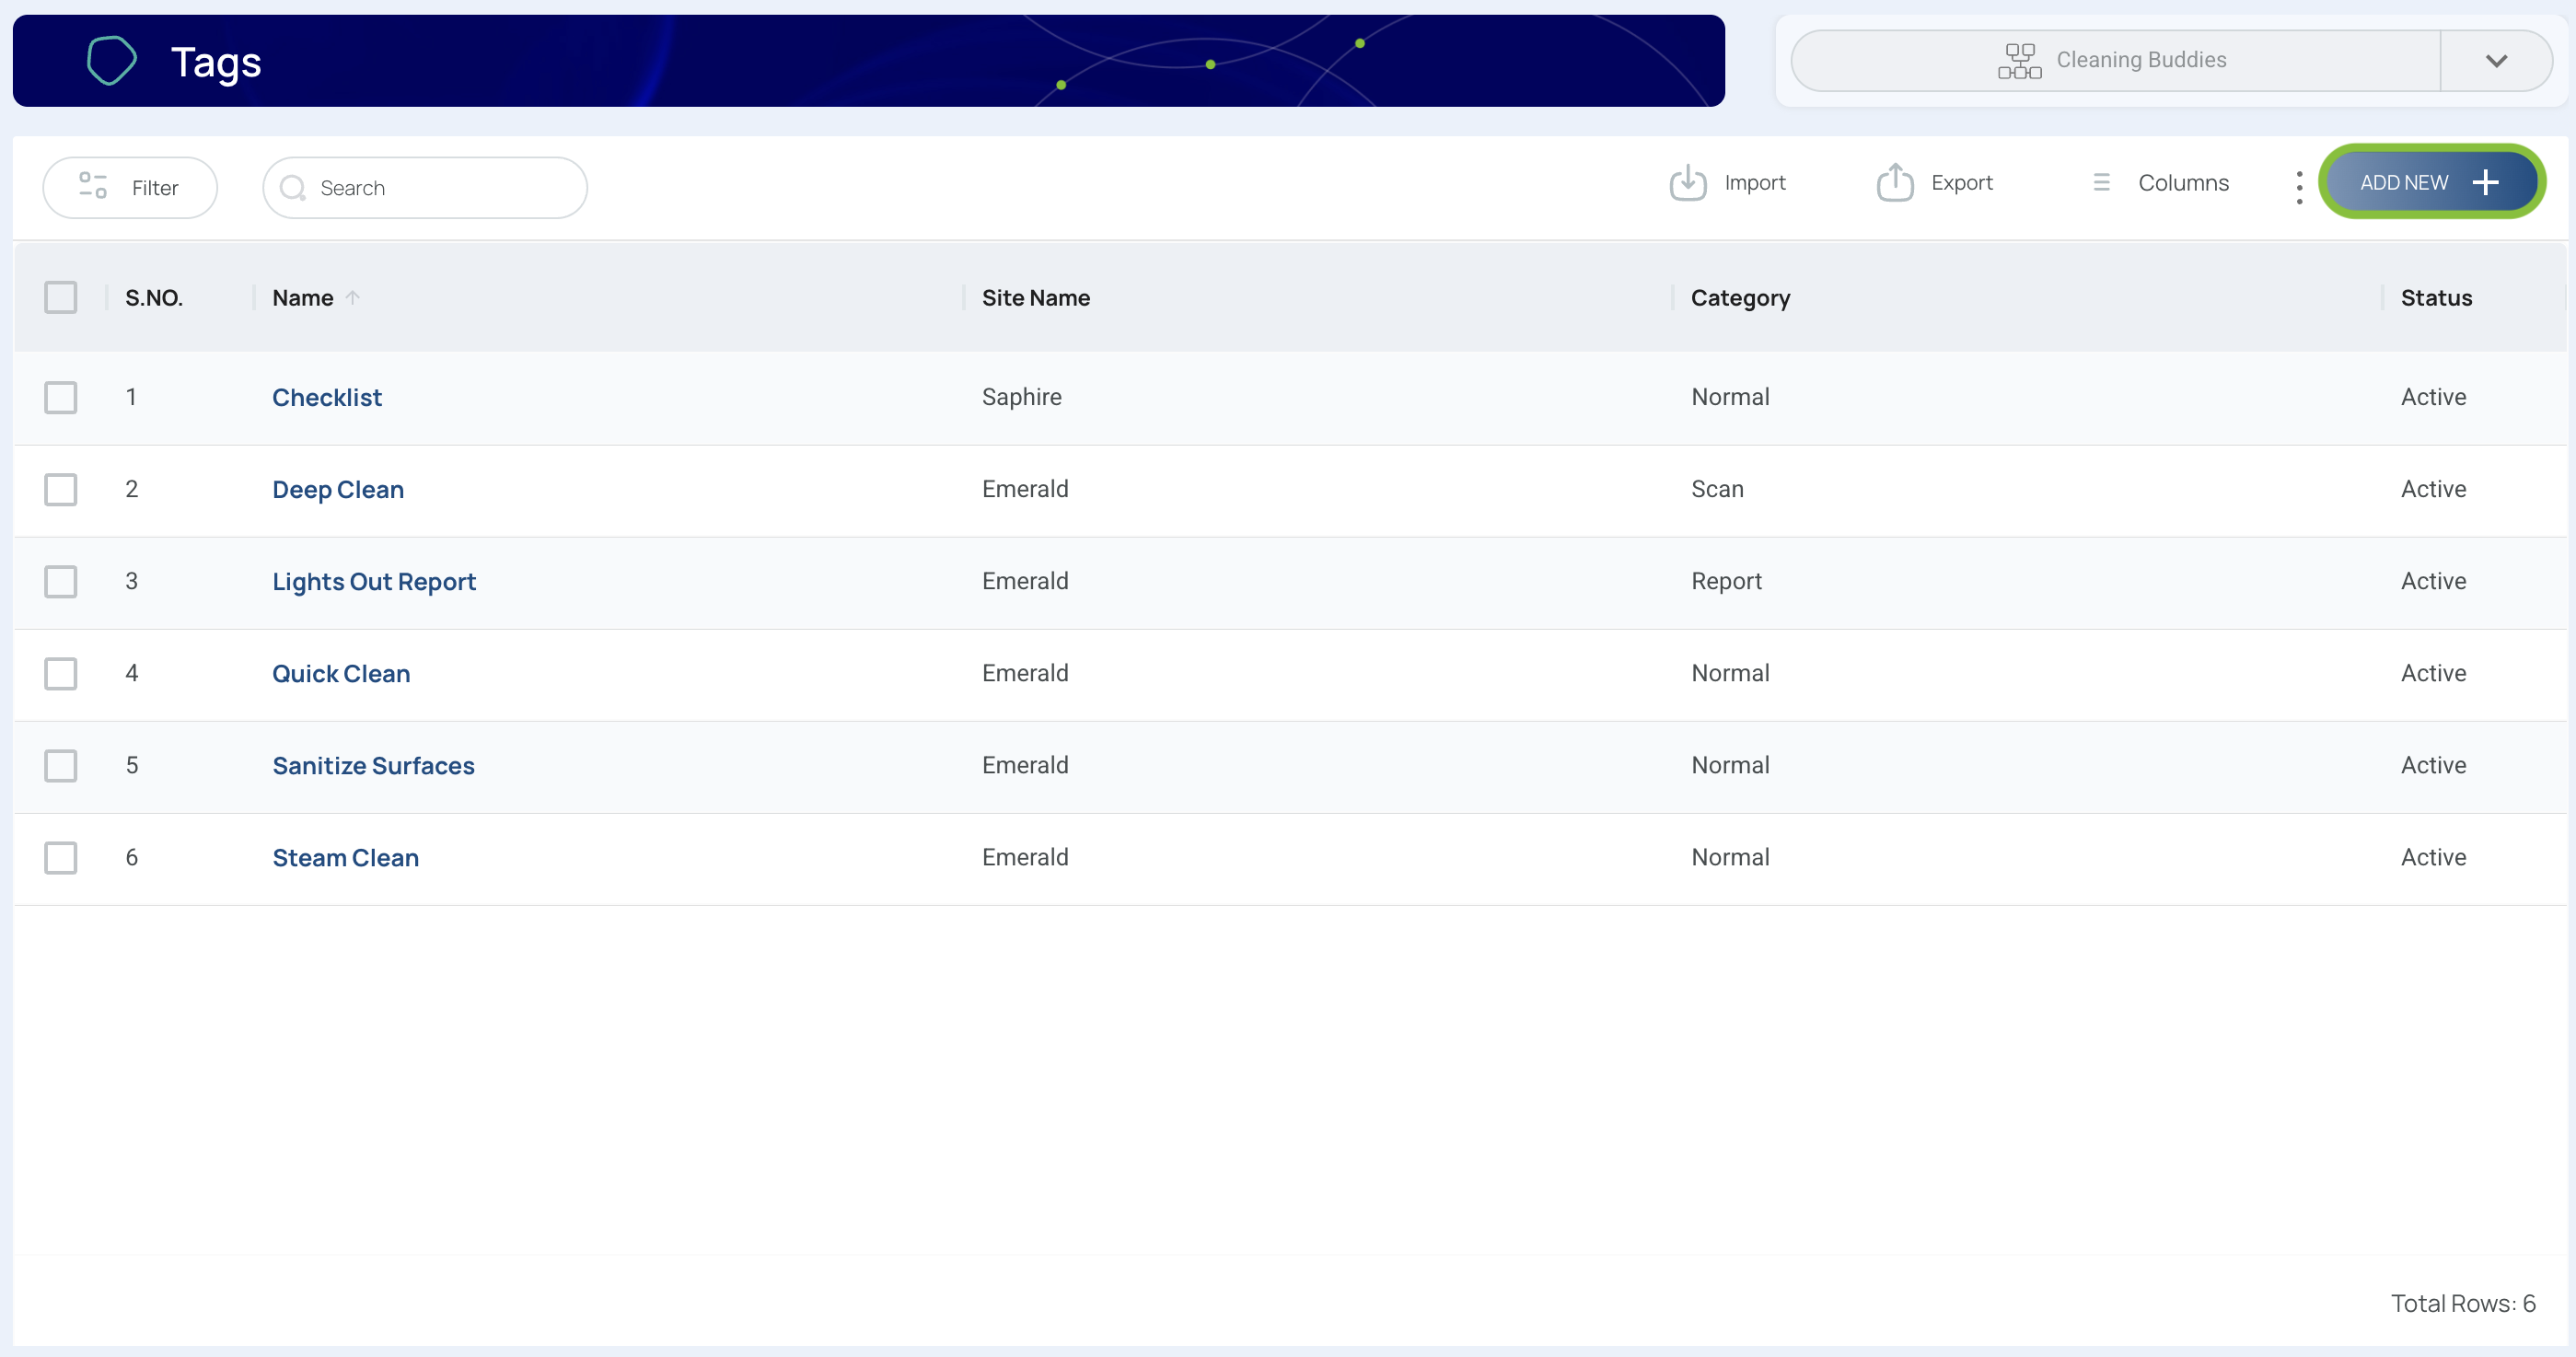
Tags
Tags helps you segment data, streamline searches, and apply specific actions by site. Each tag is associated with a color code to make visual identification quick and easy. Tags can also be category-specific, meaning you can limit their application to certain features only.
Tags are powerful labels that help you organize and filter data in the mobohubb portal—whether it’s tasks, scan points, or forms. Each tag can be assigned a color for quick visual identification and can include category-specific details like city, state, or address. By effectively managing tags, you can streamline searches, and apply unique actions.
- Organize Multiple Locations: Assign tags based on the site to quickly filter tasks and scan points by where they belong.
- Prioritize Tasks: Use color-coded tags (e.g., “Urgent,” “High Priority,” “Routine”) to help teams focus on what matters most.
- Track Departments or Teams: Label items like “HR,” “Facilities,” or “Security” so each department sees only relevant data.
- Identify Clients or Projects: When managing multiple external clients or ongoing projects, tag items accordingly for quick reference.
- Simplify Searches: Apply descriptive tags (e.g., “Electrical,” “Maintenance,” “Cleanup”) so users can find exactly what they need without scrolling through unrelated items.
In this guide you’ll learn
- How to create new tags with names, colors, and optional location information
- How to edit and delete existing tags to keep your workspace tidy
- How to export and import tags for reporting or sharing purposes
- How to associate tags with different features (tasks, scan points, forms) to enhance your data organization
Add New Tags
Follow the steps below to create a new tag:
- Navigate to the Portal’s Top Menu and select Settings from the dropdown.
- From the Configuration section, select Tags.
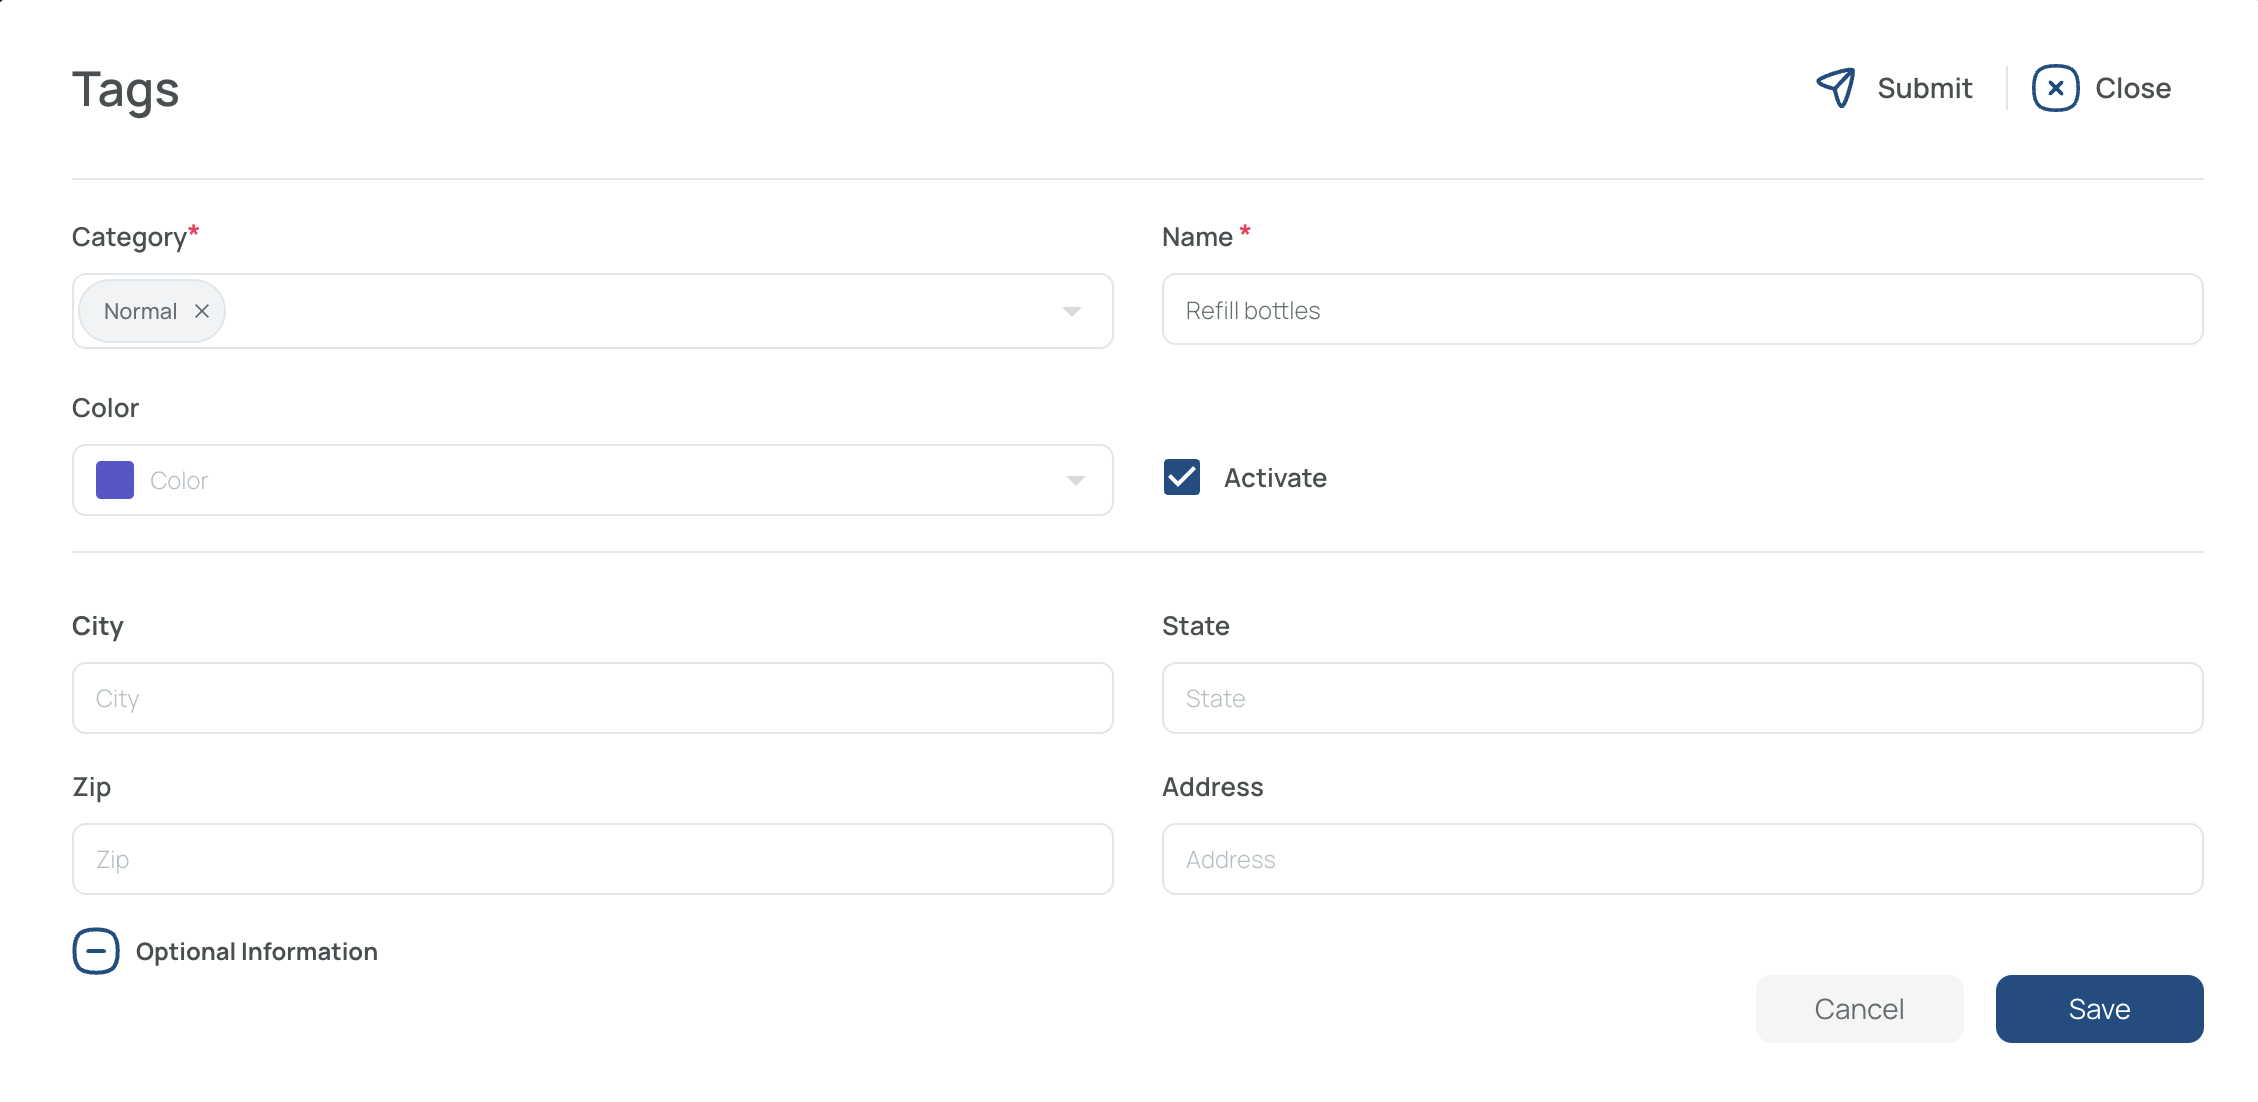
- Click “Add New”.
- Fill in the Fields.
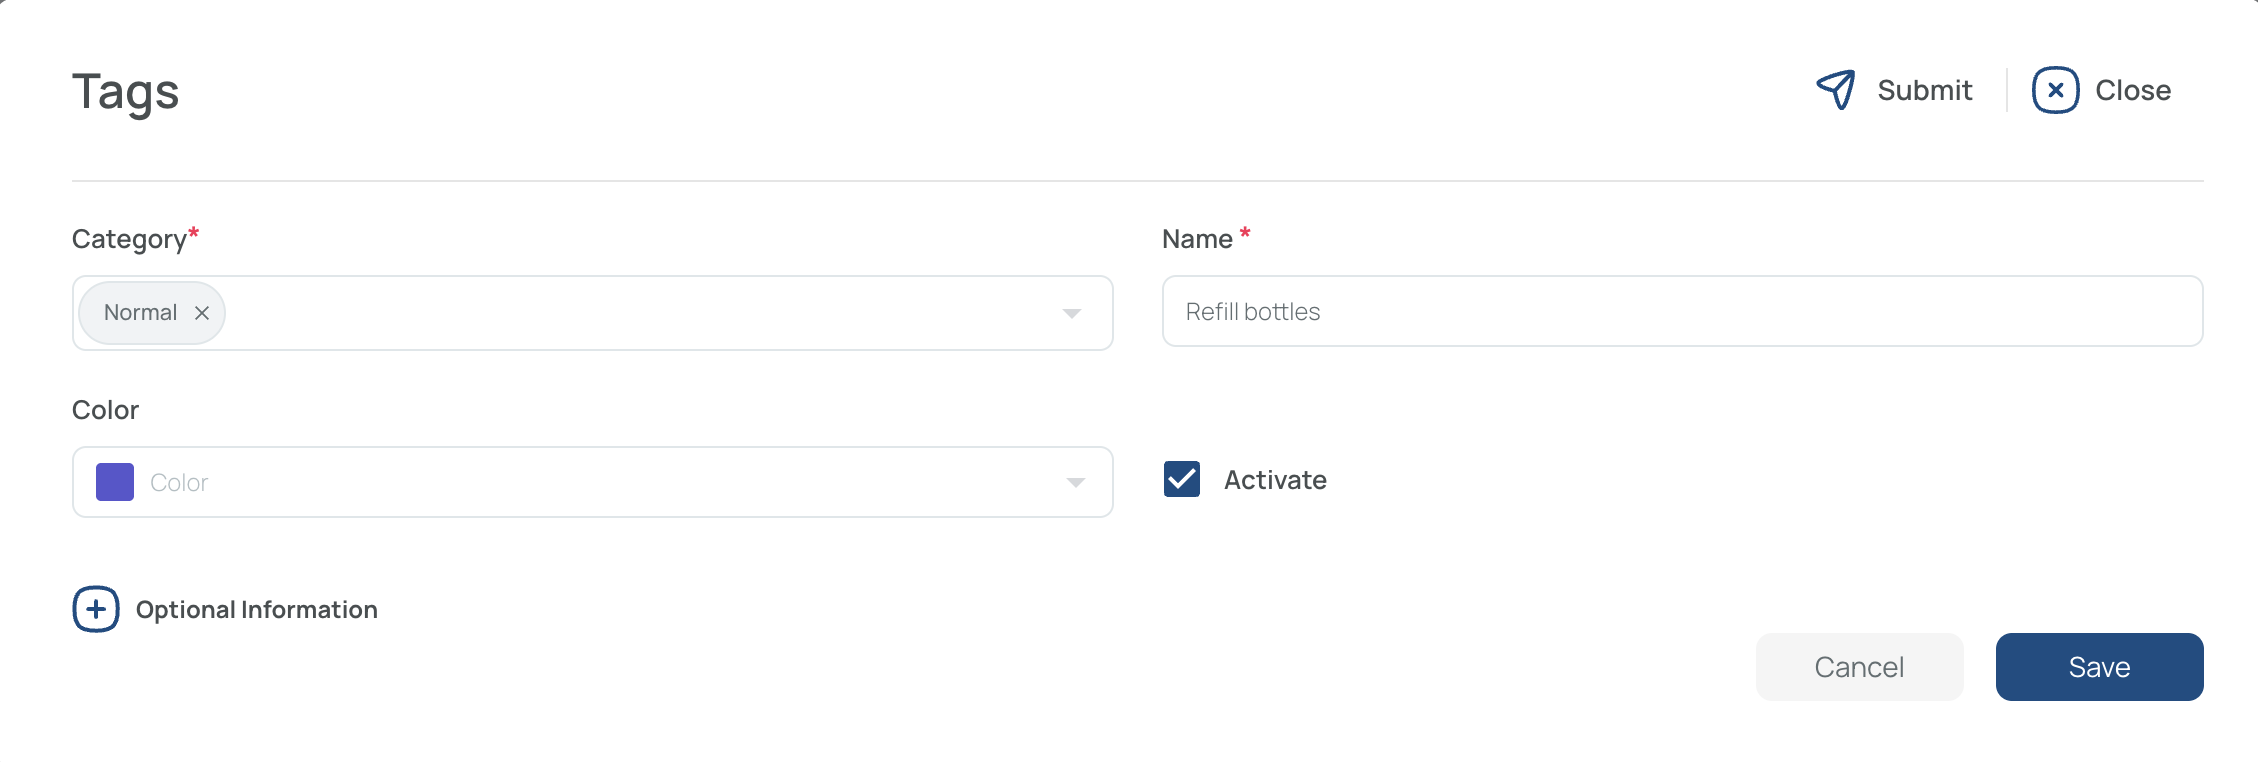
- Category: Determines where the tag can be applied. “Normal” means it can be used with any feature.
- Name: A unique identifier for your tag.
- Color: Select a hue from the color palette.
- Activate: Check the box to enable the tag.
-
Fill Optional Information (Optional)
-
Click the (+) button in the tags interface to expand optional fields:
- City
- State
- Zip code
- Address
-
-
Save and Close
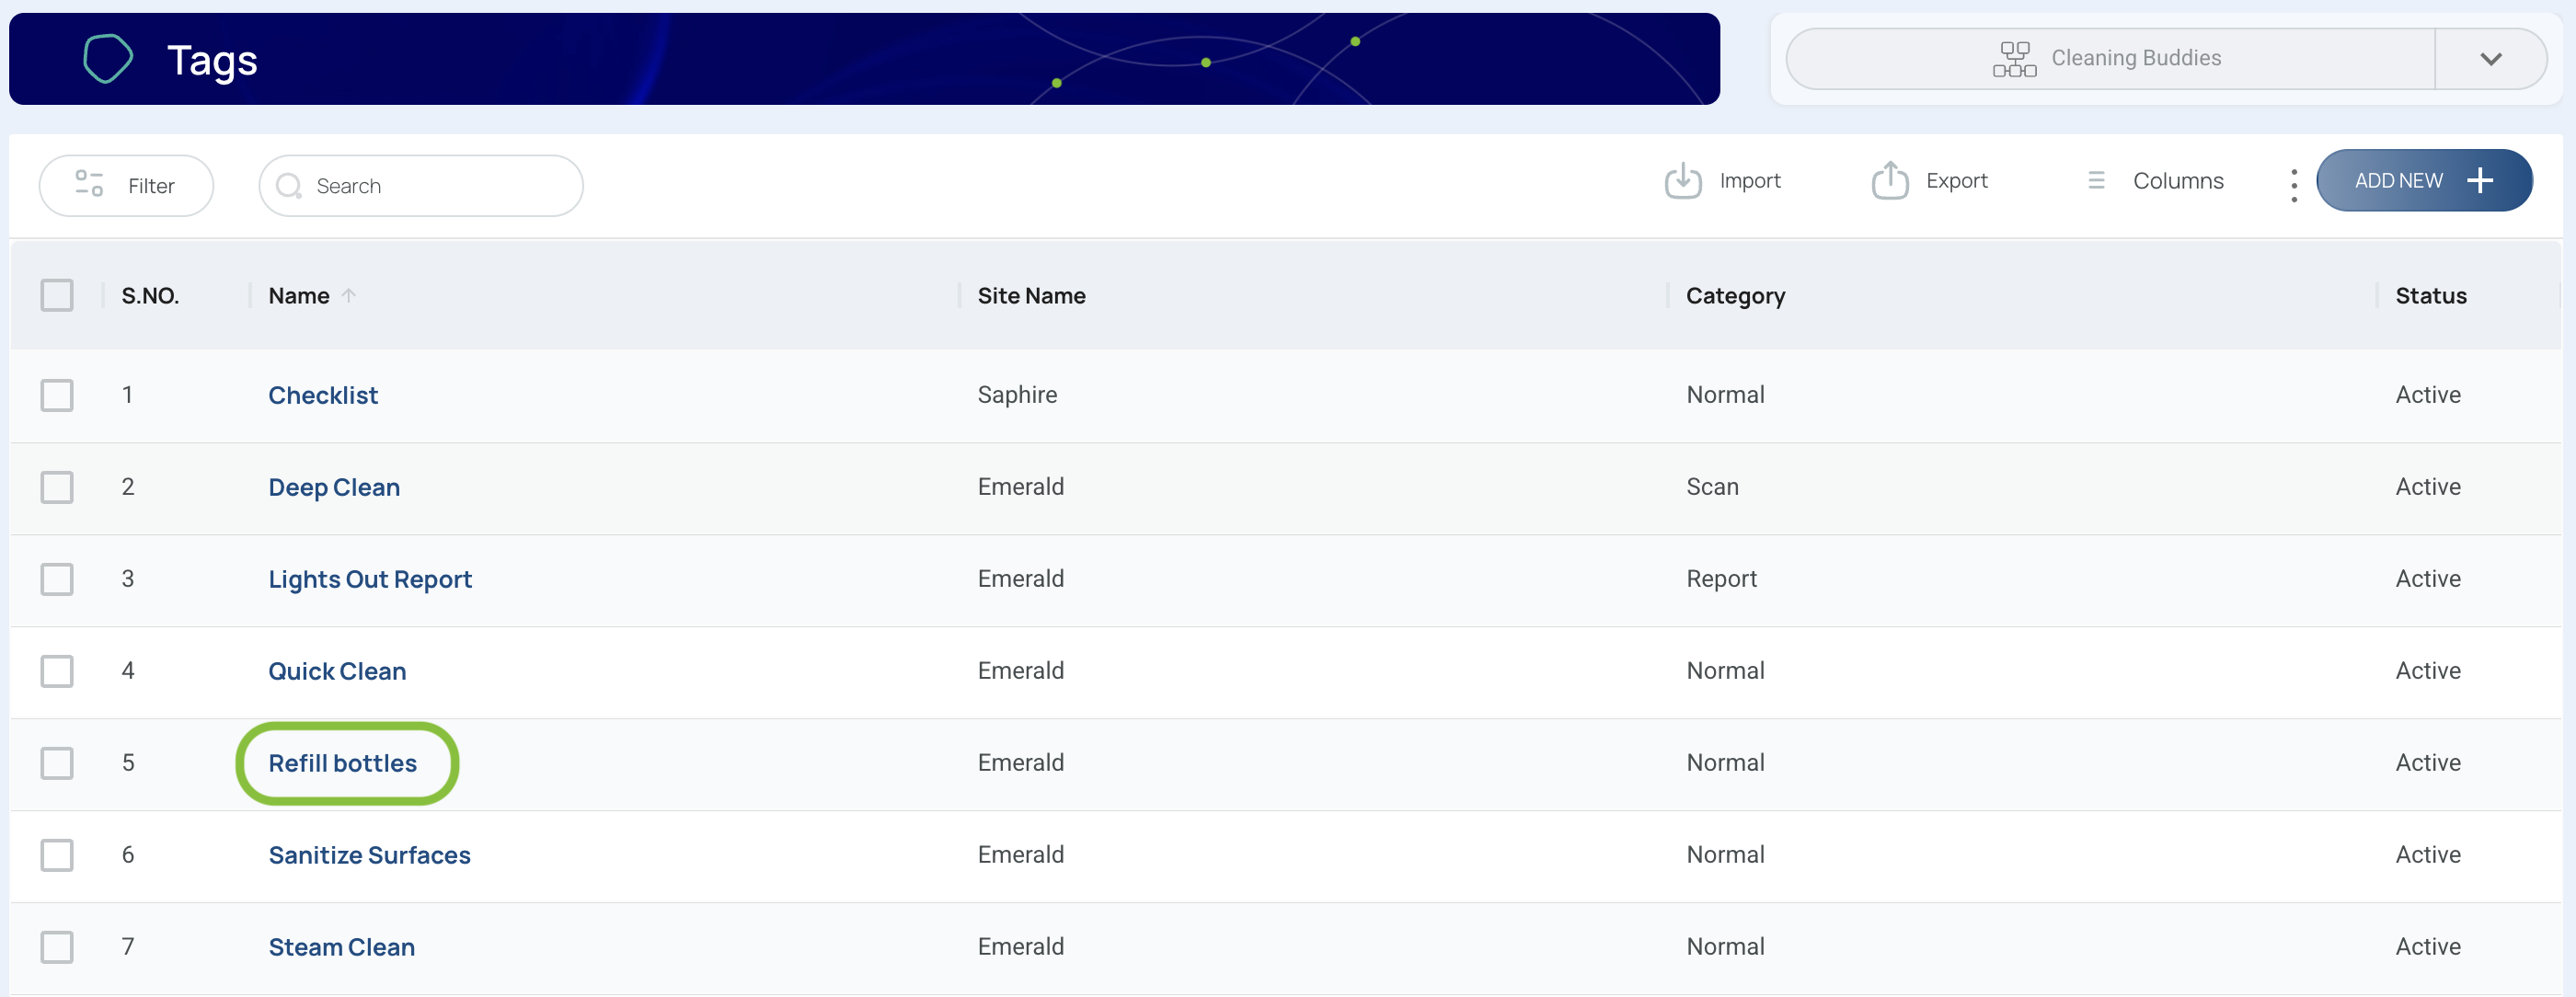
Once created, your tag becomes available for association with elements (e.g., tasks, scan points, forms) within its selected category—just look for it in the dropdown when creating or editing those elements.
Edit a Tag
- Click the name of the tag you want to modify.
Note: Only one tag can be edited at a time.
- Update the relevant data.
- Change category, name, color, or optional details like city, state, zip code, and address.
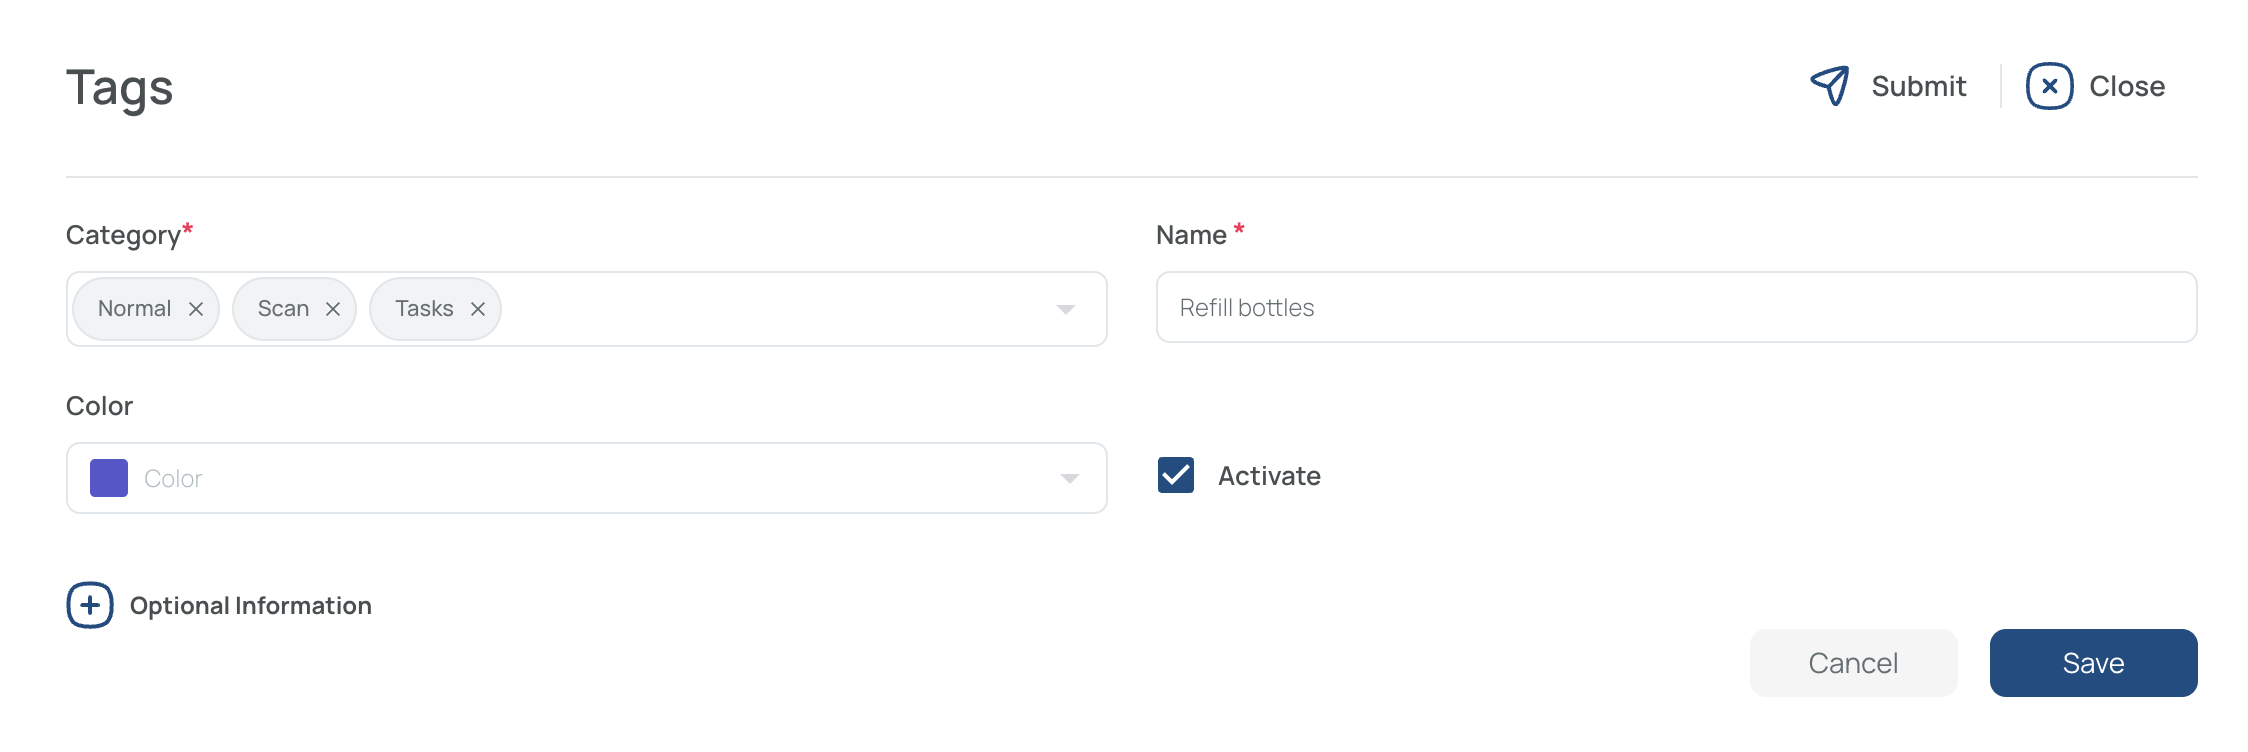
- Save and close
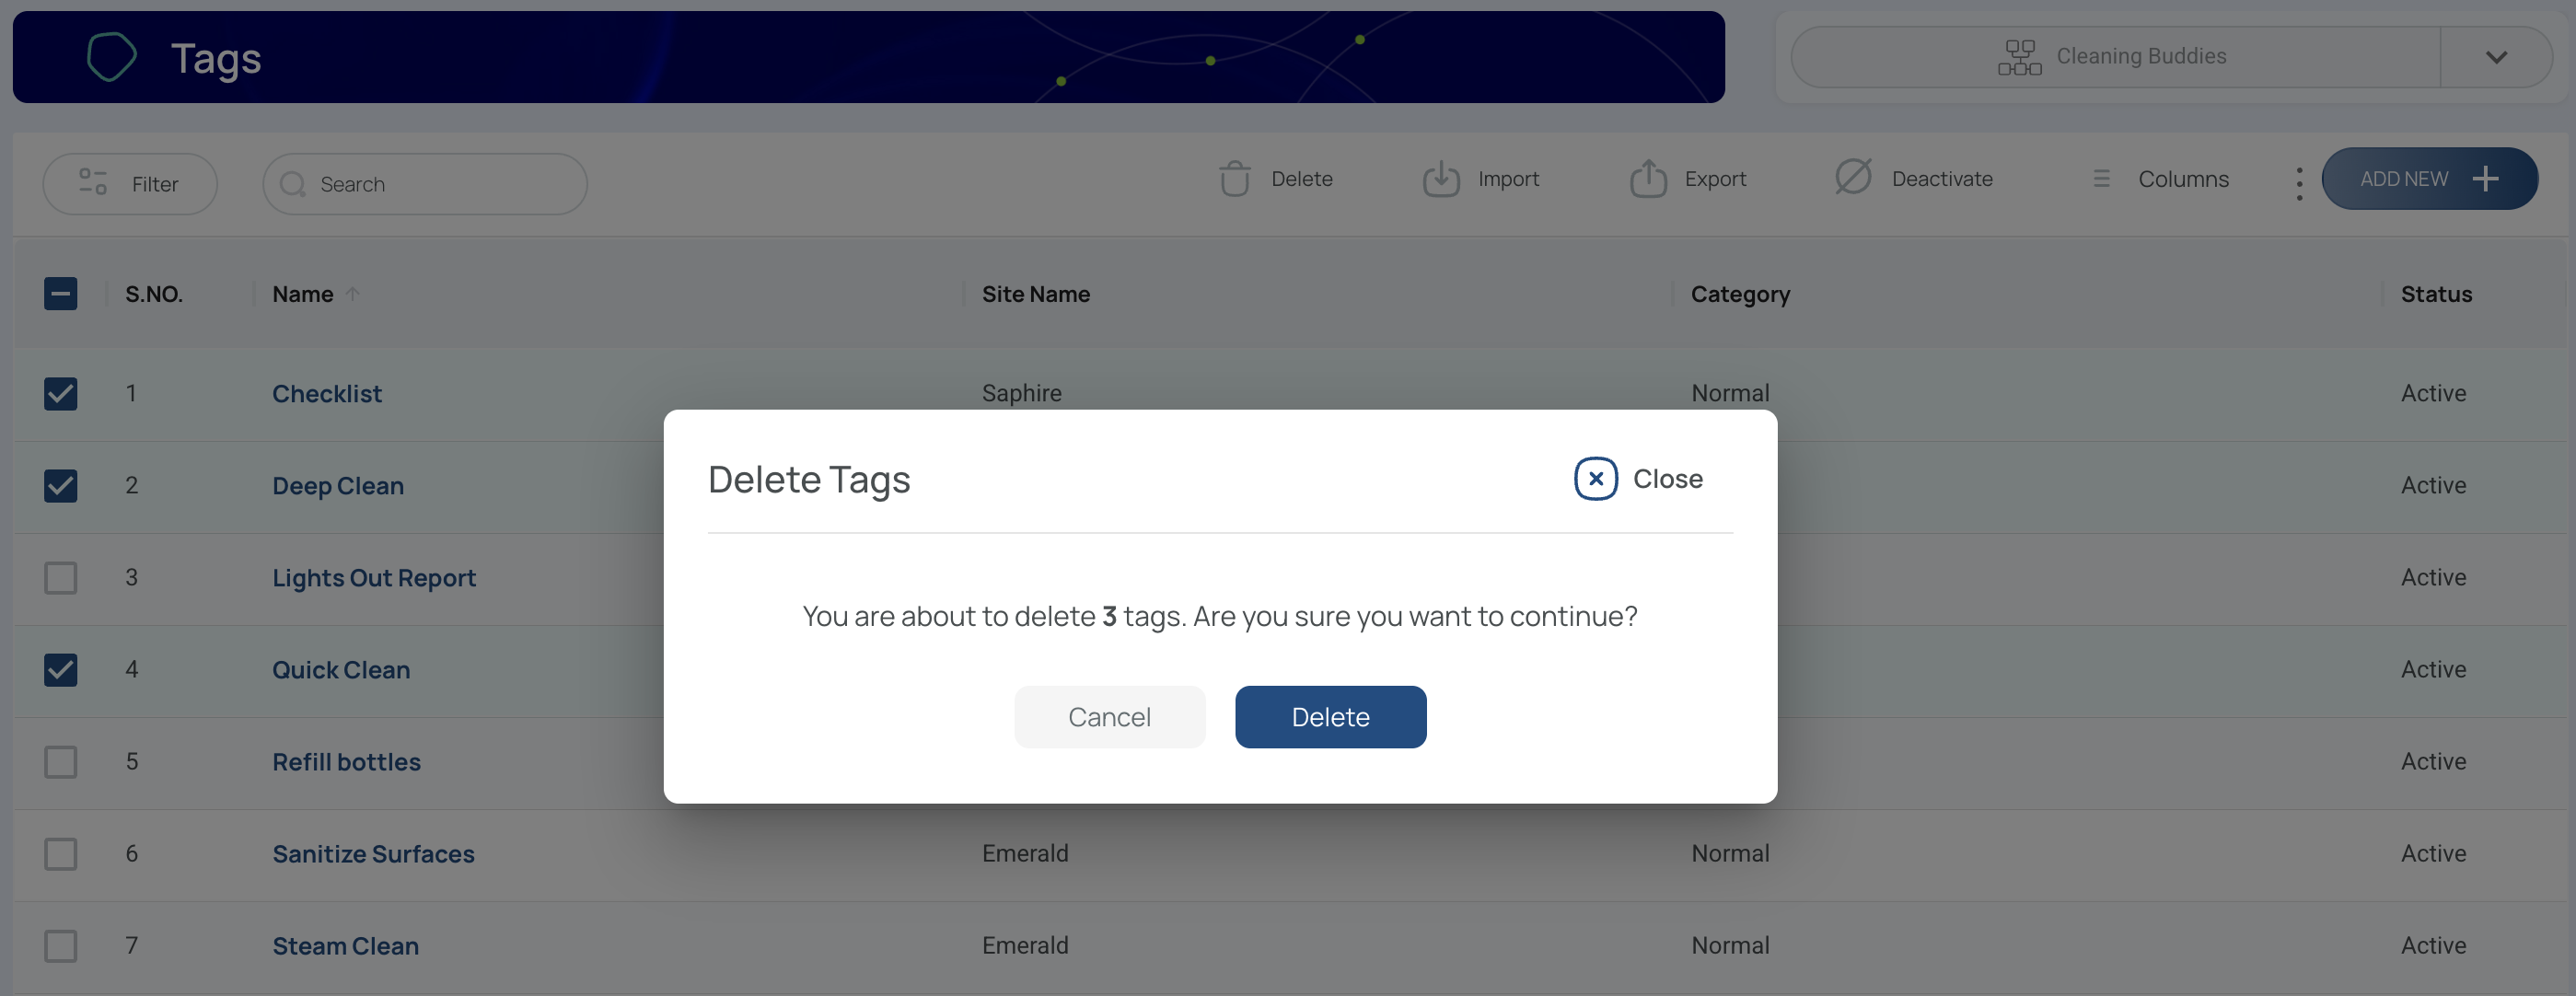
Delete Tags
-
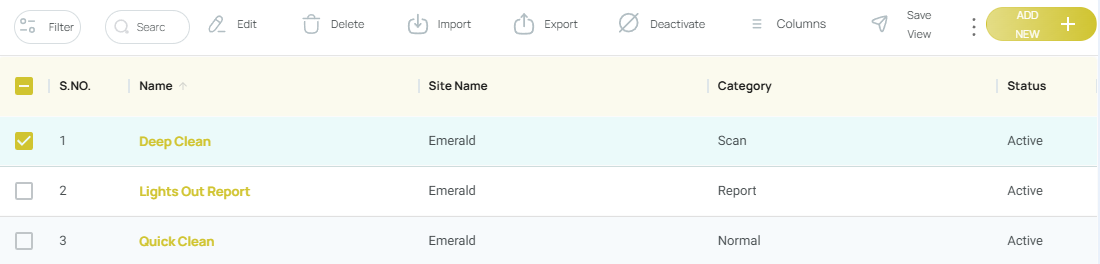
Check the tags you wish to remove
- You can select multiple tags at once.

-
Click “Delete”.
All selected tags will be discarded.
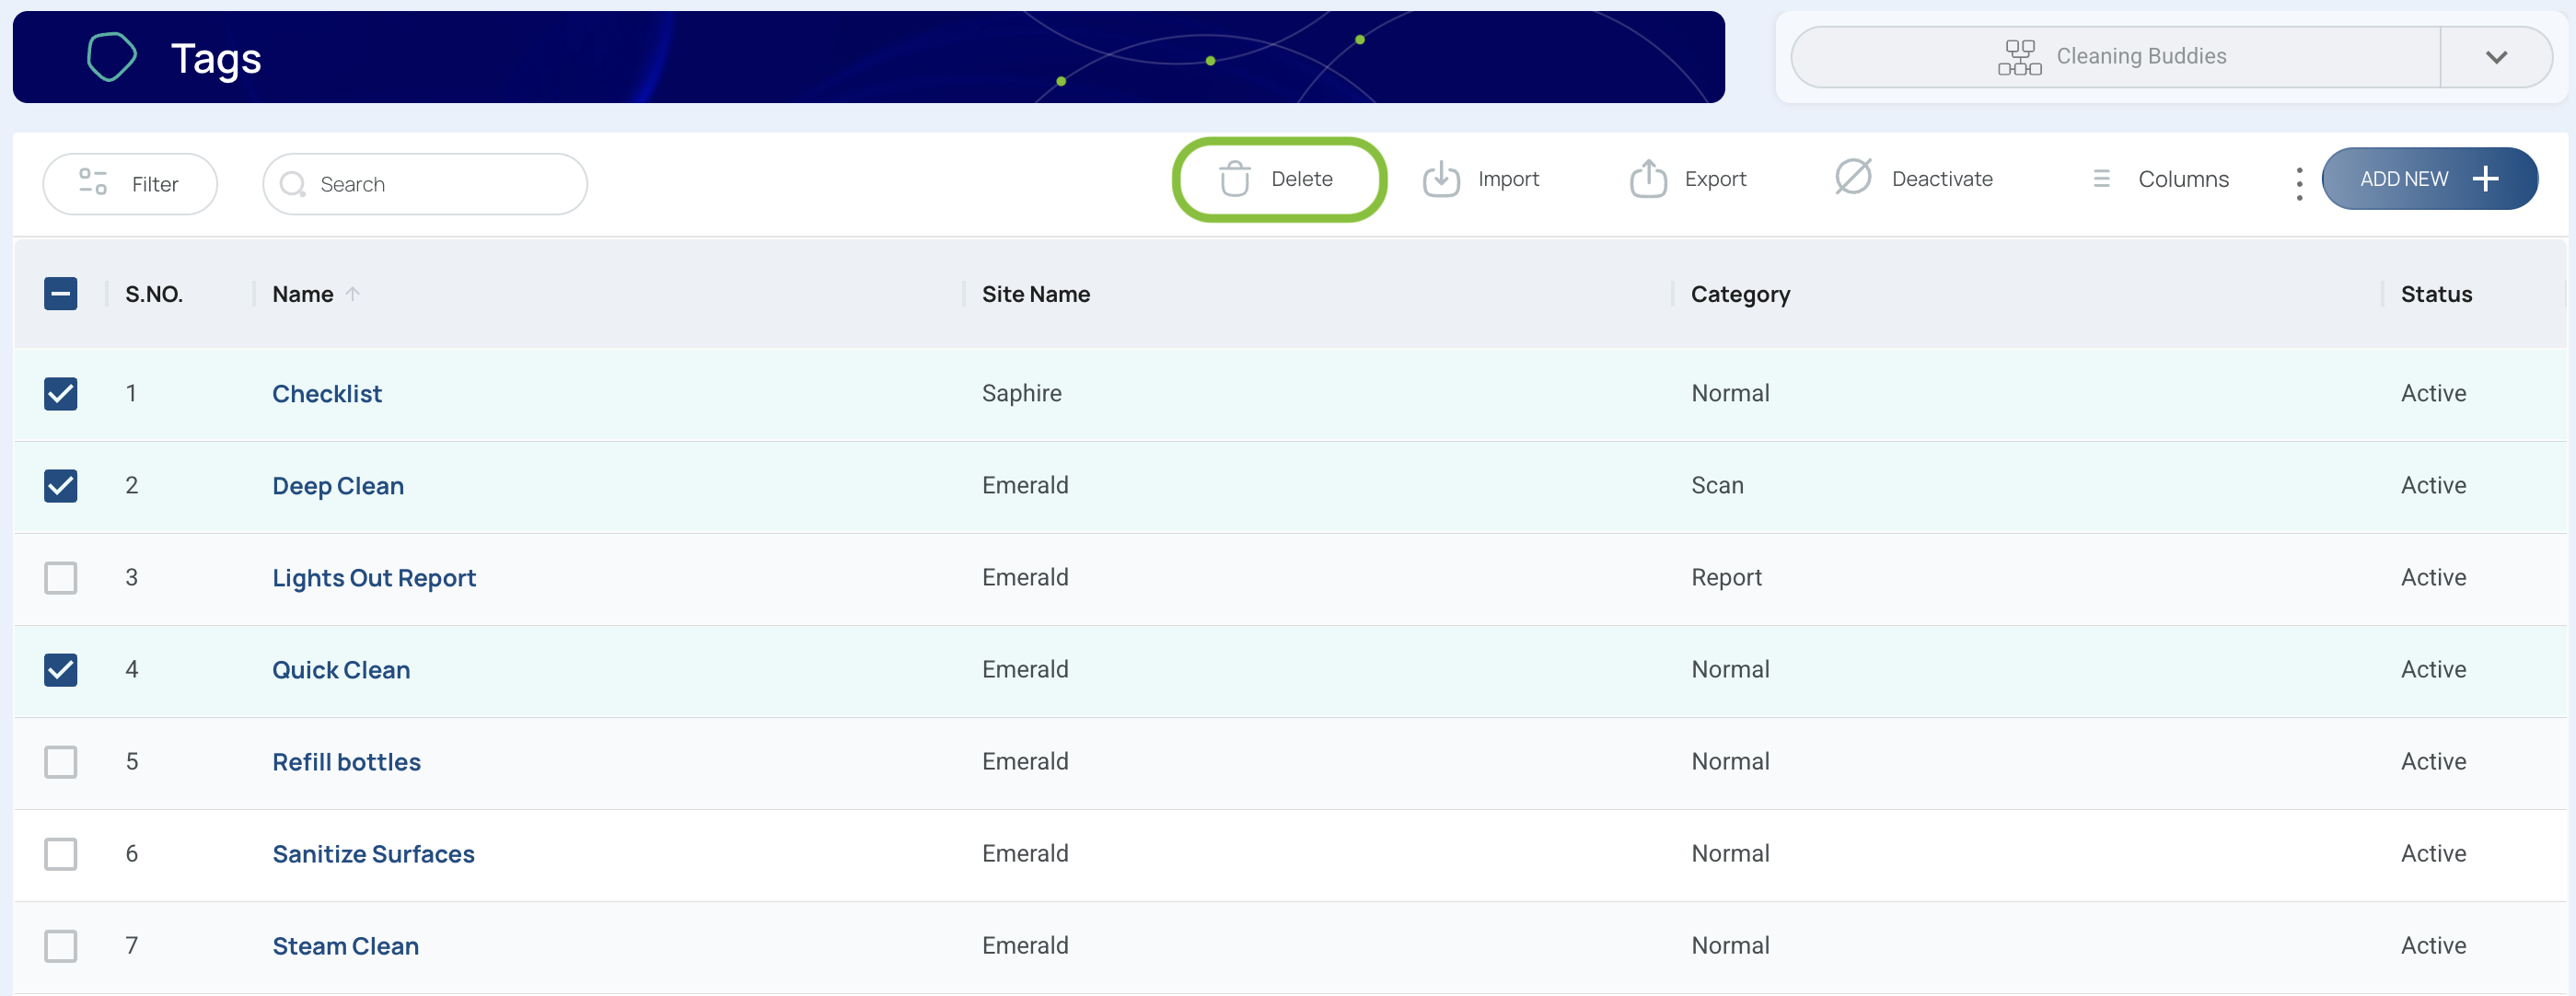
- Confirm
- Verify the count of tags to be deleted.
- Click Delete to finalize.
Export Tags
To export existing tags in Excel format:
- Click “Export”.

- Choose which data to export.
- Export Data or Export Current View. Export Data will export all the data available, and Export Current View will only export either the selection or a customized view.
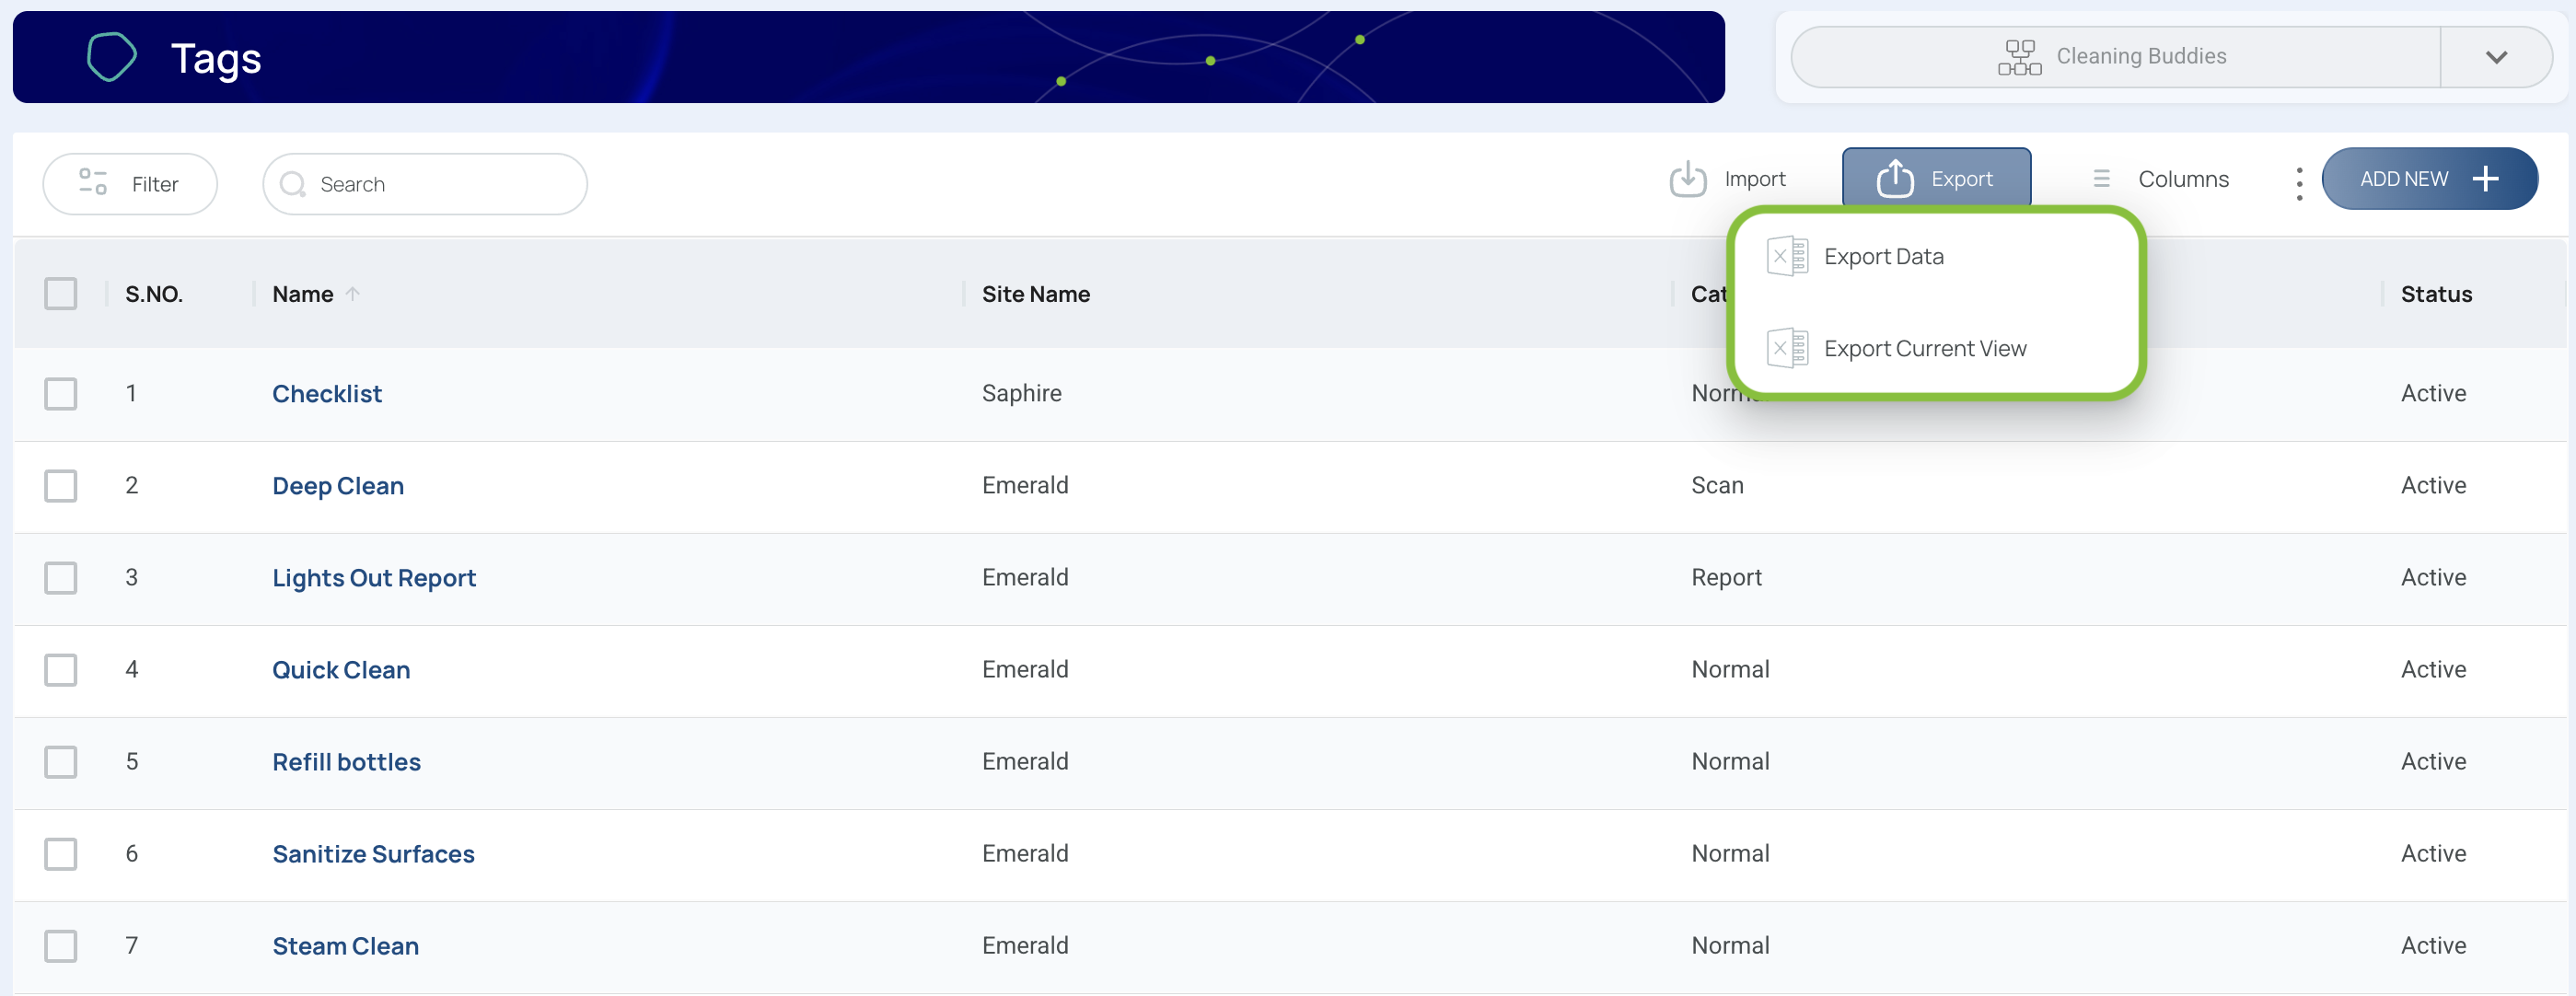
A file in Excel format will be downloaded if it’s within the size limit.
Note: If the file is too large, it will appear in the “Downloads” section on the platform.
Import Tags
- Click the "Import" button.

- Press "Download Template".
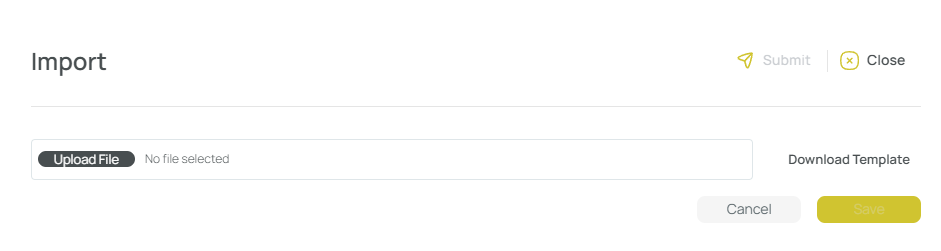
- Fill in the template.

- Send the completed template with the required information to support so that we can assist you with the import process.
Activate or Deactivate Tags
- Select one or more tags that share the same status (either all active or all inactive).
Note: You cannot modify multiple Tags at once if they have different statuses.
- Press the Deactivate button if the selection is currently active, or Activate if the selection is inactive.