Report Scheduler
Learn how to create, manage, and deliver scheduled reports across your organization.
In This Guide You'll Learn
- How to access the Report Scheduler and understand its main tools
- How to create a new report schedule, including format, timing, data range, and delivery settings
- How to manage filters, columns, imports, exports, and active or inactive schedules
A report scheduler automatically generates and emails reports on a cadence you define.
We will continue supporting reports created with the previous version of Report Scheduler, although the reports will include some visual changes.
How to Access the Report Scheduler
- From General Settings → Report Configuration, select Report Scheduler.
General View
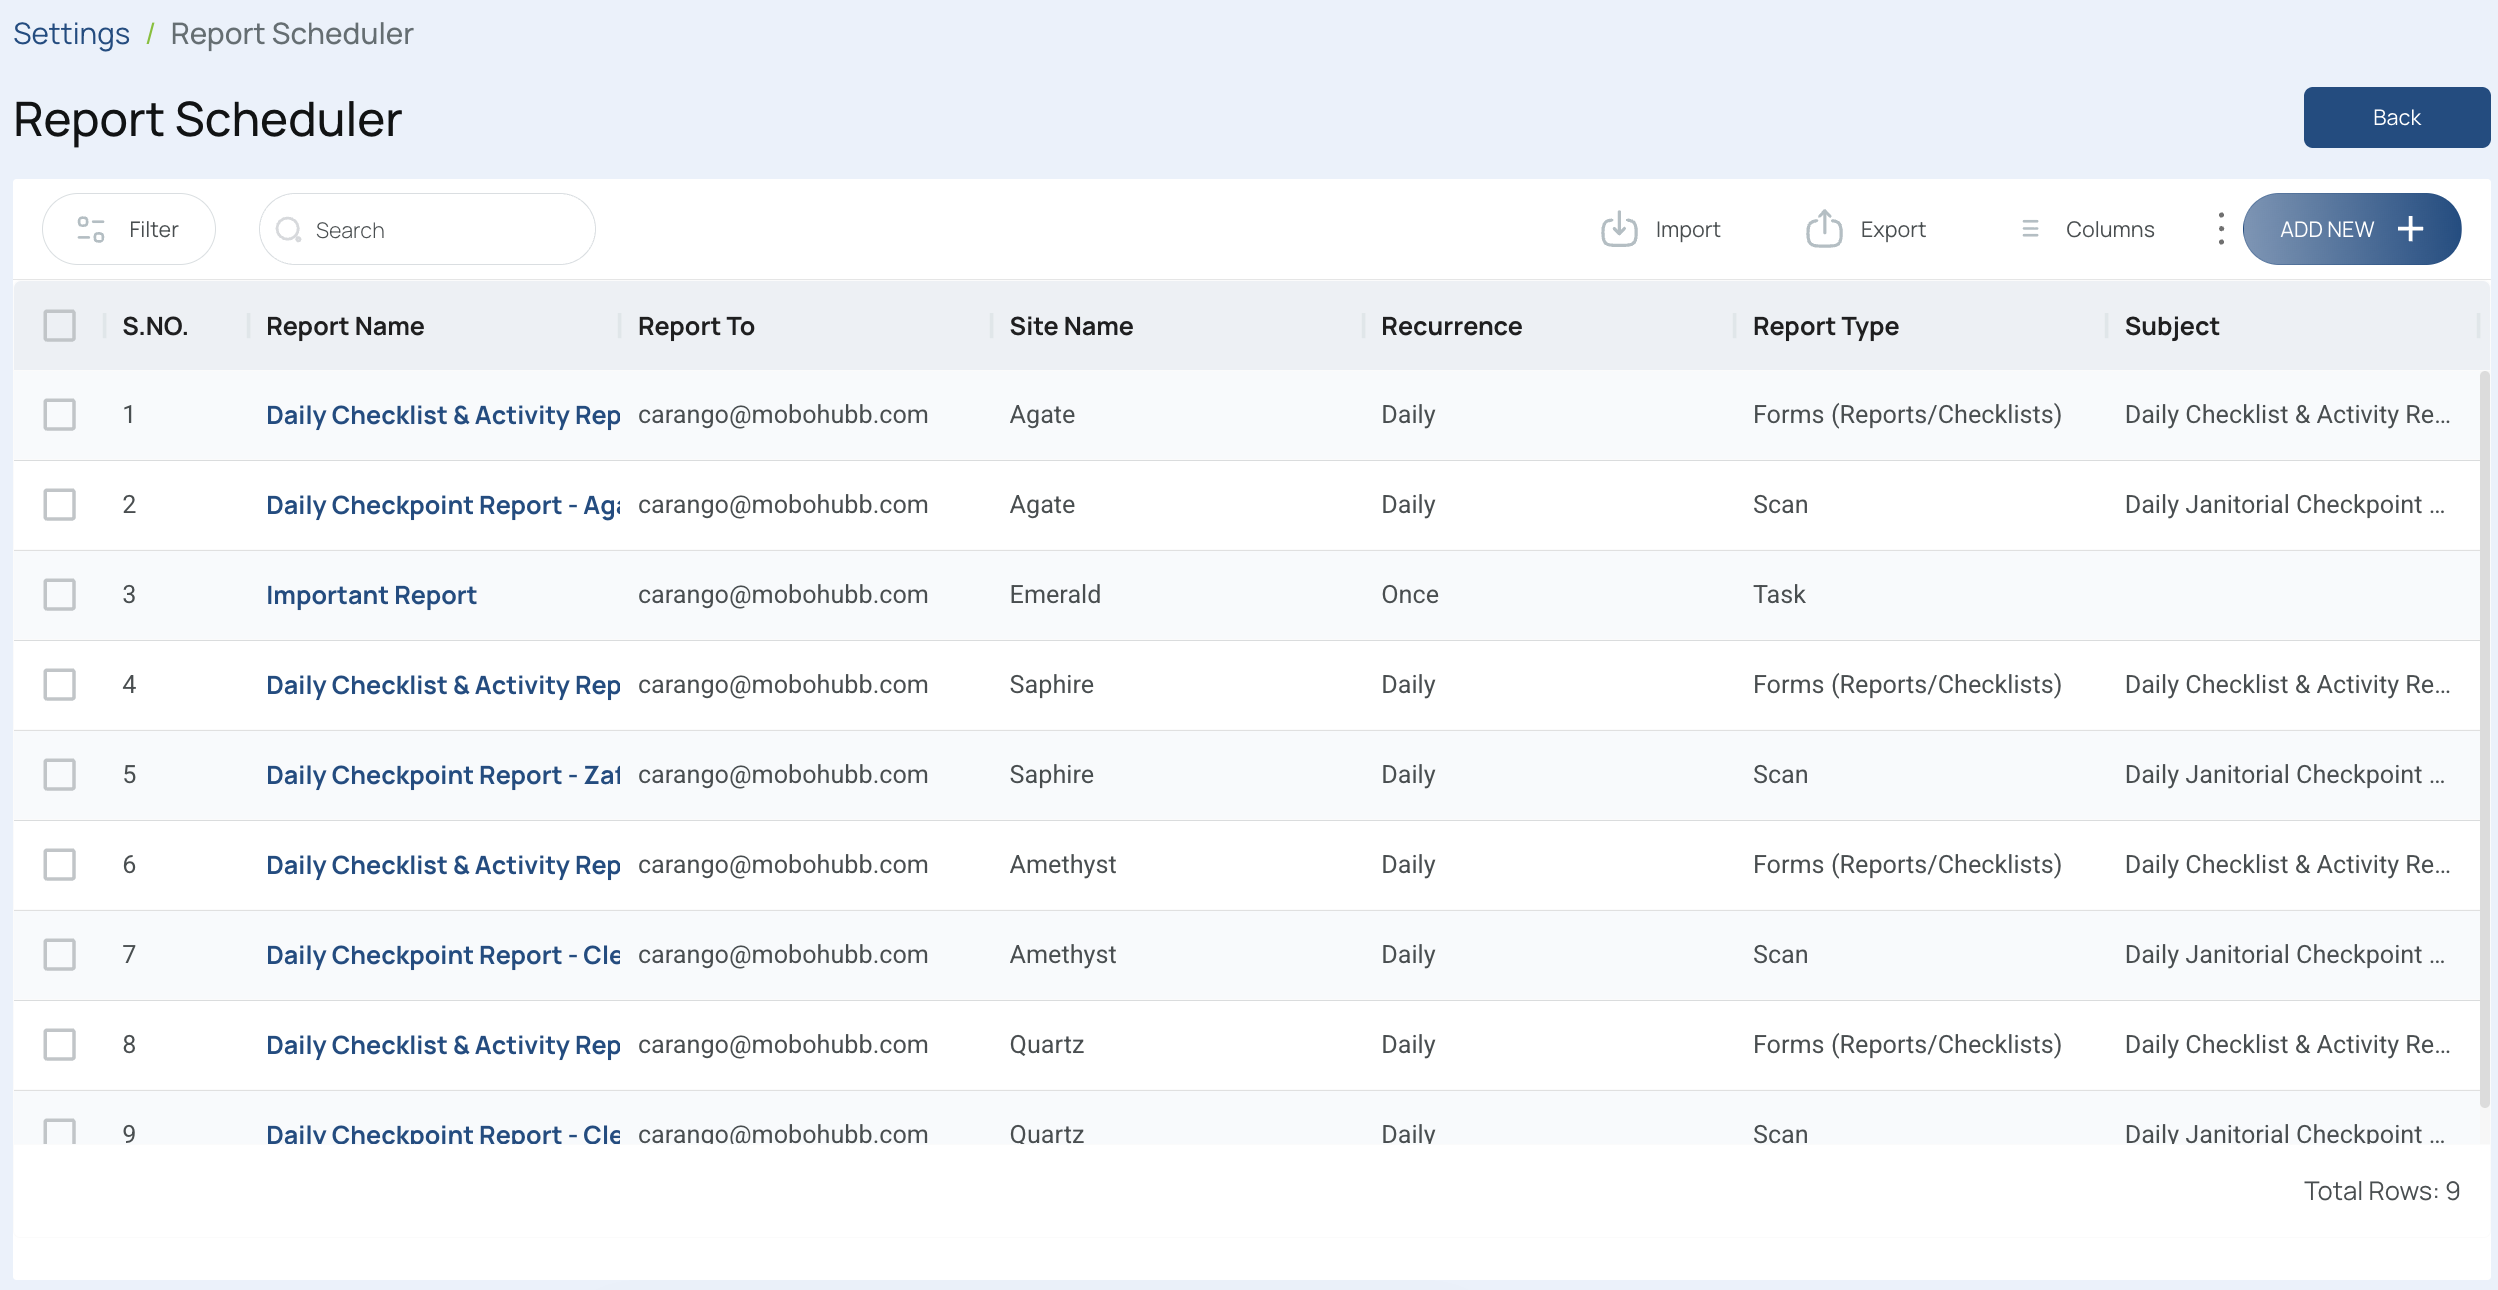
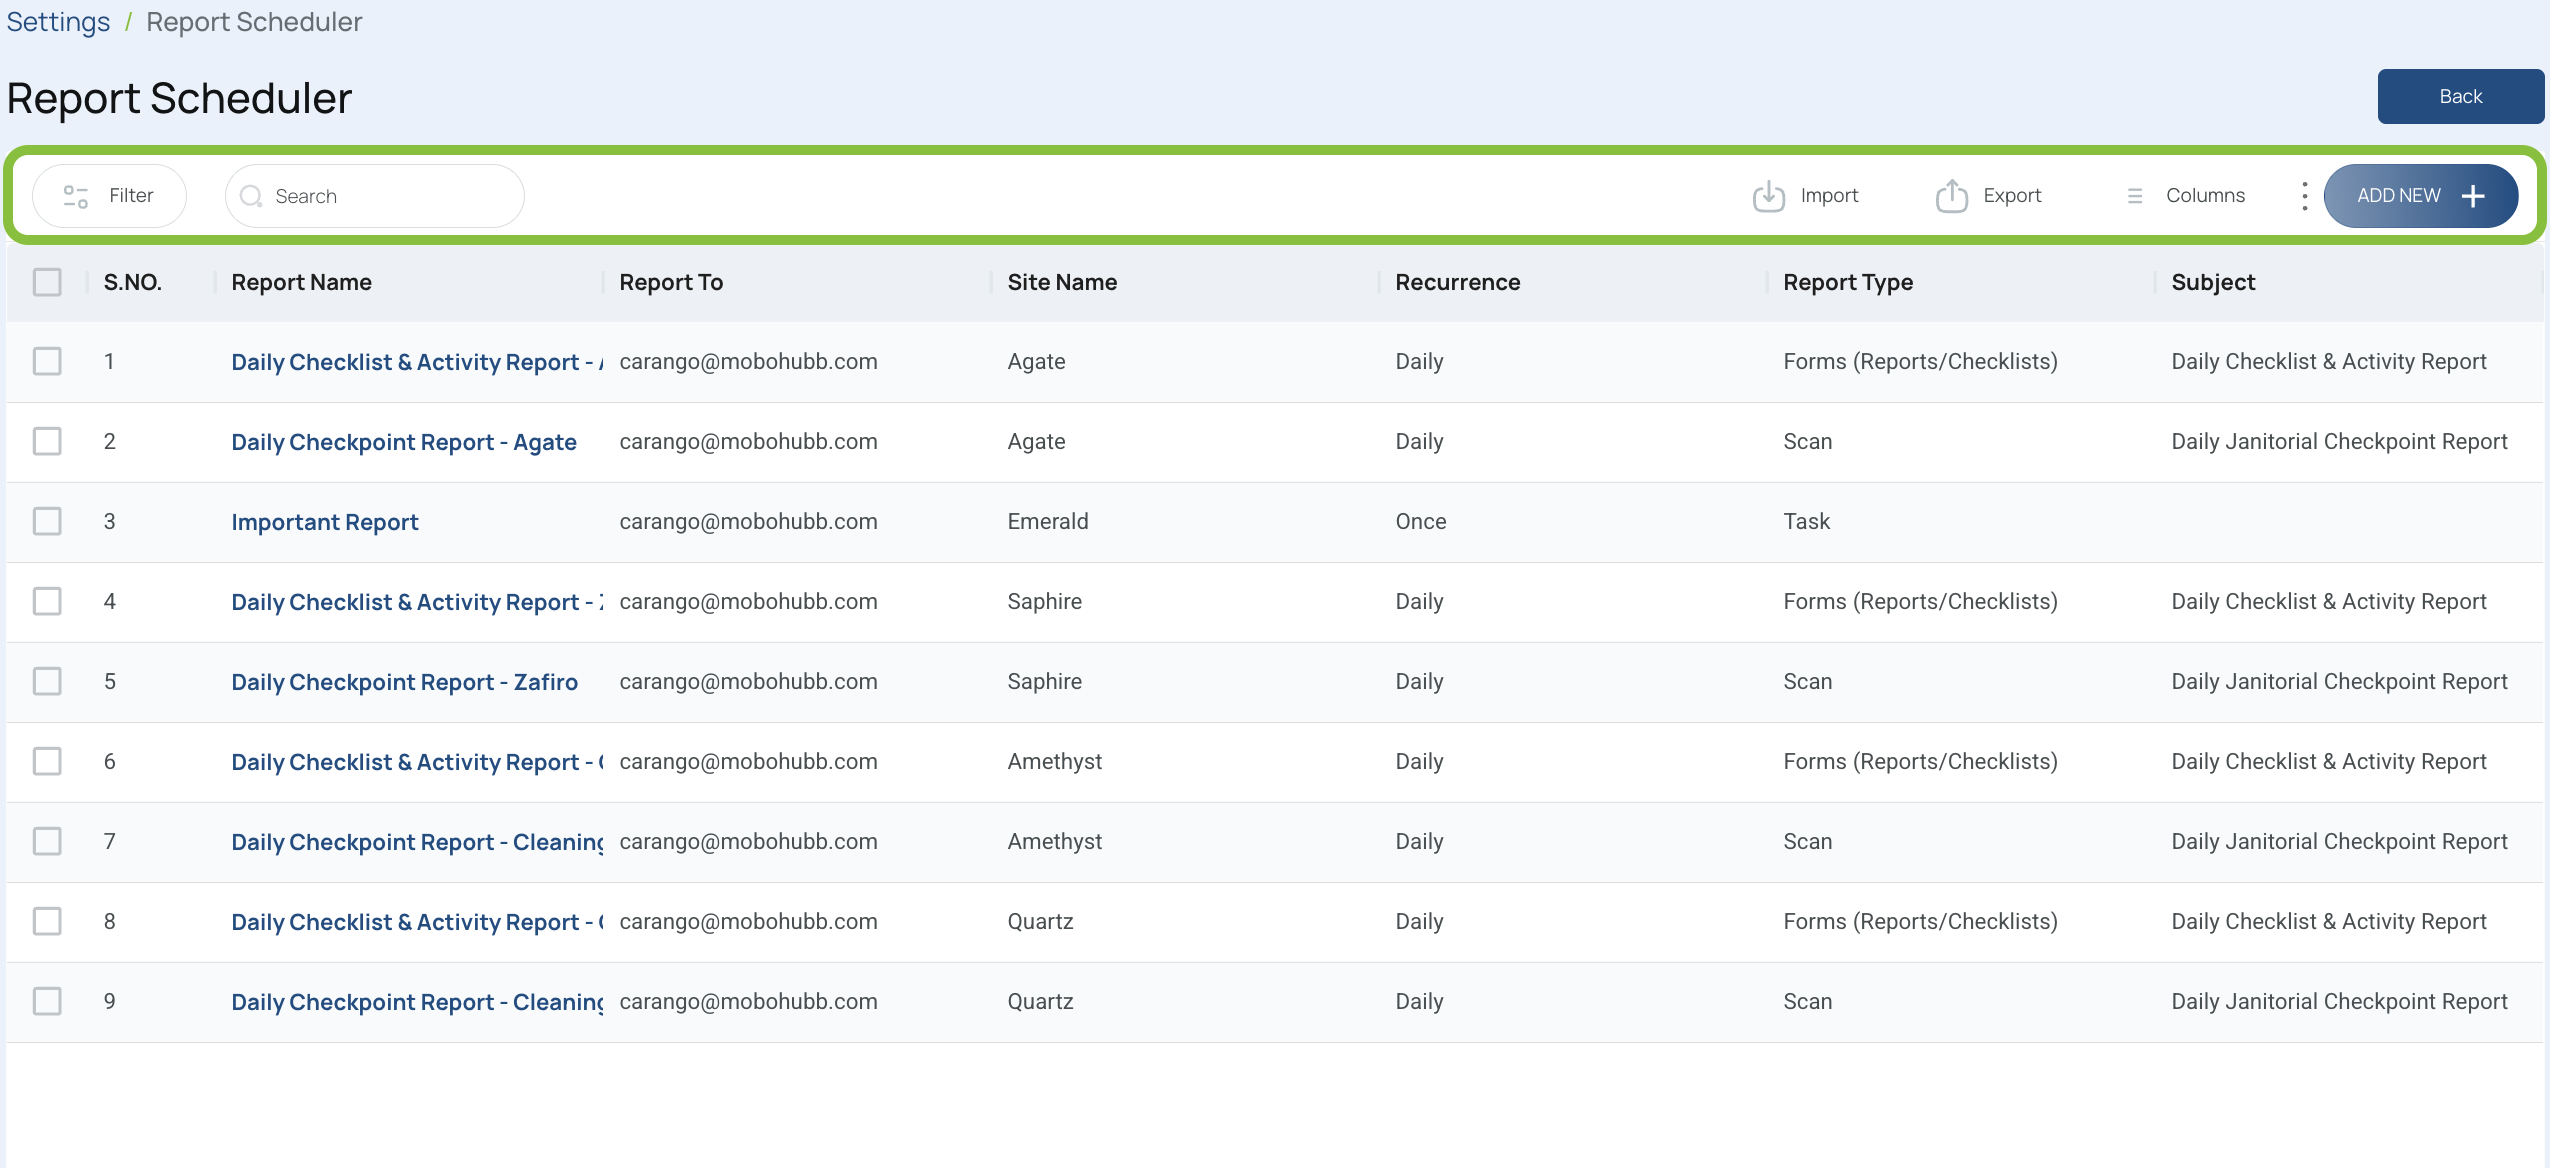
Toolbar Overview
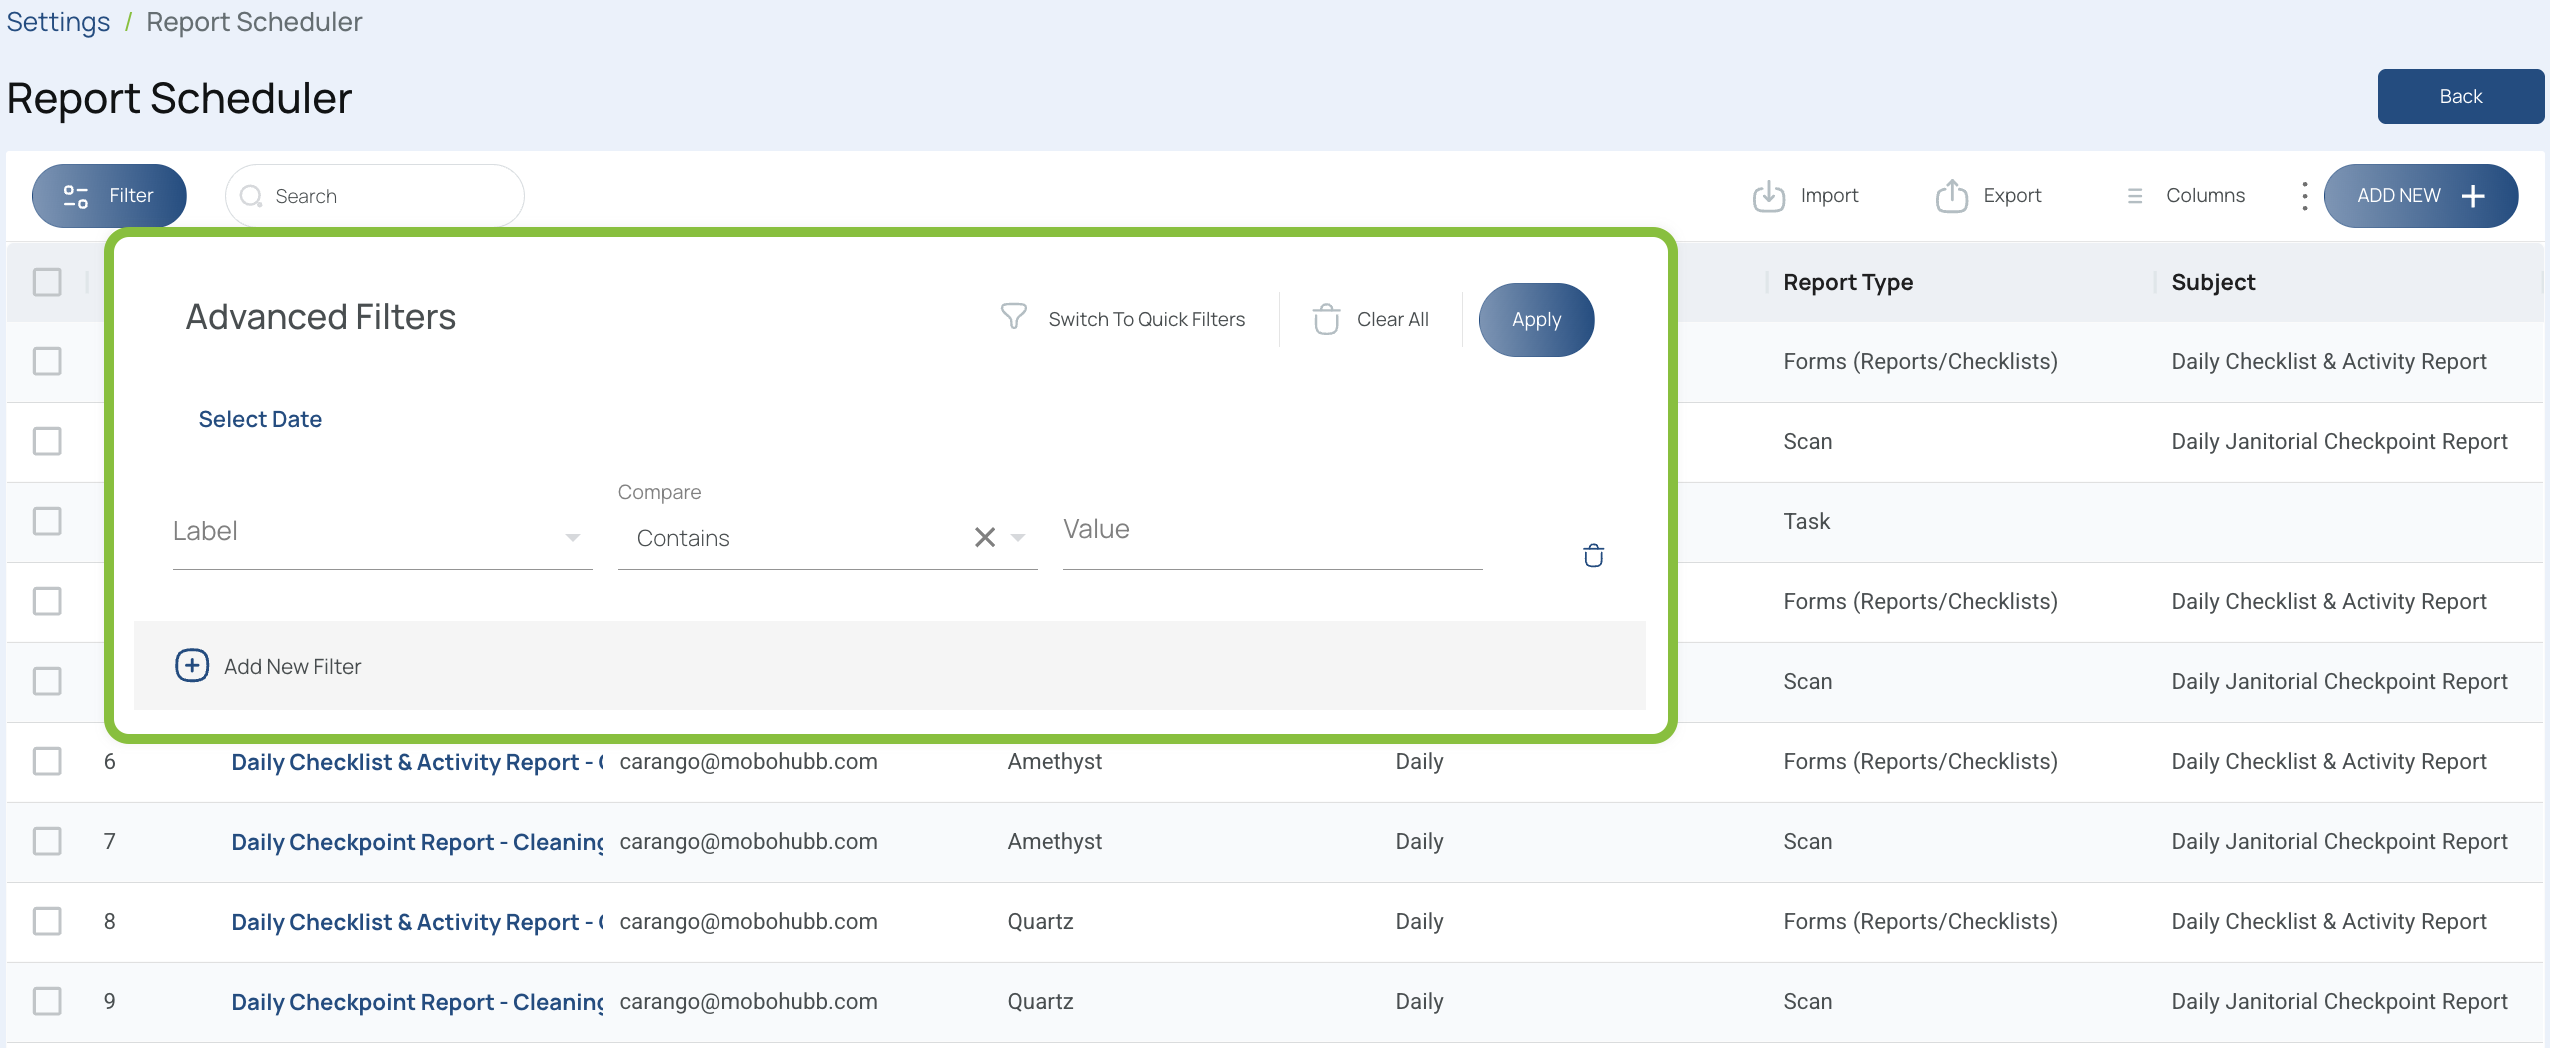
Filters
Use quick and advanced filters to display the report schedules you want on screen.
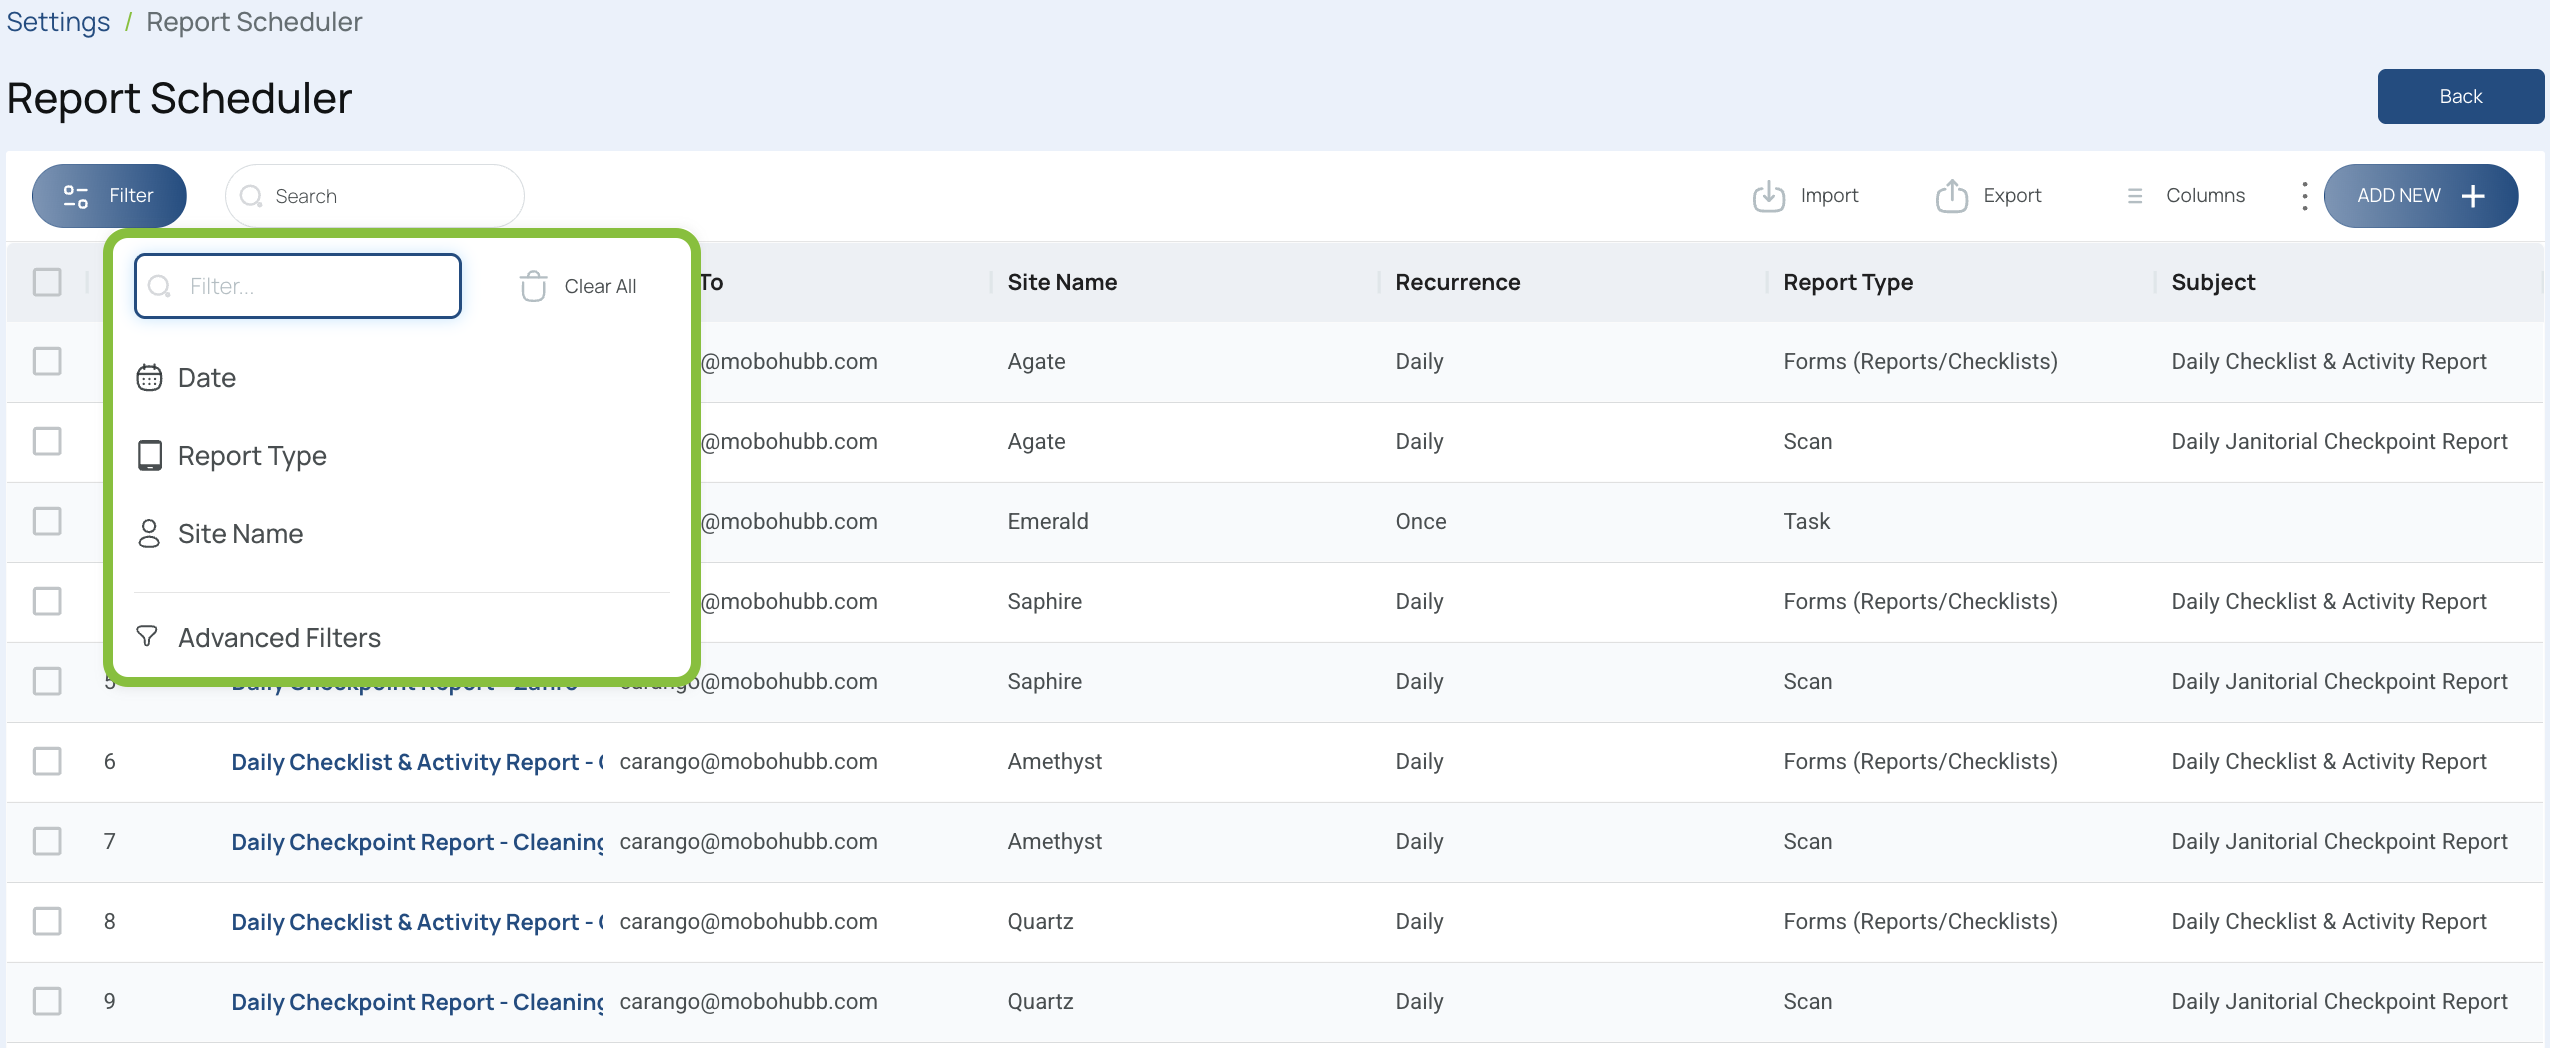
You can filter by date, report type, and site name, or use advanced filters for a more granular approach.
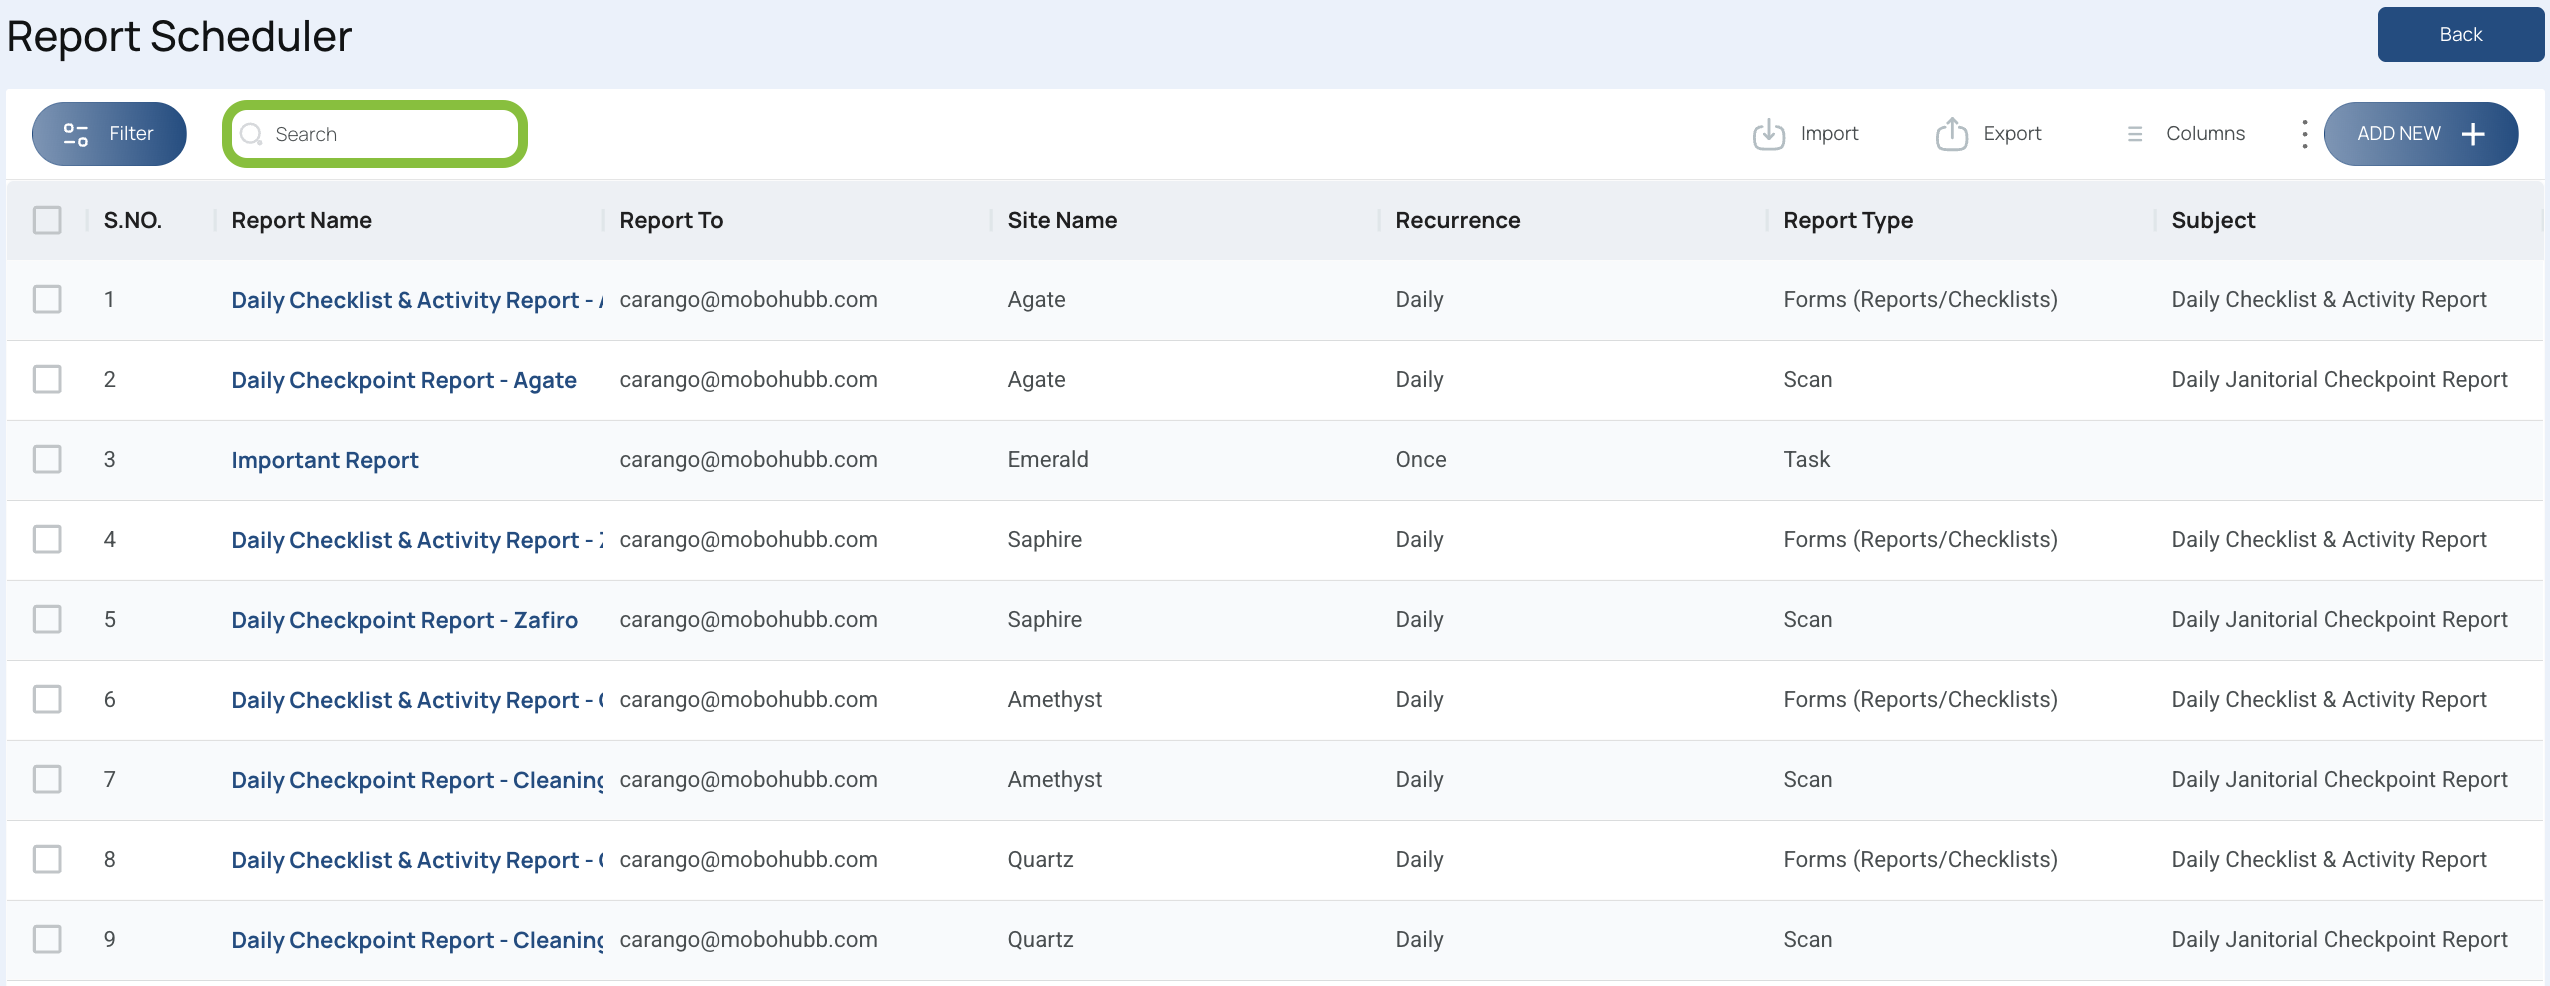
Search Bar
Use the search bar to look for a specific report.
Import and Export
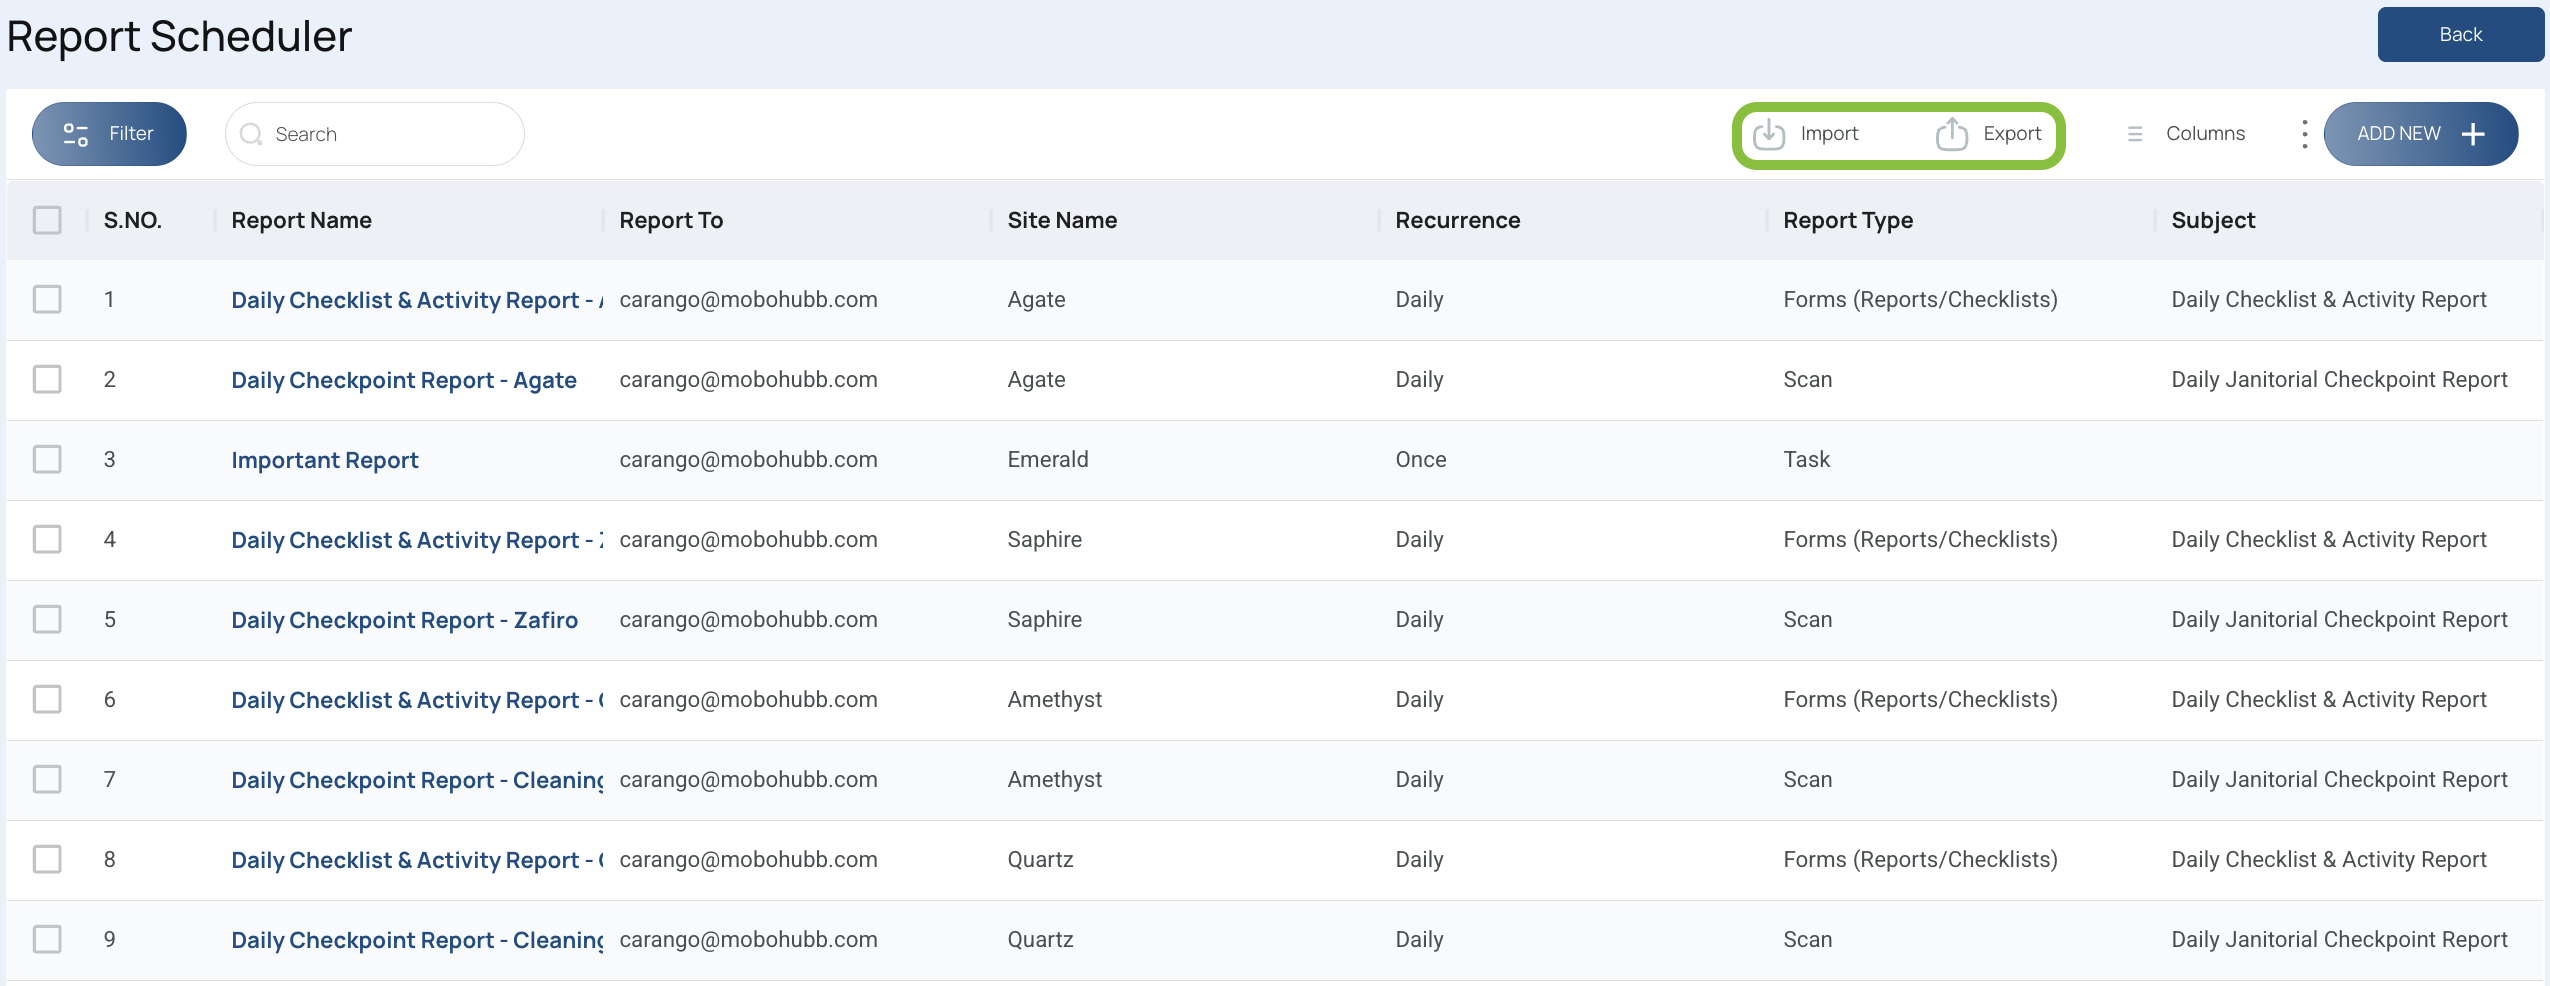
- Export: Use the Export button to download the current view of the Report Scheduler.
- Import: Reach out to support to have report schedules imported into your organization.
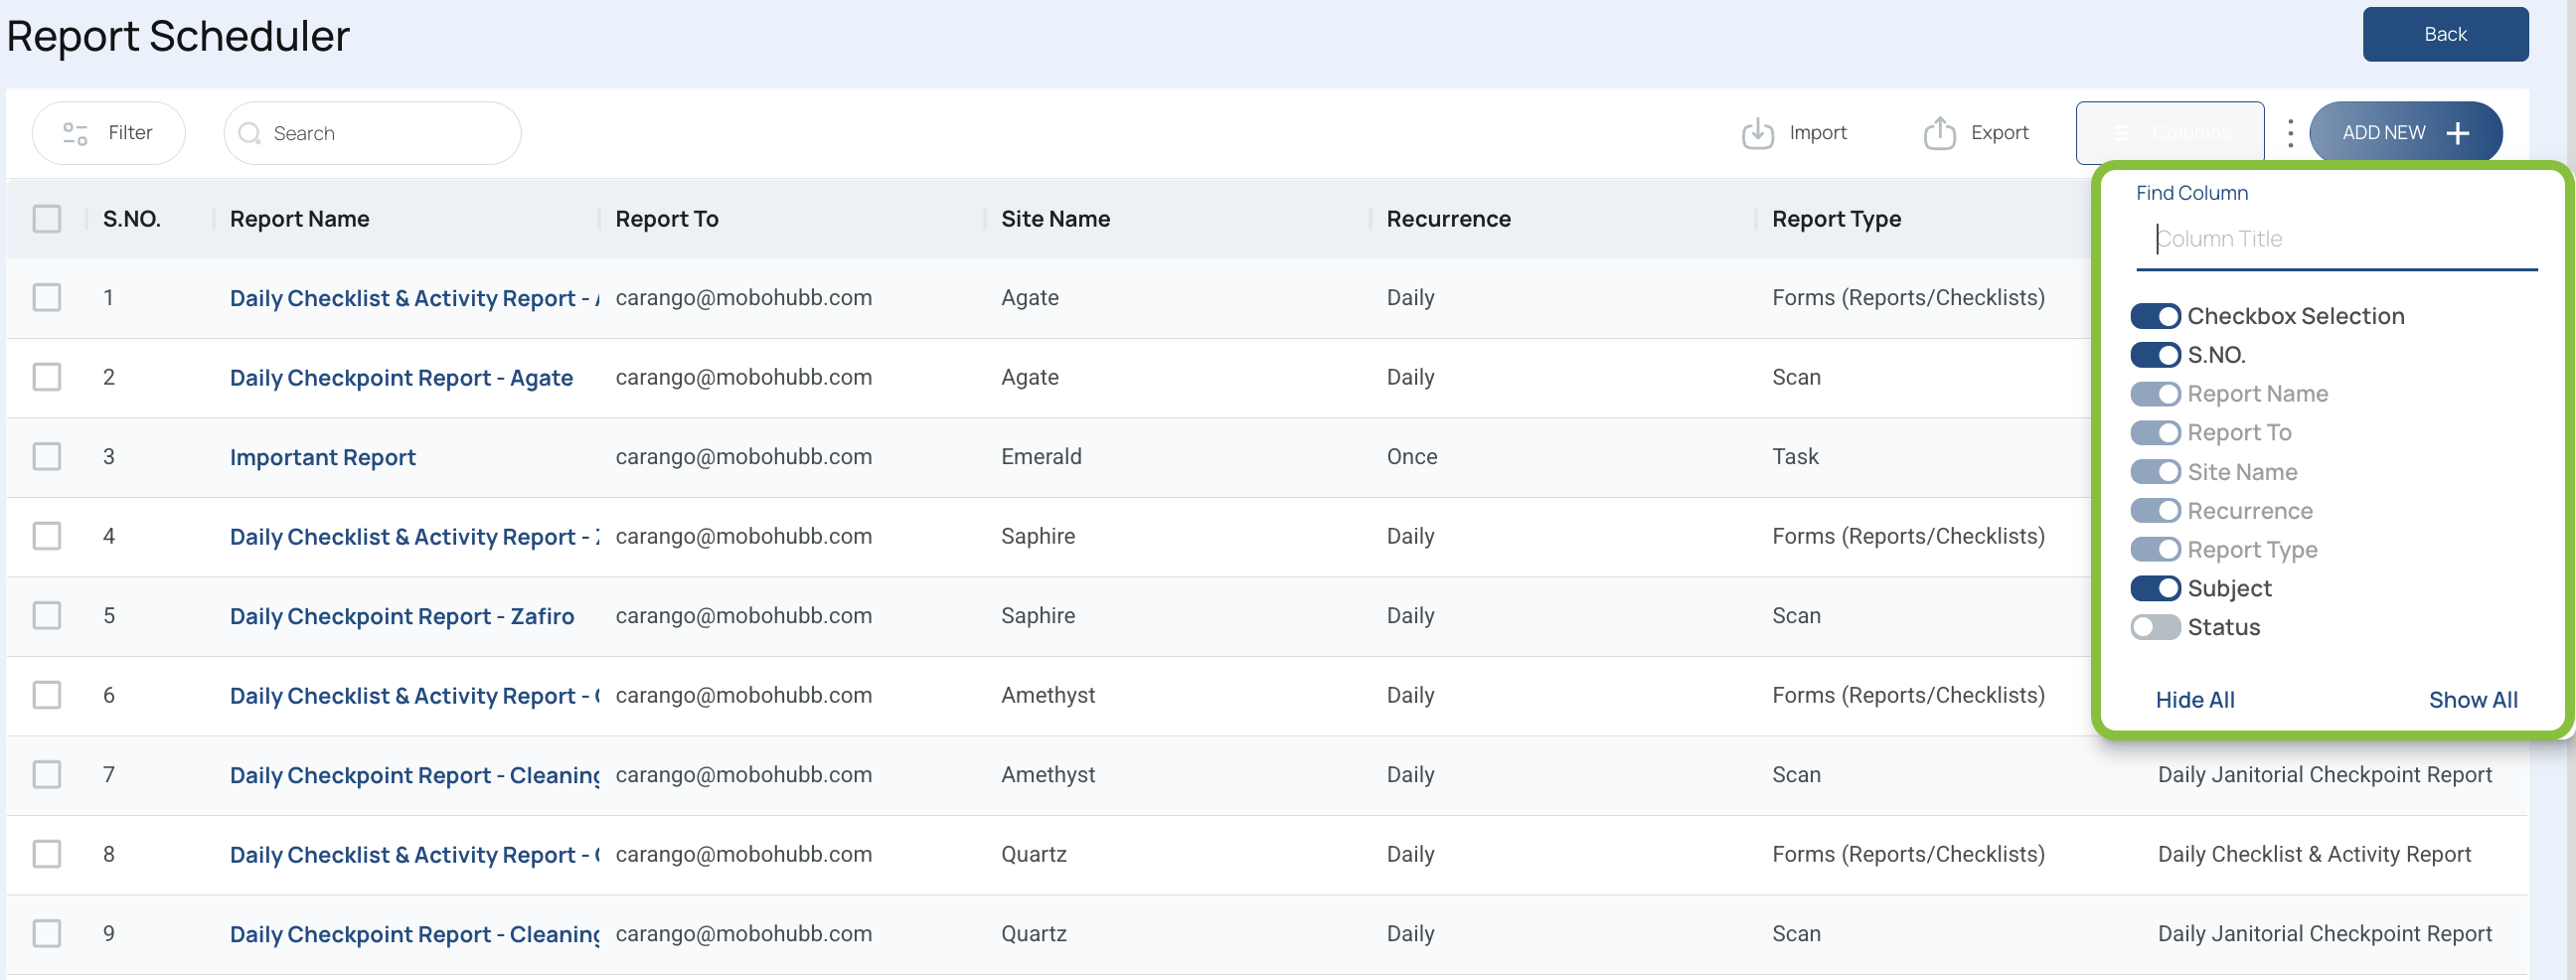
Columns
Show or hide the columns you want visible on screen.
How to Create a New Report Schedule
- Click Add new.
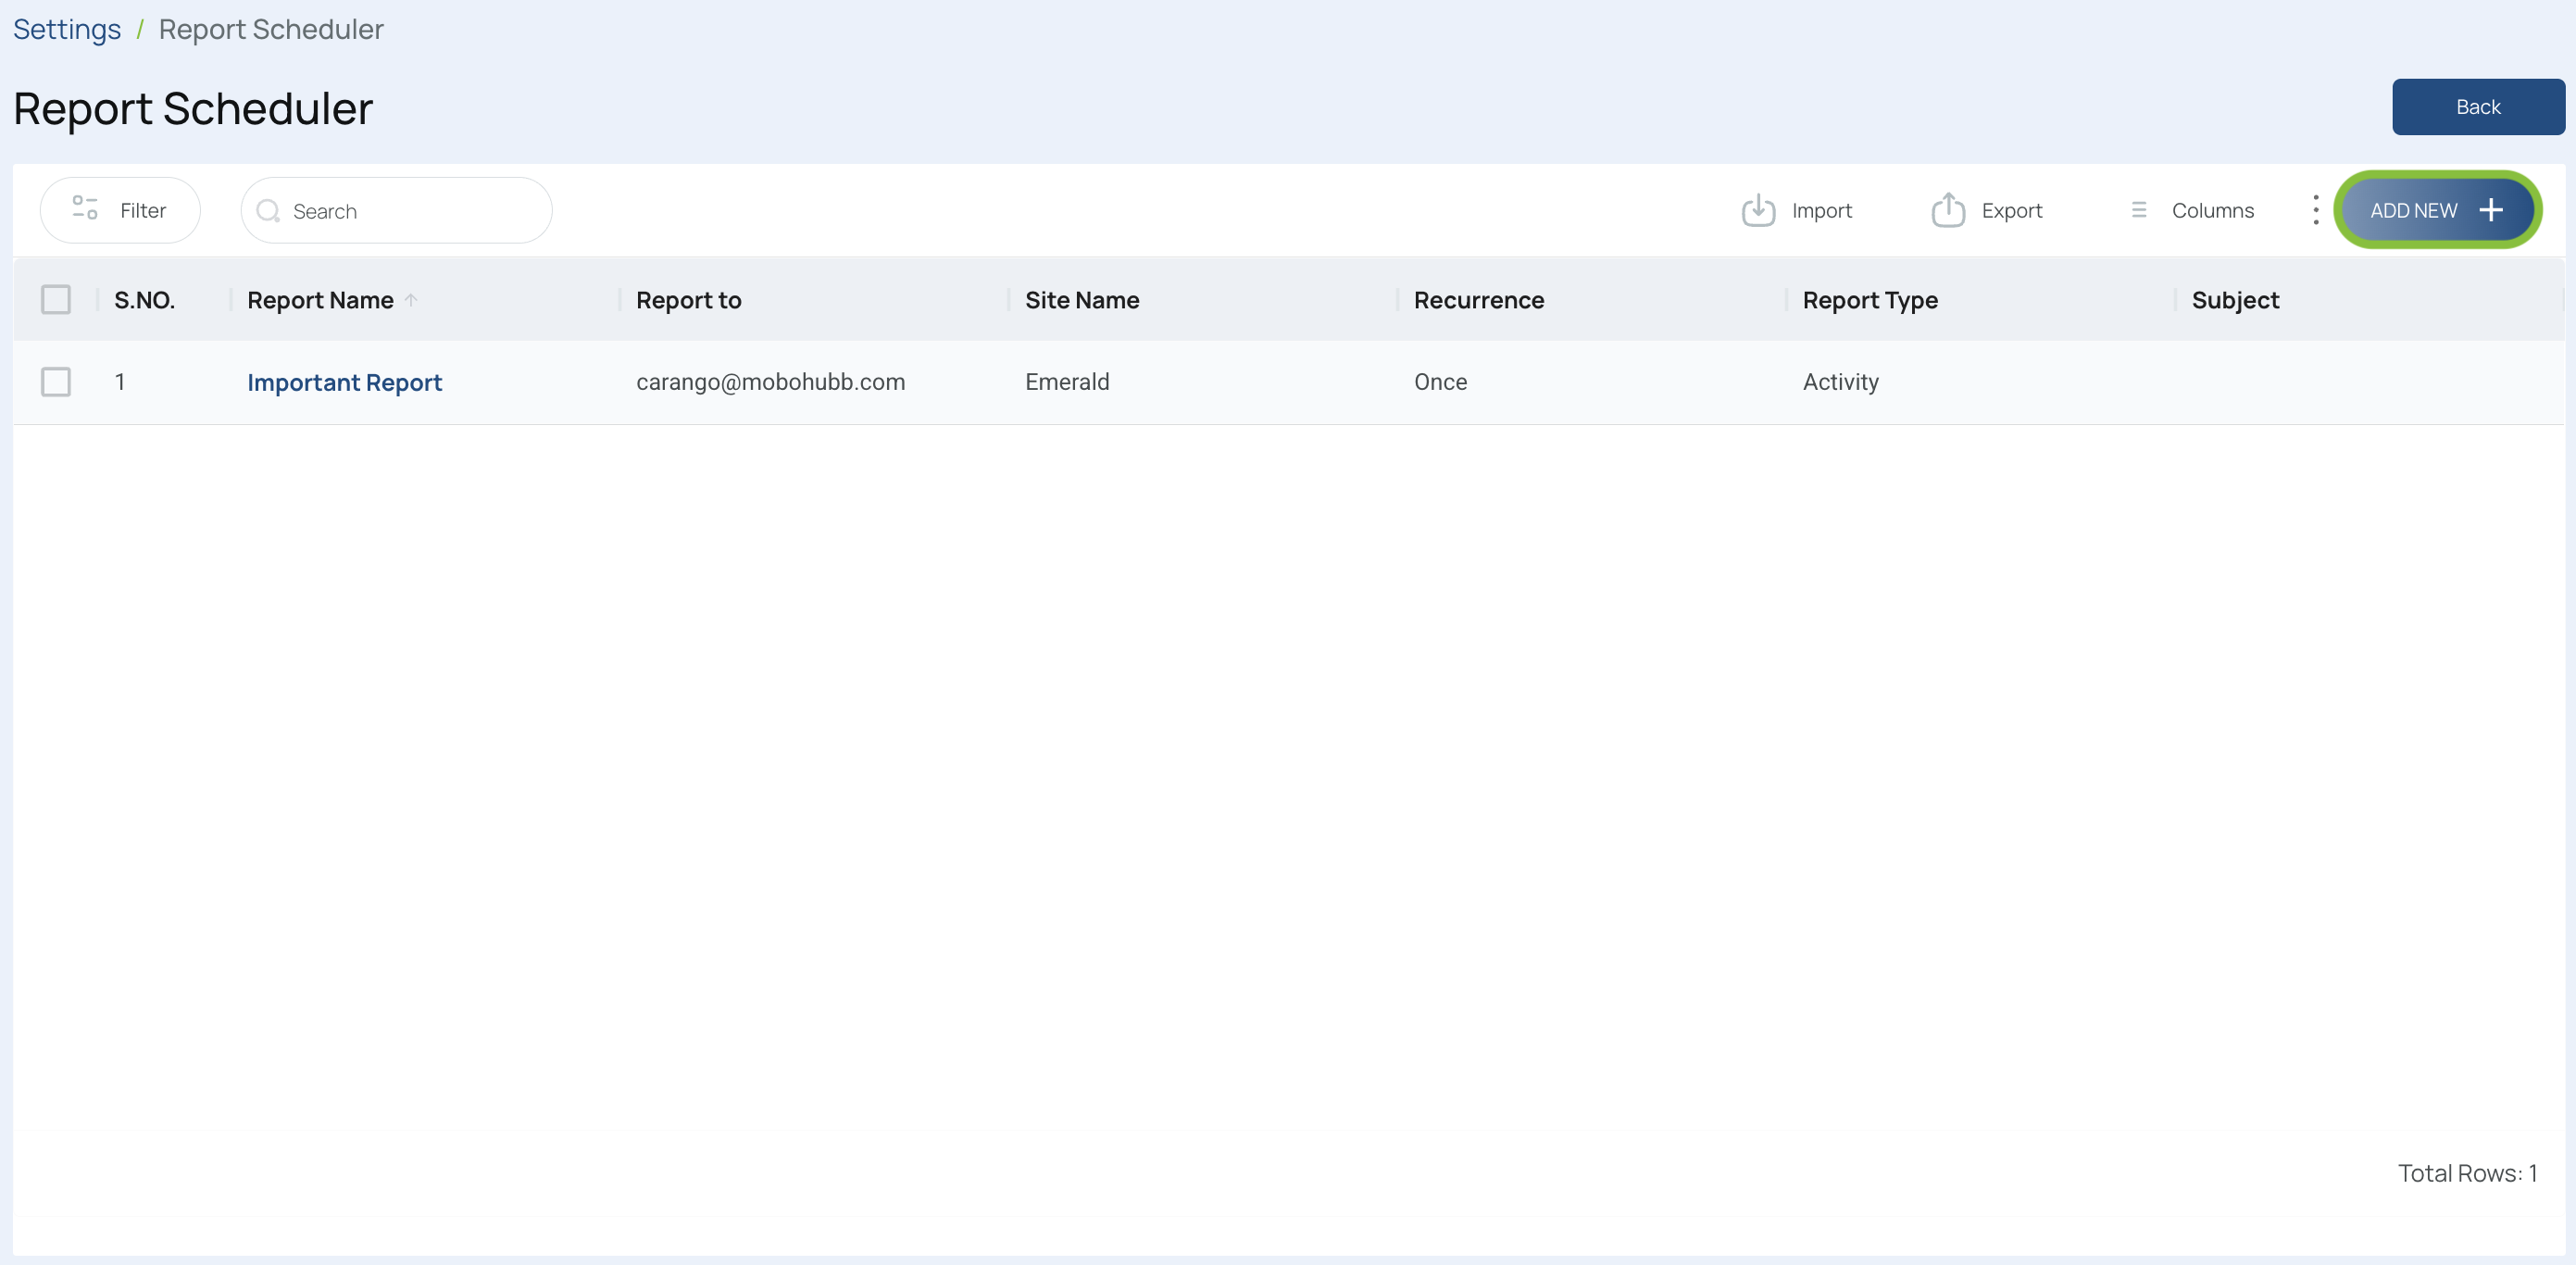
- In General Information, complete the report details.
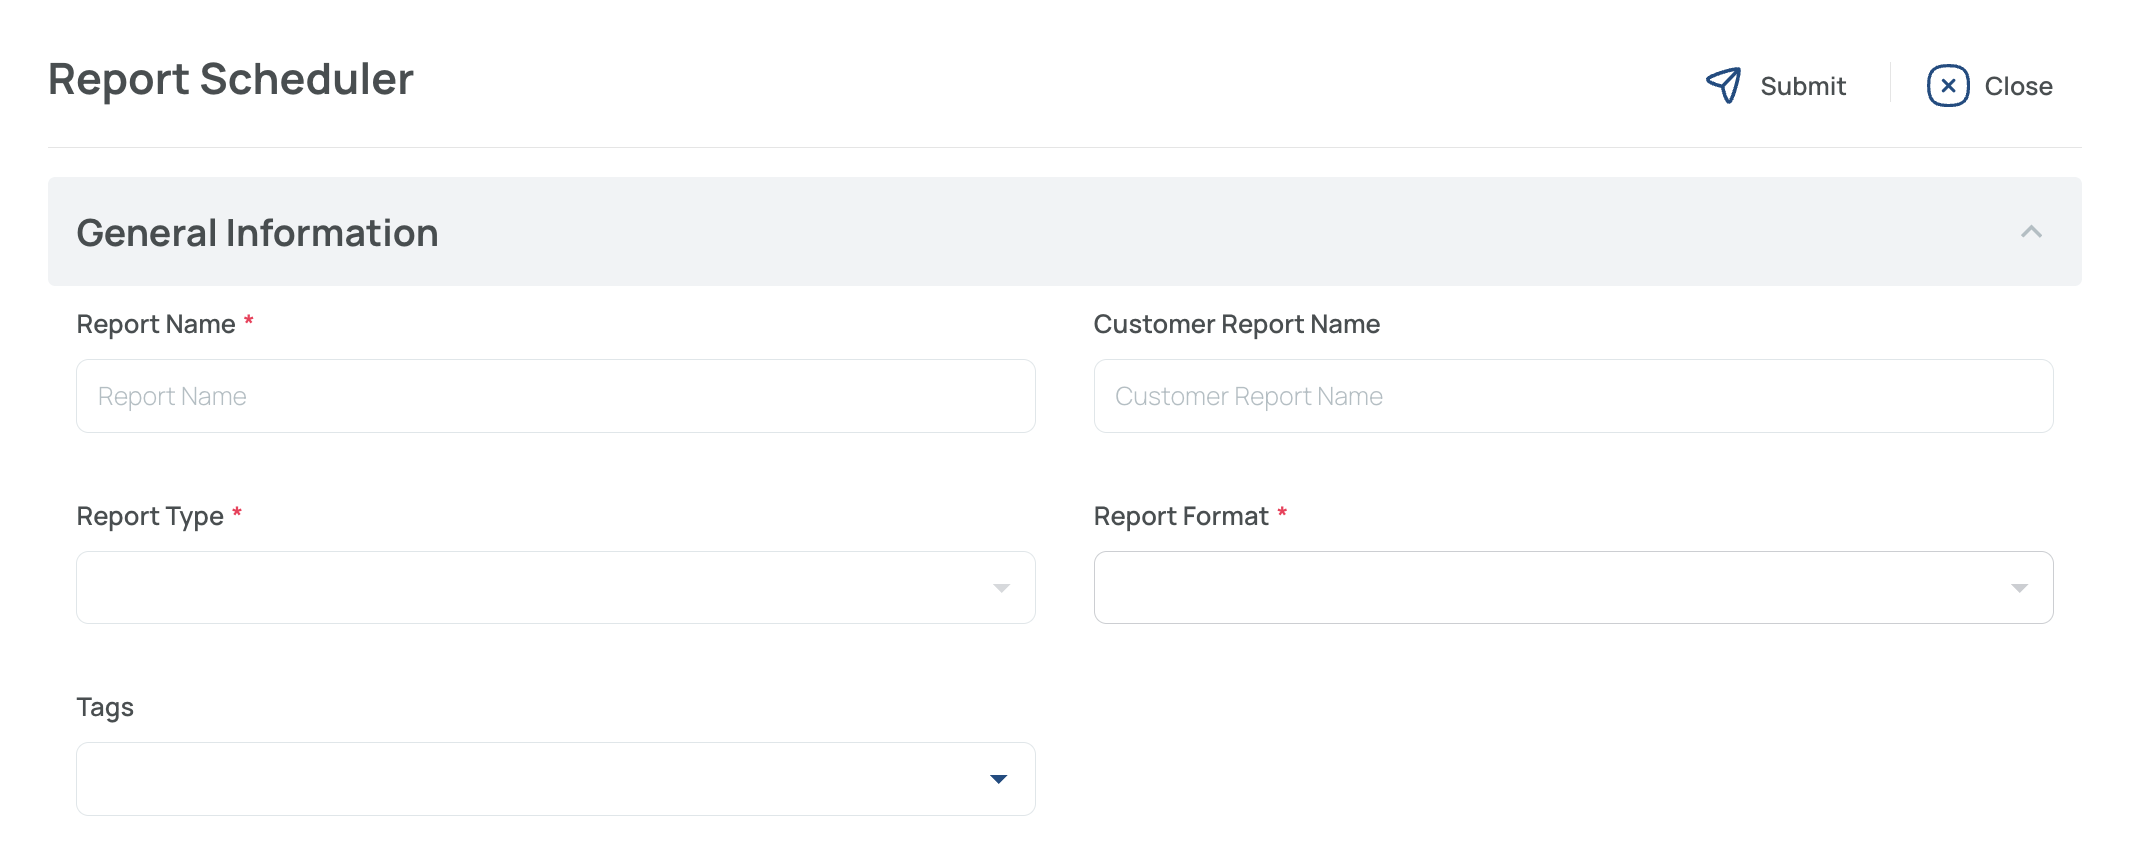
General Information Fields
- Report Name: Enter the name you want to assign to the report.
- Report Type: Select the report type from the dropdown. This selection determines which tag options are available.
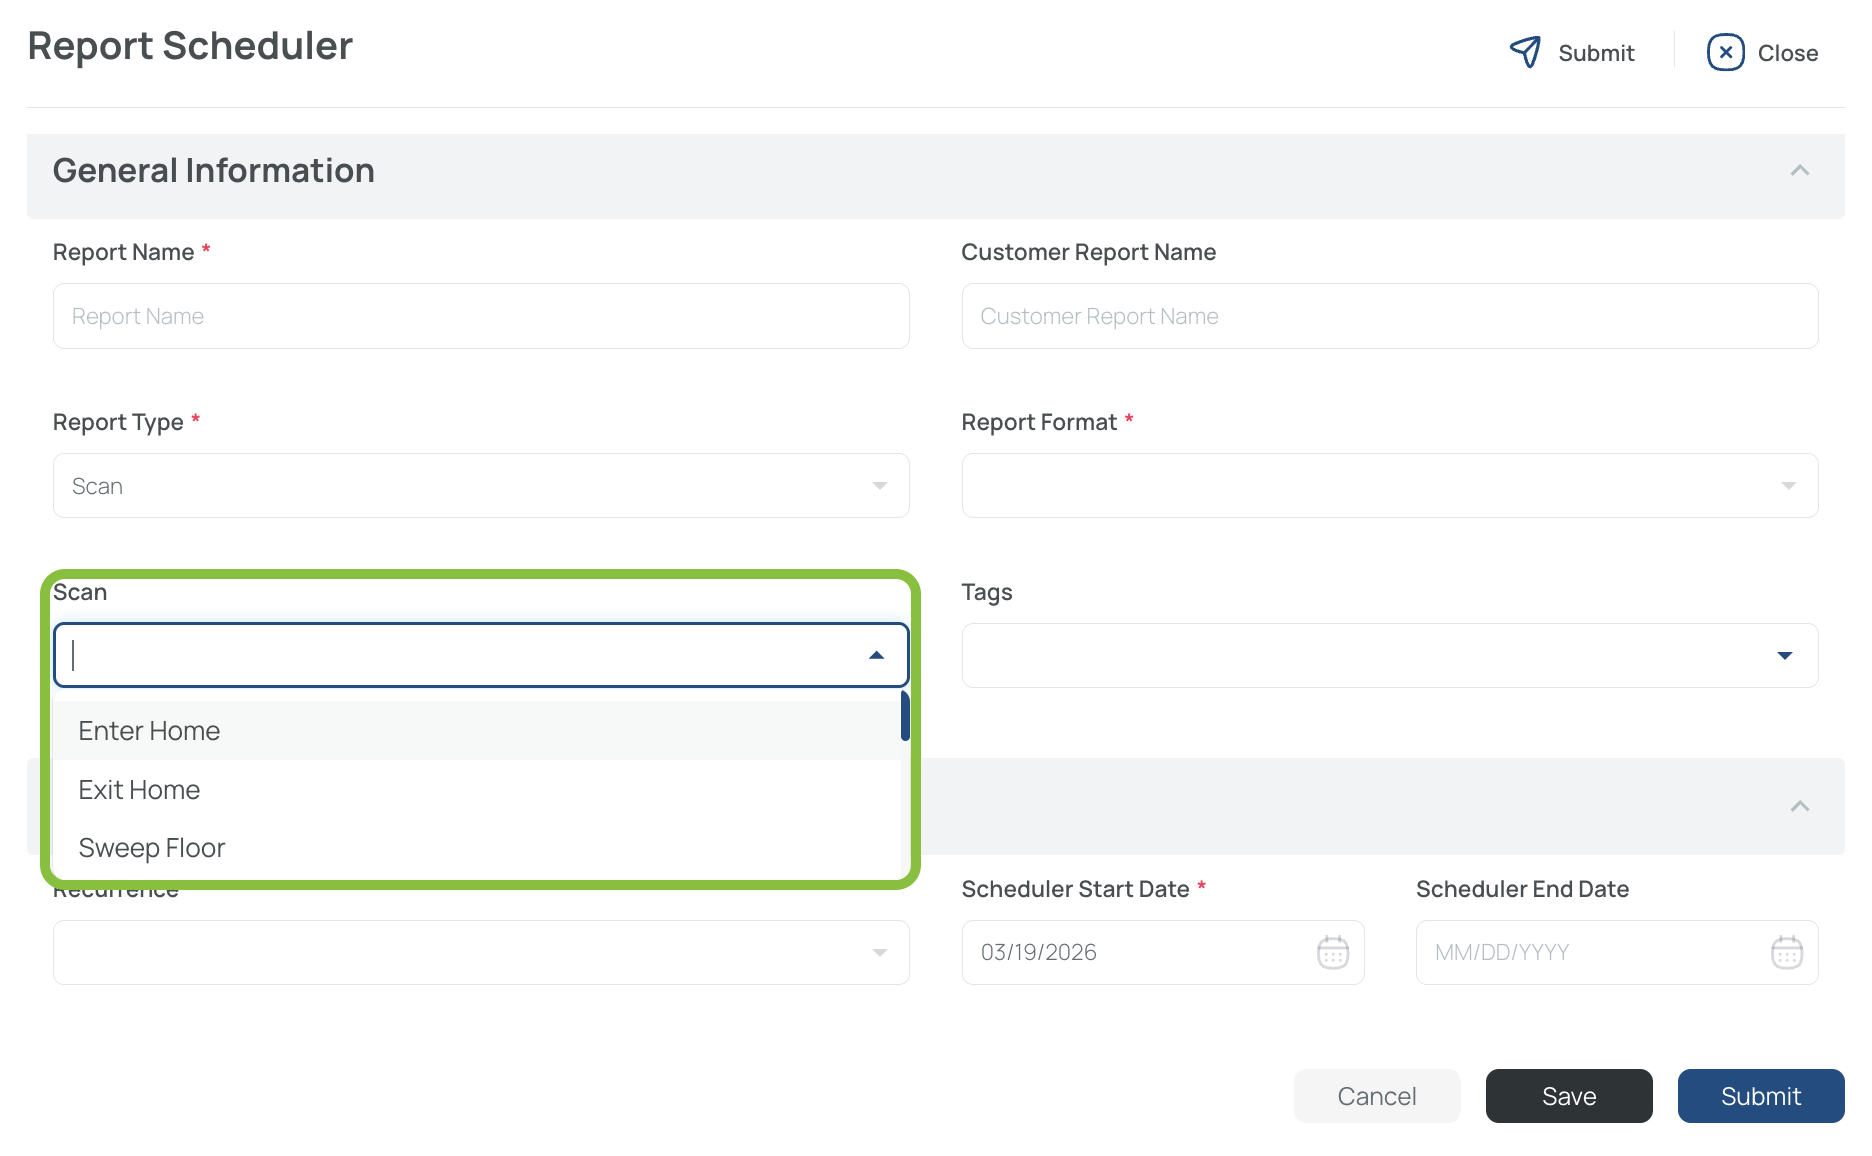
- Scan: Filter the report by one or more specific scan points. Leave this field blank to include all records.
- Tags: Filter the report by tags related to the selected Report Type. Available tags may vary depending on whether the report is based on Scan, Task, or Report data.
- Customer Report Name: Enter an optional alternate label to display inside the report. This option is only available for Scan, Task, Forms, and Device reports generated in PDF or HTML format.
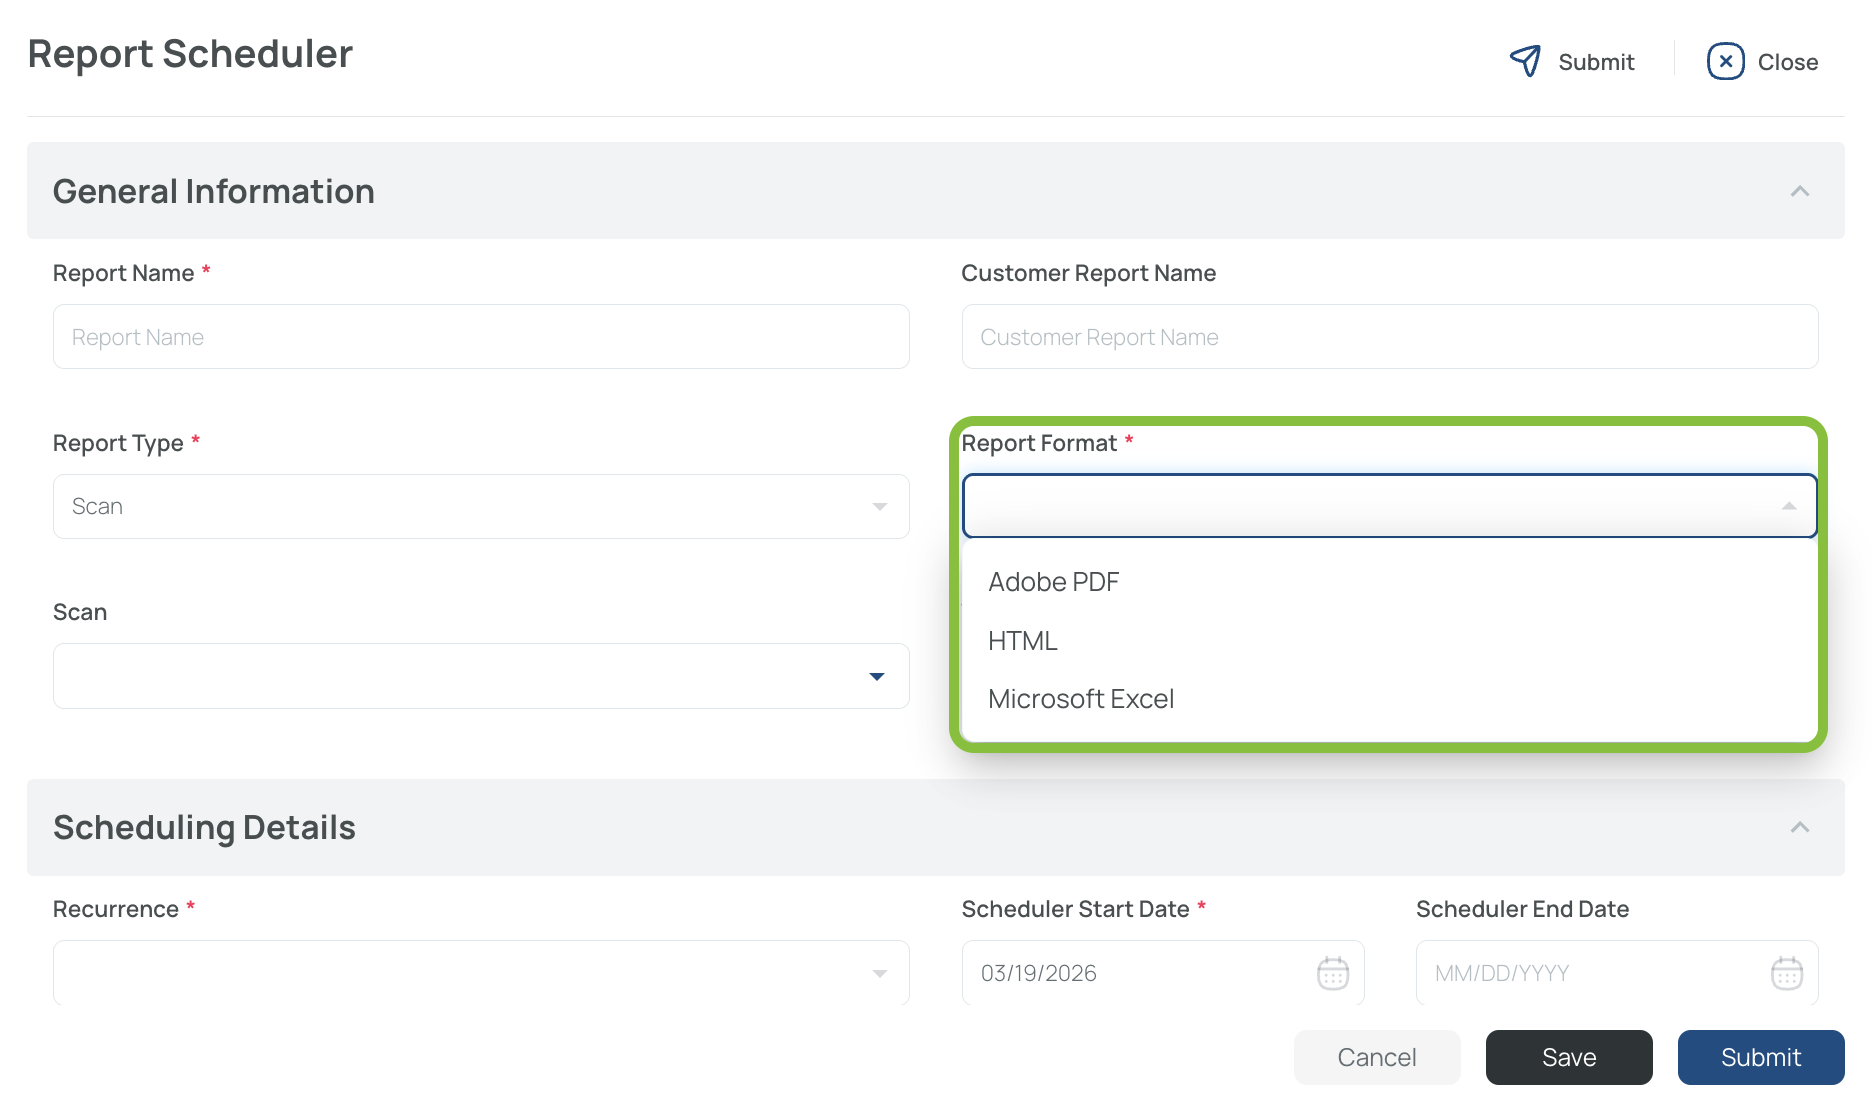
- Report Format: Select the report output format. Available options depend on the selected report type.
Available Report Types
| Report Type | Description |
|---|---|
| Scan | Report of completed scans |
| Tasks | Report of tasks |
| Forms | Report of completed forms or checklists |
| Device | Report of enrolled or used devices |
| Timesheet | Report of timesheet data |
| Advanced Reporting | More advanced reporting option. To learn more, visit our documentation. |
In scan reports, the Report Format field includes Adobe PDF, HTML, and Microsoft Excel.
For Scans, Devices, and Advanced Reporting, an additional field appears where you can choose a specific item, or leave it blank so the report includes all items.
Supported Formats by Report Type
| Report Type | Supported Formats |
|---|---|
| Scans | PDF, HTML, Excel |
| Tasks | PDF, HTML, Excel |
| Forms | PDF, HTML |
| Device | HTML |
| Timesheet | PDF, Excel |
| Advanced Reporting | PDF, HTML, Excel, PNG, JPG, SVG |
About PDFWhen a PDF file is too large, the system sends a download link instead of attaching the file directly. These links expire after a period of time.
How to Configure Scheduling Details
- Scroll down to Scheduling Details and complete the required fields.
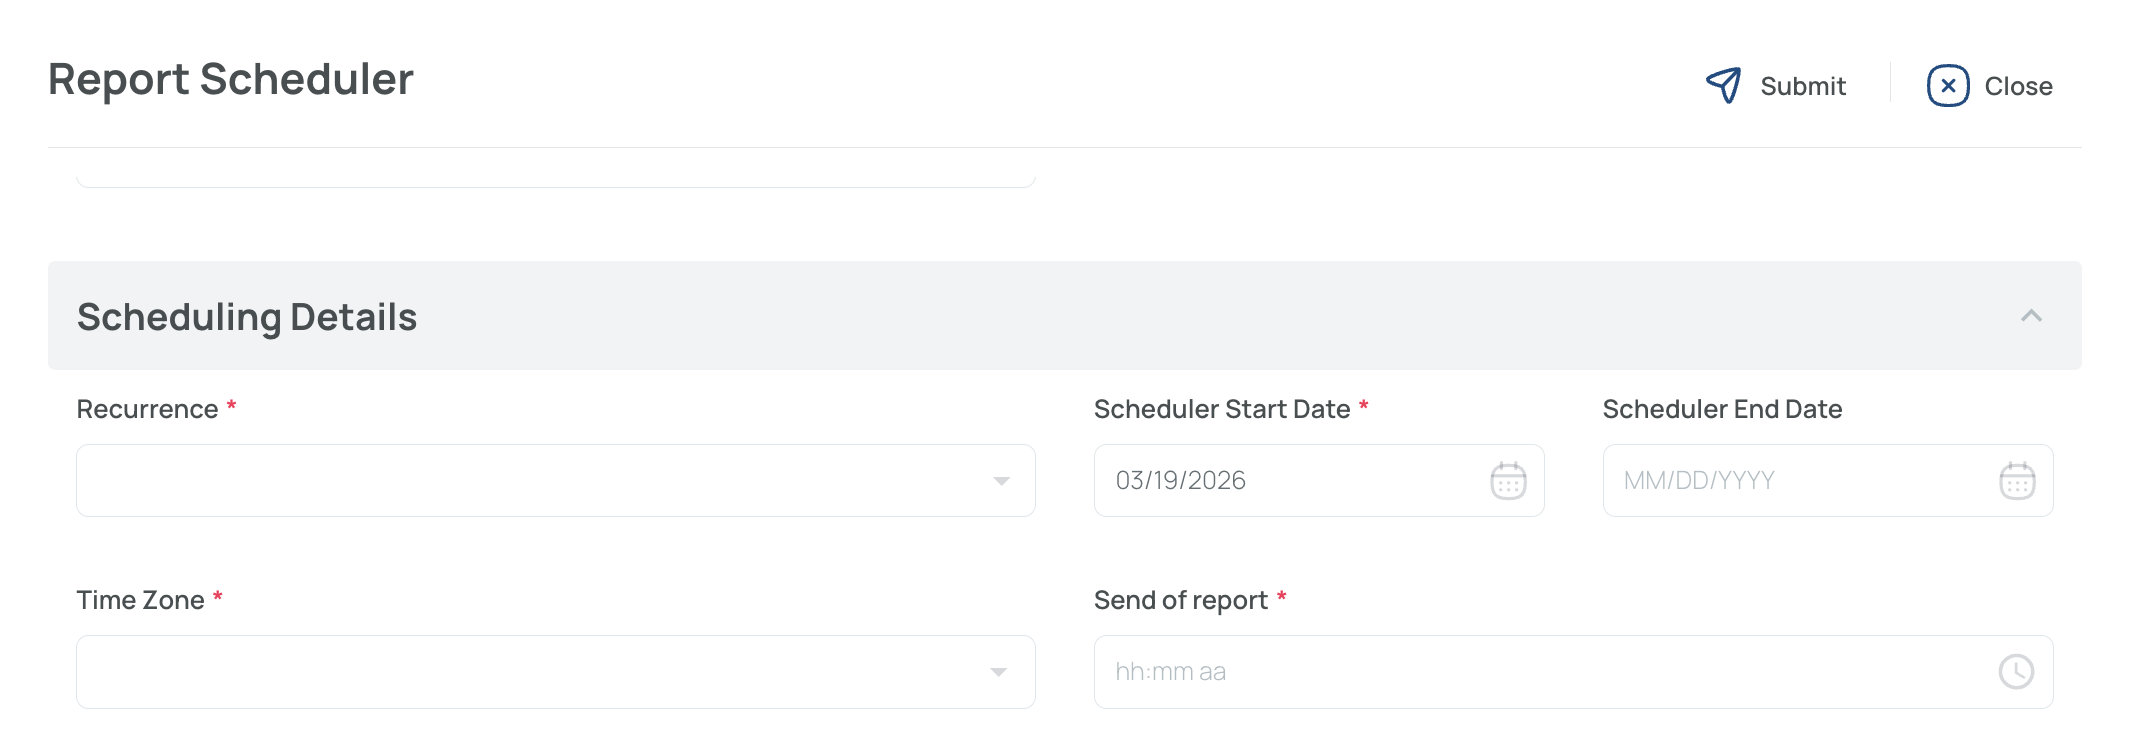
Scheduling Details Fields
- Recurrence: Defines how often the report is delivered.
- Once: The report is delivered one time only.
- Daily: The report is delivered every day.
- Weekly: The report is delivered every week.
- Scheduler Start Date: Defines when the report starts being sent.
- Scheduler End Date: Defines when the report stops being sent. If left blank, the report continues indefinitely.
- Time Zone: Defines the reference time zone used by the system to send the report. This time zone can be different from the site or organization time zone.
- Send of Report: Defines the time the report is sent based on the selected time zone.
If you configure a report to send today at 8:00 AM, but that time has already passed, the report is still delivered immediately.
It is also important to leave enough time between Stop Time and Send of Report so the report can be generated correctly. For example, you can set Stop Time to 8:00 AM and Send of Report to 8:15 AM.
How to Configure Report Data
- Scroll down to Report Data and configure the report range and behavior.
This section is important because it defines the time range included in the report.
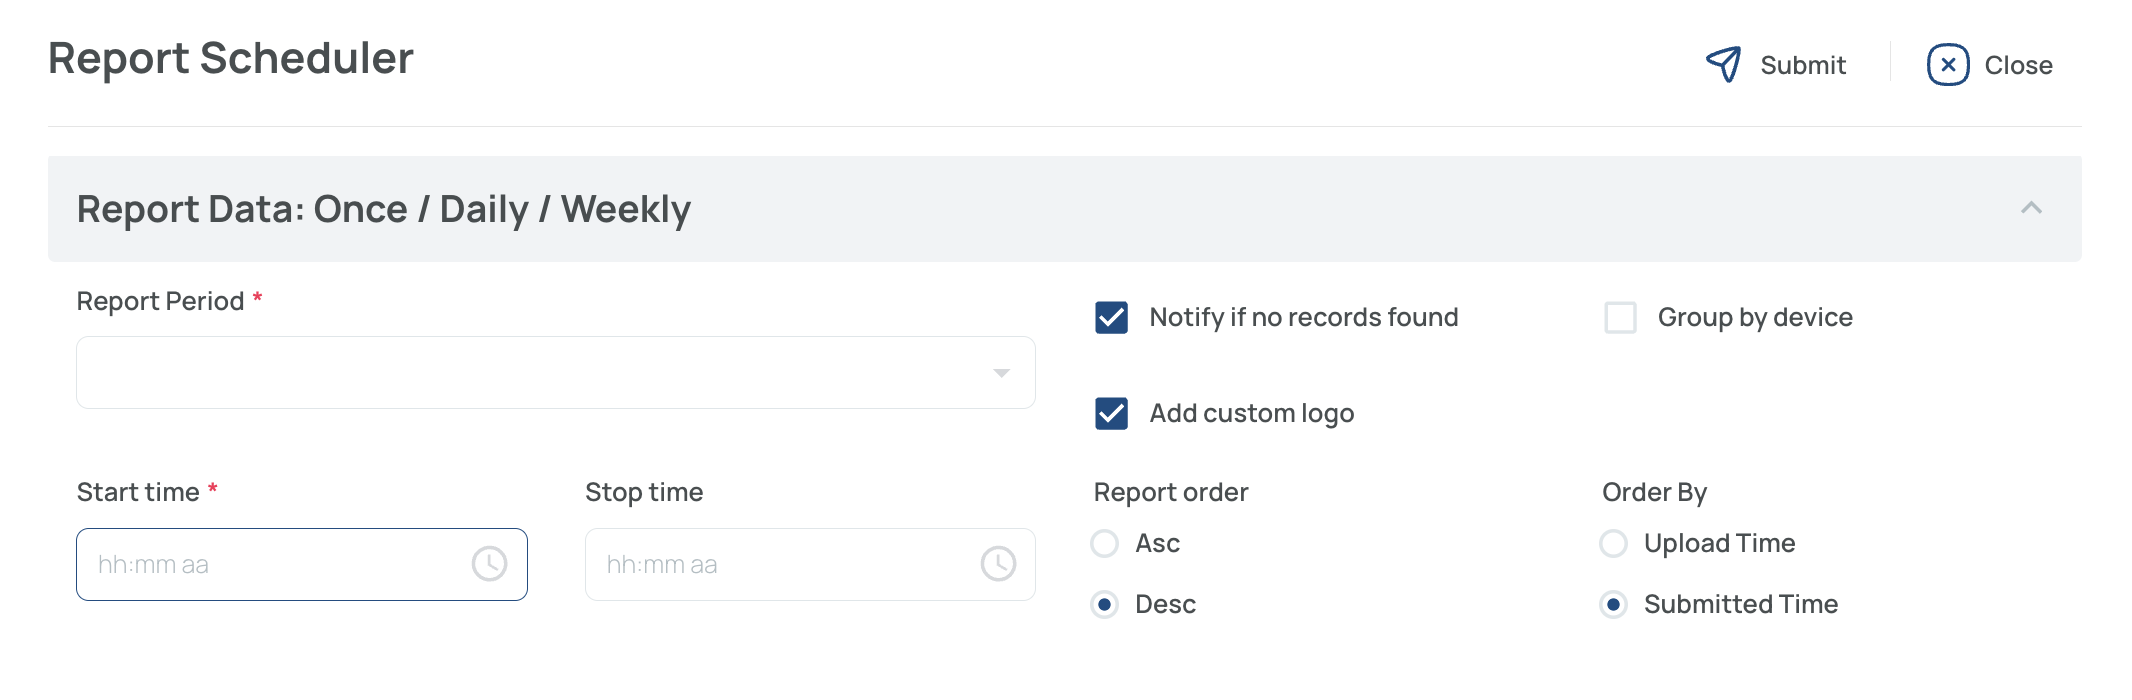
Report Data Fields
- Report Period: You can configure this field as:
- Today to receive only the information from the day the report is sent
- Last 1 day for the last 24 hours
- Up to Last 7 days
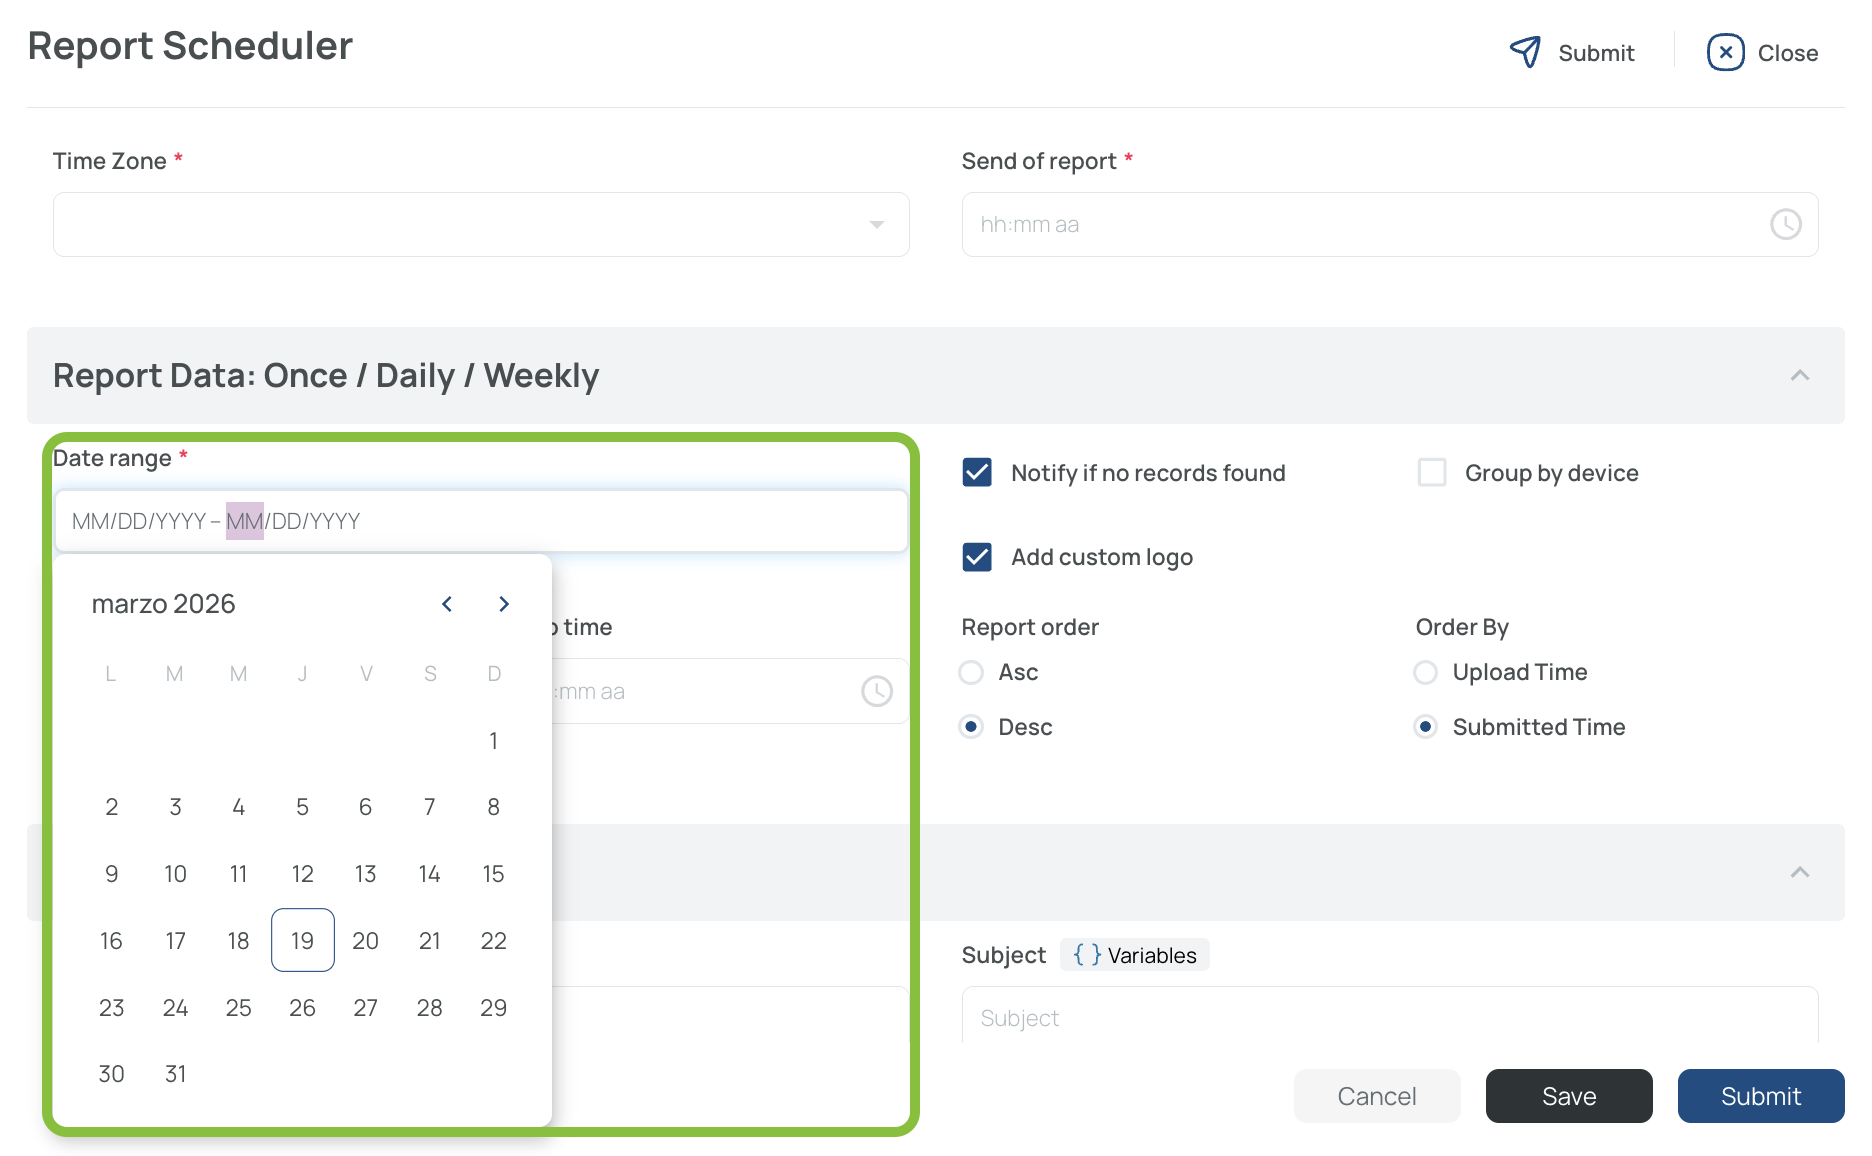
- If Recurrence in Scheduling Details is set to Once, the Report Period field changes to Date Range, which allows you to select a maximum range of 7 calendar days.
- Start Time: Defines the time from which the system starts considering records for the report. For example, from 8:00 AM two days ago. If you use 00:00, the system considers the beginning of the first day in the selected date range.
- Stop Time: Defines the cutoff time for records to be included in the report. For example, 11:59 PM on the last day. You can leave it blank or set it to 00:00 to include records through the end of the selected date range.
- Notify if No Records Found: Sends a notification when no records are found for the selected report criteria.
- Add Custom Logo: Displays the logo already configured for the site in the report header. This option does not upload or enable a new logo; it links to the existing image from the site configuration and displays it in the report.
- Group by Device: Groups activity records by device. The report does not add separate device headers because Device is already included as a report field.
- Report Order (Asc/Desc): Defines whether the report data is shown in ascending or descending order based on the selected ordering parameter.
- Order By (Upload Time/Submitted Time): Defines whether records are ordered by Submitted Time, when the activity was created or completed, or Upload Time, when the activity was stored in the system. This is useful when records are completed offline in the mobile app and uploaded later after reconnection.
Practical ExamplesDaily Report: Set Report Period to Last 1 day, set Start Time to 00:00, and leave Stop Time blank so the report includes data from the start of the previous day through the end of the current day. You could also set Stop Time to 8:00 AM on the current day to receive all information submitted up to that time.
Friday Report: You can configure the system to send a scan report for the last 3 days, starting on Wednesday at 8:00 AM and ending on Friday at 4:00 PM.
Overnight Report: If you set Start Time to 11:00 PM and Stop Time to 3:00 AM, a moon icon ☾ appears next to Stop Time, indicating that 3:00 AM belongs to the next day.
How to Configure Delivery Settings
- Scroll down to Delivery Settings and complete the email delivery details.
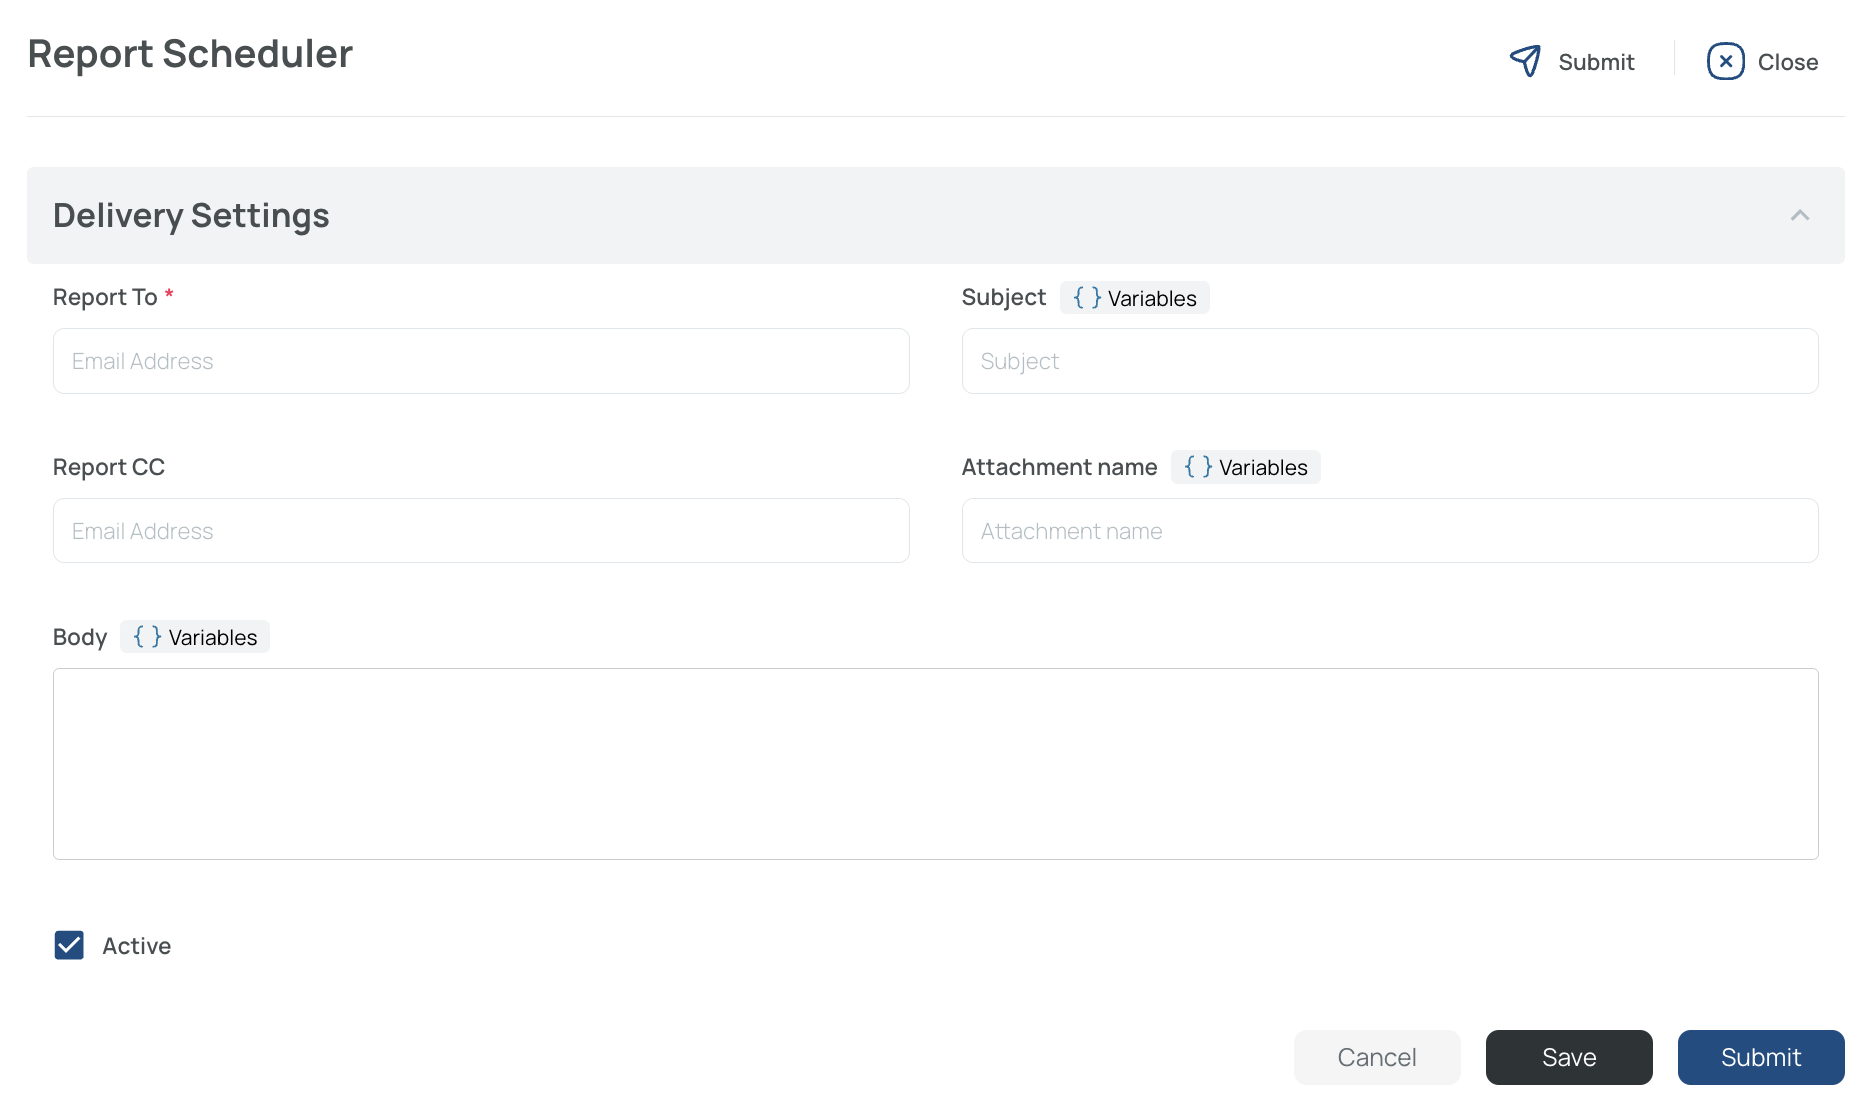
Delivery Settings Fields
- Report To: Person who will receive the report.
- Report CC: Additional recipients who will receive a copy.
- Subject: Email subject line. You can add variables to automate it.
- Attachment Name: Defines the name of the attached file. You can also use variables.
- Body: Email body content. This field also supports variables.
To learn more about the variables you can use, review our documentation.
How to Save and Activate the Report Schedule
-
Set the report as active or inactive using the Active checkbox.
-
Click Save to save your changes without closing the editor, or click Submit to save your changes and close the editor.