Schedule: Templates
Learn how to speed-up shift creation by saving and re-using shift templates, adding new shifts from templates, and keeping your template library tidy in mobohubb.
In this guide you'll learn
- How to save any shift as a reusable template
- How to insert a template into the calendar (“Add shift from template”)
- How to manage or delete templates in the Template Management tab
Templates speed up shift creation by letting you reuse proven combinations of times, roles, tasks, forms, scans, and other details. Instead of rebuilding the same structure every week, save a shift once and drop it into the calendar whenever you need it.
Save Shifts as Templates
-
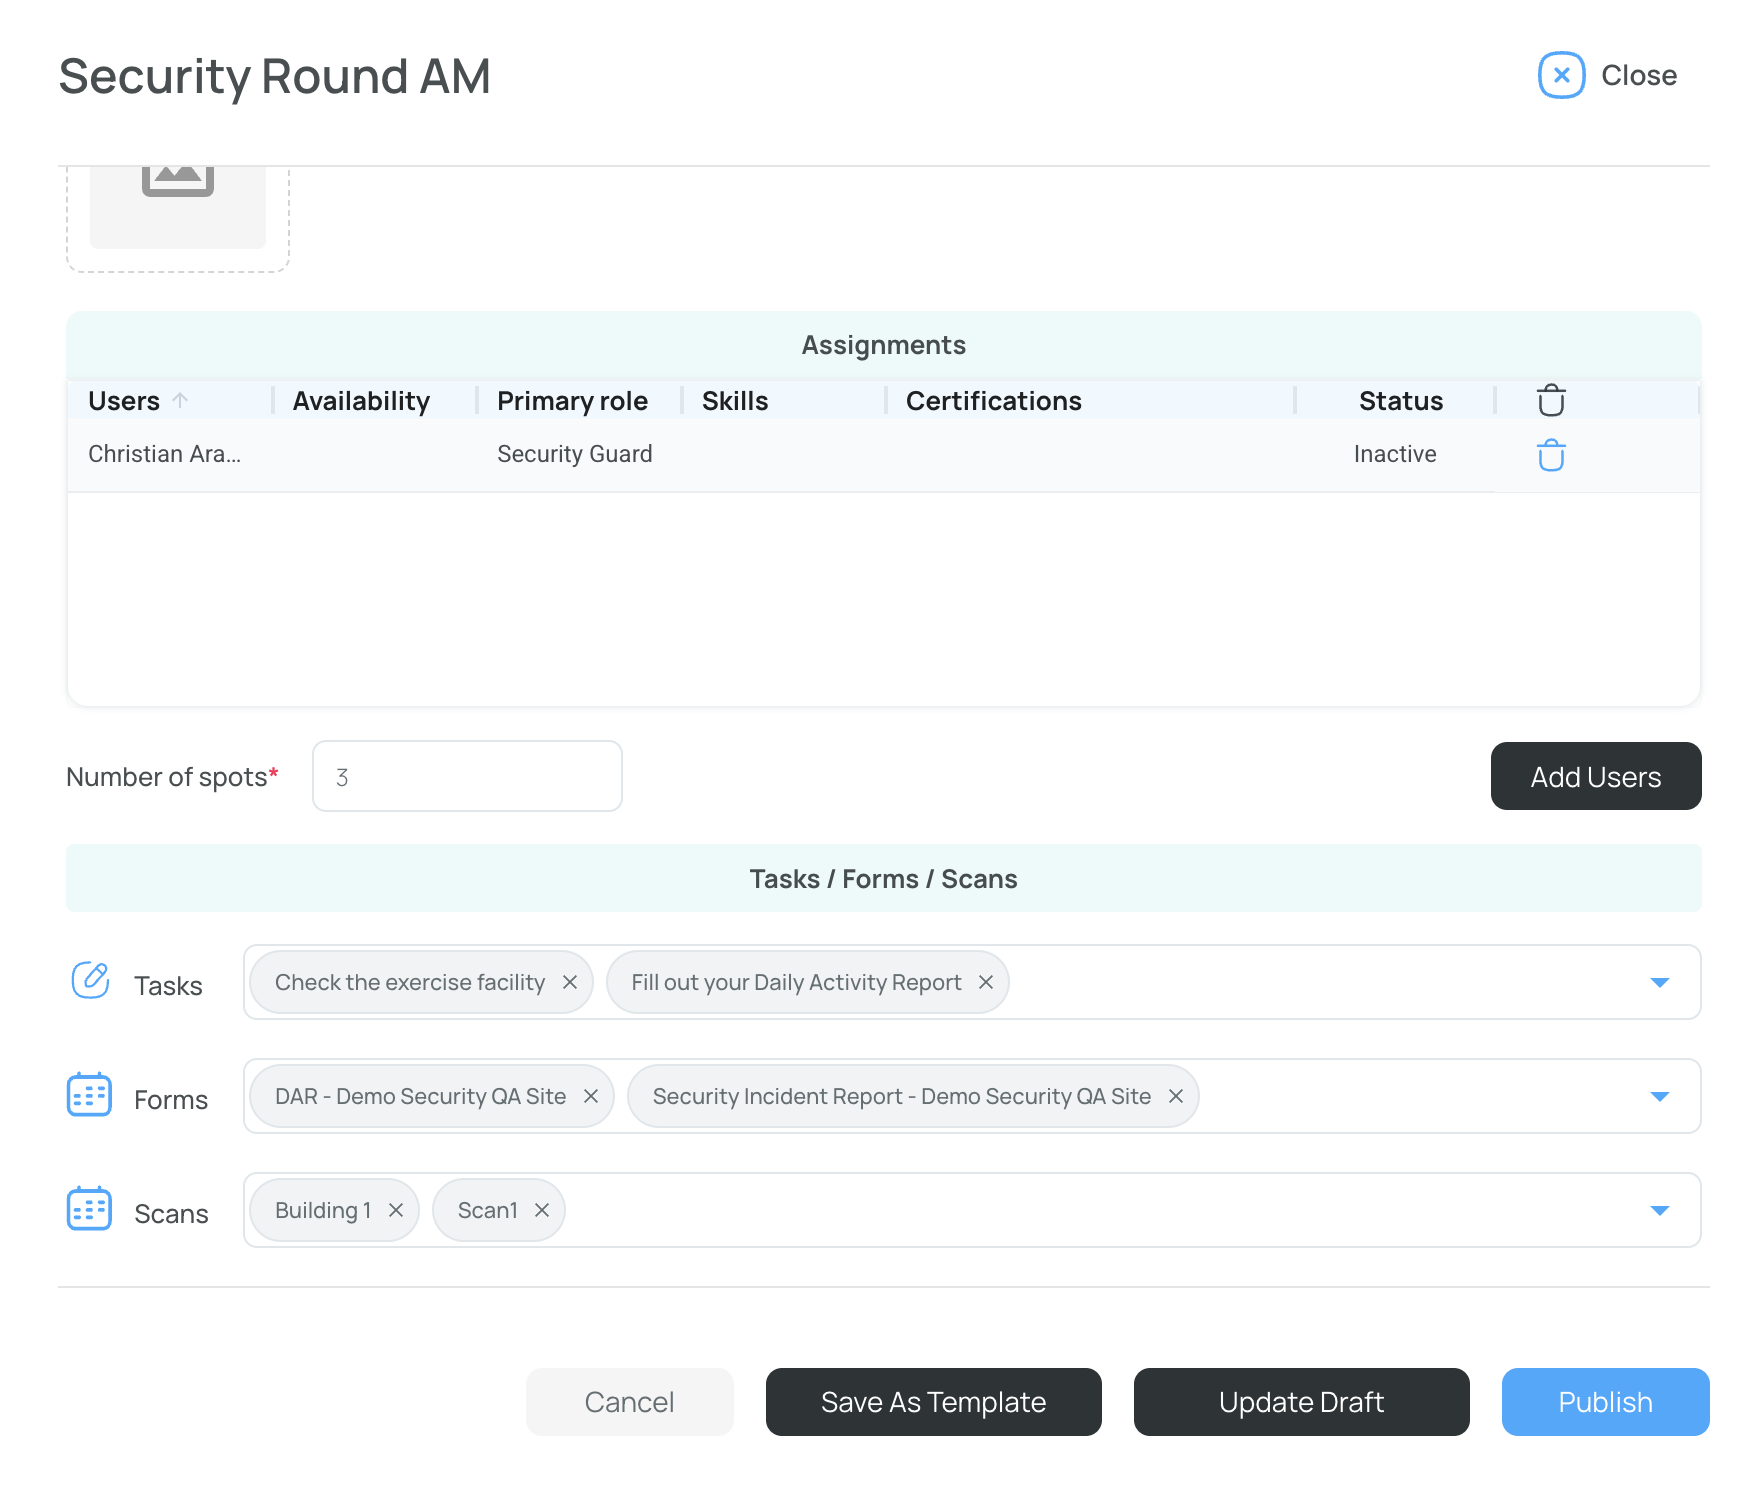
Open the scheduler and click the shift you want to reuse in the future.
-
Edit anything you’d like to standardize—title, role, start / end, tasks, forms, scans, notes.
- All fields are available from the shift’s Tool bar.
-
Scroll to the bottom of the details panel and press “Save As Template.”
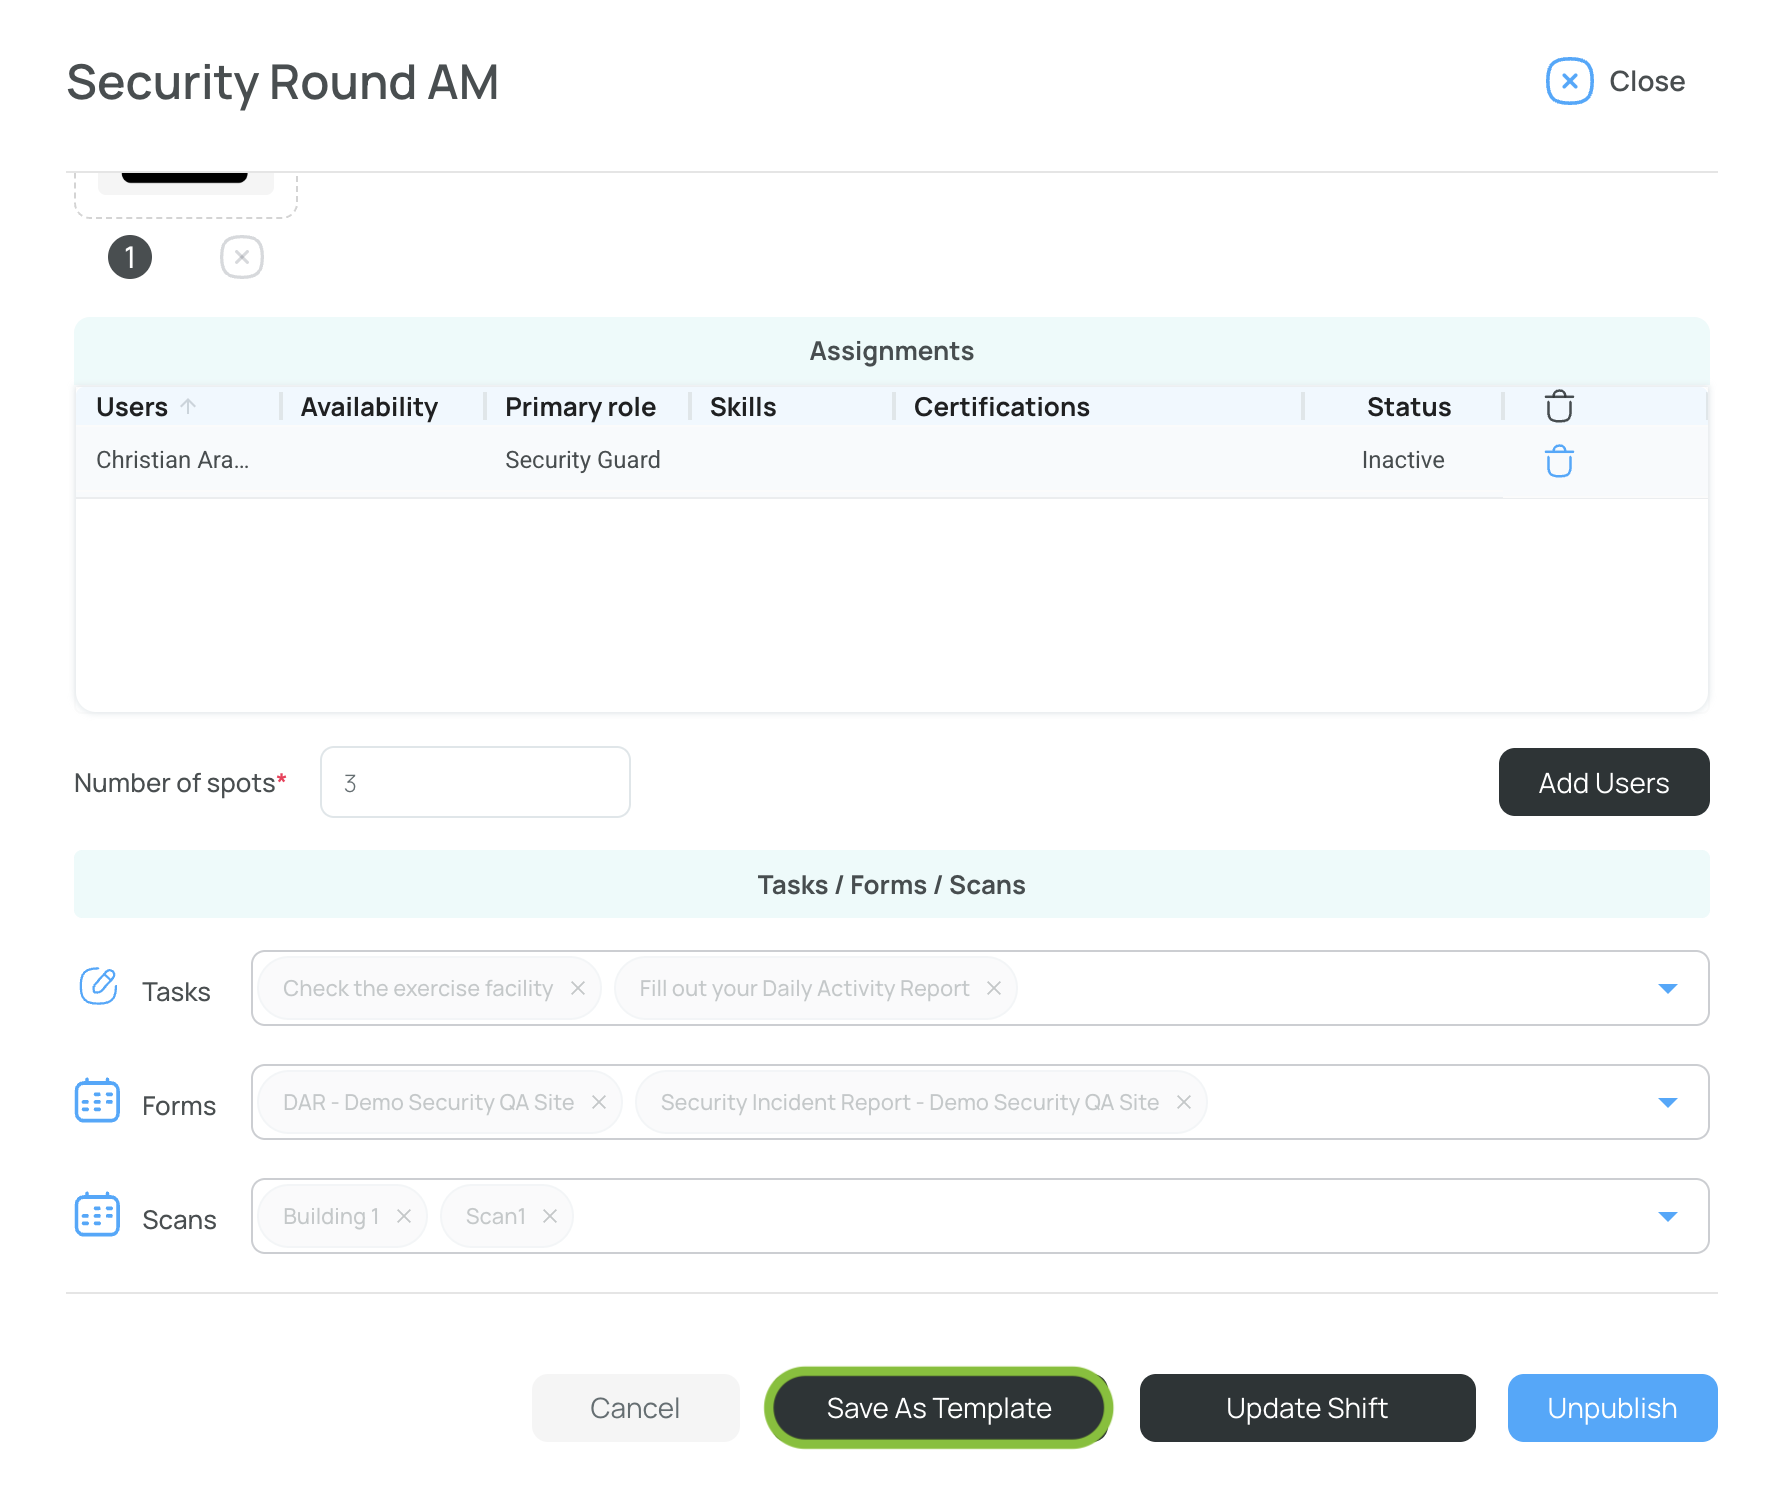
That shift is now stored as a template and will appear in the Add New → New Shift from Template dialog.
Tip: If you save an existing template again (same name), it simply updates—perfect for keeping your standard shift in sync with new duties or times.
Save Week as a Template
- Navigate to the week you want to save as a template.
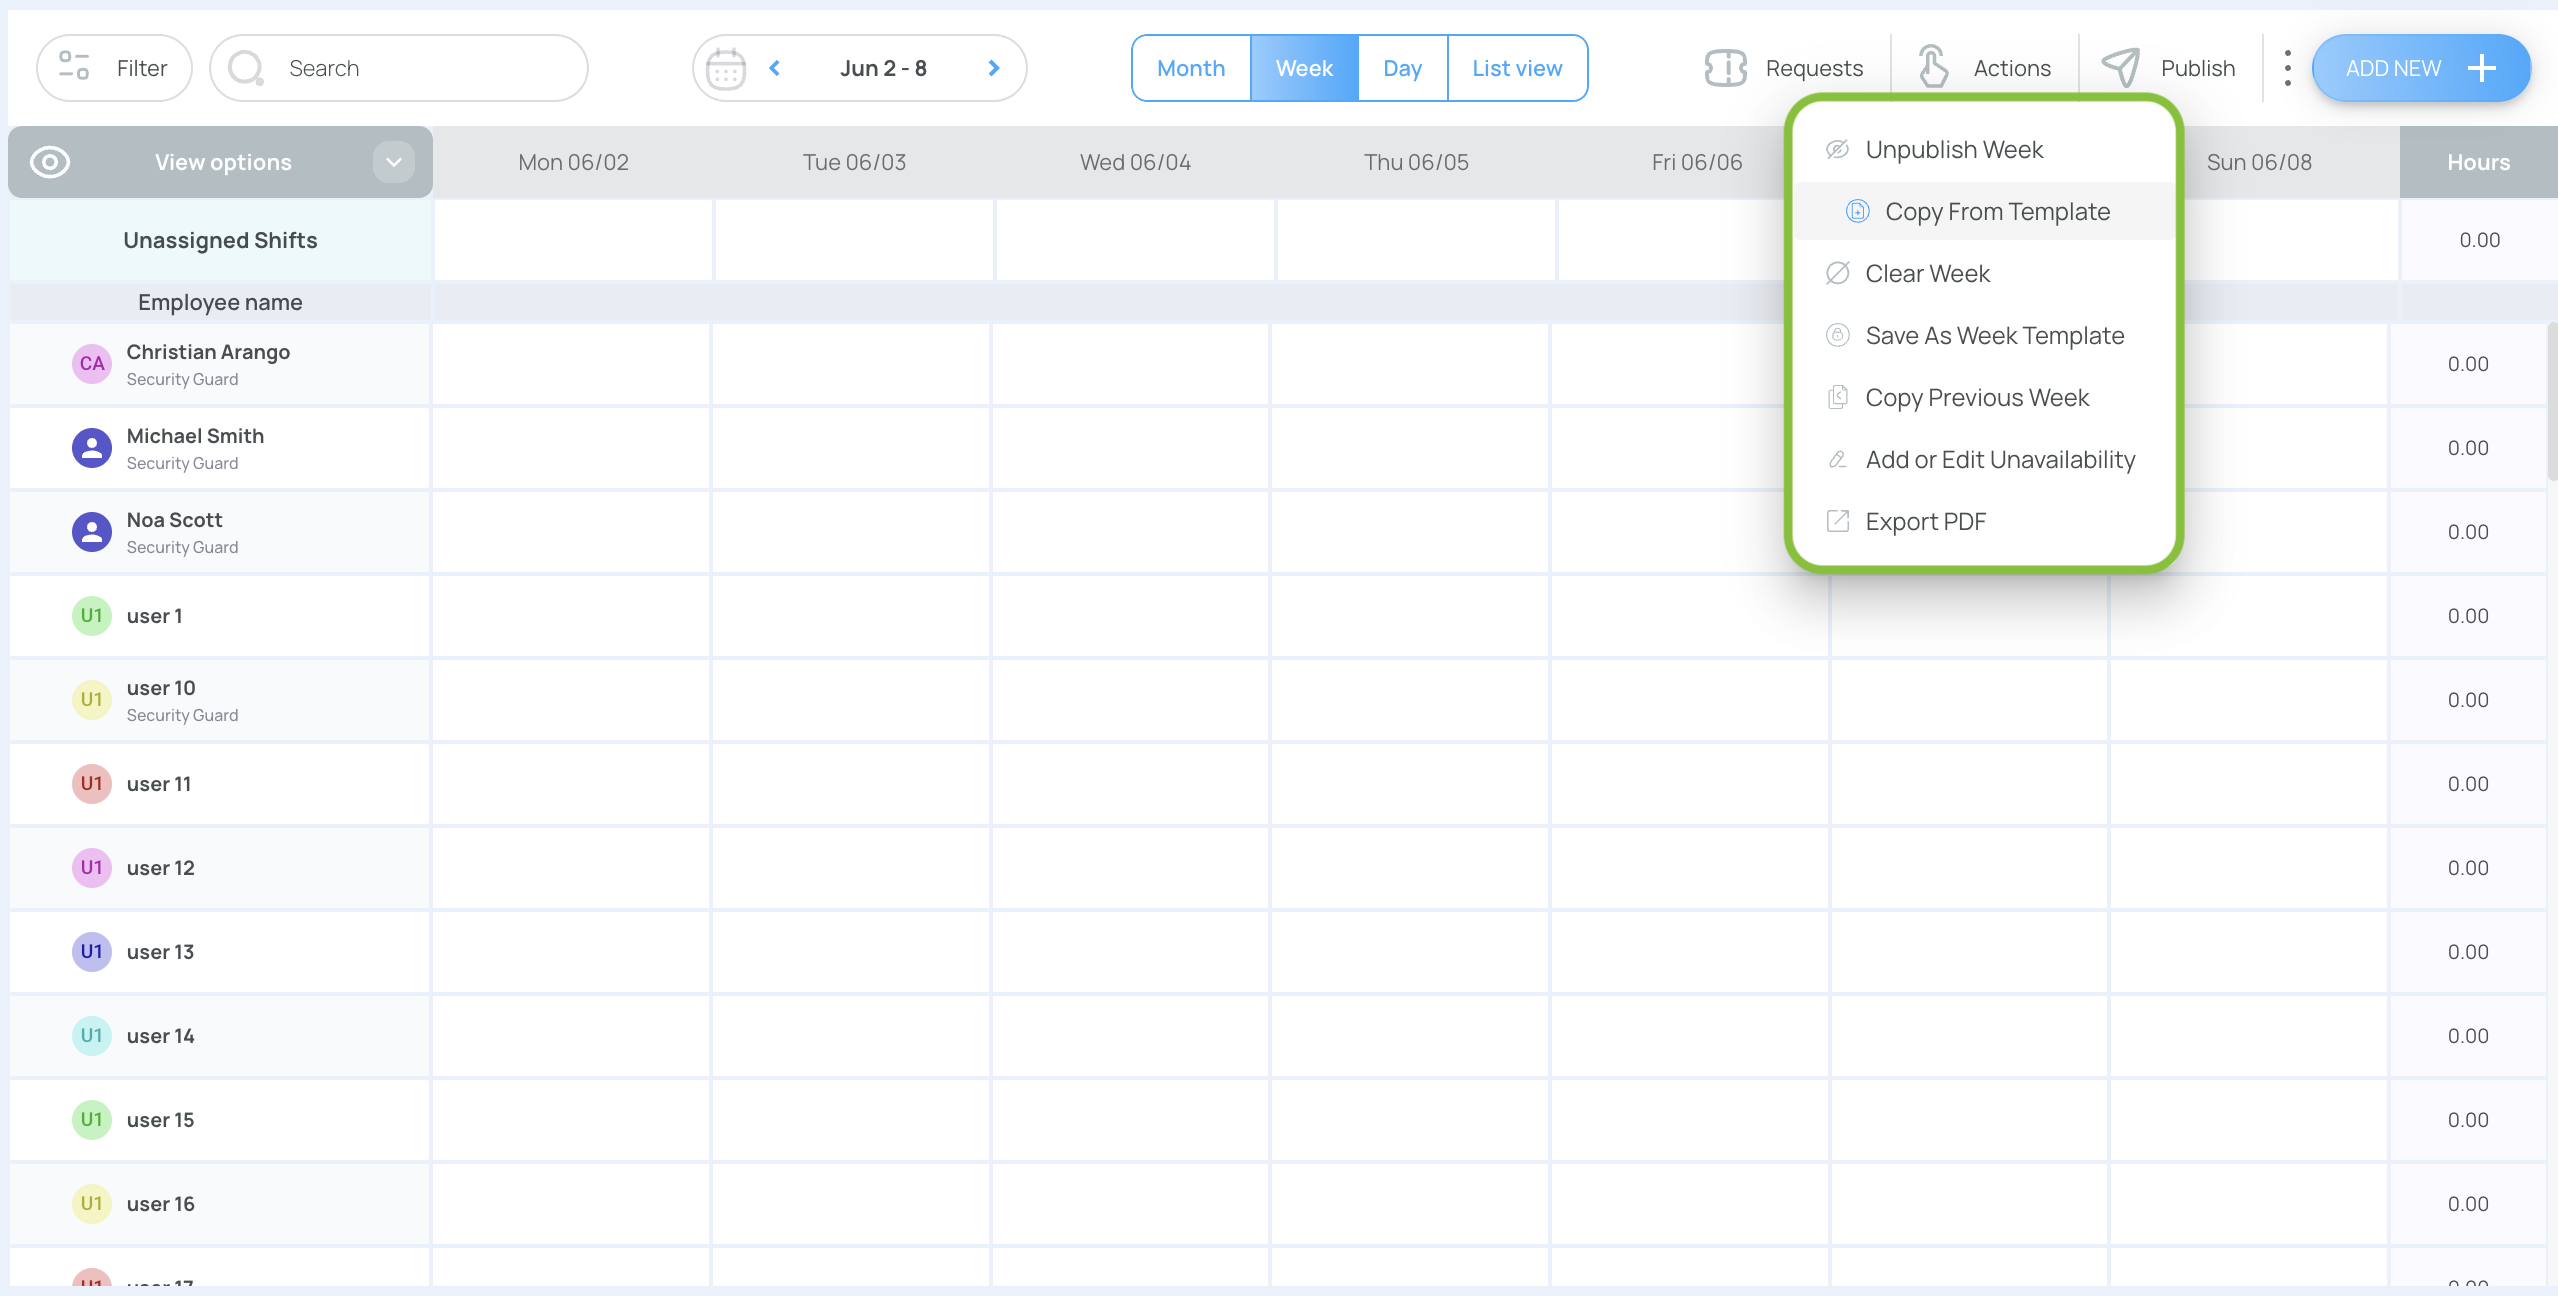
- In the scheduler, click Actions and select Save As Week Template.
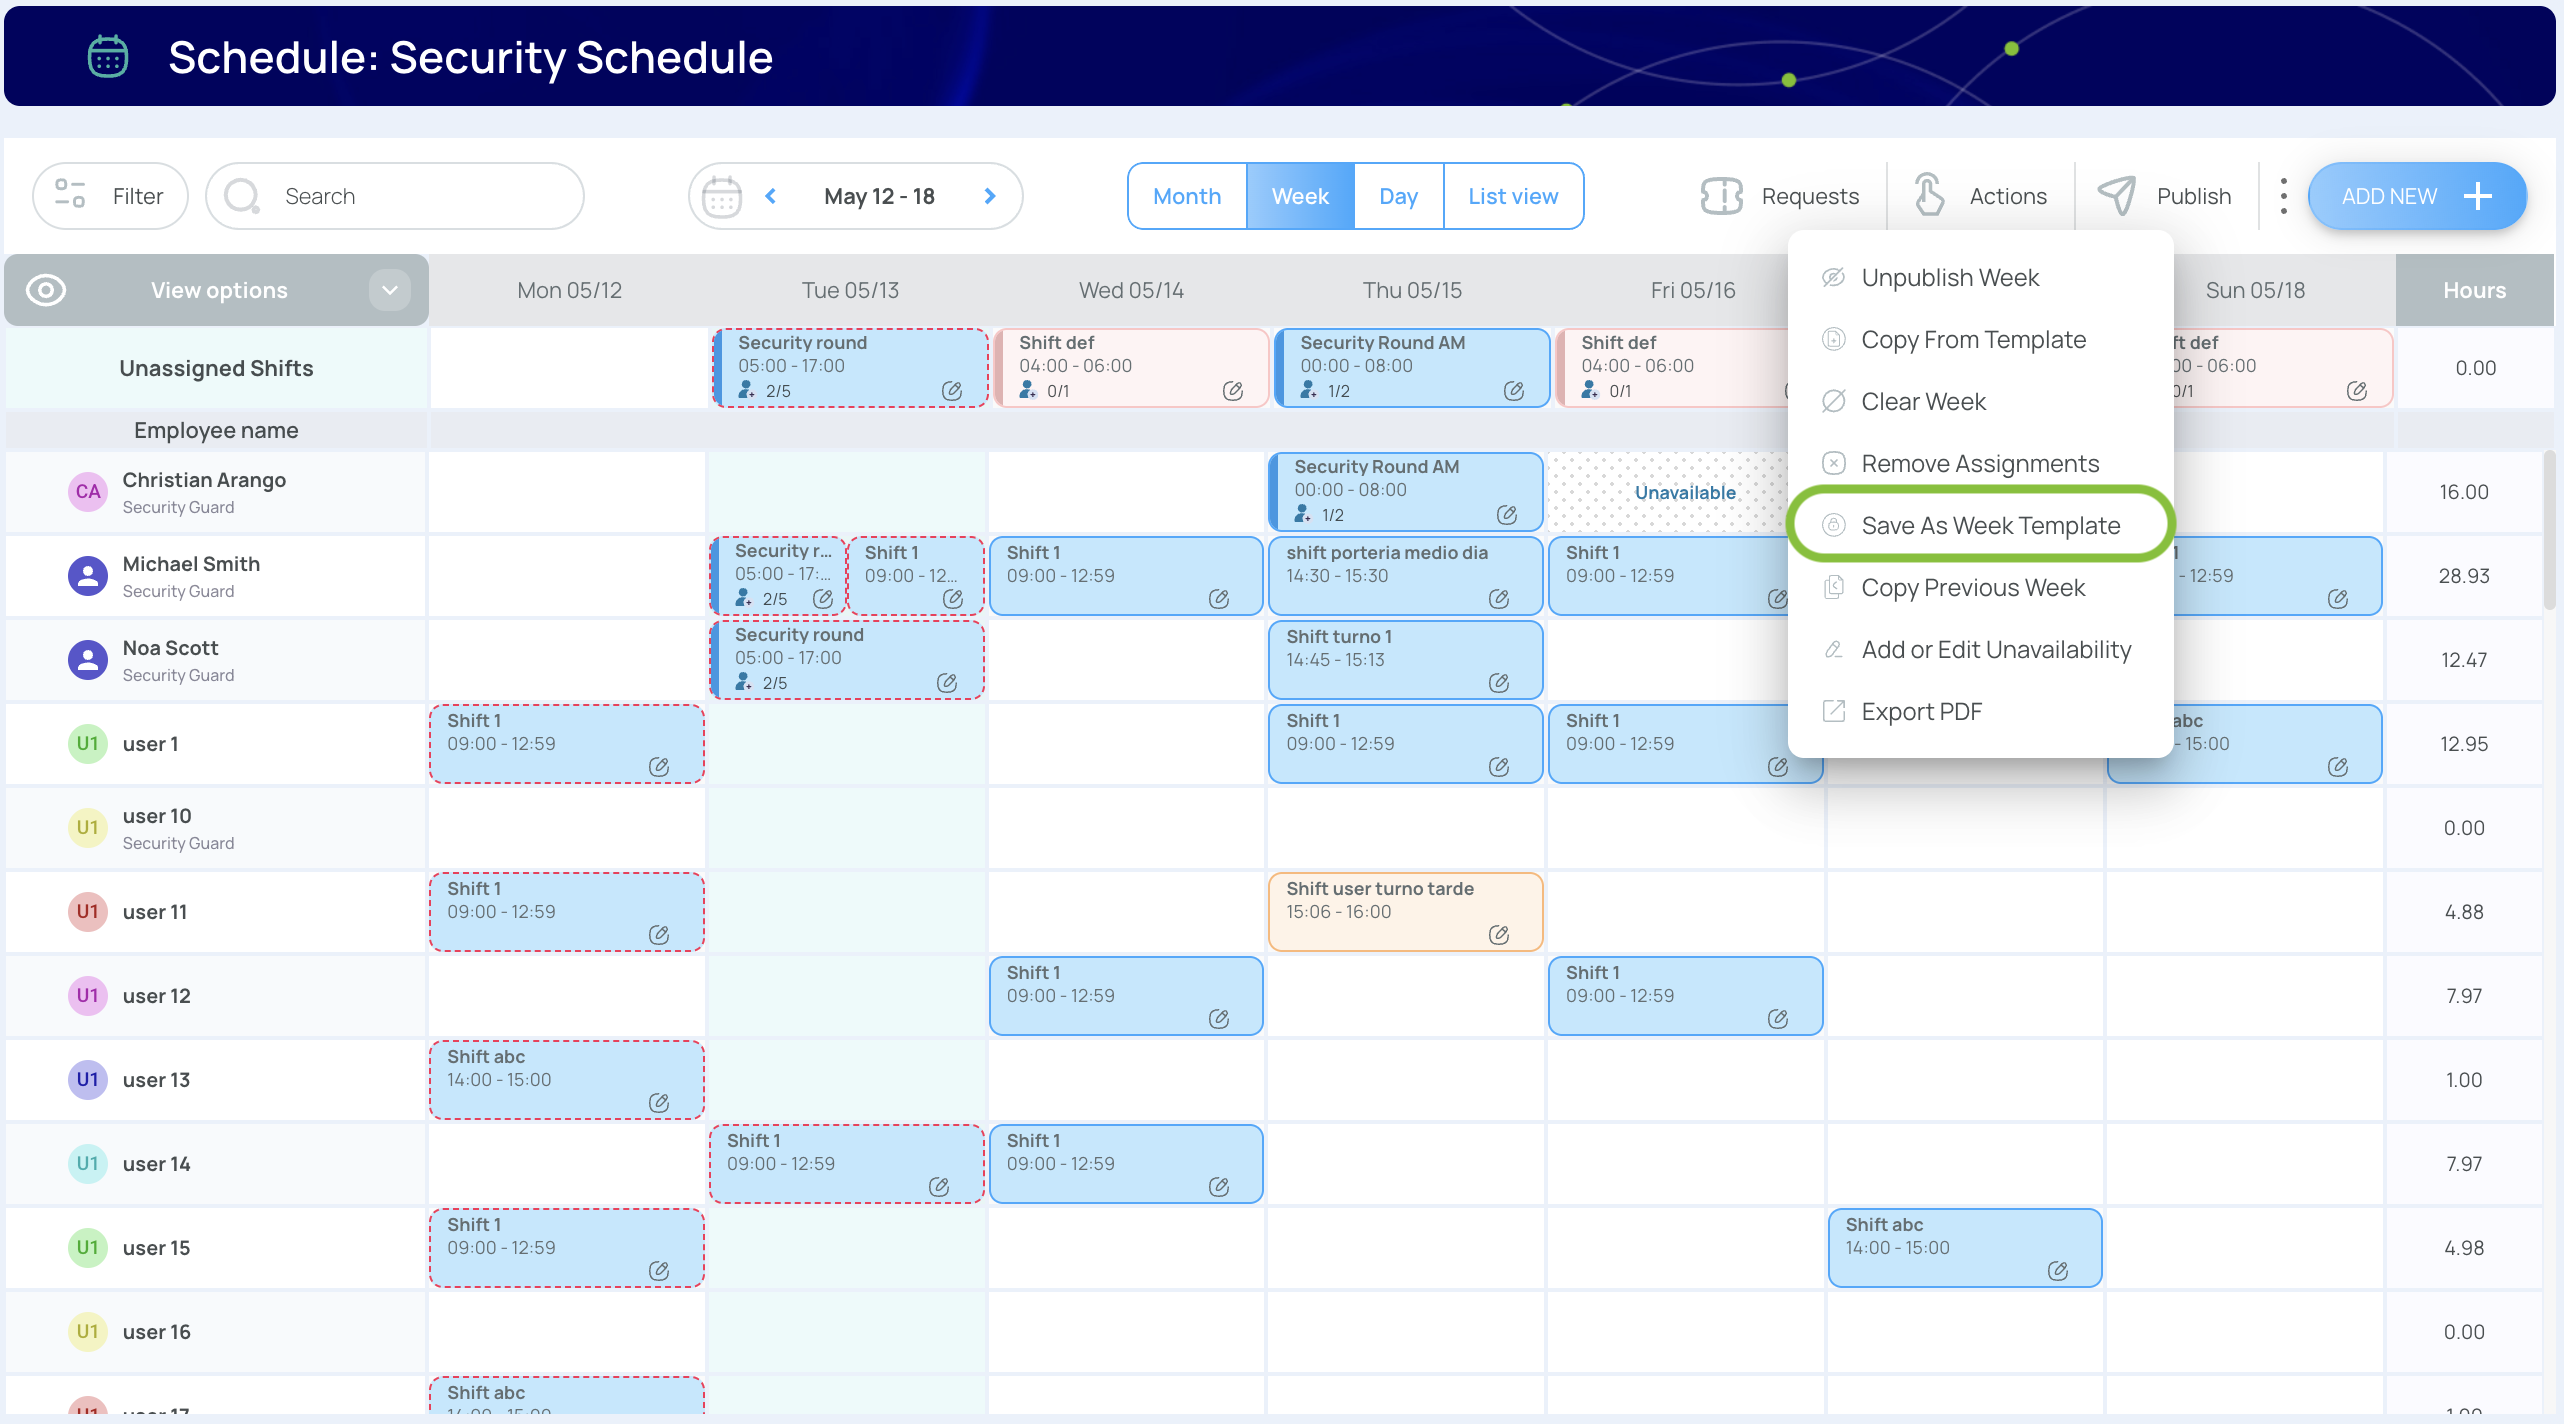
- Give this template a name and press Save template
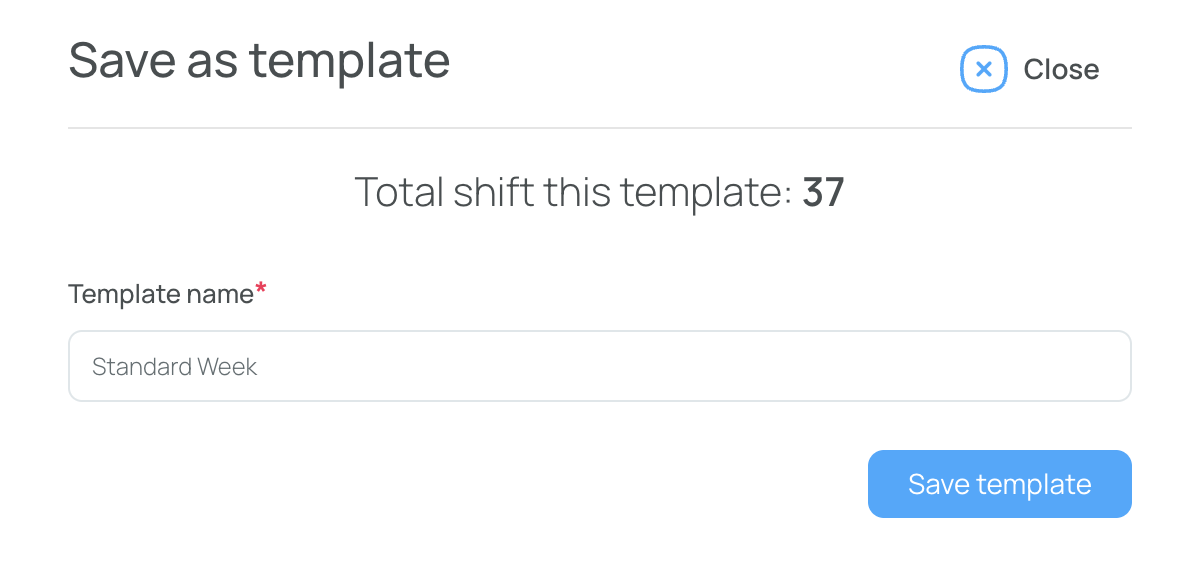
That week is now stored as a template and will appear in the Actions → Copy From Template dialog.
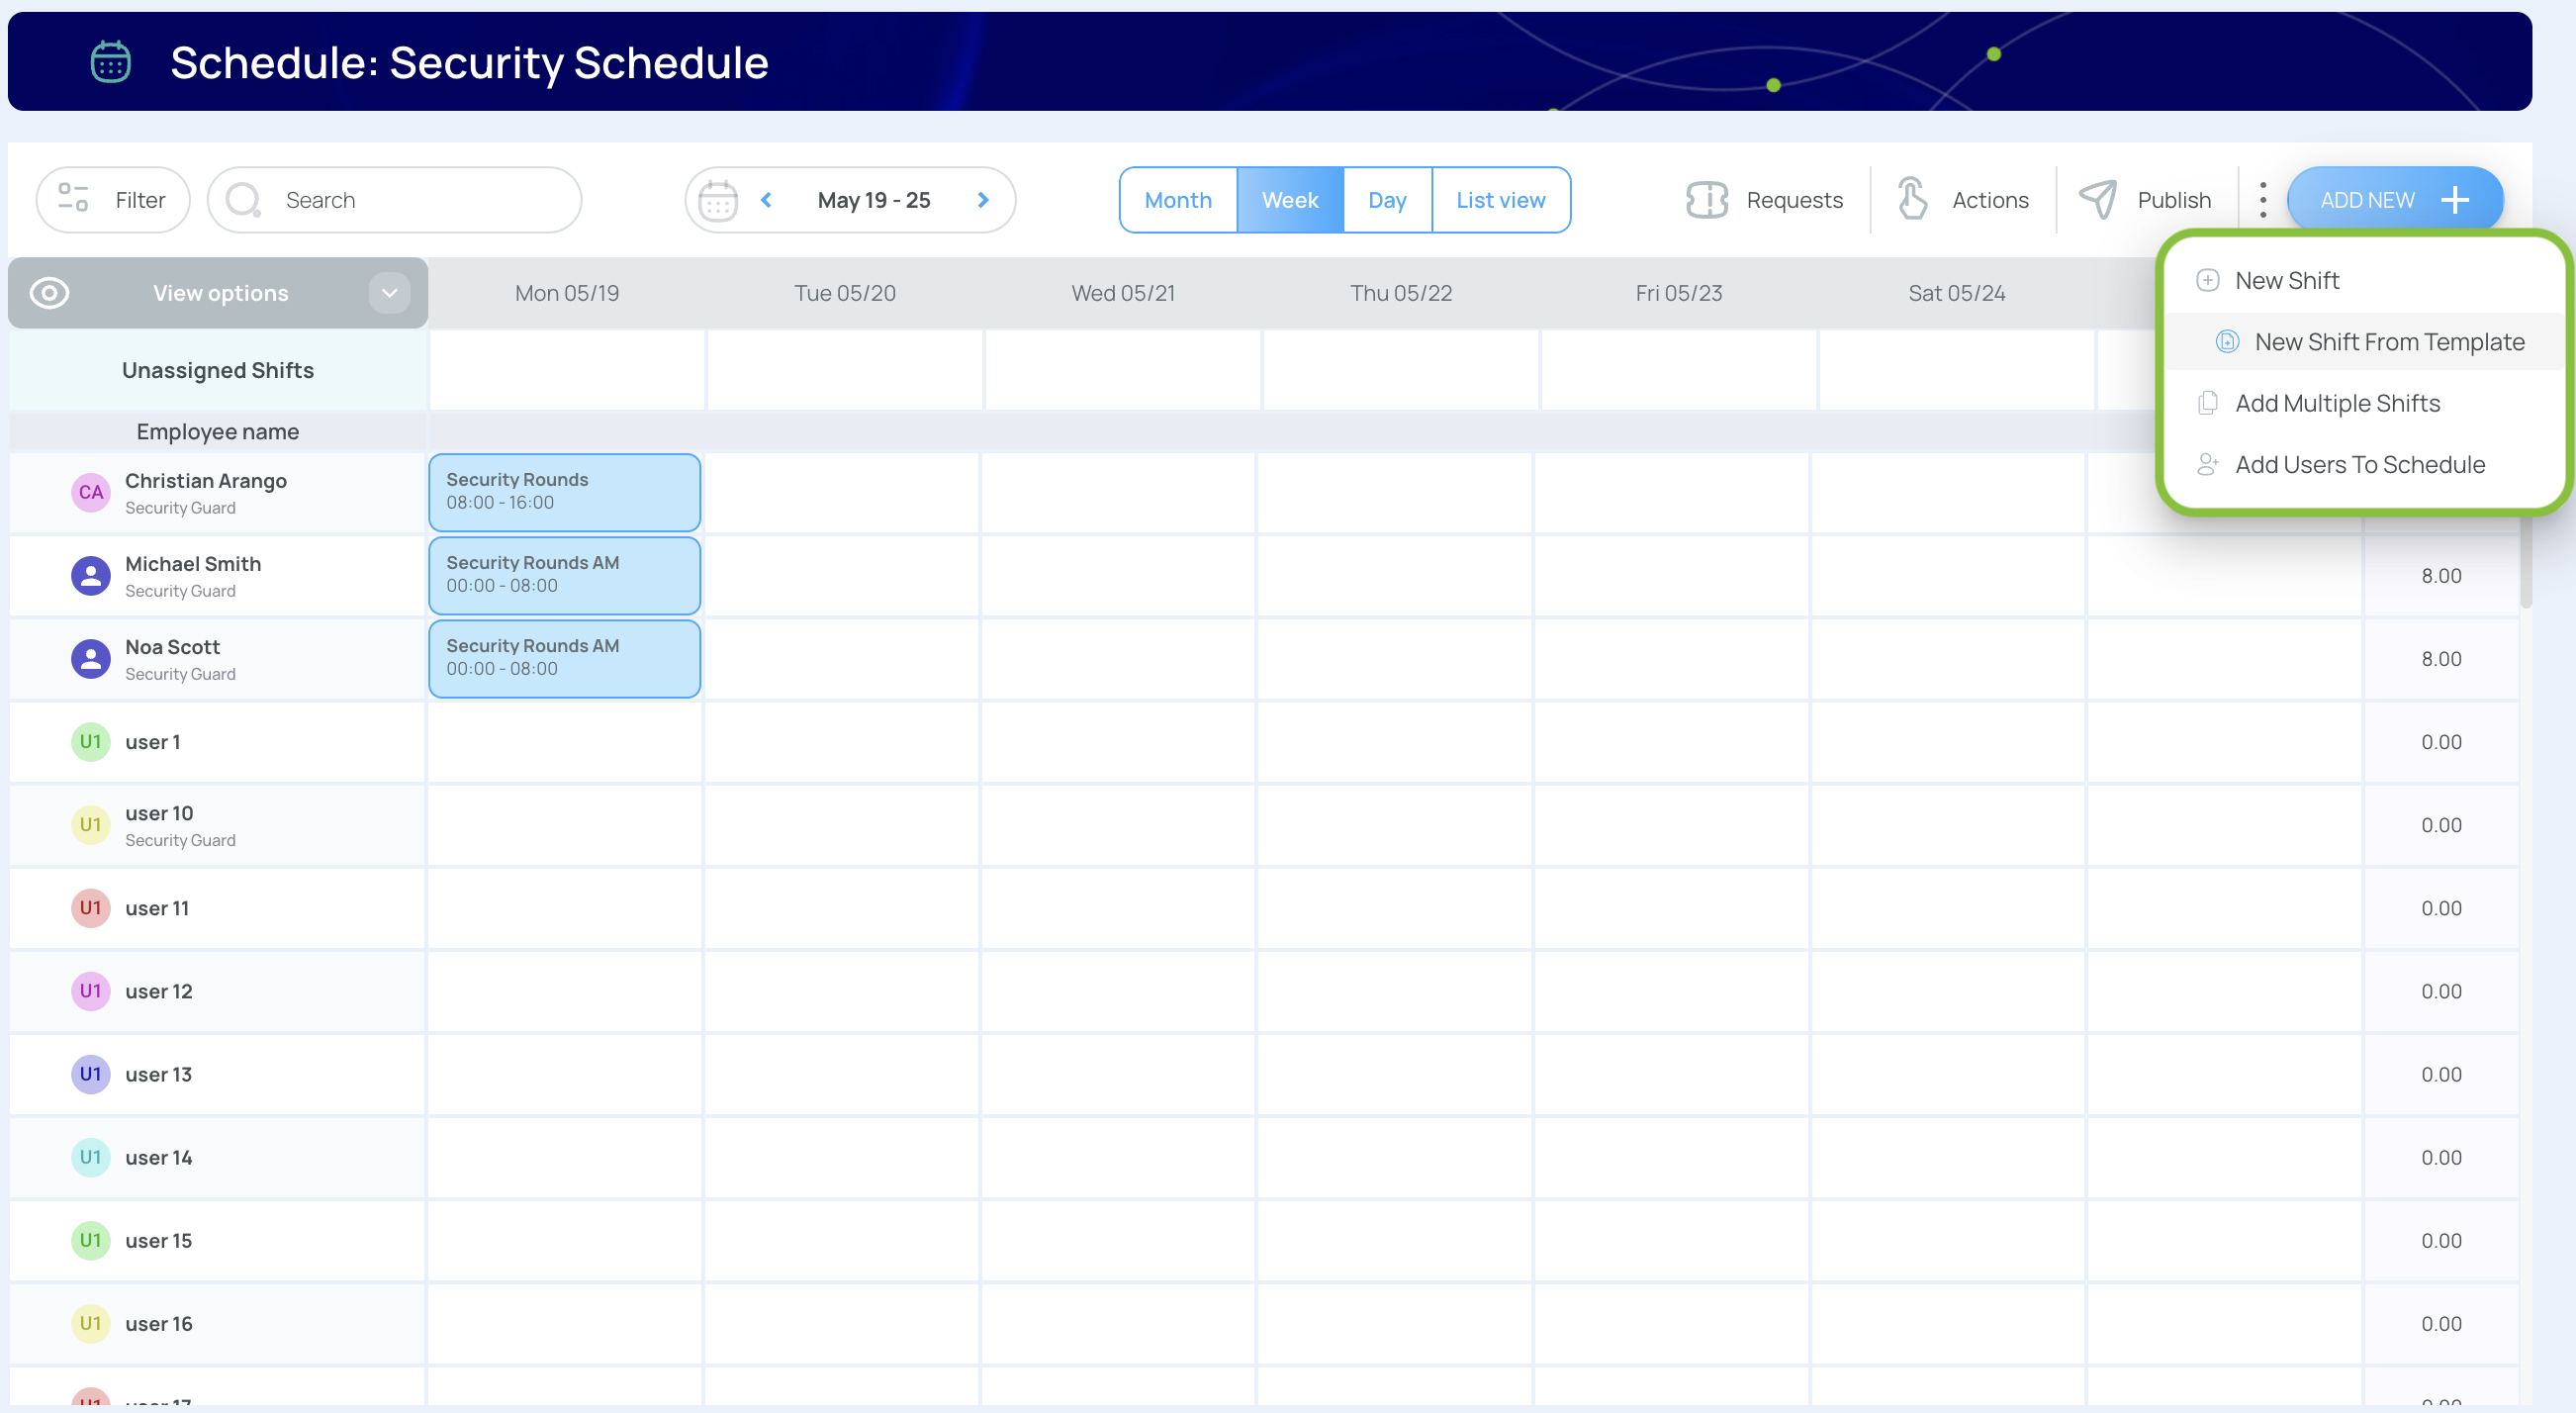
Add New Shifts from Templates
- In the scheduler, click Add new, and choose “New shift from template.”
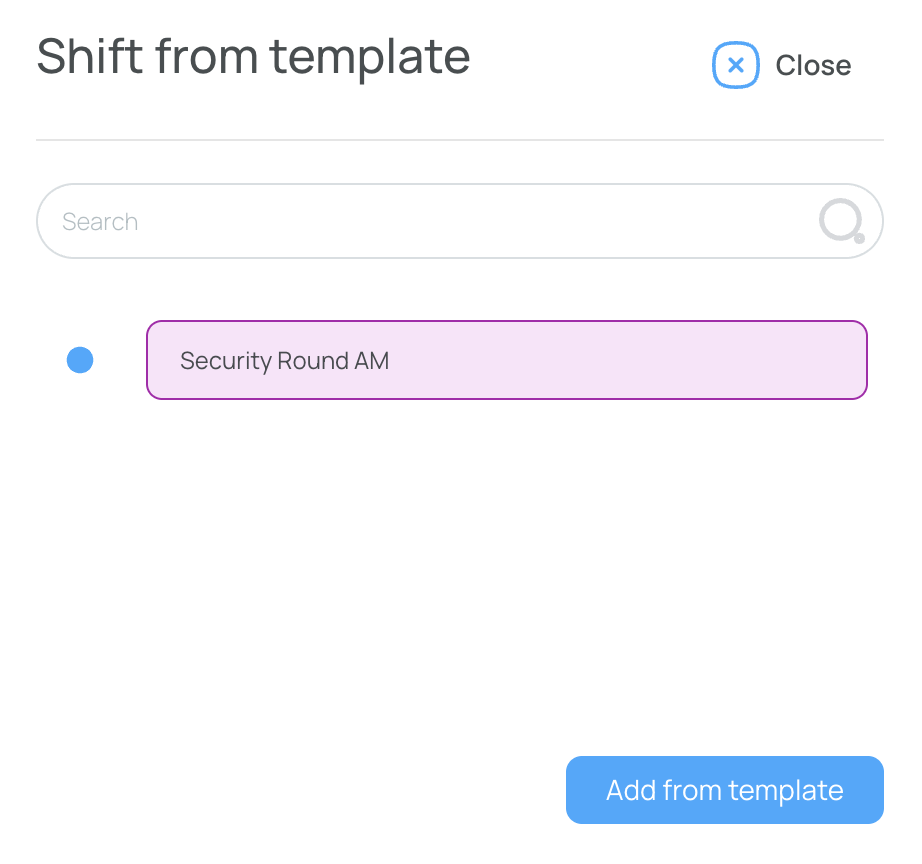
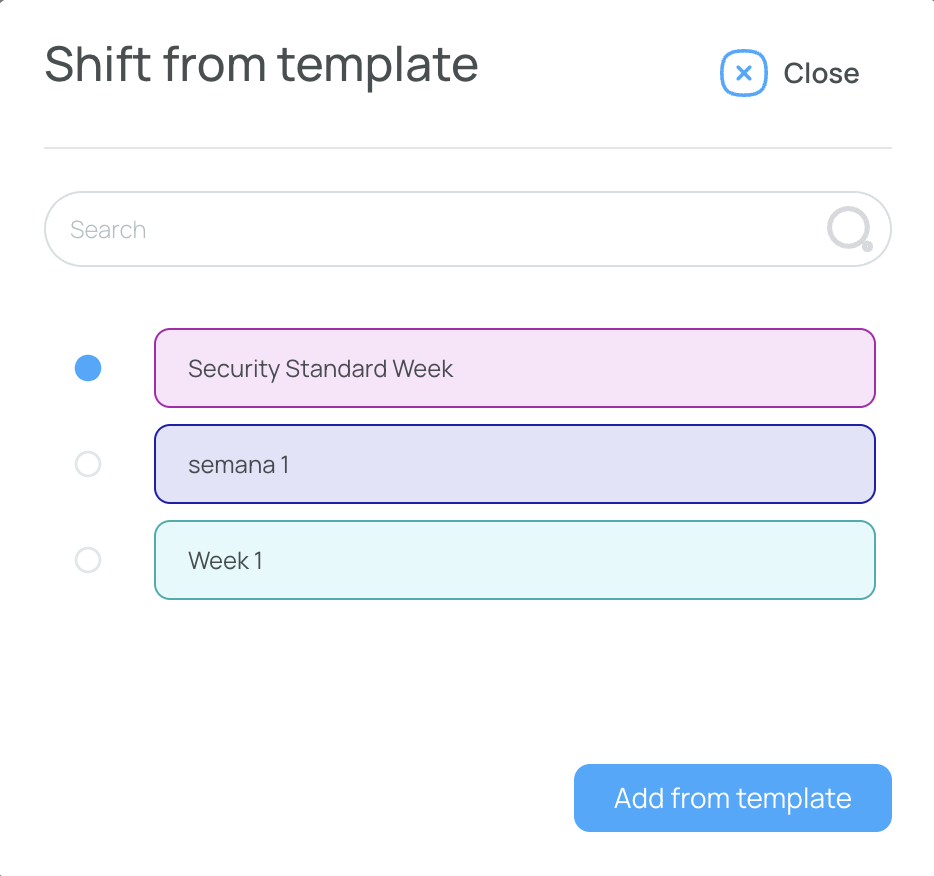
- Use the search bar to locate your template, then click “Add from template.”
- Find the shift in the schedule. It will be saved as a Draft.
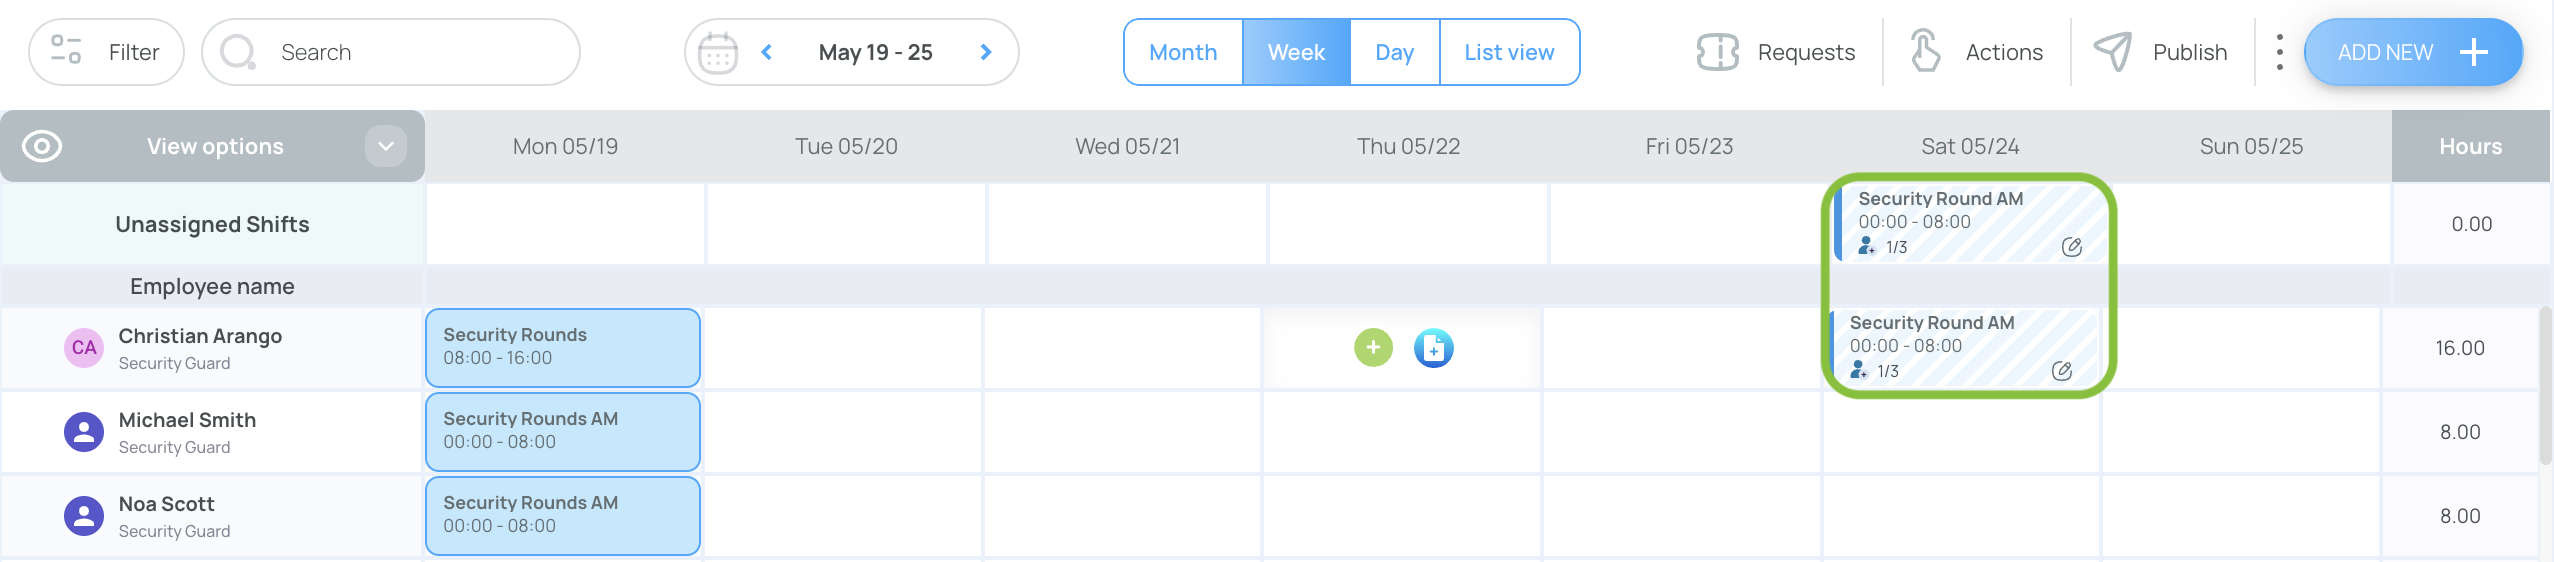
- If needed, press the Edit button and adjustspecifics (date, assignees, number of spots, etc.).
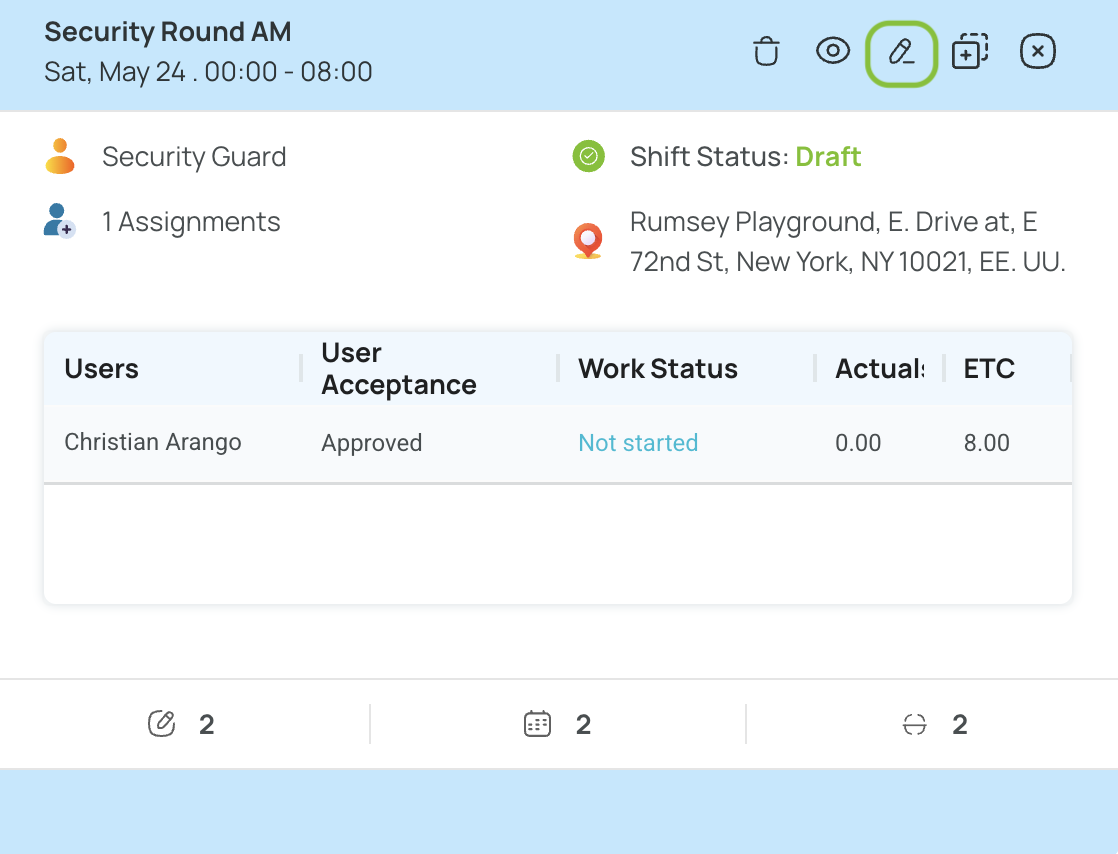
- Publish or Updated Draft.
The new shift inherits every element you stored: role colors, tasks, forms, and any attached documents—ready in seconds.
Add Week from Template
- Navigate to an empty week.
- In the scheduler, click Actions and select Copy from template.
- Use the search bar to locate your template, then click “Add from template.”
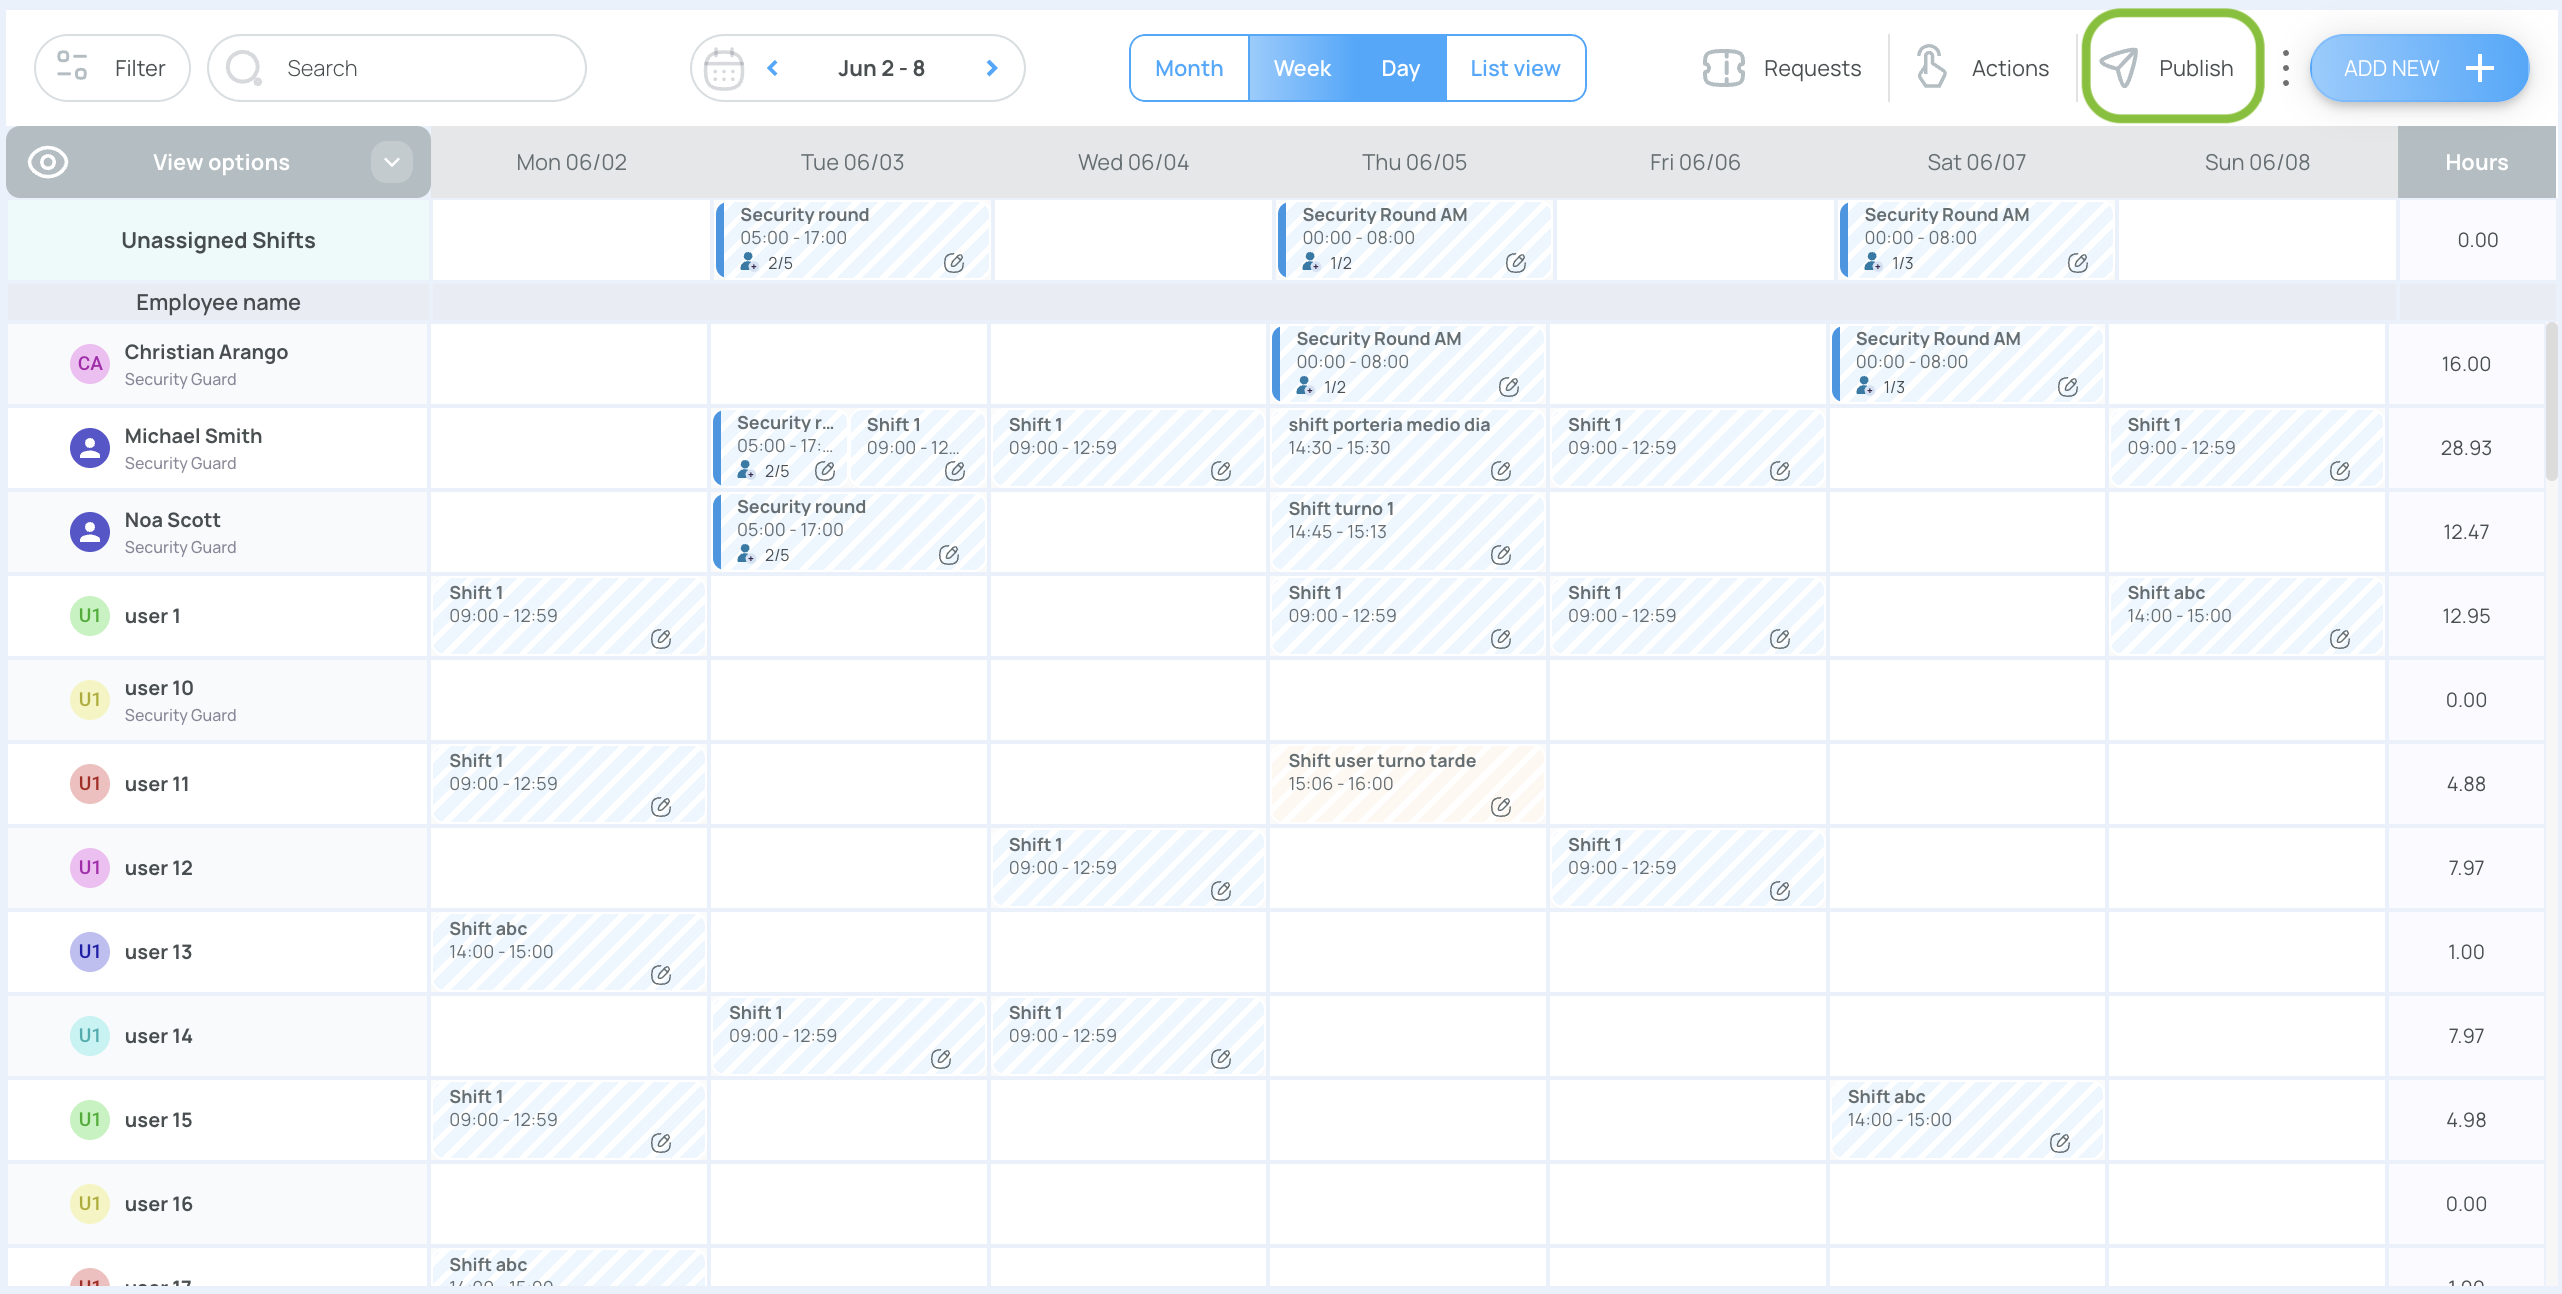
- All the shifts from the template will appear as drafts on the scheduler. Press "Publish" or edit the drafts as needed.
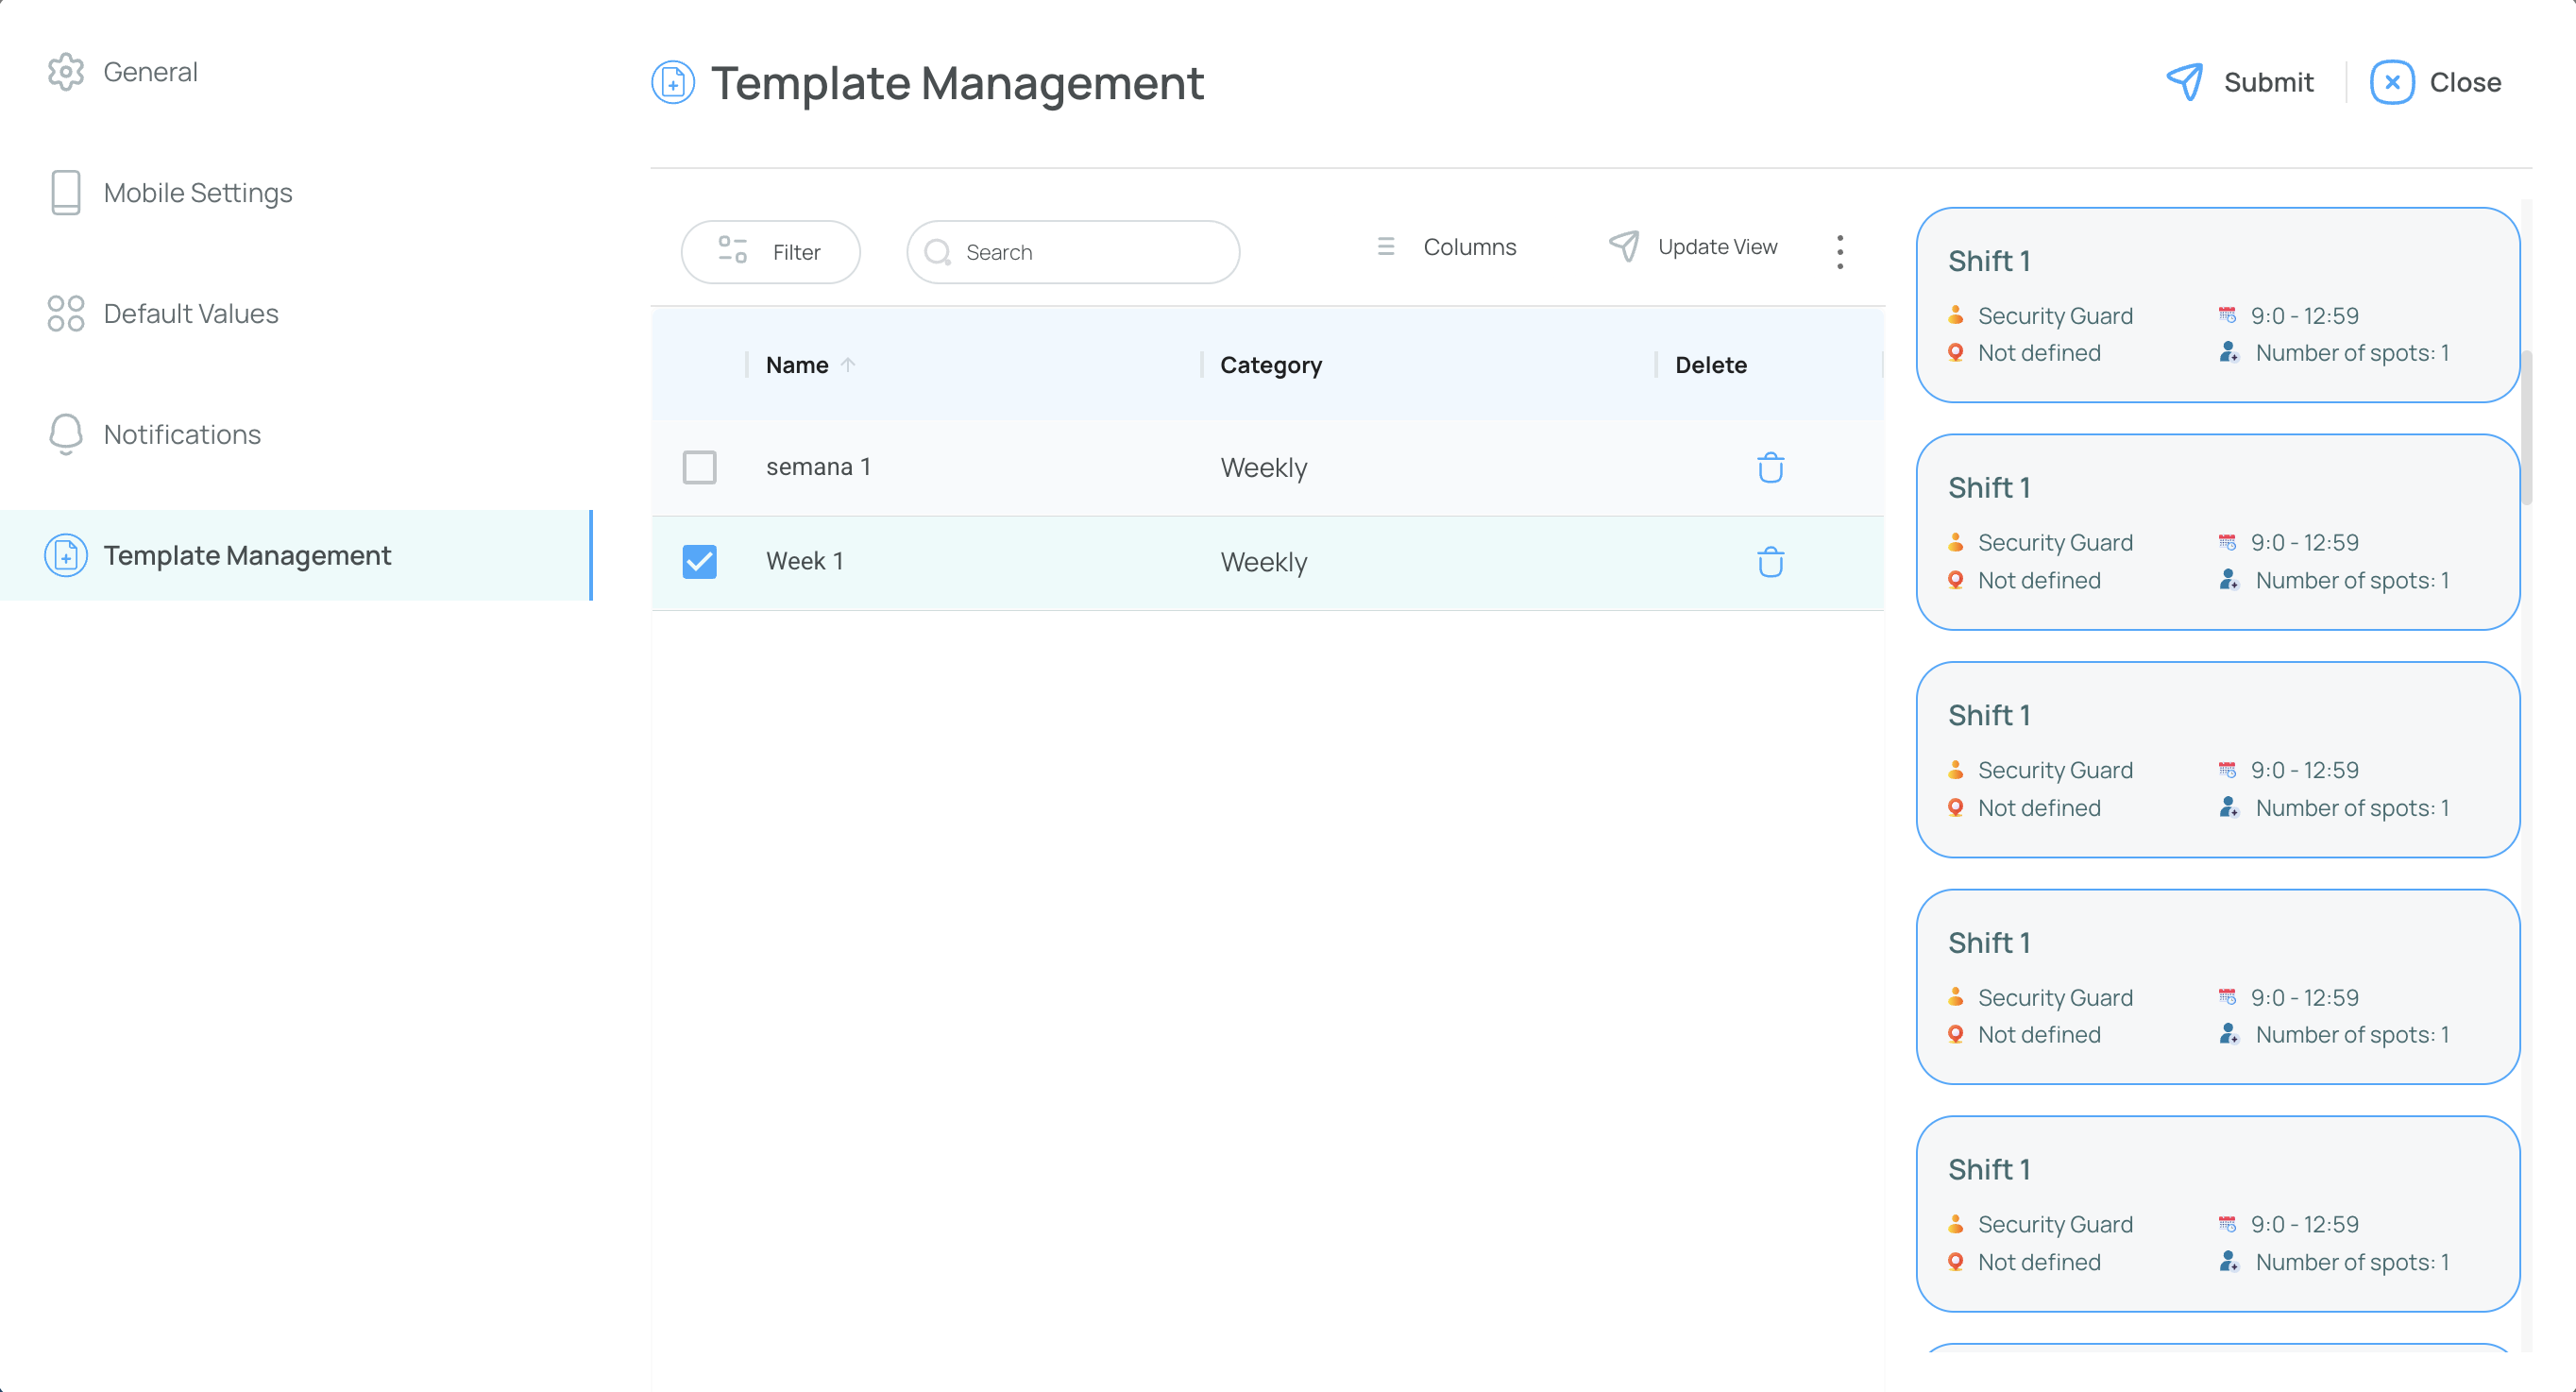
Template Management Tab
Need to clean up old templates or confirm what’s available? Use the dedicated management view:
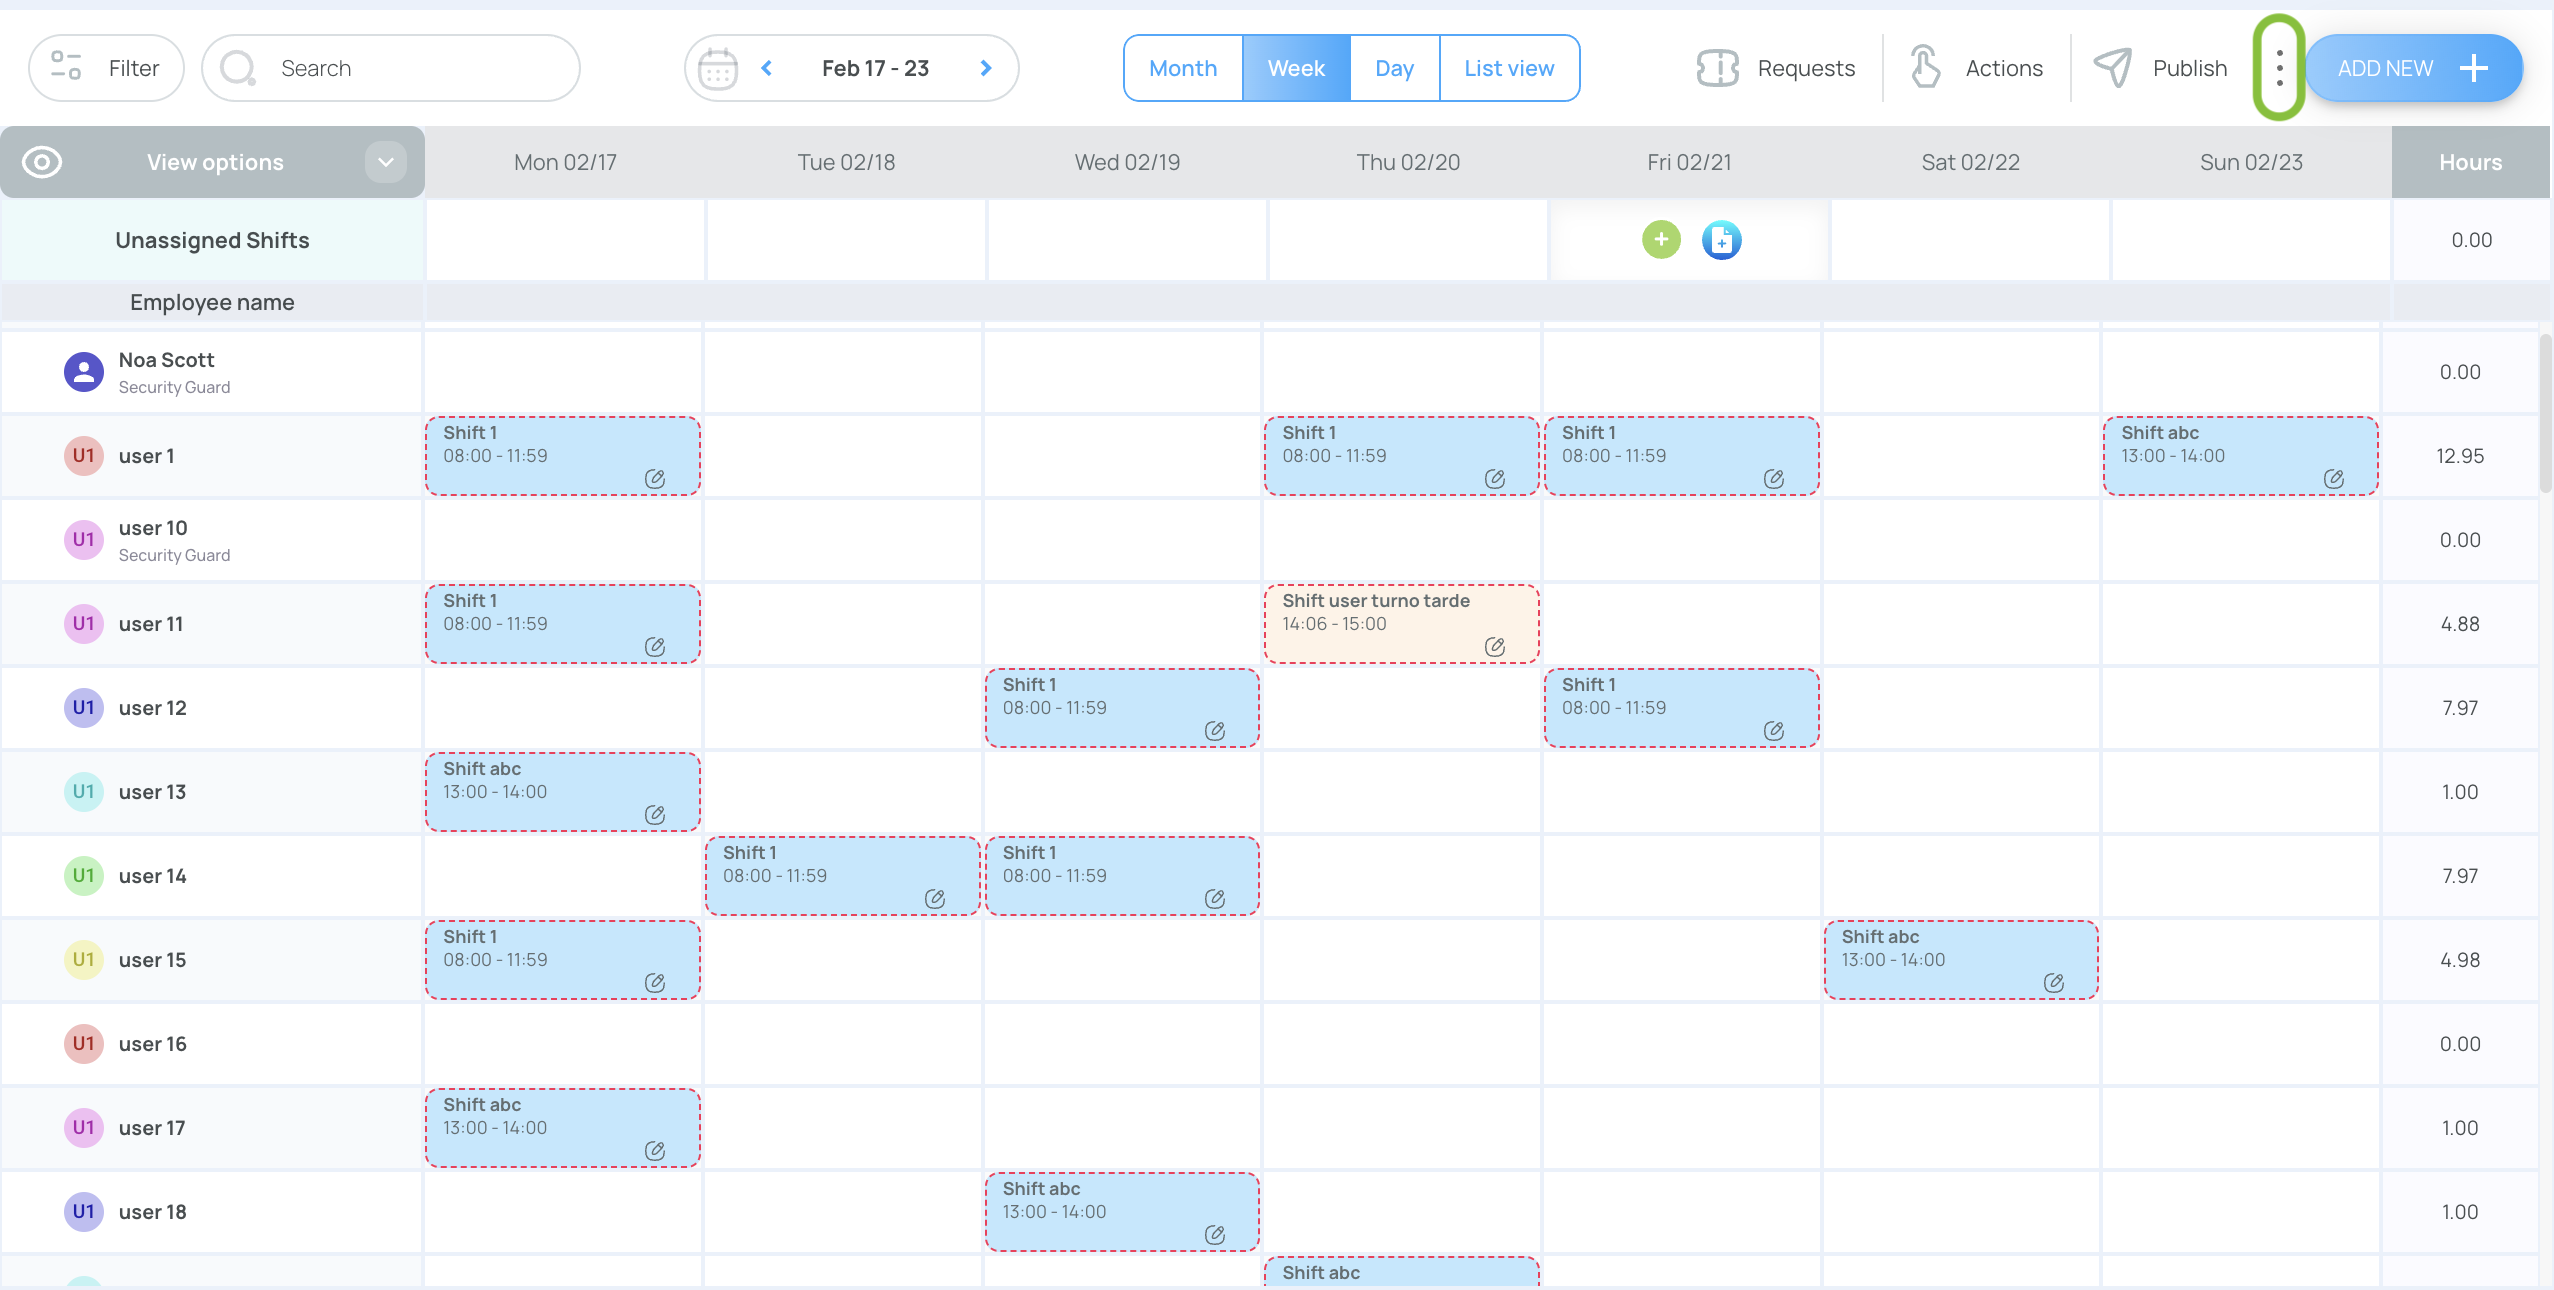
- From the scheduler’s three-dots menu, choose Settings.
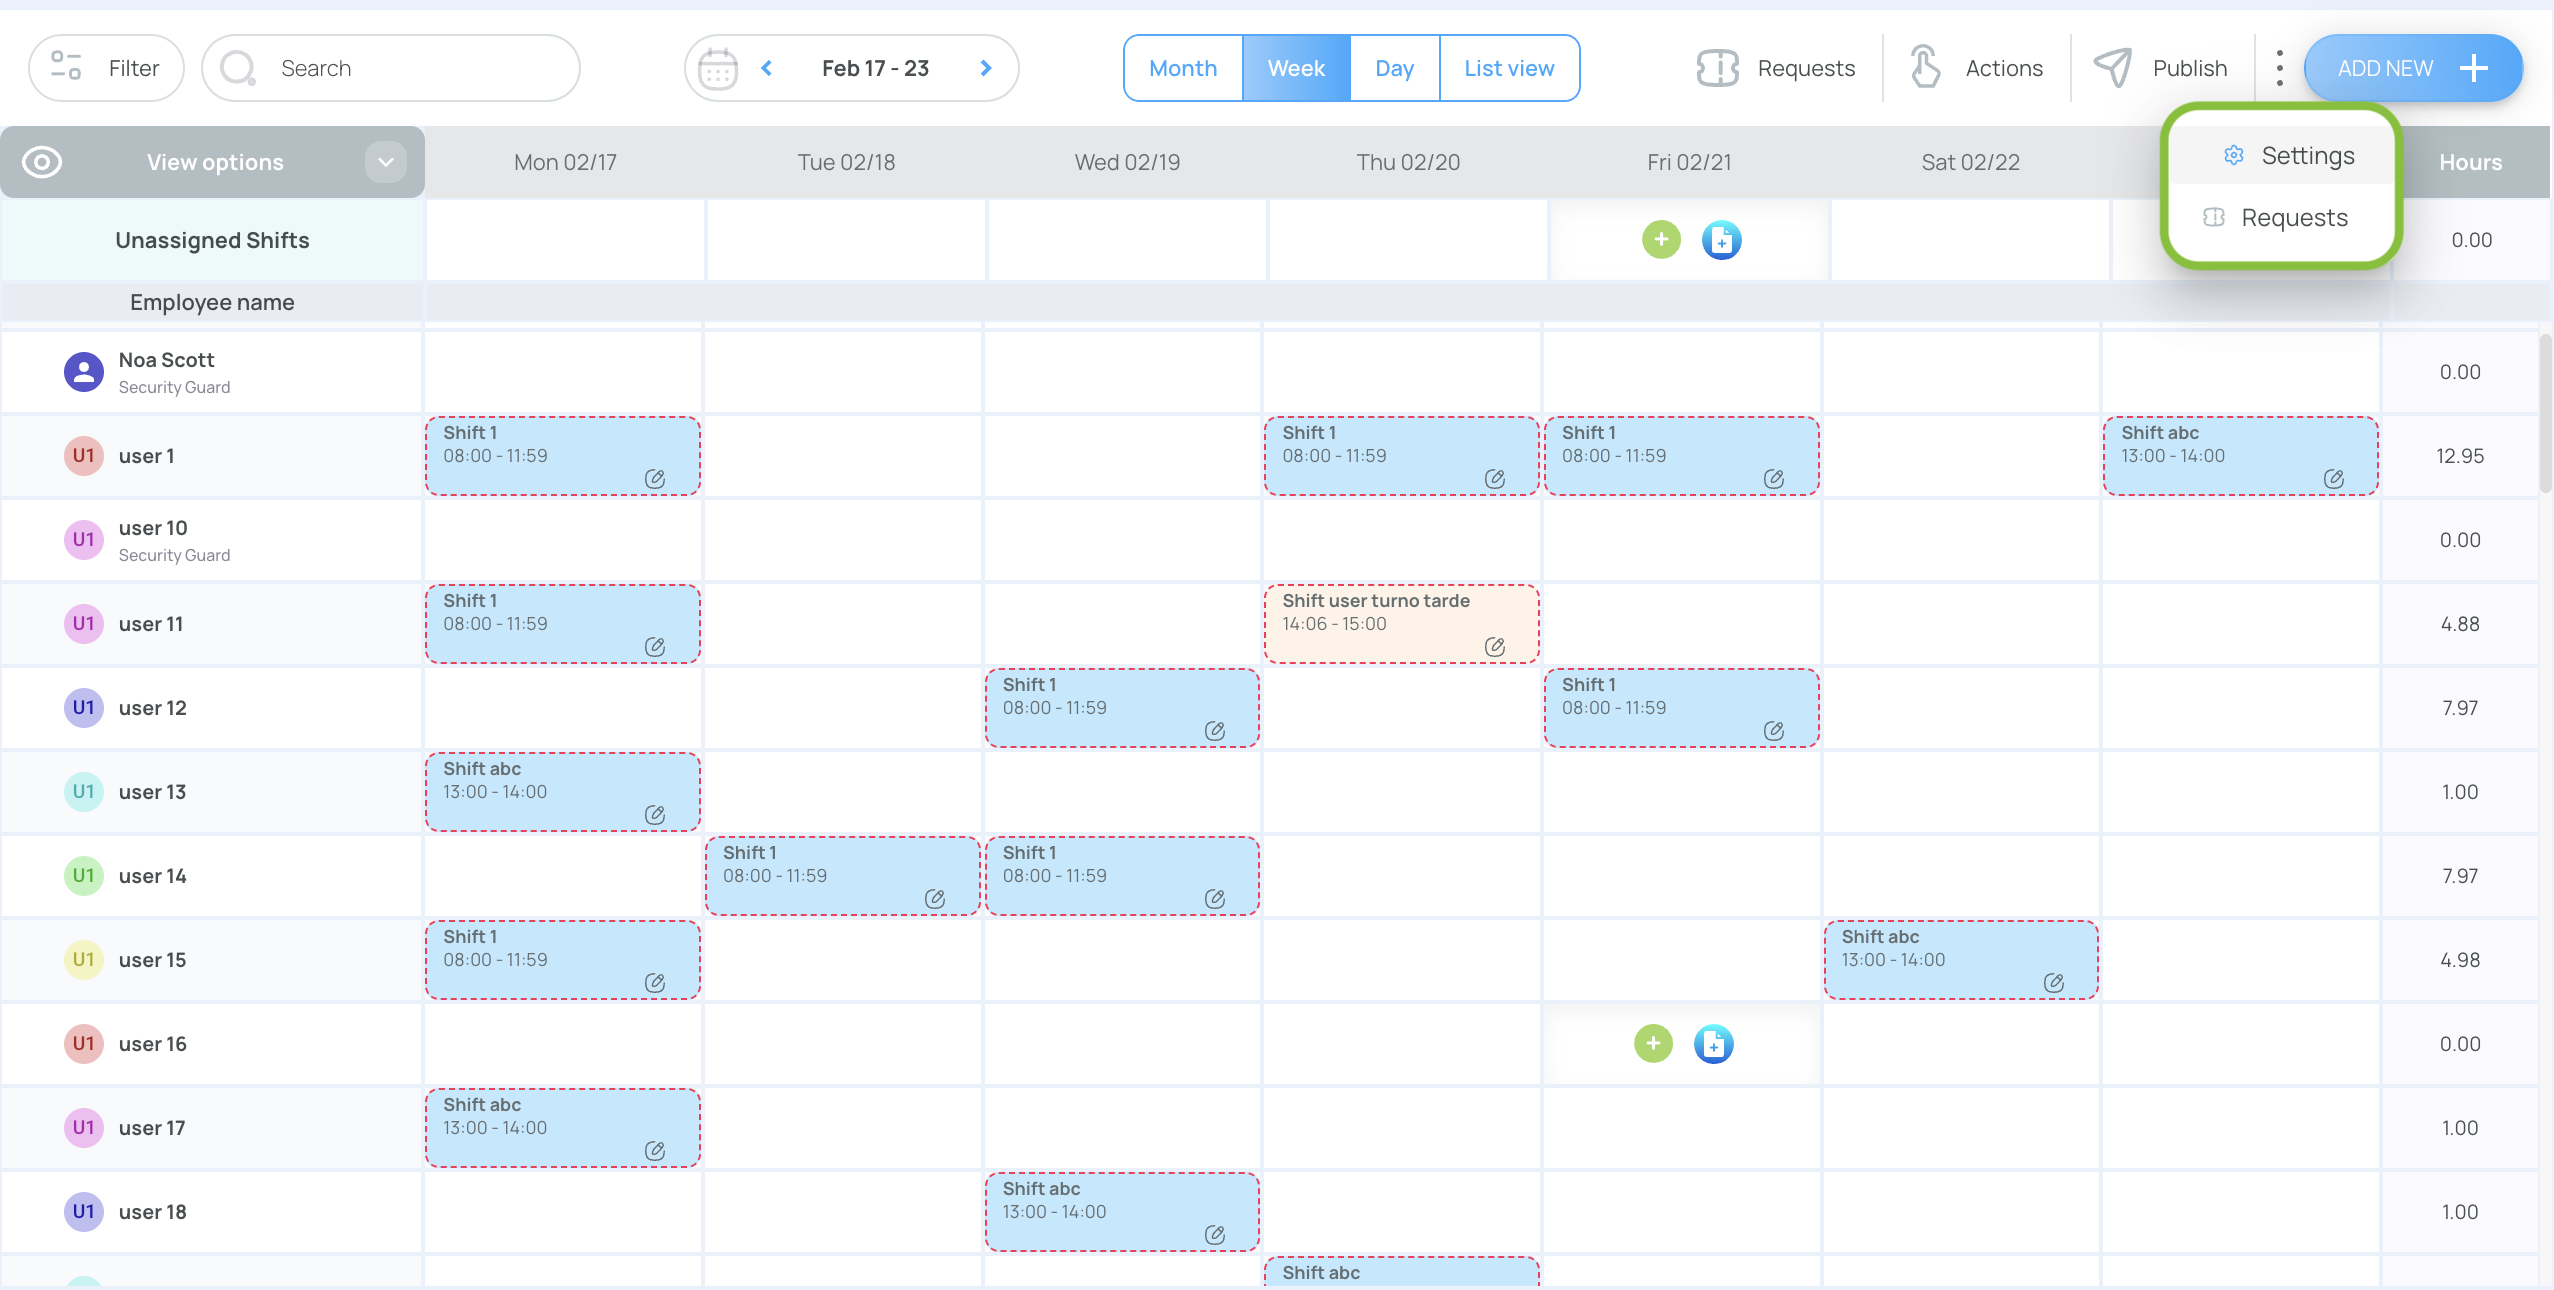
-
Open the Template Management tab.
- View every saved template in one grid.
- Delete single or multiple templates if they’re no longer needed.