Schedule: Shifts
Learn how to manage Shifts in mobohubb’s Scheduling tool. This guide covers shift indicators, how to add new shifts, create drafts, use shift templates, and edit or update existing shifts for efficient workforce scheduling.
Scheduling in mobohubb helps assign jobs or shifts to each user, ensuring your business has coverage for every hour it operates. A shift is a designated time slot an employee is assigned to work. Administrators create these shifts, and mobile users can then fulfill them with relevant tasks, scans, or forms. Shifts are displayed as the central axis in the scheduling interface.
Tip: If you haven’t yet created a schedule, visit our “Schedule: Add, Edit and Delete Schedules” guide for instructions on adding or editing a schedule.
Pay Rate Calculation
mobohubb calculates a user’s pay rate based on two different settings:
-
Role Assigned to the Shift: If a shift is linked to a specific role, mobohubb uses the pay rate from that role. You can view or modify these rates in the Roles configuration menu.
-
User Configuration: If the shift has no role, the system automatically pulls the pay rate set in the User configuration menu.
Shifts Indicators
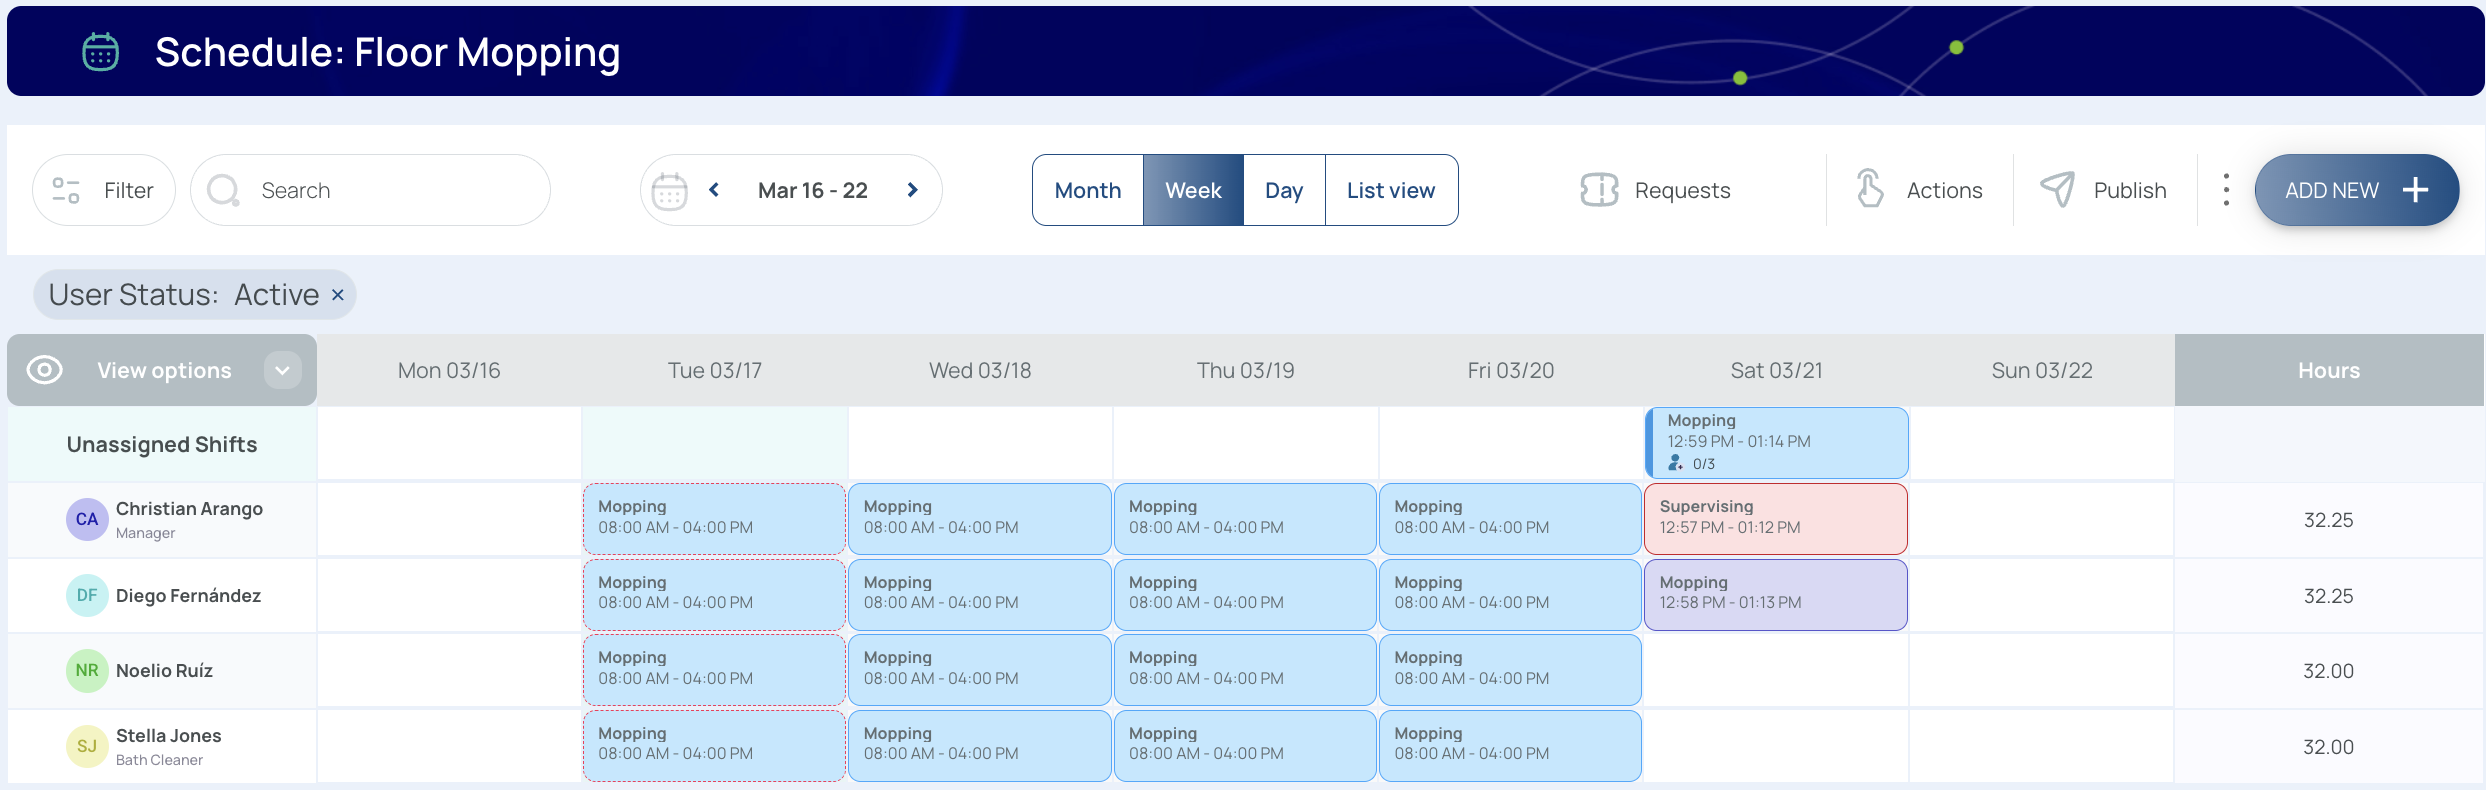
Each shift can include various visual indicators, which help differentiate their statuses or key attributes:
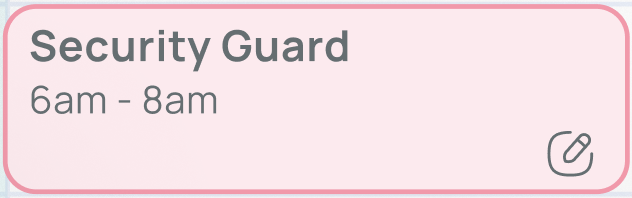
Shift states
Published
Visible in the mobile app, so users can accept or decline the assignment. A published shift displays a solid background in the color tied to its role.
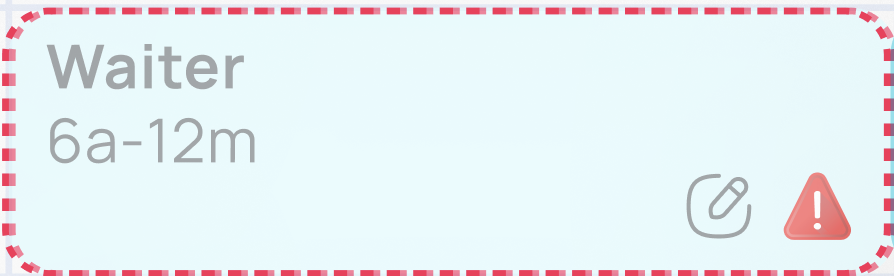
Missed
The shift was accepted but never started before its scheduled time. It keeps the role’s solid color, but the border fades to signal it was missed.
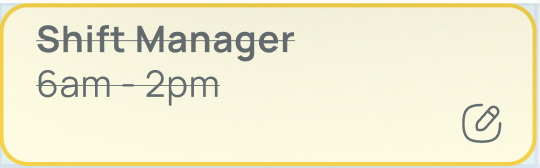
Completed
After the user checks in, works, and checks out, the shift label is shown with a strikethrough, confirming completion.
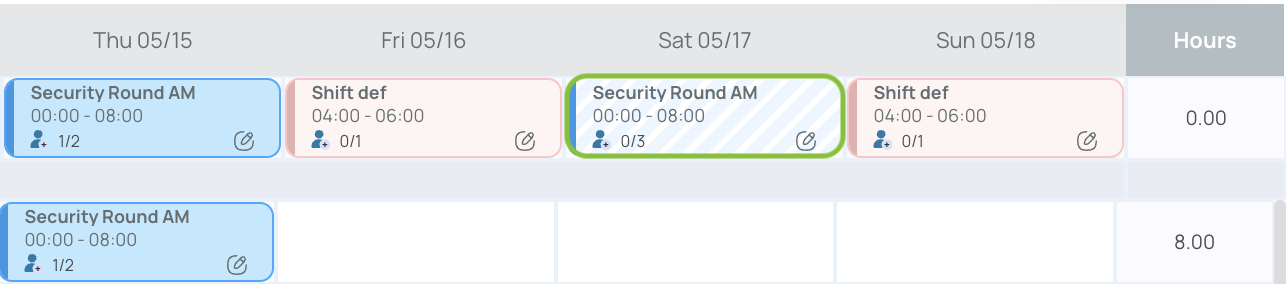
Draft
Still unpublished—therefore invisible to mobile users—and rendered with a faded background. Drafts may already include tasks, scans, or forms.

Alert notification types
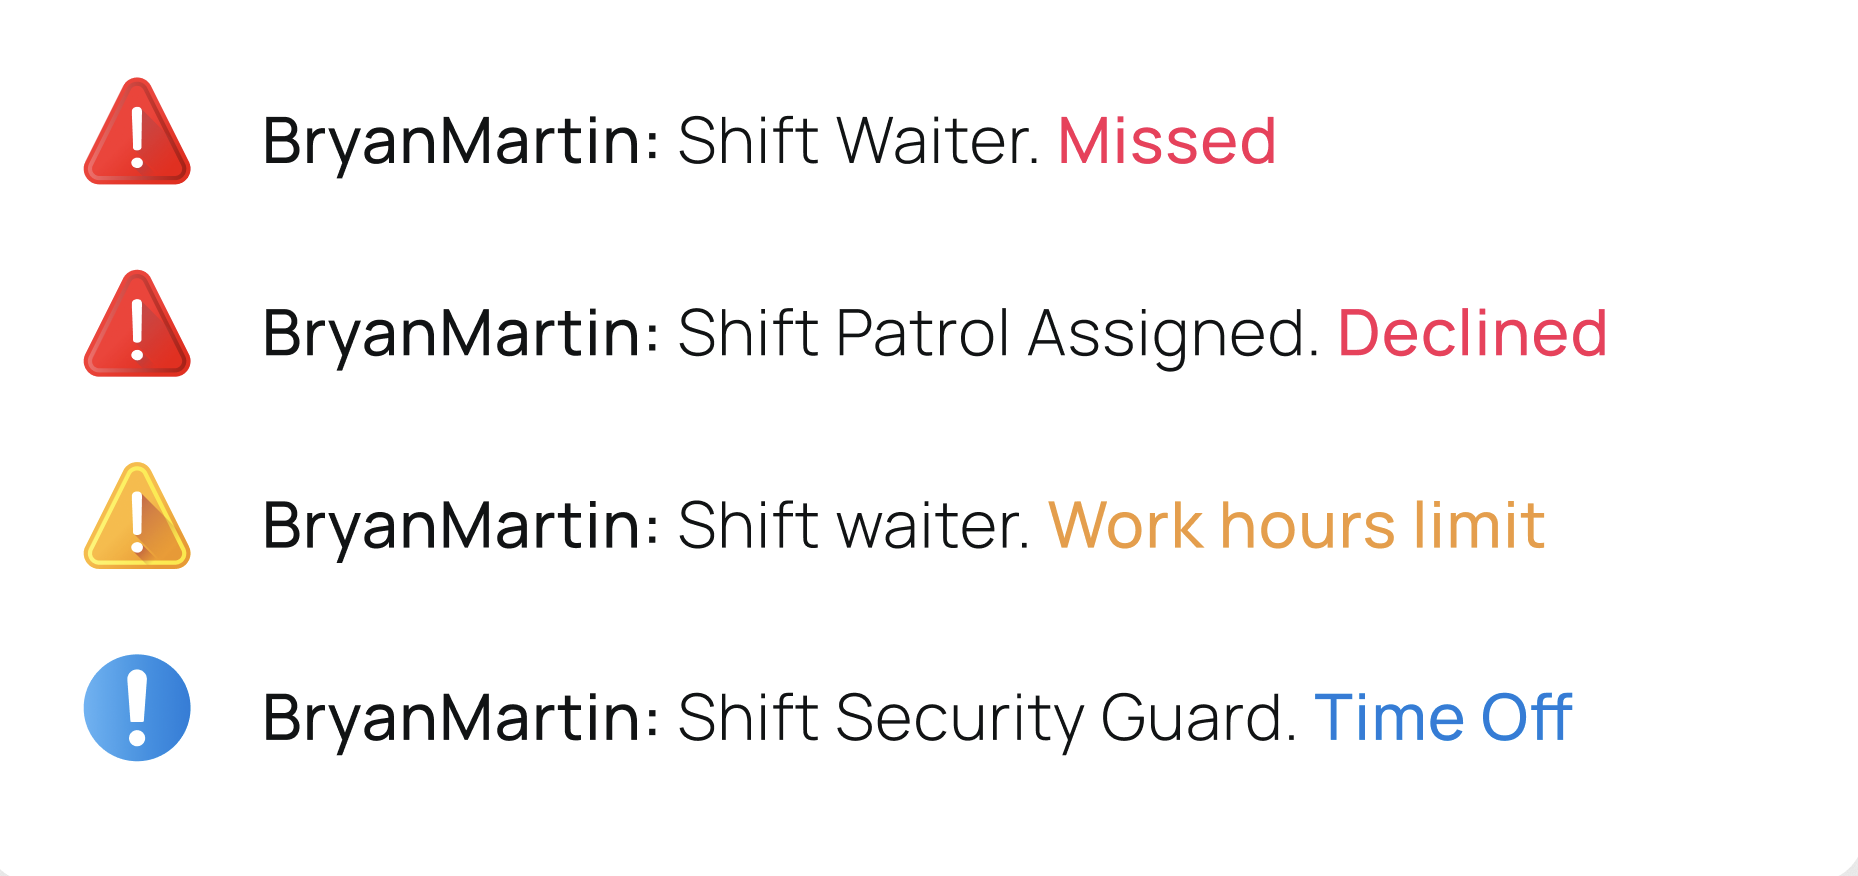
Immediate Attention Messages
A red icon flags urgent conflicts—missed shifts, shifts not yet accepted, or overlapping assignments.

Alert Messages
A yellow icon highlights non-critical issues, such as unfinished activities, undefined pay rates, or hour-limit violations.

Informative Messages
A blue icon communicates neutral information—scheduled time-off, holidays, or other unavailabilities tied to the user or shift.

Shift-based indicators
Tasks Indicator
Shows an activity icon when tasks, scans, or forms are linked to the shift.
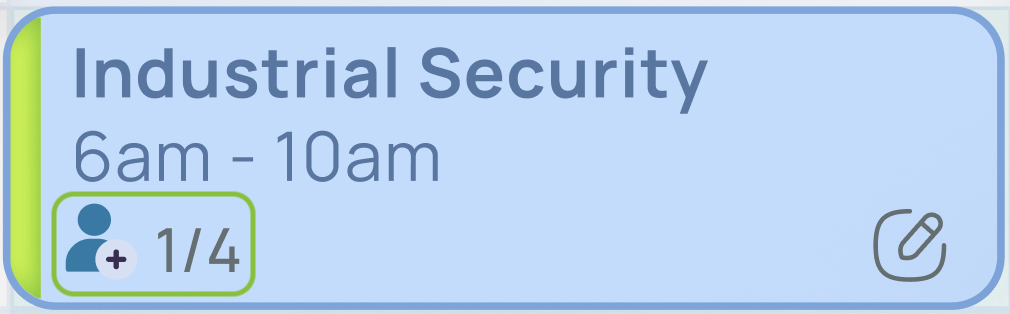
Spots Indicator
Displays the remaining and claimed spots for an unassigned shift that users can pick up.
No matter which scheduling view you’re in (day, week, month, or list), you can always view individual shift details:
- Click on a shift to inspect.

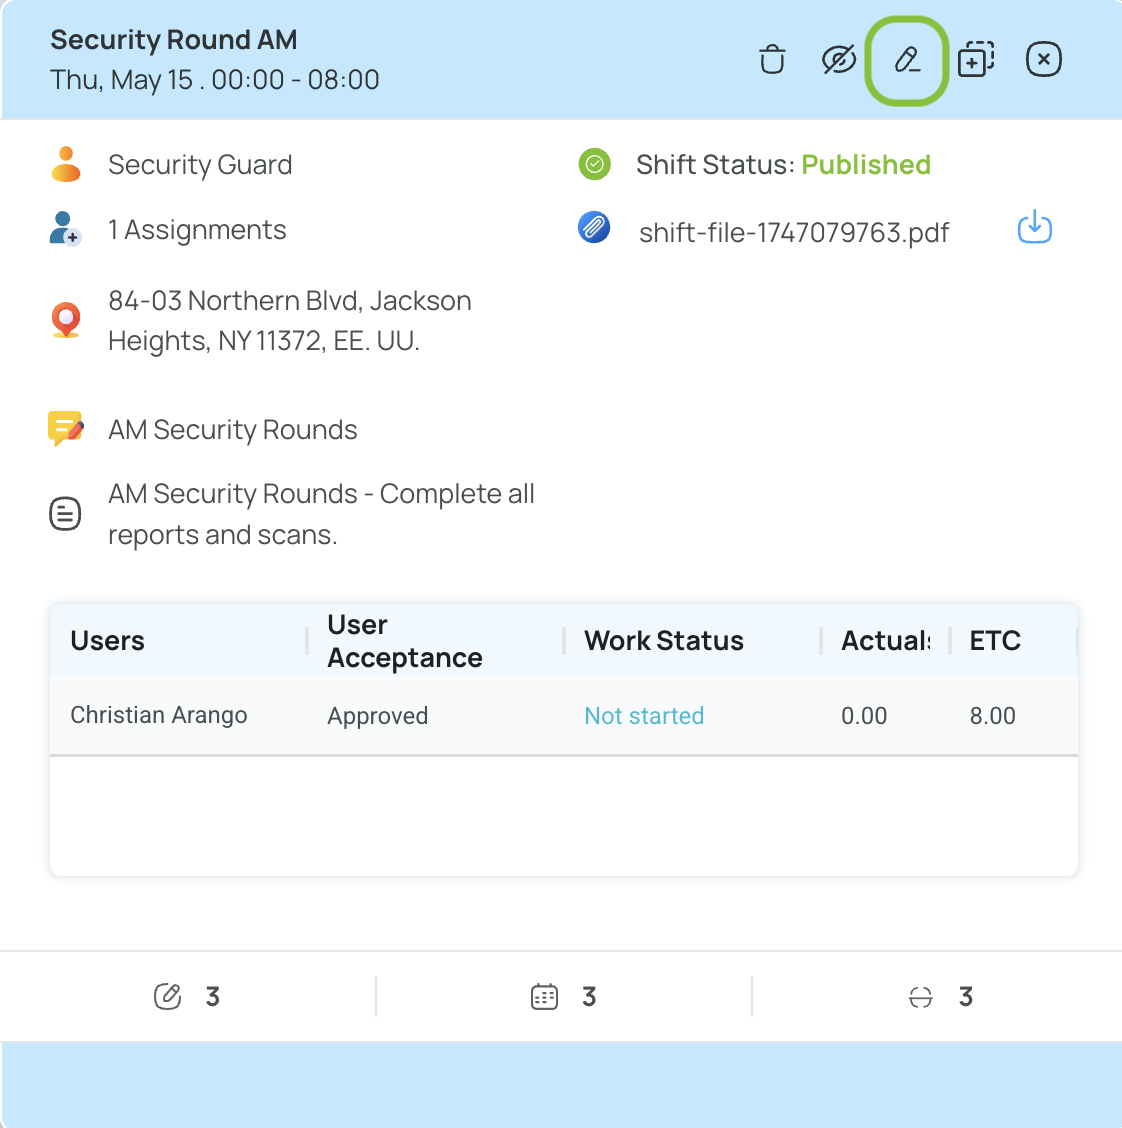
- A popup displays that shift’s core info:
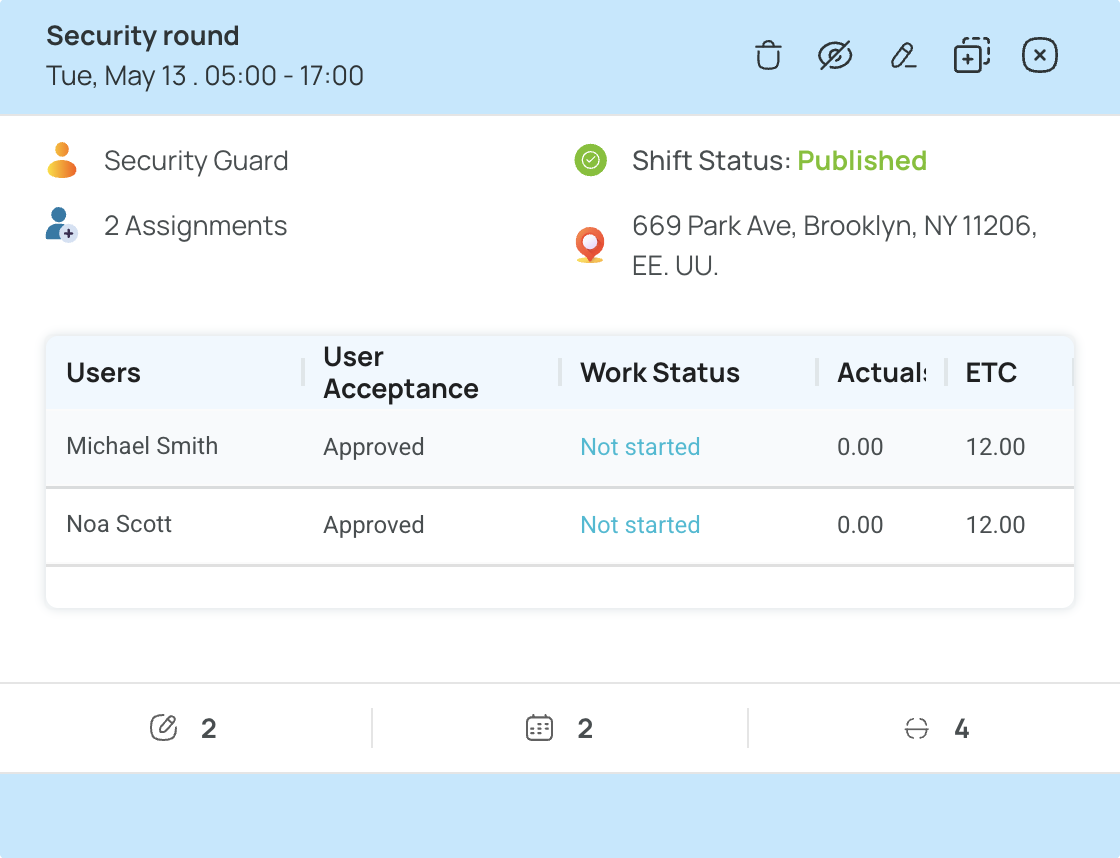
- Card Color: When a shift is created, the Role setting determines its color by default—each role has its own color configuration. If needed, you can adjust each role’s color in the Role configuration menu. This color helps employees quickly recognize the nature of their shifts at a glance. You can also set a customized color for each shift.

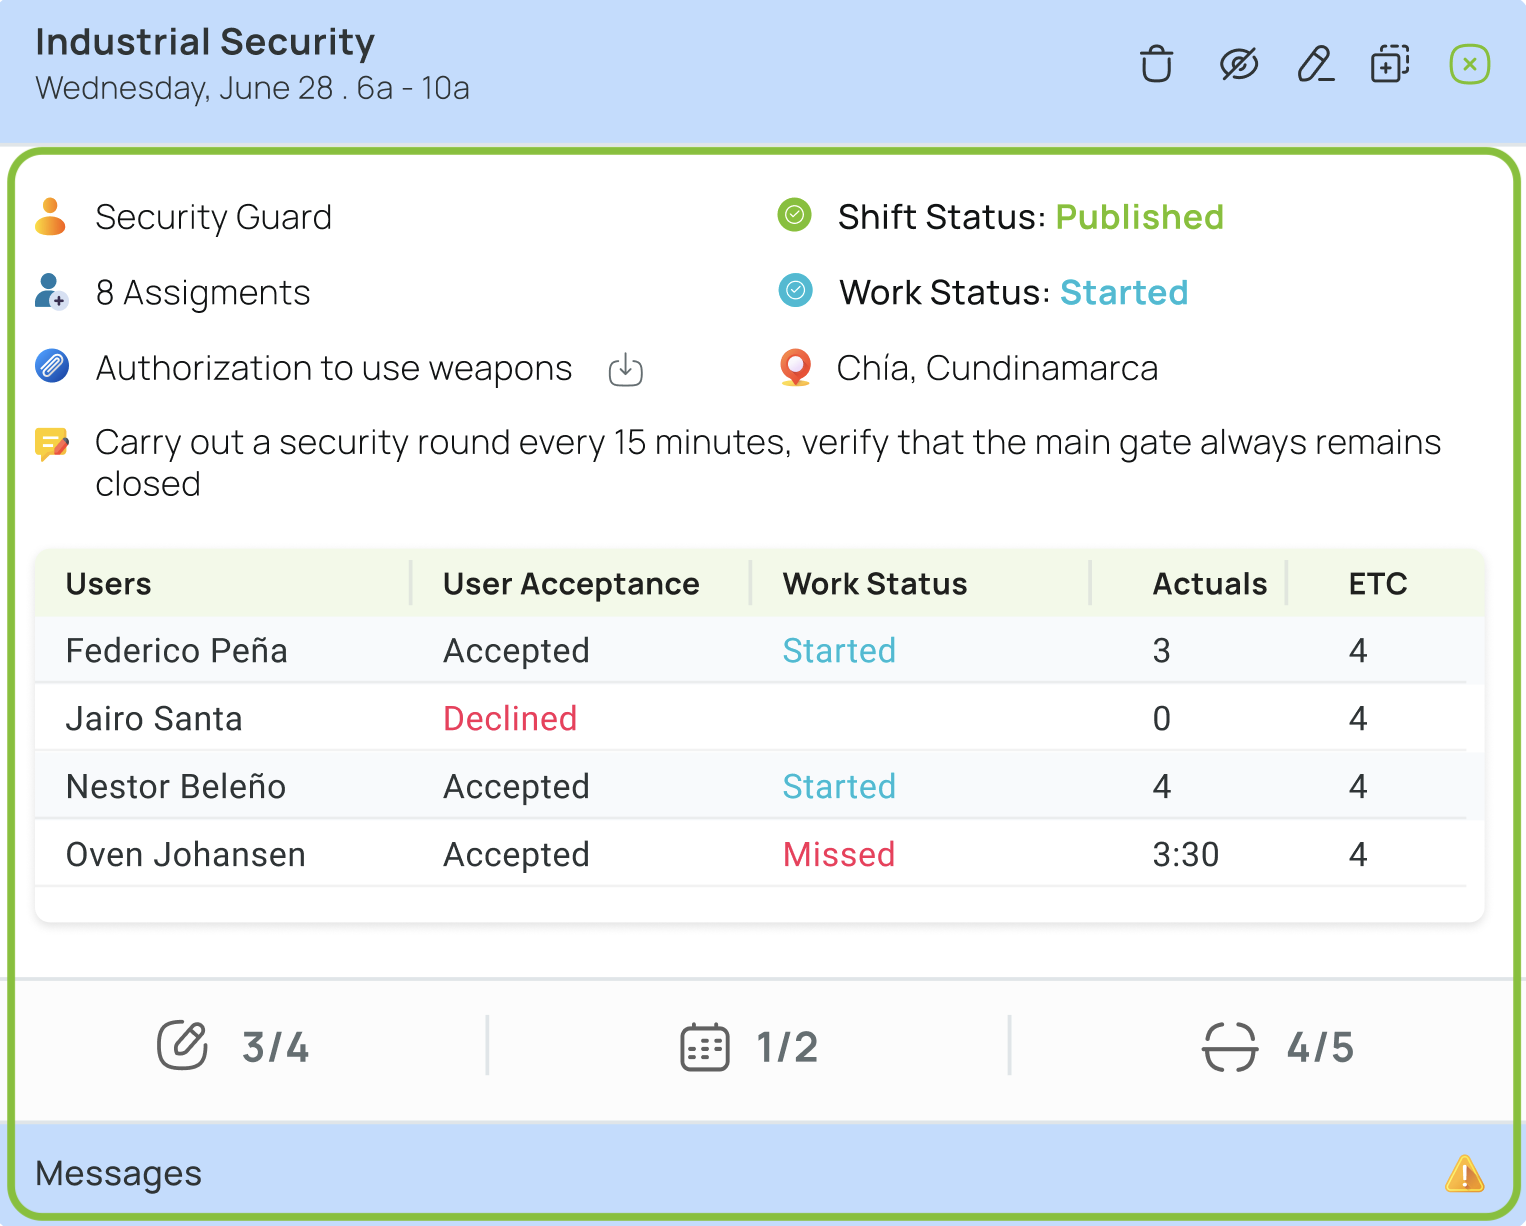
- Tool Bar: Options to delete, edit, publish/unpublish, duplicate, or exit the shift.
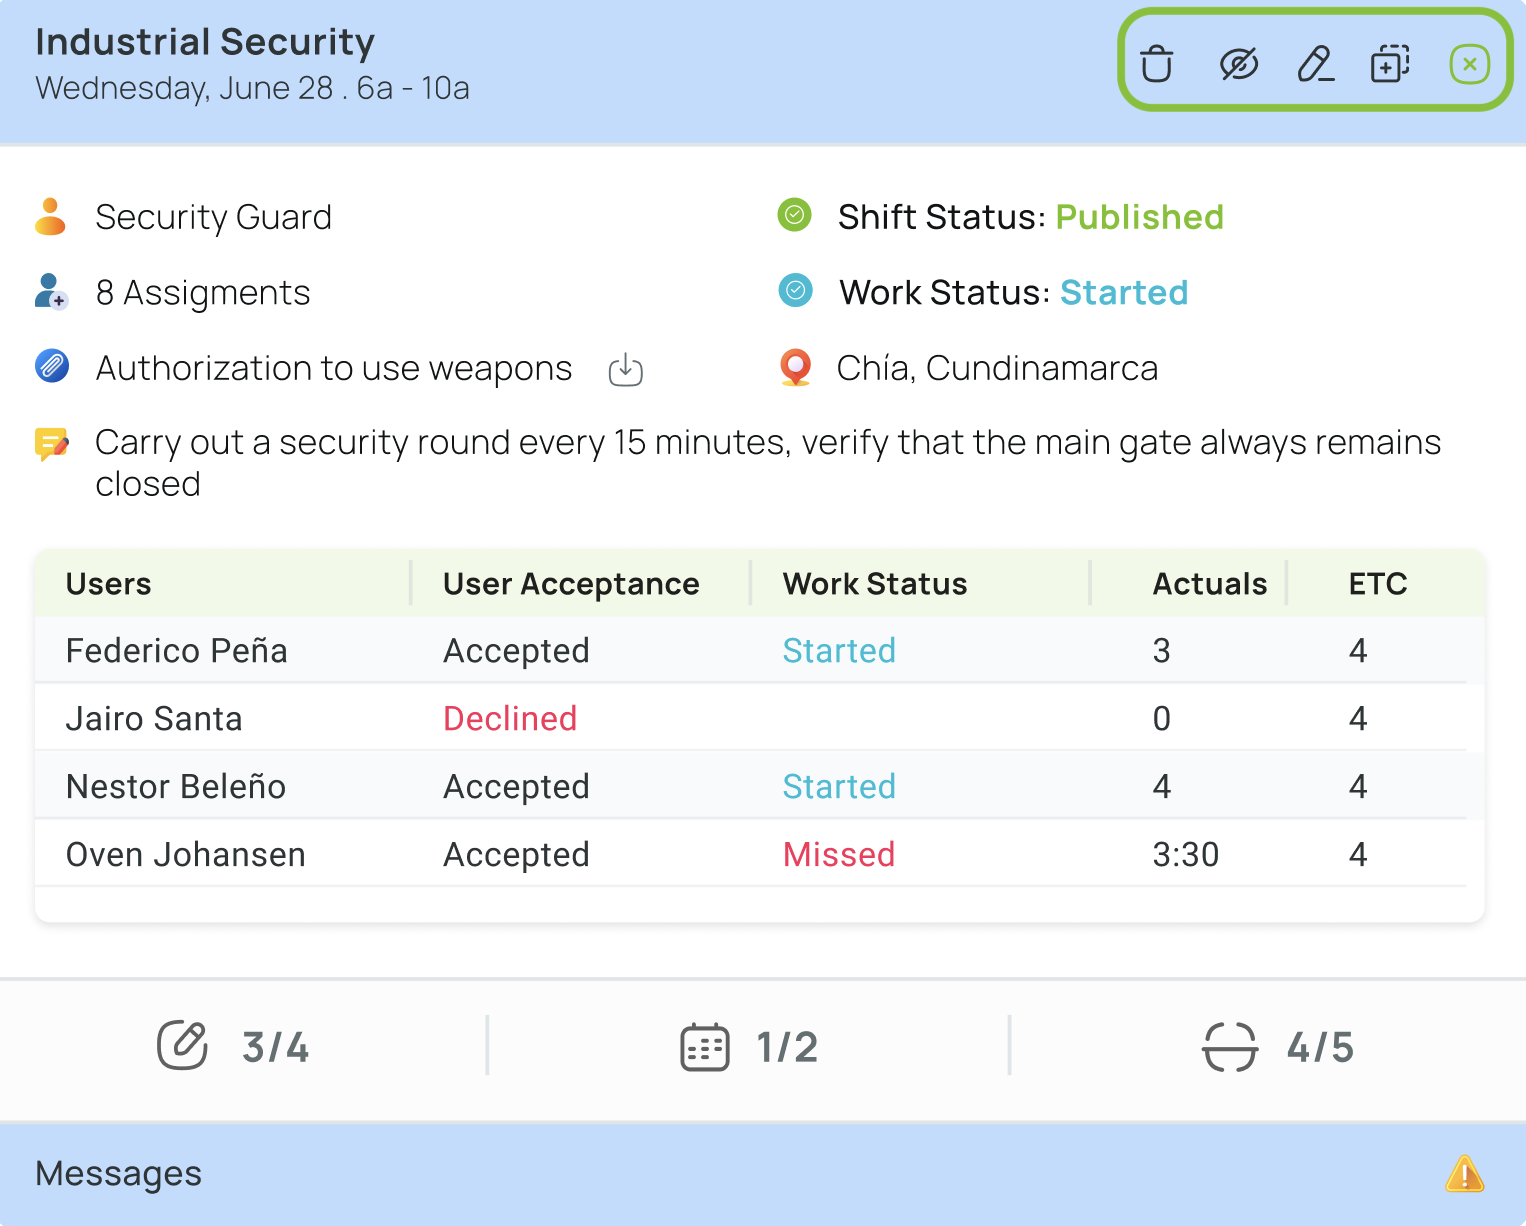
- Shift General Information:
- Shift Status: “Draft” or “Publish.”
- Work Status: “Not started” until a user checks in; then it becomes “Started.”
- Location: The defined work location.
- Assigned Users: Number of people assigned.
- Attachments: Files or images accessible to users (e.g., instructions).
- Users’ Information: Detailed acceptance status, work status, etc.
- Tasks/Scan/Forms: Activities linked to the shift and their progress.
- Alert Messages: Immediate attention issues or standard alerts. Click to view specific problems.
Add New Shifts
When you're inside a schedule, you can quickly create new shifts for your team.
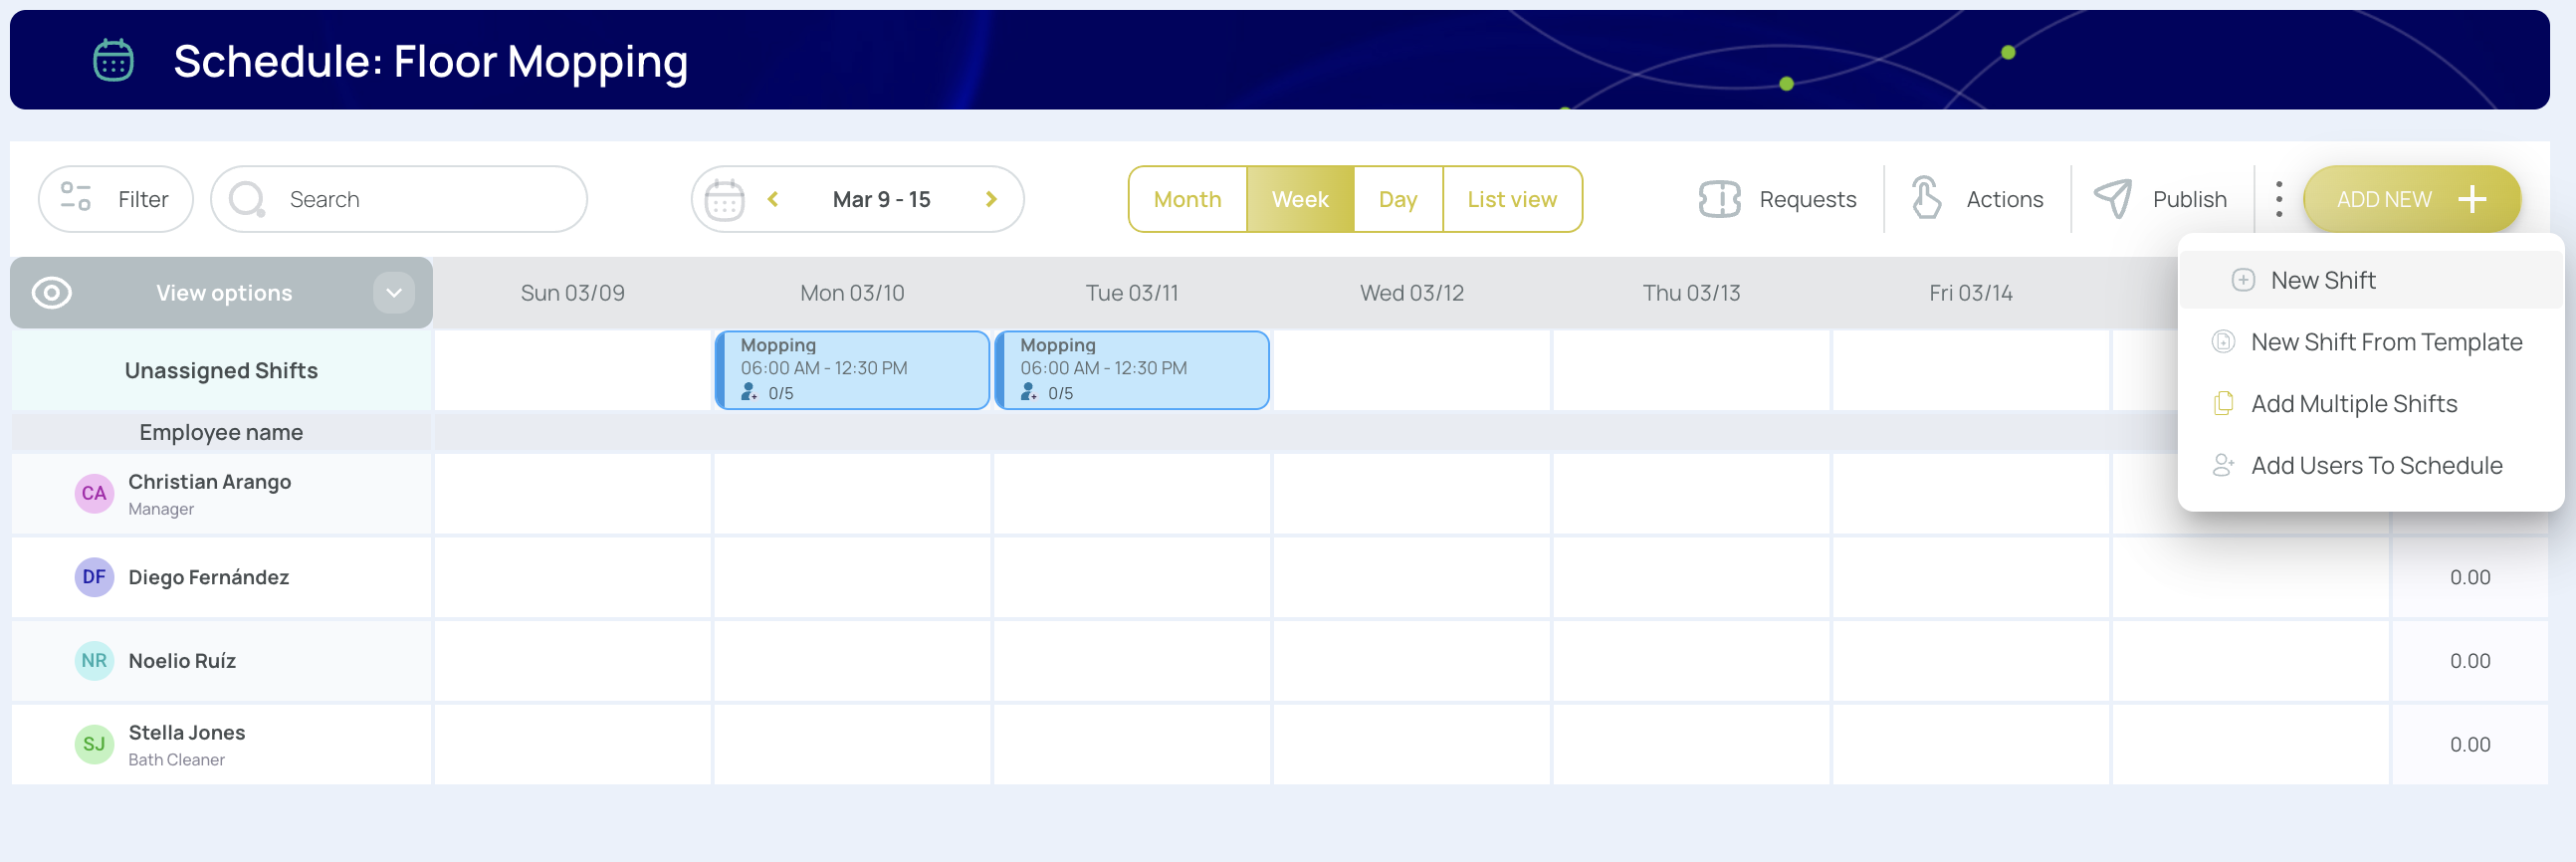
- Click Add new in the scheduler.

- Select New shift.

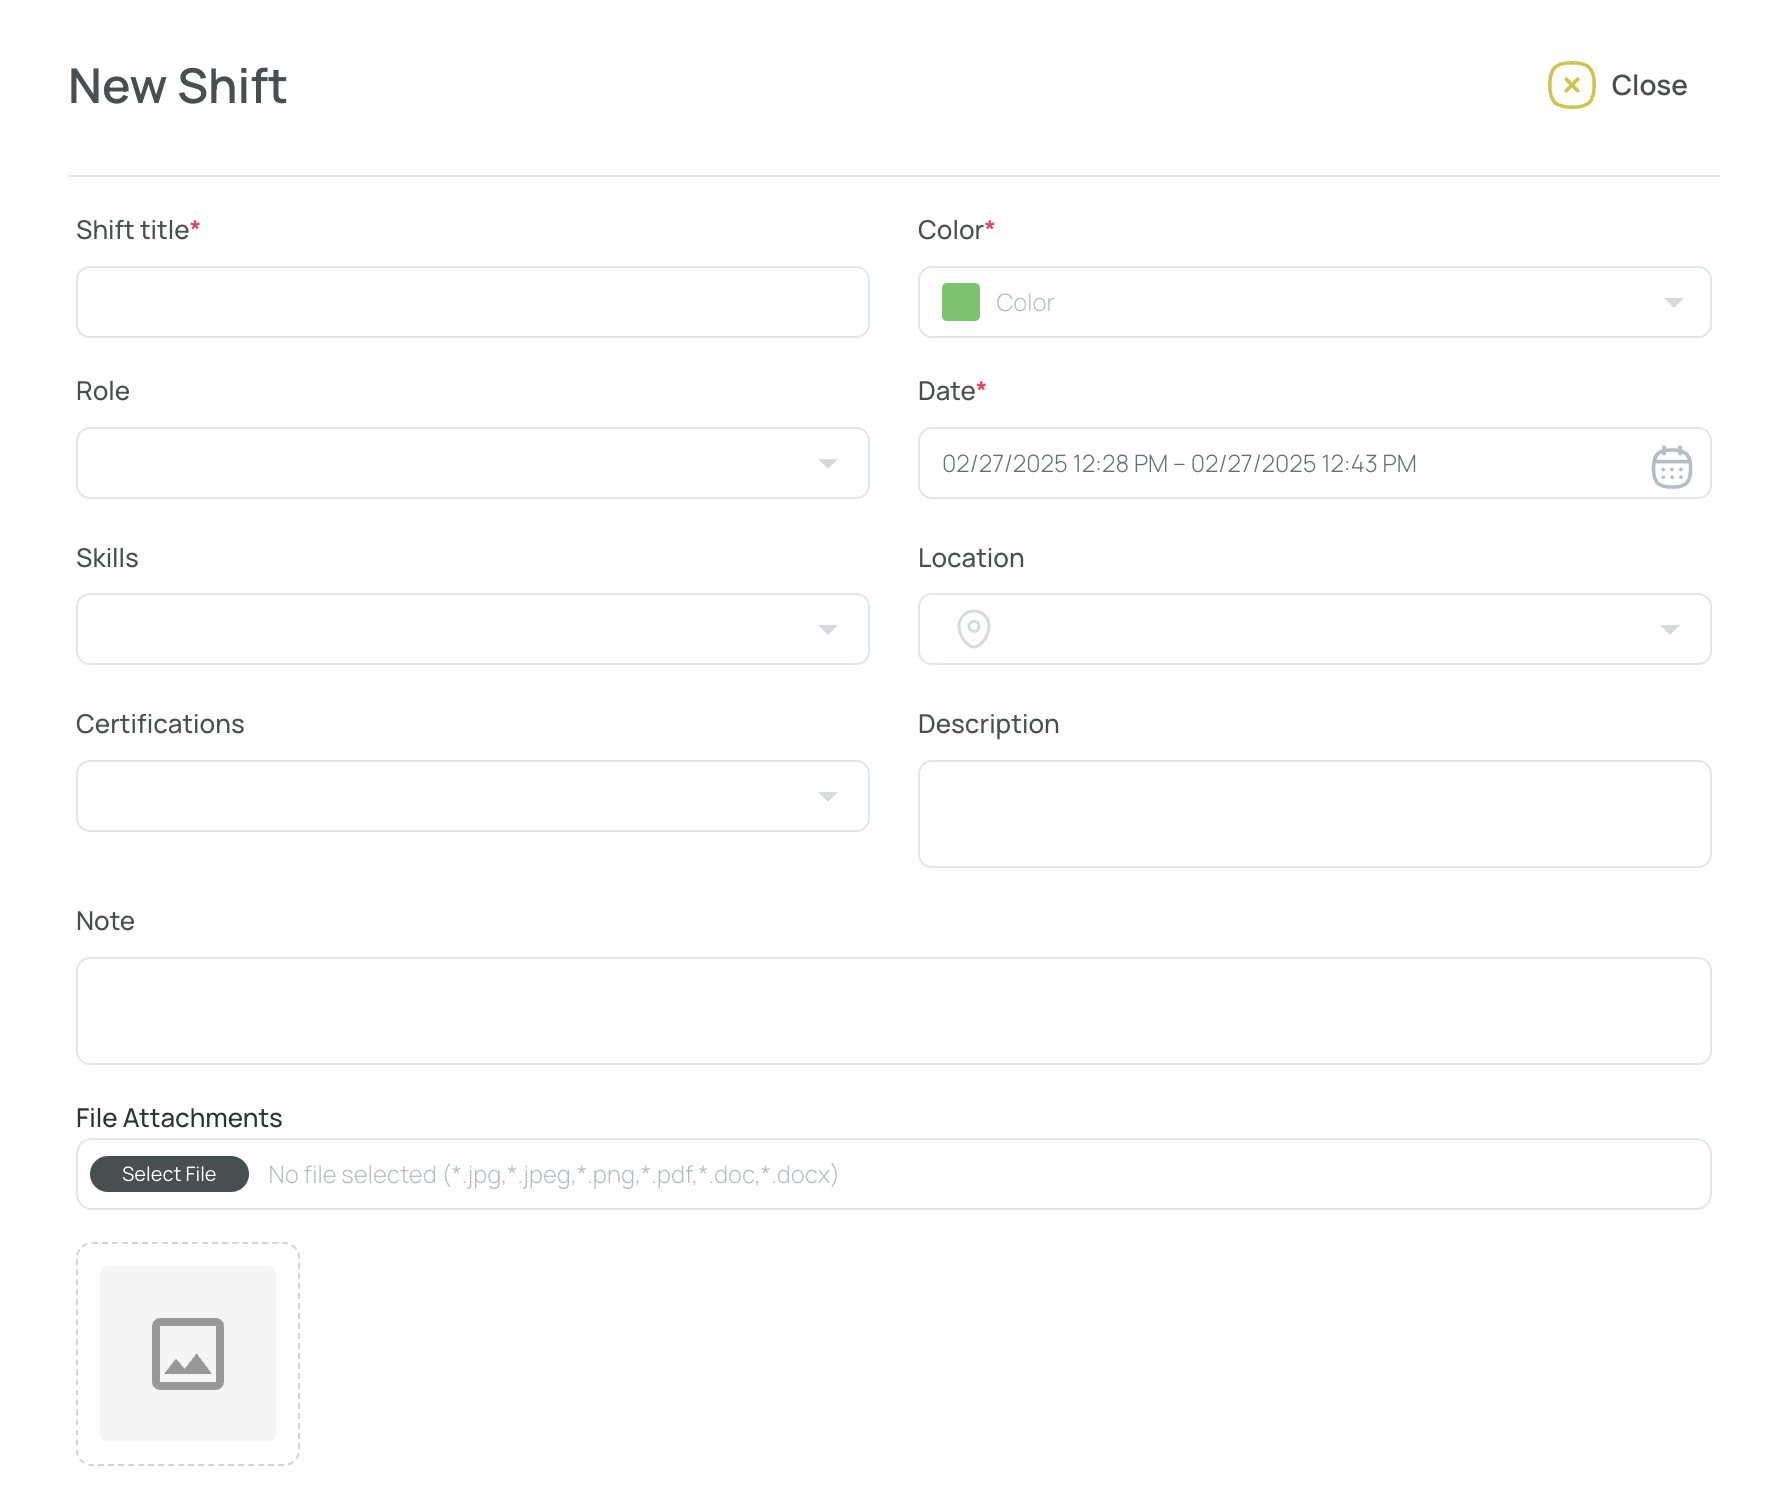
- Complete the shift details.
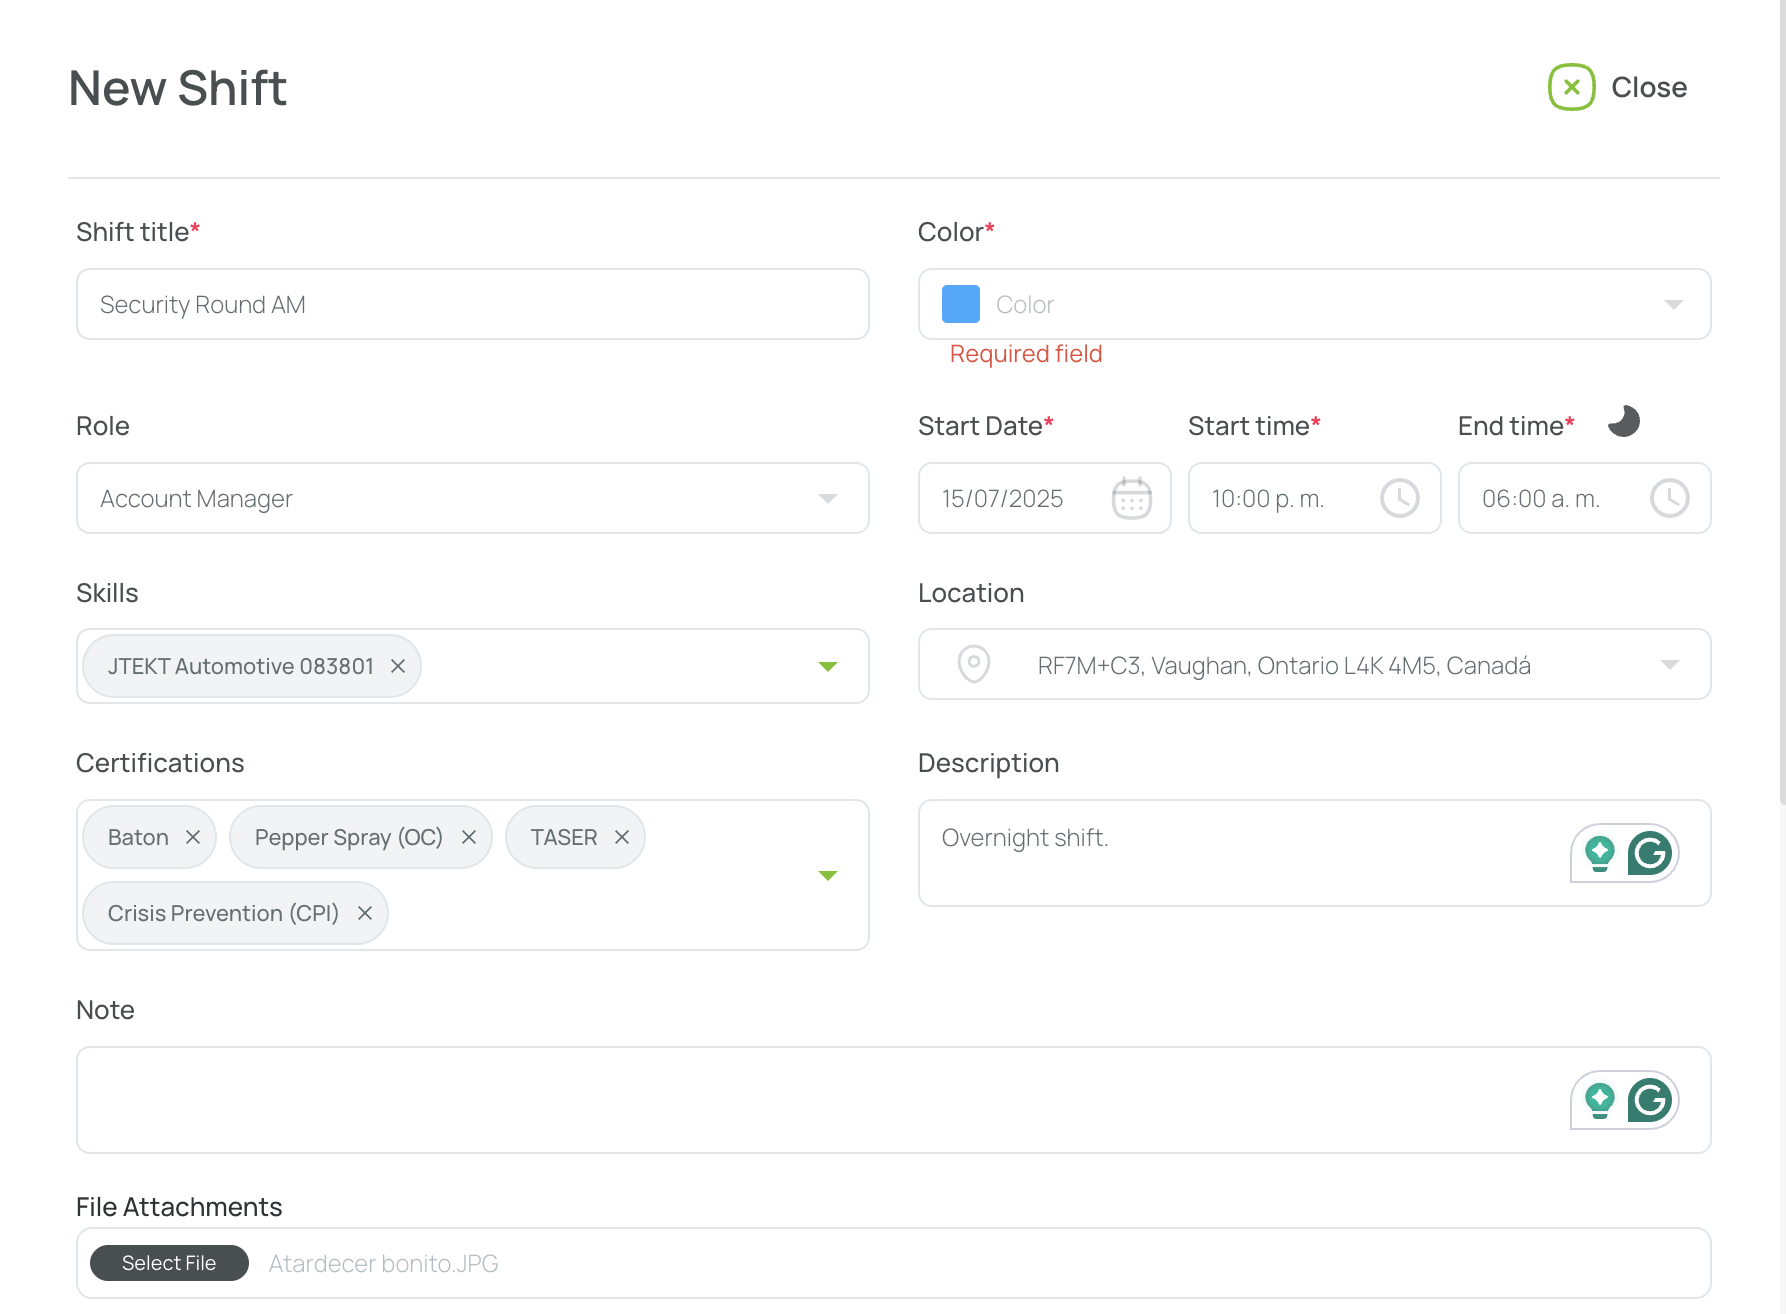
- Shift Title (*) — Enter the name employees will see.
- Color (*) — Use the role color by default, or choose a different one.
- Role — Link the shift to a predefined role.
- Date (*) — Select the day and time from the calendar.
- Skills / Certifications — Add any required qualifications.
- Location — Specify where the shift takes place.
- Description / Notes — Add helpful context for admins or staff.
- File Attachment — Upload supporting files, such as images or PDFs.
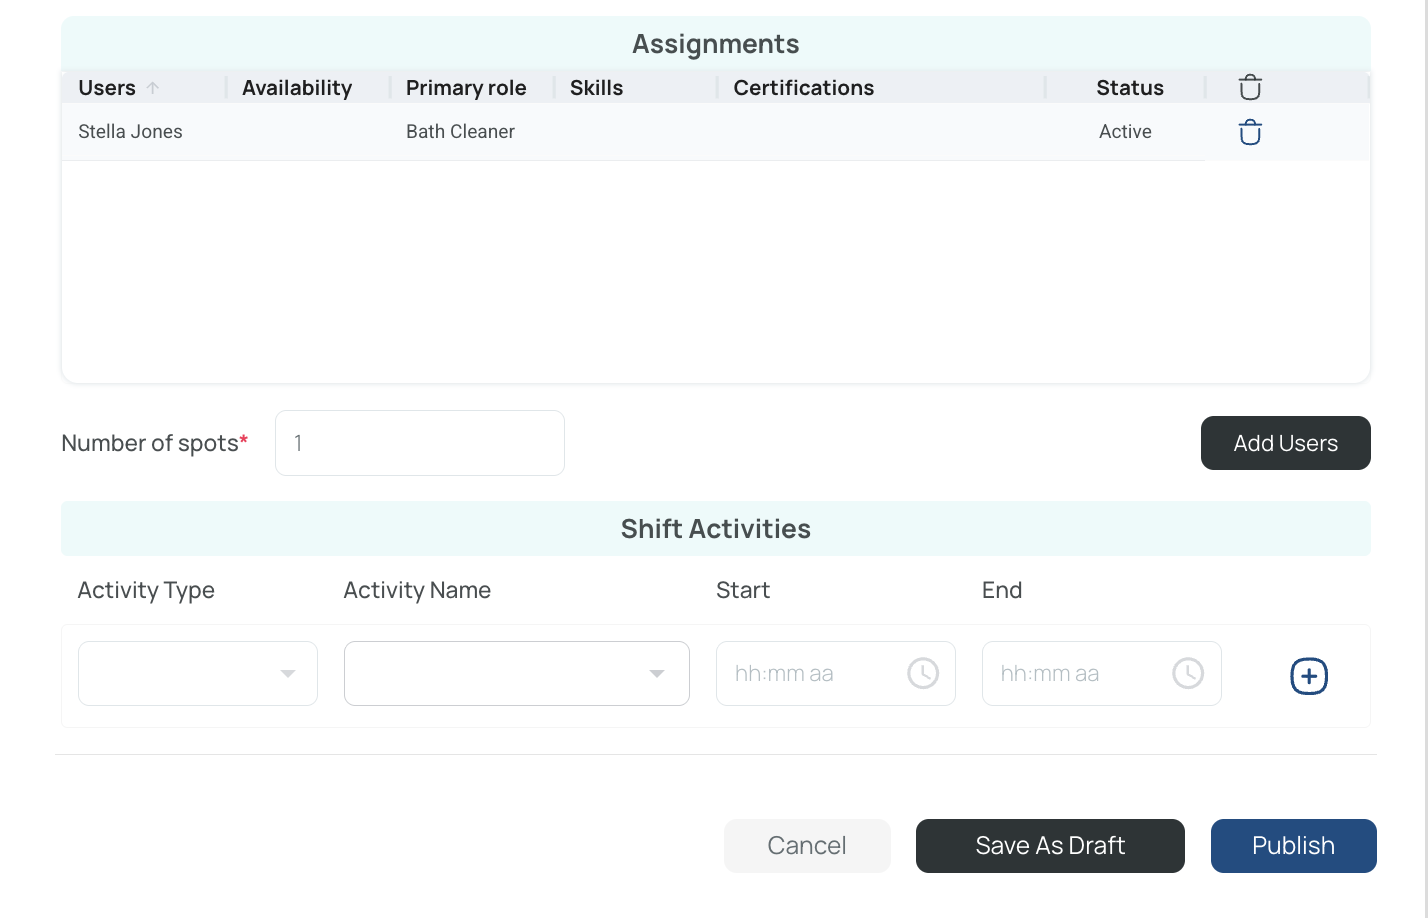
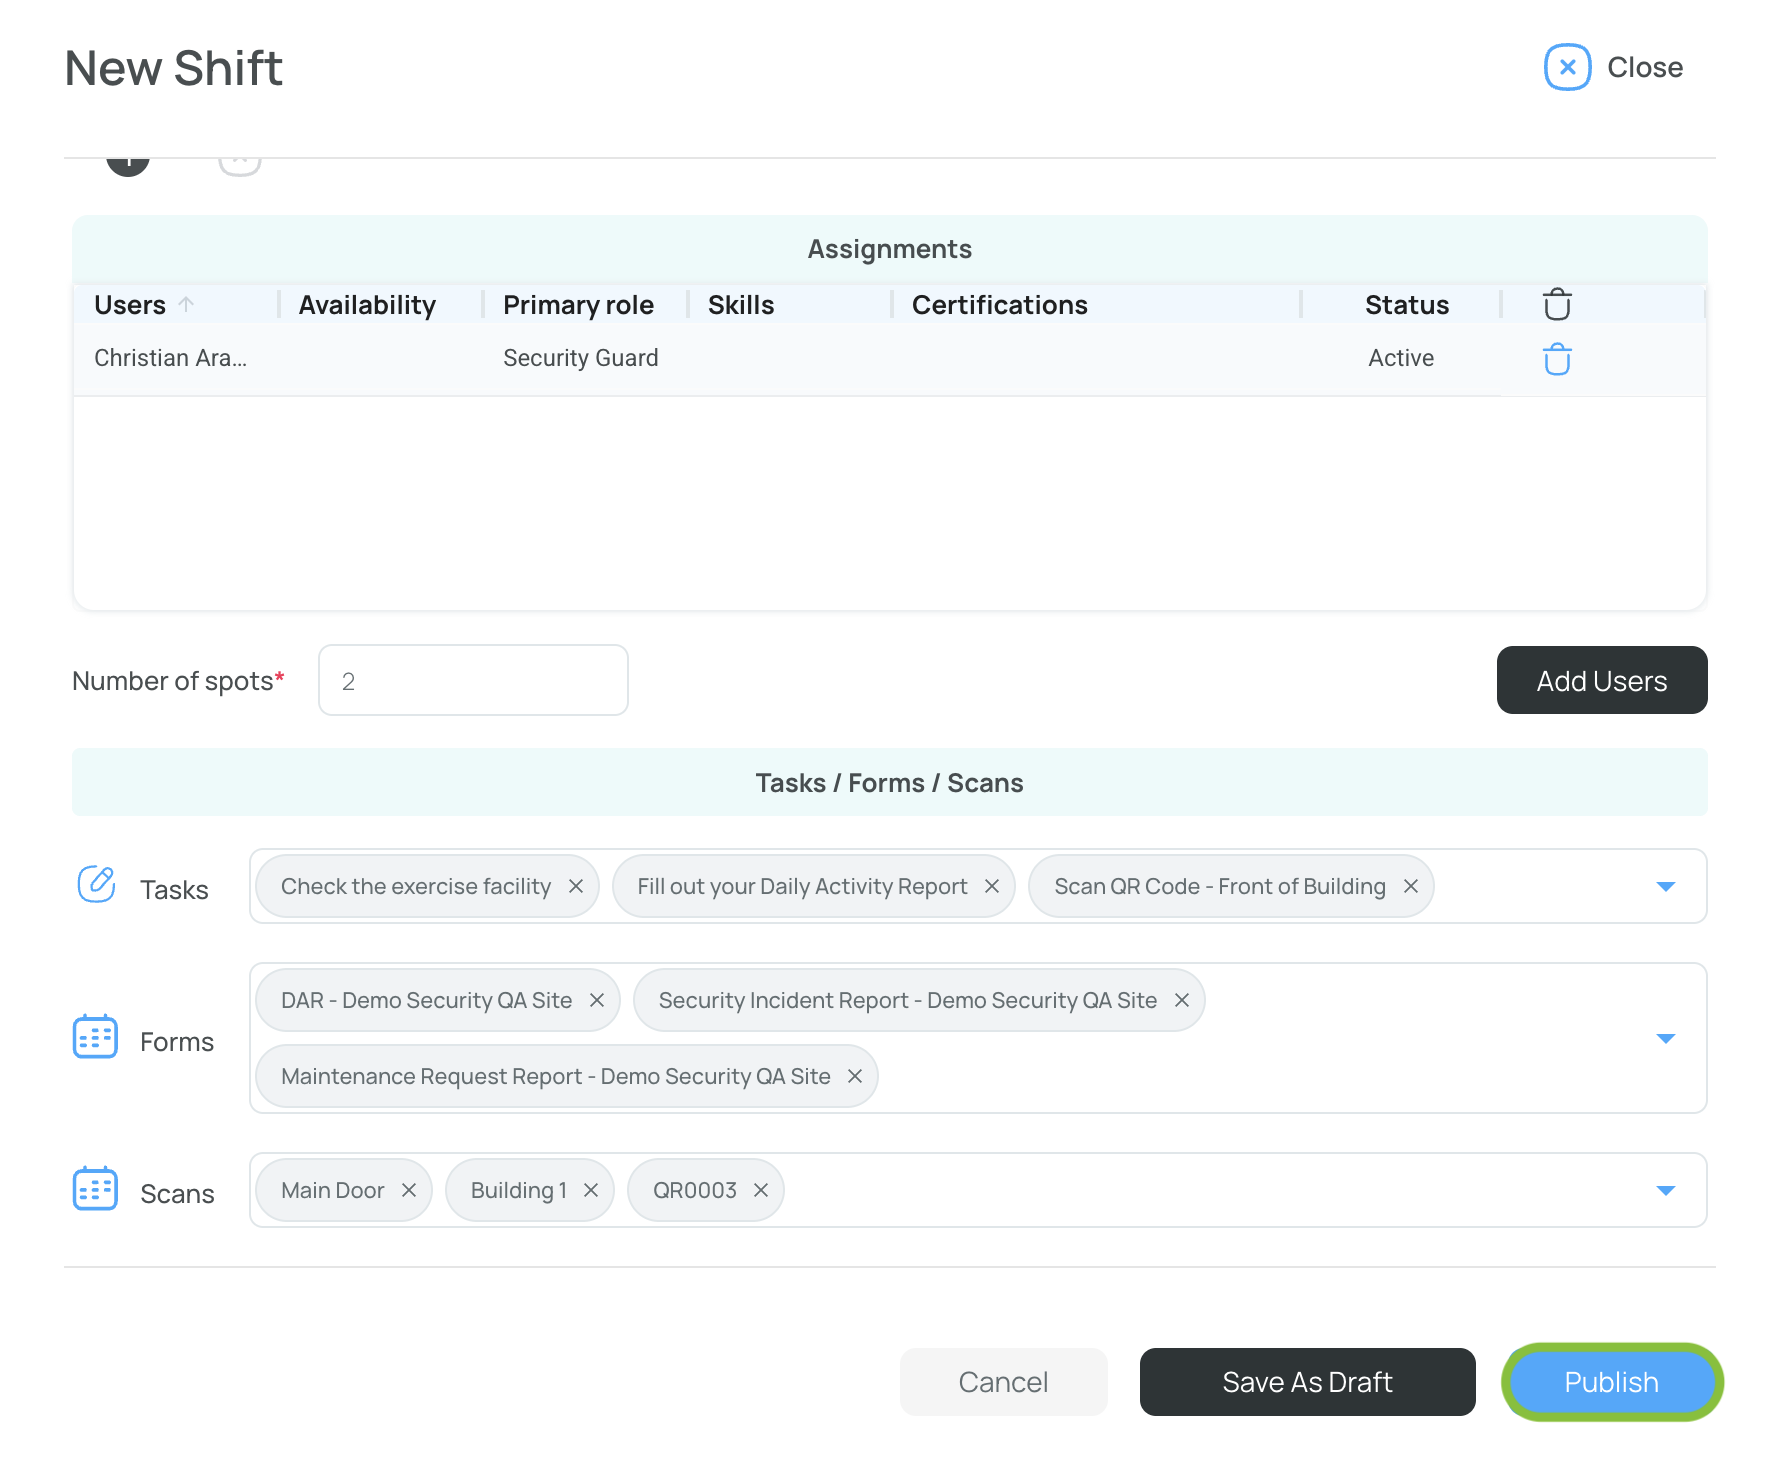
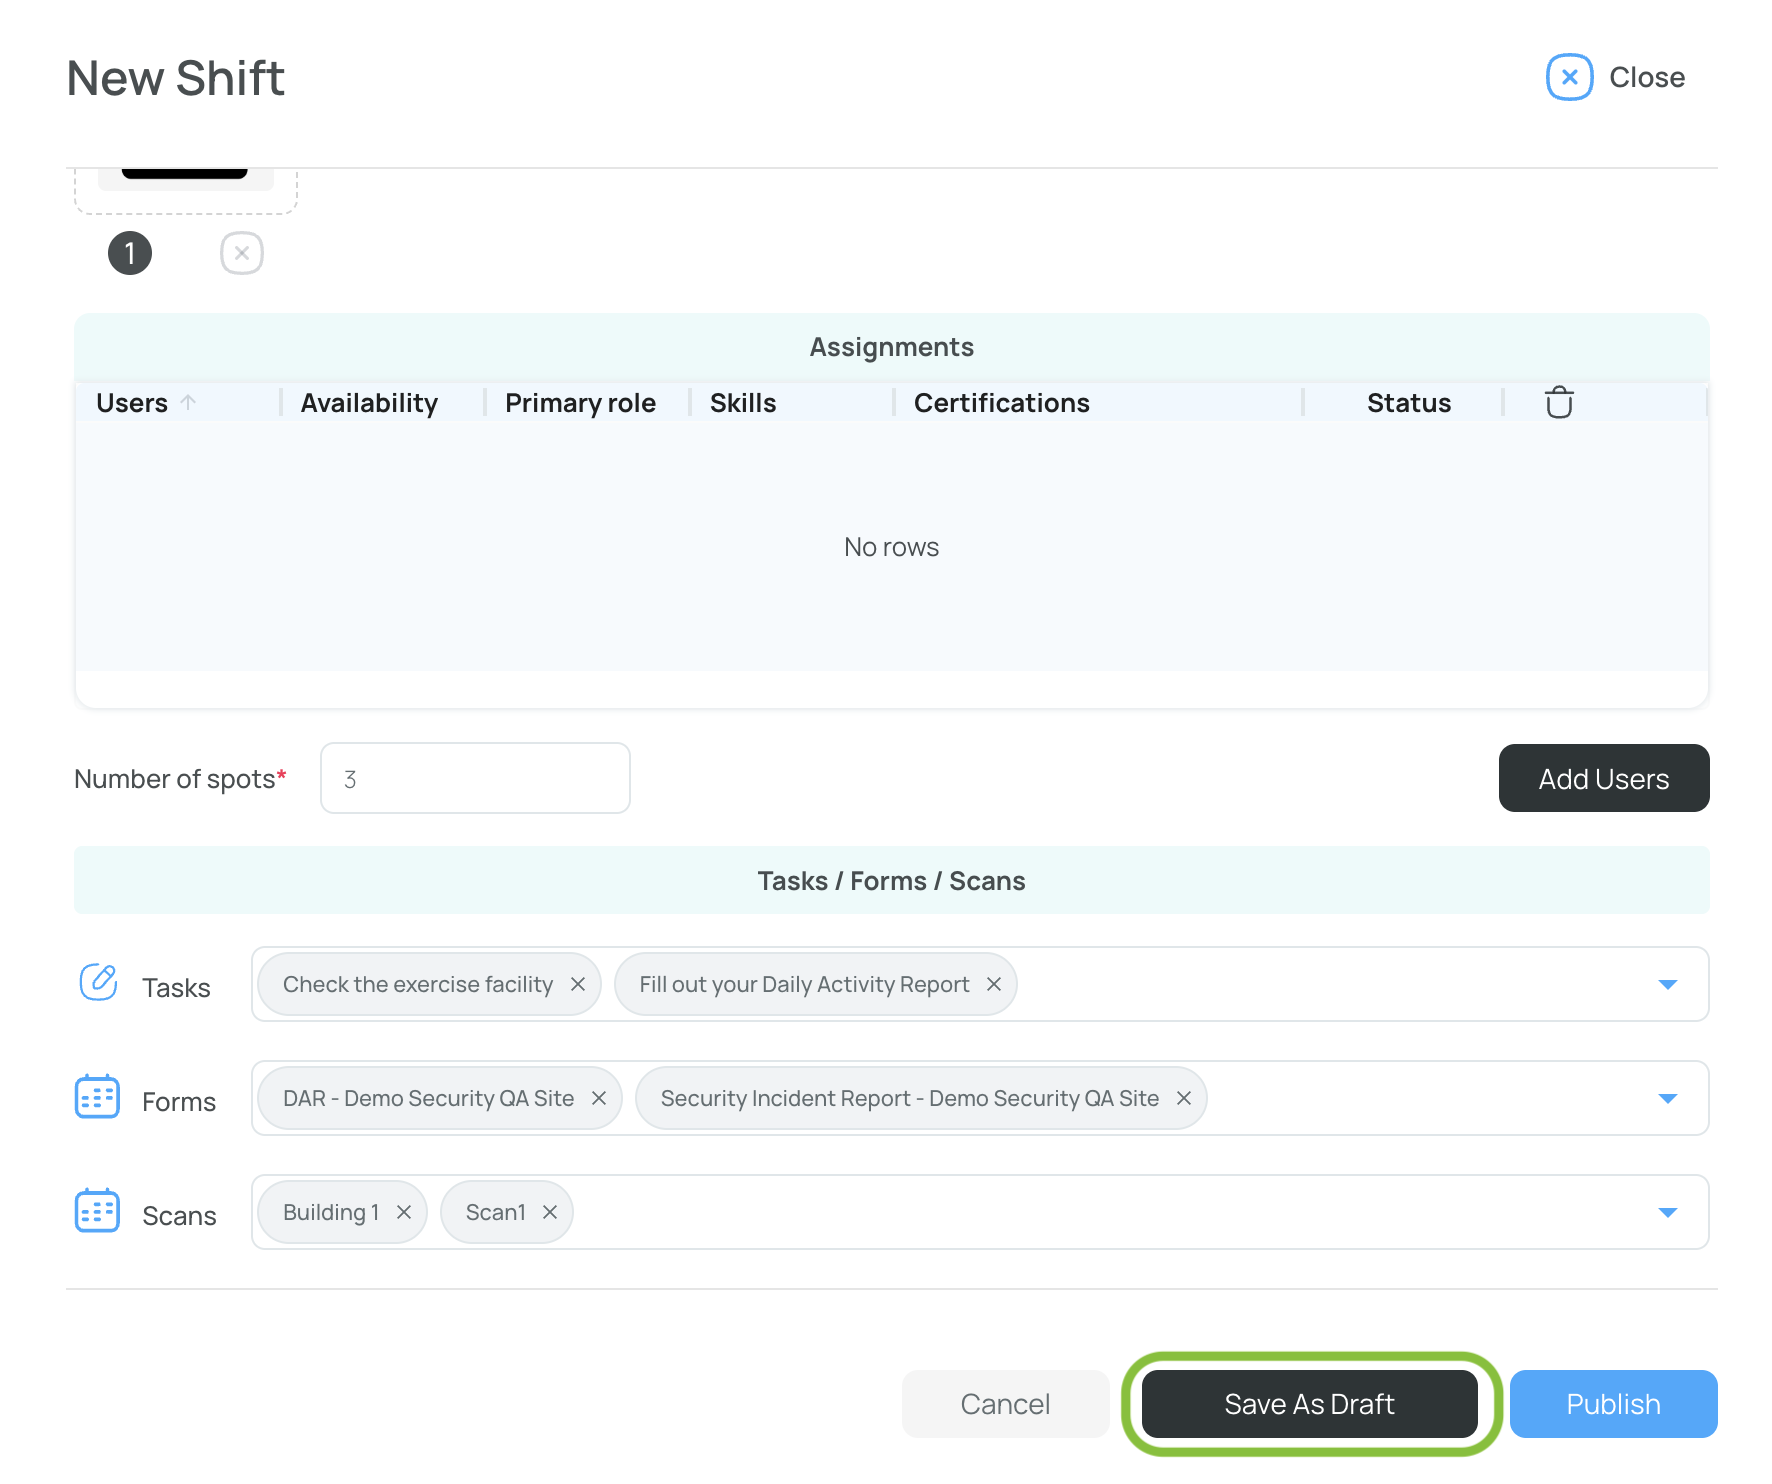
- Assignments — Select users now, or leave the shift unassigned so employees can claim it later.
- Number of Spots — Define how many employees can claim the shift when it is unassigned. For example, set Spots to 2 if two employees need to cover the same shift.
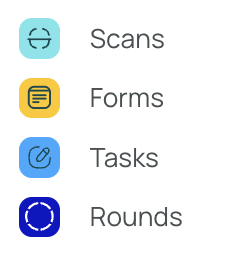
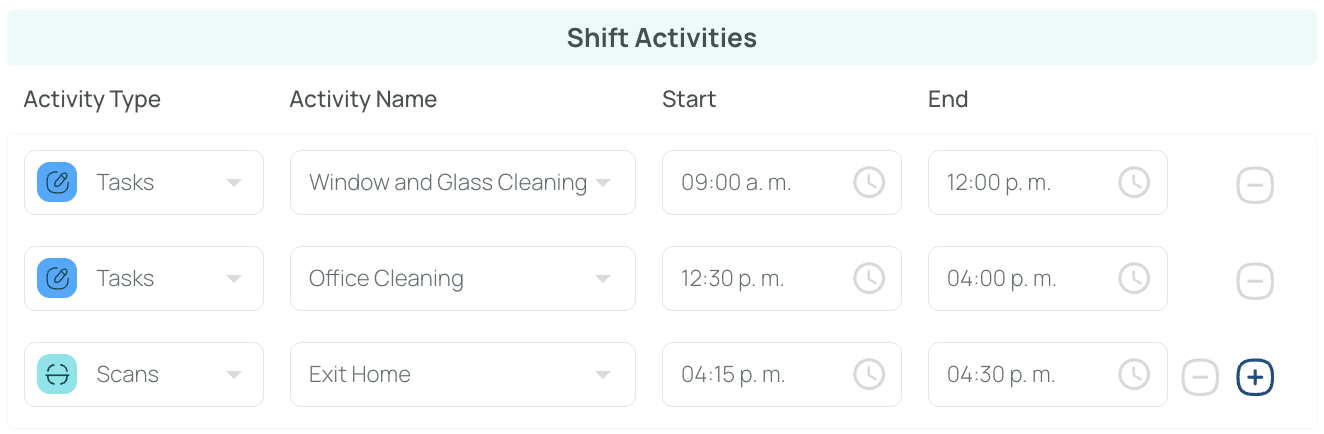
- Shift Activities — Add the activities employees must complete during the shift.
You can choose from Scans, Forms, Tasks, and Rounds.
You can add more than one activity using the plus button, remove activities using the minus button, define start and end times, and combine different activity types within the same shift.
- Publish the shift to make it visible in the mobile app, or Save as Draft to keep it hidden for now.
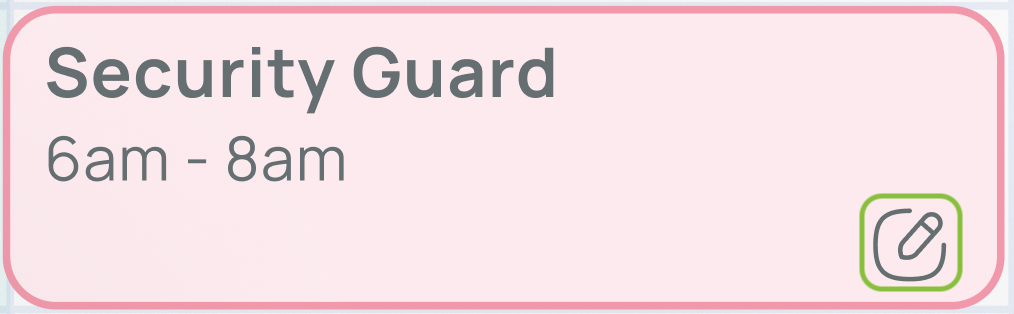
- Edit the shift at any time by hovering over it and clicking the pencil icon.
- A draft shift can be updated or published directly.
- A published shift must be unpublished before it can be edited. After editing, you can publish it again or save it as a draft.
- Shifts that have already started cannot be edited.
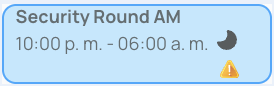
Overnight Shift Indicator
If a shift’s end time extends past midnight, a crescent-moon icon appears to flag it as an overnight shift.
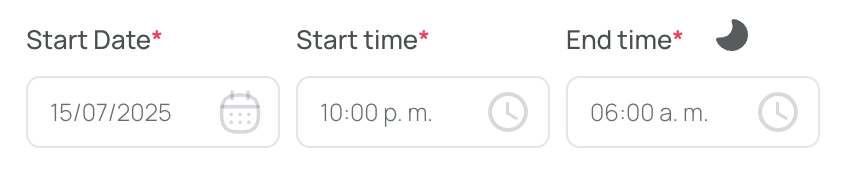
The same icon is displayed in the main schedule grid wherever an overnight shift is present.
Add New Drafts
Draft shifts remain invisible to mobile users until published:
- Click “Add new” in the scheduler.
- Select “New shift.”
- Fill in the information (similar to adding a new shift above).
- Click “Save As Draft”.
- This shift appears in the schedule with a faded background, indicating a draft state.
Add Multiple Shifts
A shortened form lets you quickly create multiple shifts in bulk at once with minimal details (e.g., basic date/time, role).

- Open the scheduler and click the “Add new” button.
- Choose “Add Multiple Shifts”.
- Fill in the necessary shift details:

- Start Date: Select the date from the interactive calendar.
- Start Hour and End Hour: Define when the shift begins and ends.
- Shift Title: Provide a name your users will recognize.
- Role: Assign a role (which determines shift color) from previously created roles.
- Assignments: Pick which users will work these shifts. A pop-up lets you filter users by role, certification, or skills.
- Add Another Row:

- Click the add (+) button to create as many shift rows as you need.
- Click the delete (-) icon next to that entry to remove a row.
- Publish or Save as Draft:
- Publish makes the shifts visible to your team on their mobile devices.
- Save as Draft keeps them hidden until you’re ready to publish.
Note: You can revisit these shifts later to include more details (like location, tasks, forms, or scans) in the full shift editor if needed.
Edit Shifts
Even after publishing, you may edit a shift as long as it hasn’t started:
- In the scheduler, click the shift to edit.
- Unpublish if it’s already published (but not started).
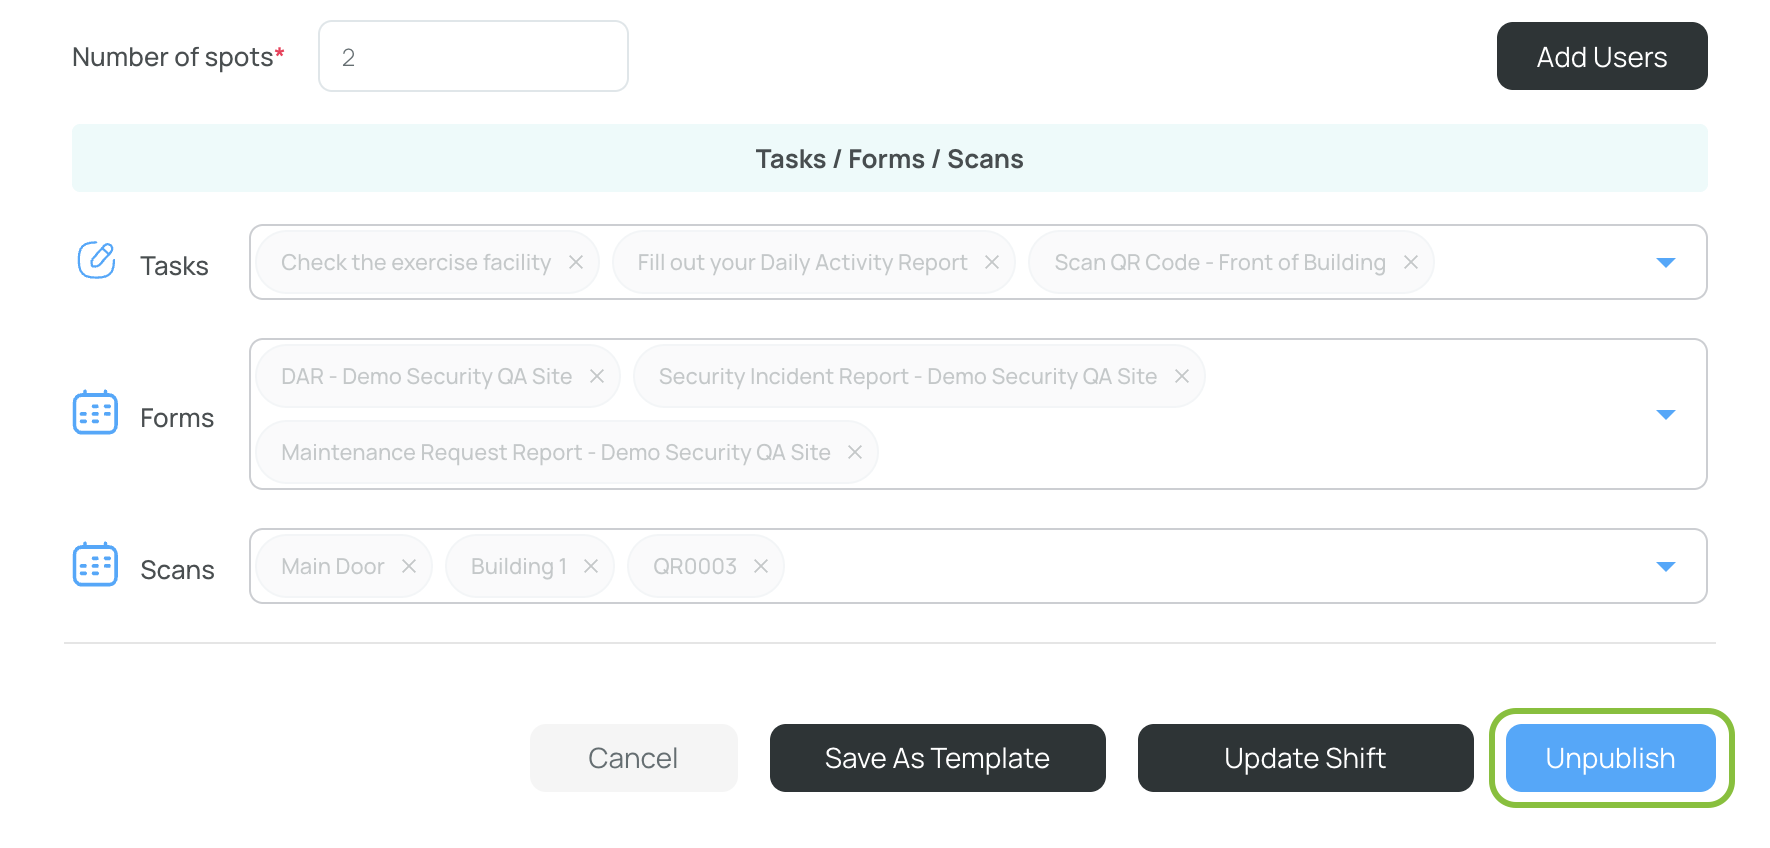
- Edit any fields necessary (title, time, tasks, assignments).
- Click “Update Shift”. If it’s still a draft, the button says “Update Draft”.
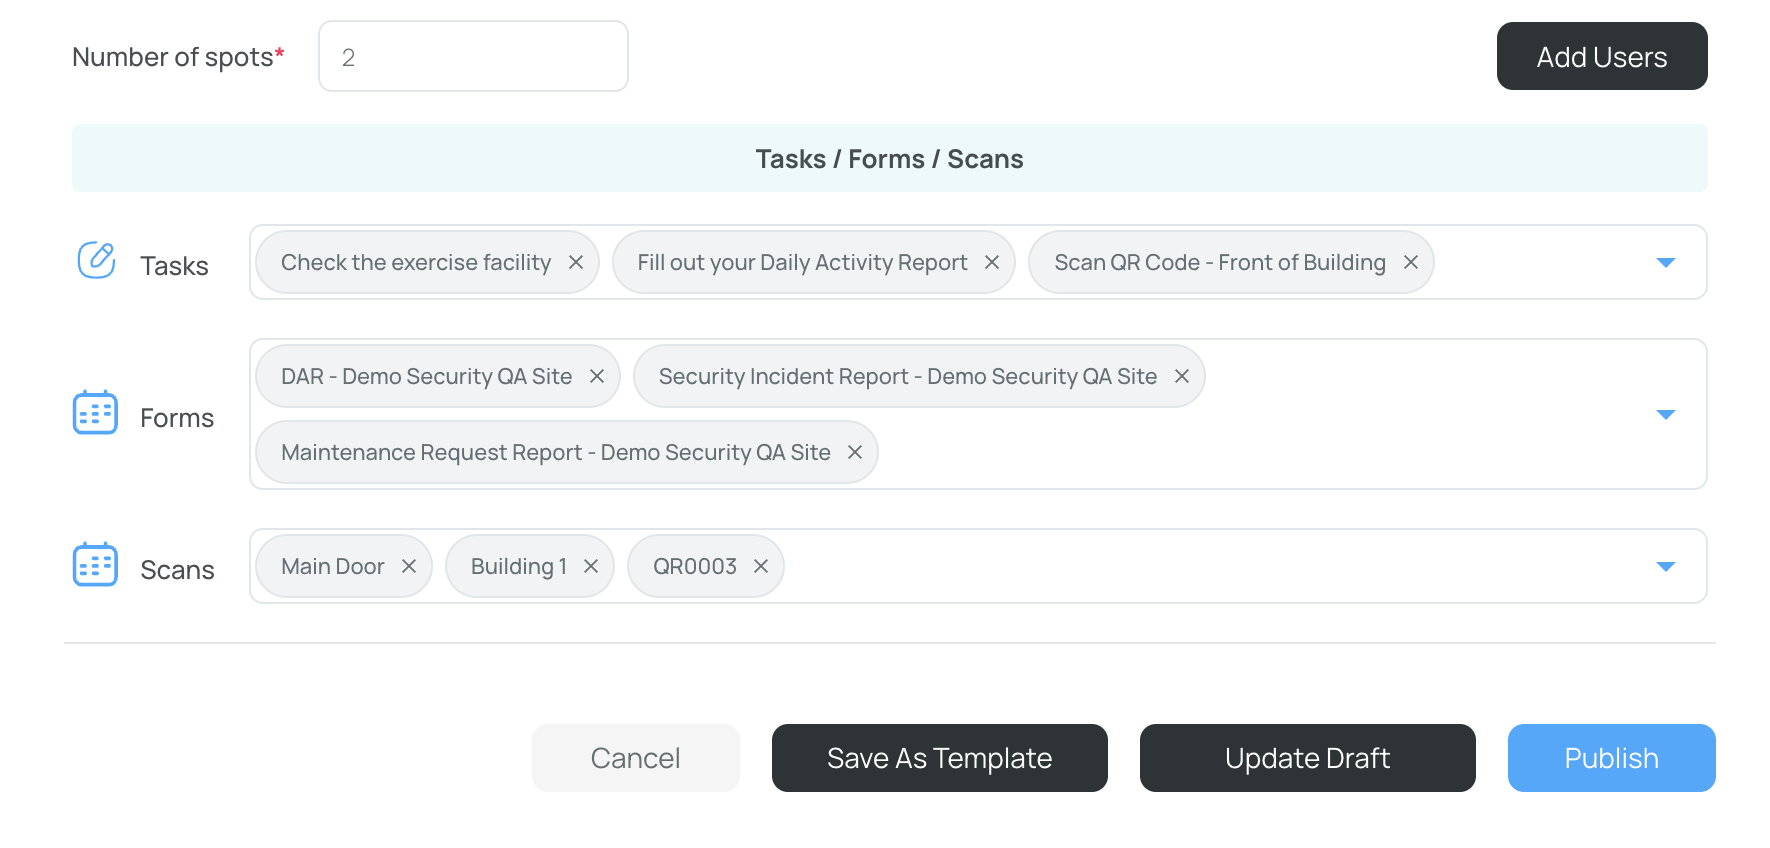
- Publish again to make changes visible to users.
Schedule: Unassigned Shifts
Unassigned Shifts (open shifts) allow employees to claim spots themselves, rather than having administrators assign them. Shifts can have multiple spots, so multiple employees can claim until the quota is filled.
Note: To be able to publish unassigned shifts, please make sure to have at least set up a Role.
Unassigned Shift View

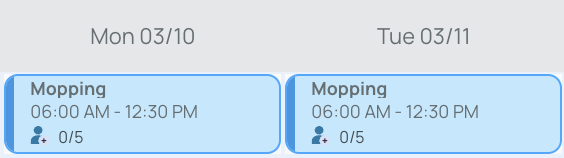
The scheduling interface includes a special Unassigned Shift section showing hours and a spots indicator (e.g., “3 of 5 spots claimed”). This helps track how many employees can still claim each open shift.

Add New Unassigned Shifts
-
Open the scheduler, then click “Add new”.
-
Select “New shift.”
- Enter general shift information:
- Shift Title: The name employees see.
- Color: Defaults to the role’s color but can be changed.
- Role: Associates with a predefined role/color.
- Date: Select a specific time using the calendar.
- Skills/Certifications/Location/Description/Notes/File attachment (optional): Add clarifications or references.
- Assignments: Leave users unassigned so they can claim these spots.
- Number of spots: Set how many users can claim this shift.
- Tasks/Forms/Scans: Link existing tasks, forms, or scan points.
- Click Publish to make it visible in the schedule.
Note: As employees claim the shift, the spots indicator updates. If admin approval is required, see below for details on approving claims.
How to Approve Claimed Shifts (If Admin Approval is Required)
If you configure your schedule to require admin approval before employees can fully claim a shift:
- Open the scheduler and click “Requests.”
- A window shows all requests, including Claim shift types.

- Review the user, shift details, and request date.
- Use the decision buttons:
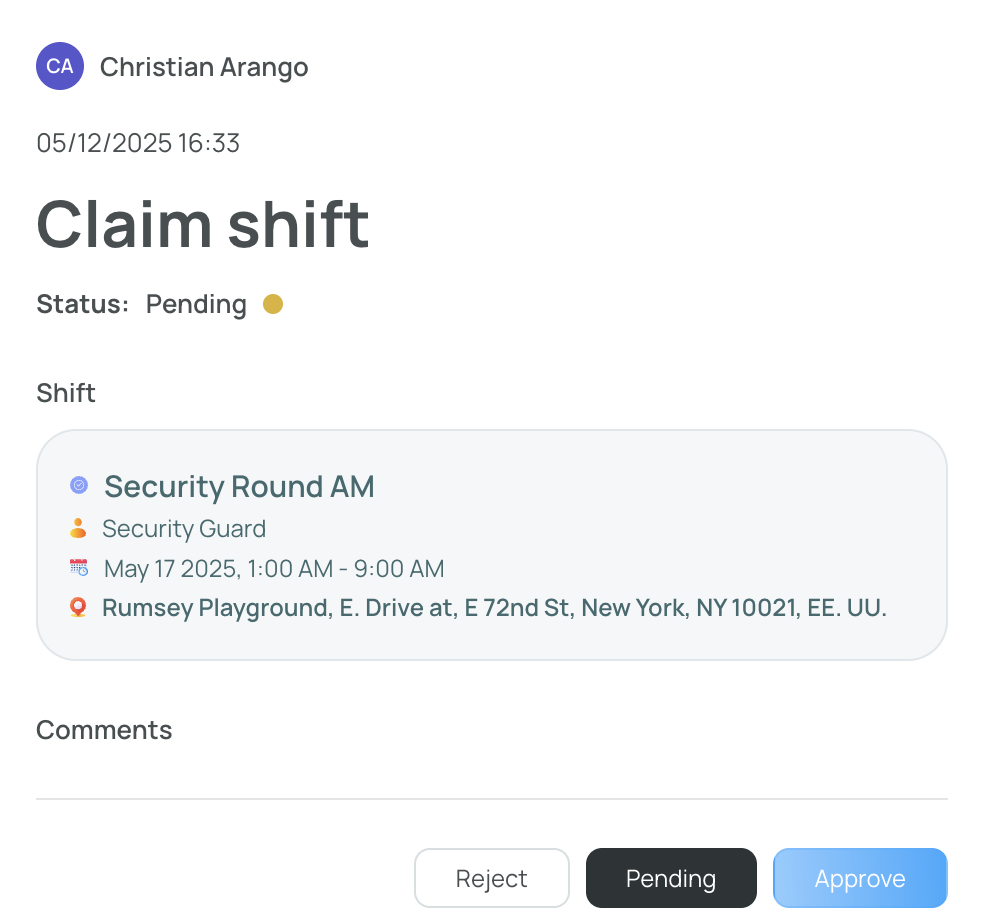
- Accept: The user is officially assigned and deducted the claimed spot.
- Reject: The user’s claim is denied; they get a rejection notification.
- Pending: Keeps the request unresolved until you decide.
Note: You can set up or change approval requirements in “Edit Request Settings” within the schedule’s Mobile Settings.
By following these guidelines, you can manage each Shift—from drafts to final publishing, from setting up tasks and forms to verifying user assignments. Each shift remains the core building block of the schedule, allowing employees to know precisely when and where they’re needed.